Irresistible Candied Bacon Deviled Eggs: The Ultimate Sweet & Savory Appetizer
Prepare to elevate your appetizer game with this incredible recipe for candied bacon deviled eggs! This isn’t just any deviled egg recipe; it’s a delightful, sweet-and-savory twist on the beloved classic that promises to be the star of any gathering. Perfect for potlucks, festive parties, holiday celebrations, or simply a special snack, these deviled eggs are guaranteed to impress your guests and leave them asking for more.

While classic deviled eggs hold a special place in our hearts, sometimes it’s fun to introduce a little pizzazz! This variation incorporates our absolute favorite sweet and savory candied bacon, transforming a simple appetizer into an extraordinary culinary experience. The crunchy, caramelized bacon topping provides a wonderful textural contrast and an explosion of flavor that complements the creamy egg filling perfectly.
And for those who love a little heat, you can even take this recipe up a notch by substituting the candied bacon with million dollar bacon or billionaire’s bacon, which feature a delightful spicy kick. This recipe offers a fantastic way to re-invent your favorite appetizer, ensuring it stands out from the crowd. We’re confident your guests will absolutely adore this unique and flavorful creation.
Key Ingredients for Sweet & Savory Perfection
Creating truly exceptional candied bacon deviled eggs starts with high-quality ingredients. Here’s a detailed look at what you’ll need to achieve that perfect balance of creamy, rich, sweet, and smoky flavors.
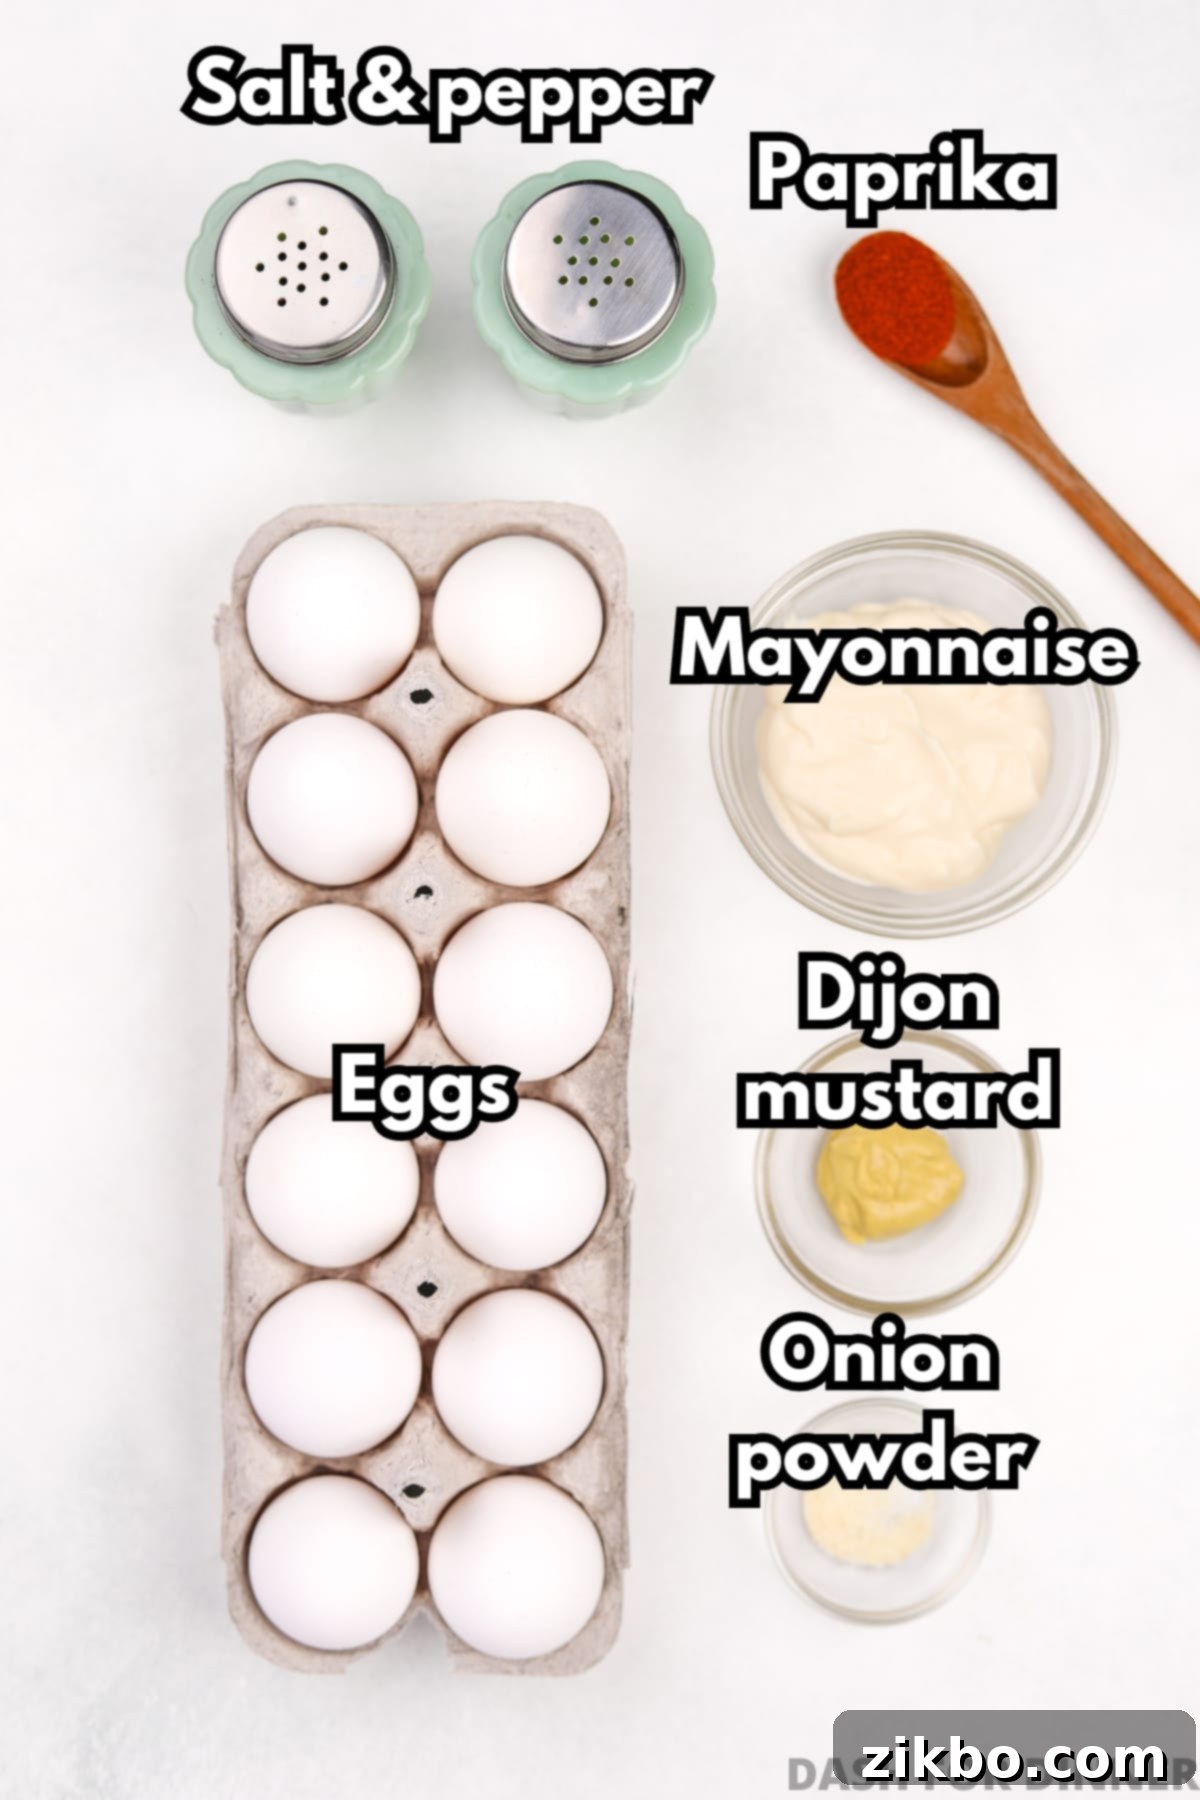
- Eggs: You’ll need 12 large eggs for this recipe, yielding 24 deviled egg halves. This recipe is easily scalable; simply adjust the number of eggs and other ingredients as needed. A key tip for easier peeling: older eggs (still within their good-by date) tend to peel more effortlessly than very fresh ones.
- Mayonnaise: The foundation of any good deviled egg filling! Use your favorite brand of real mayonnaise for the best creamy texture and rich flavor. We highly recommend Hellmann’s or Duke’s for their superior taste.
- Dijon Mustard: This adds a mild, tangy depth to the filling without overpowering the other flavors. While Dijon is our preference, a classic yellow mustard can be substituted for a slightly sharper, more traditional deviled egg flavor if that’s what you prefer.
- Onion Powder: A secret weapon for adding a subtle savory note and depth of flavor to the yolk mixture. Feel free to experiment by adding a pinch of garlic powder or other favorite seasonings like a touch of celery salt for an extra layer of complexity.
- Salt & Pepper: Essential for seasoning and balancing all the flavors. Always taste your filling before piping and adjust the salt and freshly ground black pepper to your personal preference. Proper seasoning makes all the difference!
- Paprika: This vibrant spice serves a dual purpose. It’s a classic, popular garnish that adds a beautiful pop of color, and it also contributes a subtle, smoky (if using smoked paprika) or sweet flavor depending on the type. It’s optional, but highly recommended for that traditional deviled egg finish.
For the Candied Bacon:

- Bacon: Choose your favorite type of regular-cut bacon. Thick-cut bacon can also work but might require a slightly longer baking time. For an affordable yet delicious option, we’ve found Kirkland brand bacon (from Costco) to be excellent in terms of quality and taste.
- Brown Sugar: The key to that irresistible sweet, caramelized coating. Any type of brown sugar will work, but we often opt for light brown sugar for its more subtle molasses flavor, which allows the bacon to shine.
- Pepper: A crucial counterpoint to the sweetness of the brown sugar. Just a little more than a pinch of freshly ground black pepper adds a delightful savory depth and a tiny bit of warmth that perfectly balances the candied effect.
Essential Equipment for Success
Having the right tools can make preparing these deviled eggs a breeze and ensure the best results, especially for that perfectly crispy candied bacon.
- Baking Sheet: Indispensable for making the candied bacon. For smaller batches of bacon, a quarter sheet pan is ideal, while a half sheet pan is perfect for larger quantities or when preparing more for other uses.
- Wire Rack (Oven-Safe): This is highly recommended for achieving perfectly crispy candied bacon. Placing the bacon on a wire rack elevates it, allowing the excess fat to drip away and promoting even cooking and caramelization. While you can make candied bacon directly on a parchment-lined baking sheet, using a wire rack yields superior, crispier results.
- Large Pot: For boiling the eggs.
- Large Bowl: For preparing an ice bath.
- Sharp Knife: Essential for slicing the hard-boiled eggs cleanly and dicing the candied bacon.
- Medium Mixing Bowl: For mashing the egg yolks and mixing the filling.
- Fork or Mini Potato Masher: For achieving a smooth, creamy egg yolk filling.
- Piping Bag with Large Tip (Optional but Recommended): For a professional, neat presentation when filling the egg whites. A freezer bag with a corner snipped off works just as well in a pinch.
How to Craft Deviled Eggs with Candied Bacon: A Step-by-Step Guide
Creating these sensational deviled eggs is a straightforward process, broken down into manageable steps. Follow these instructions for a truly unforgettable appetizer.
Step 1: Preparing the Perfect Easy-Peel Hard Boiled Eggs
Achieving perfectly cooked, easy-to-peel hard-boiled eggs is the first secret to flawless deviled eggs. My tested method works perfectly every time! While the detailed instructions are in the recipe card below, my comprehensive recipe for classic deviled eggs offers more step-by-step photos if you are a visual learner.

- Bring a large pot of water to a rolling boil over high heat. Carefully add the eggs to the boiling water, ensuring they are fully submerged. Boil for exactly 10 minutes. This precise timing helps achieve a perfectly firm yolk without a gray ring.

- Immediately drain the hot water from the pot. Quickly transfer the boiled eggs to a prepared bath of ice water. Allow them to rest in the cold water for 3-4 minutes; this rapid cooling helps prevent the greenish ring around the yolk and makes peeling easier.
- Remove the now cold eggs from the ice bath. Gently tap and use the back of a spoon to crack the entire surface of the egg shell. This creates small fissures that help separate the shell from the membrane.
- Pick off a small portion of the cracked shell. Carefully wedge the spoon under the membrane and gently slip off the shell, rotating the spoon around the egg. This method allows the shell to come off in larger pieces, leaving a smooth, intact egg white. Rinse any lingering shell fragments and pat dry.
Step 2: Making the Creamy Egg Yolk Filling

- Using a sharp knife, carefully slice each hard-boiled egg in half lengthwise. Gently pop the cooked yolks from each half and transfer them to a medium-sized bowl.
- Place the empty cooked egg whites on a flat tray or a muffin pan (a muffin pan helps keep them stable). Set these aside while you prepare the filling.

- Using the tines of a fork or a mini potato masher, thoroughly mash the egg yolks until they are finely crumbled with no large lumps. Then, add the mayonnaise, Dijon mustard, onion powder, salt, and pepper to the mashed yolks.
Step 3: Filling and Assembling the Eggs

- Stir all the ingredients—mashed yolks, mayonnaise, mustard, and seasonings—together until the mixture is completely smooth and creamy. Taste the filling at this stage and adjust the salt, pepper, or other seasonings to suit your preference. This is crucial for achieving your ideal flavor profile.
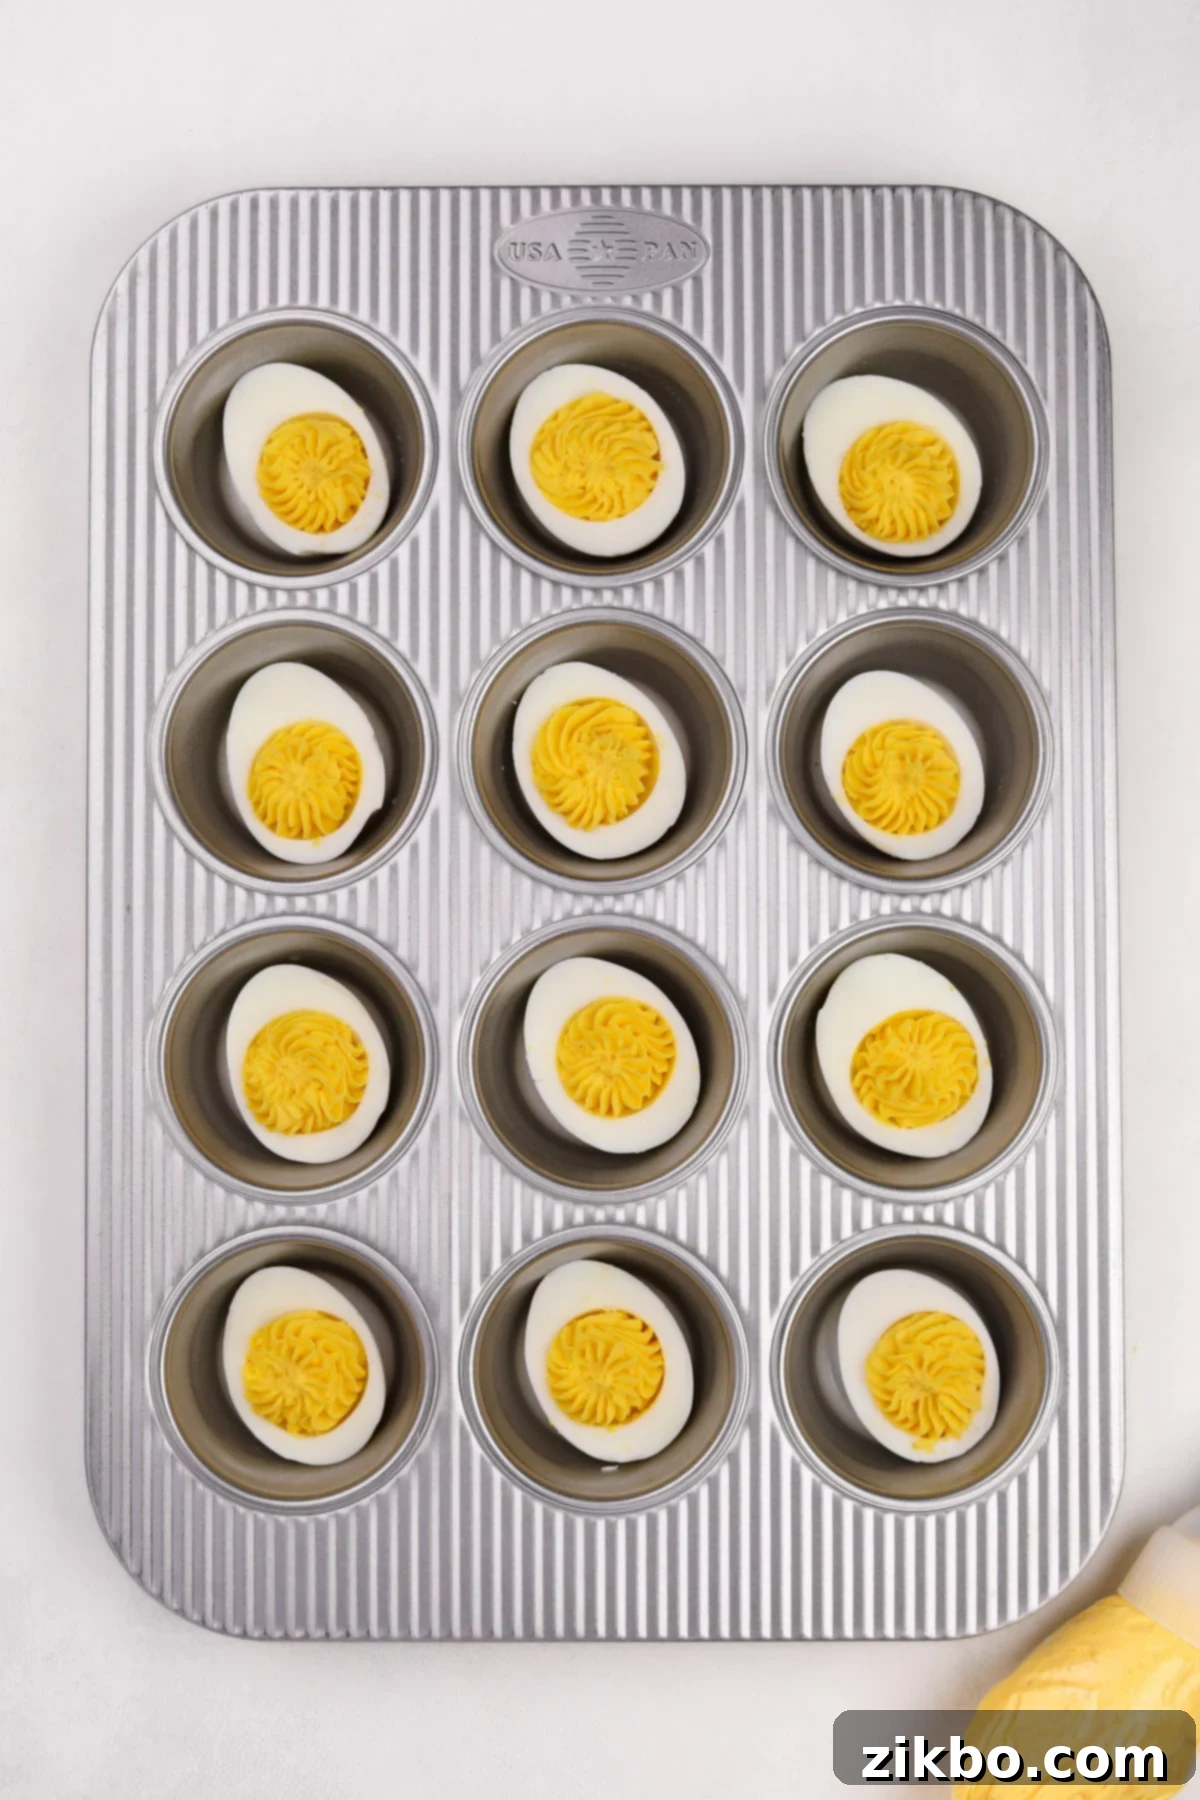
- Now, it’s time to fill the egg white halves with your delicious yolk mixture. You can simply spoon the filling into each cavity, creating a rustic look. However, for a more elegant and “tidier” presentation, I highly recommend using a pastry bag fitted with an extra large star tip or any large, open tip. This creates beautiful swirls and makes serving even more appealing. Both methods are equally delicious, so choose what works best for you!
Step 4: Making the Irresistible Candied Bacon
The candied bacon is truly the star of this dish! I often like to prepare my candied bacon recipe concurrently with boiling the eggs, but it can easily be made ahead of time if that fits your schedule better.
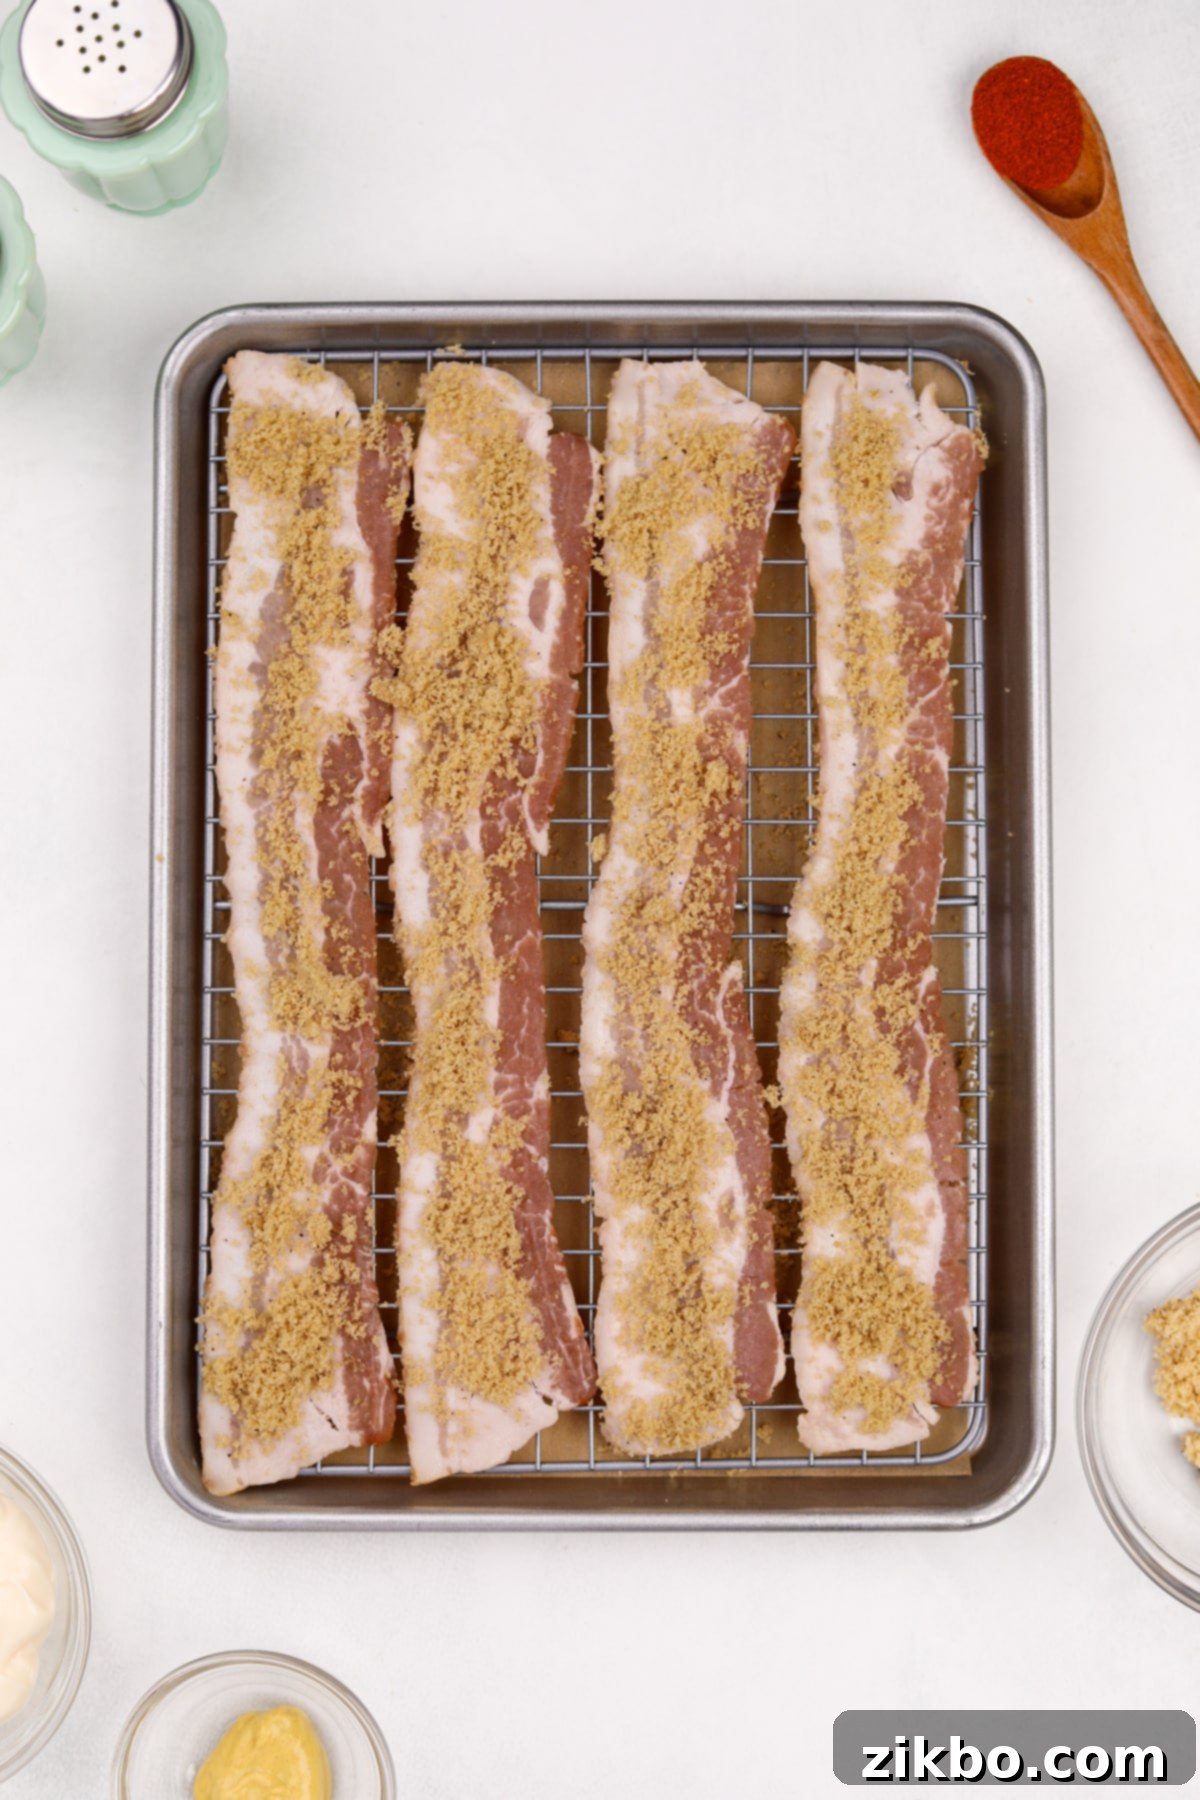
- Preheat your oven to 425ºF (218ºC). Line a baking sheet with parchment paper, then place an oven-safe wire rack on top. This setup is crucial for ensuring crispy bacon. Arrange 4 strips of bacon on the wire rack, making sure they are evenly spaced and not overlapping to allow for even cooking.
- In a small bowl, combine ¼ cup of brown sugar with ⅛ teaspoon of black pepper. Stir these two ingredients together thoroughly until well mixed.
- Evenly sprinkle about ⅔ of the brown sugar and pepper mixture over the top side of the bacon slices. Press it gently into the bacon to adhere.
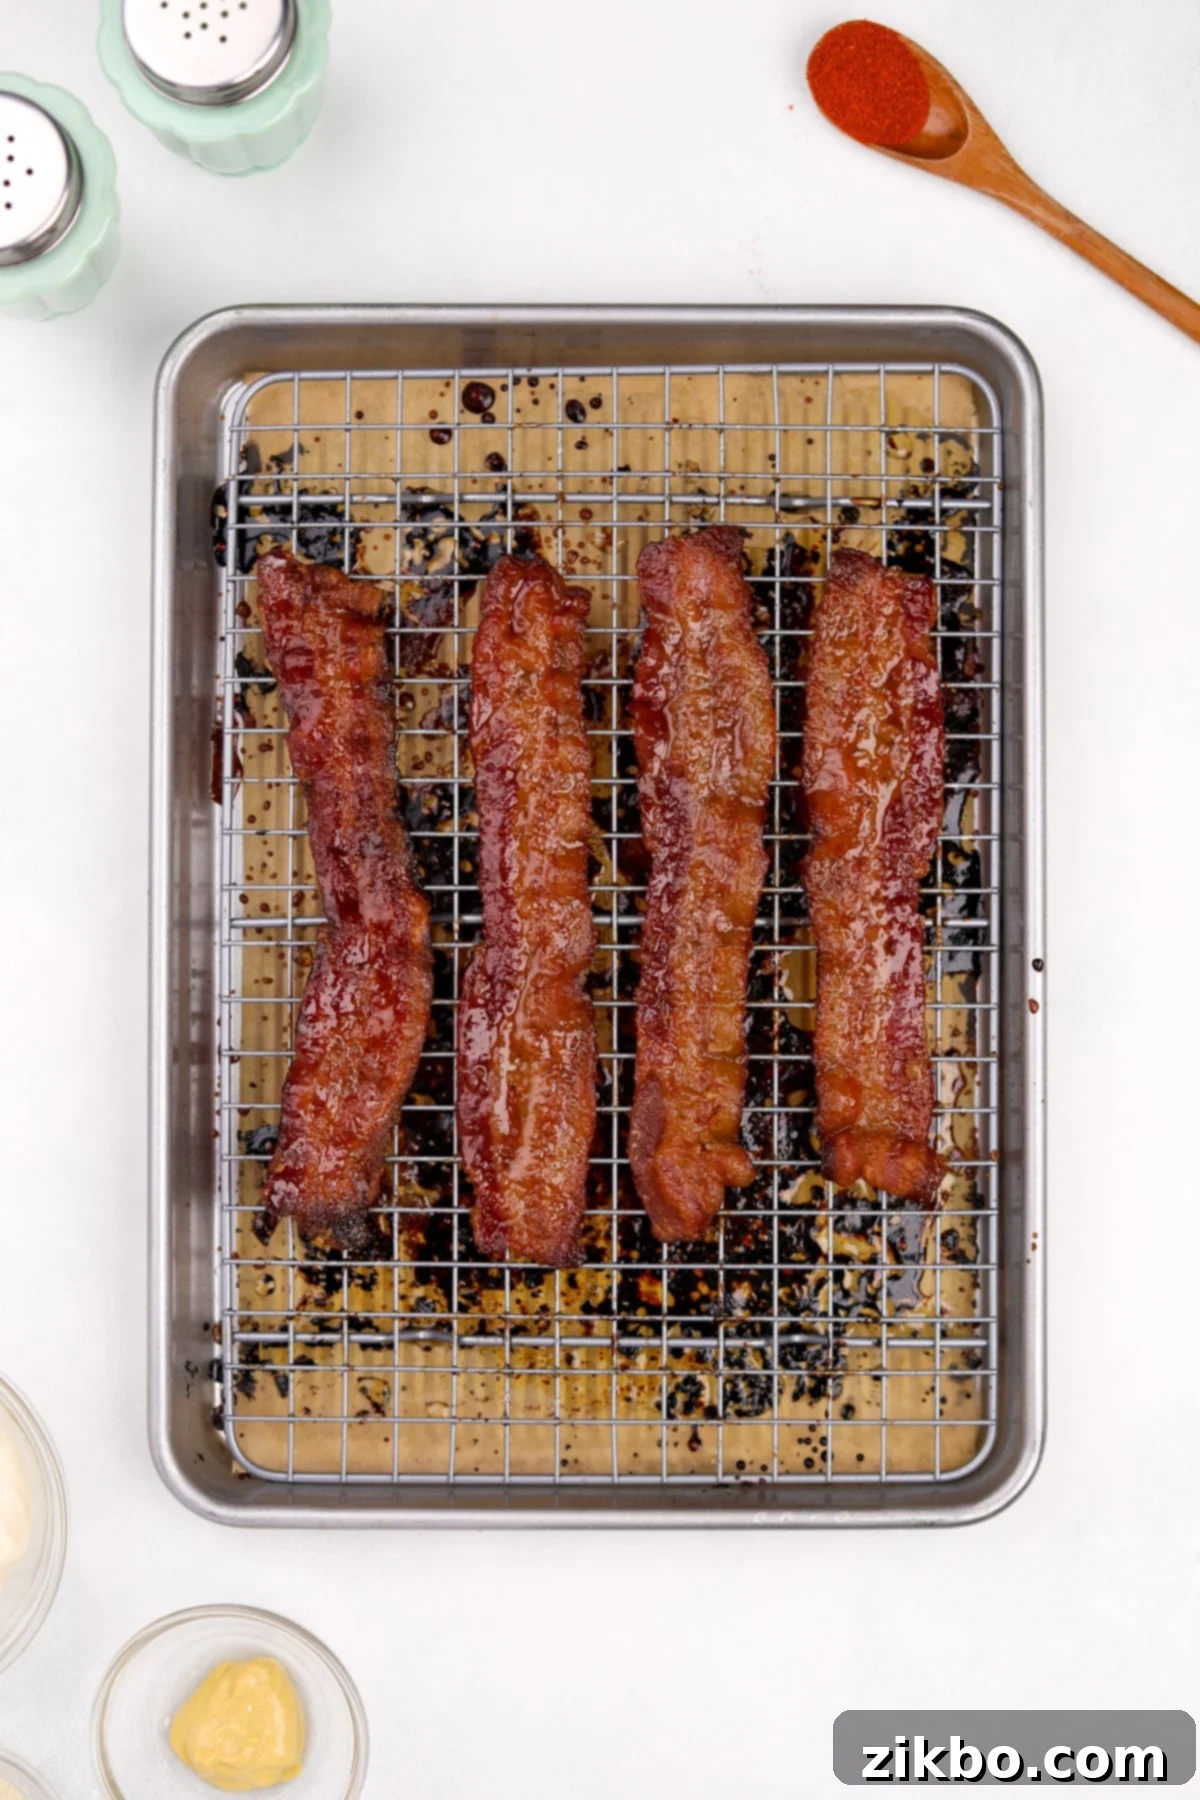
- Place the baking sheet with the bacon in the preheated oven and bake for 12 minutes. The bacon will start to crisp and the sugar will caramelize.
- Carefully remove the sheet from the oven. Using tongs, flip each bacon strip over. Evenly sprinkle the remaining ⅓ of the brown sugar and pepper rub onto the other side of the bacon. Return the baking sheet to the oven and bake for an additional 4-6 minutes, or until the bacon reaches your desired level of crispiness. Keep a close eye on it during this final stage, as it can burn quickly.
- Once cooked to perfection, remove the candied bacon from the oven and allow it to cool on the wire rack for about 5 minutes. As it cools, the caramelized sugar will harden, making the bacon wonderfully crispy and easy to handle.
Step 5: Garnishing and Serving Your Masterpiece
The final touches bring all the flavors and textures together, making your candied bacon deviled eggs visually stunning and utterly delicious.
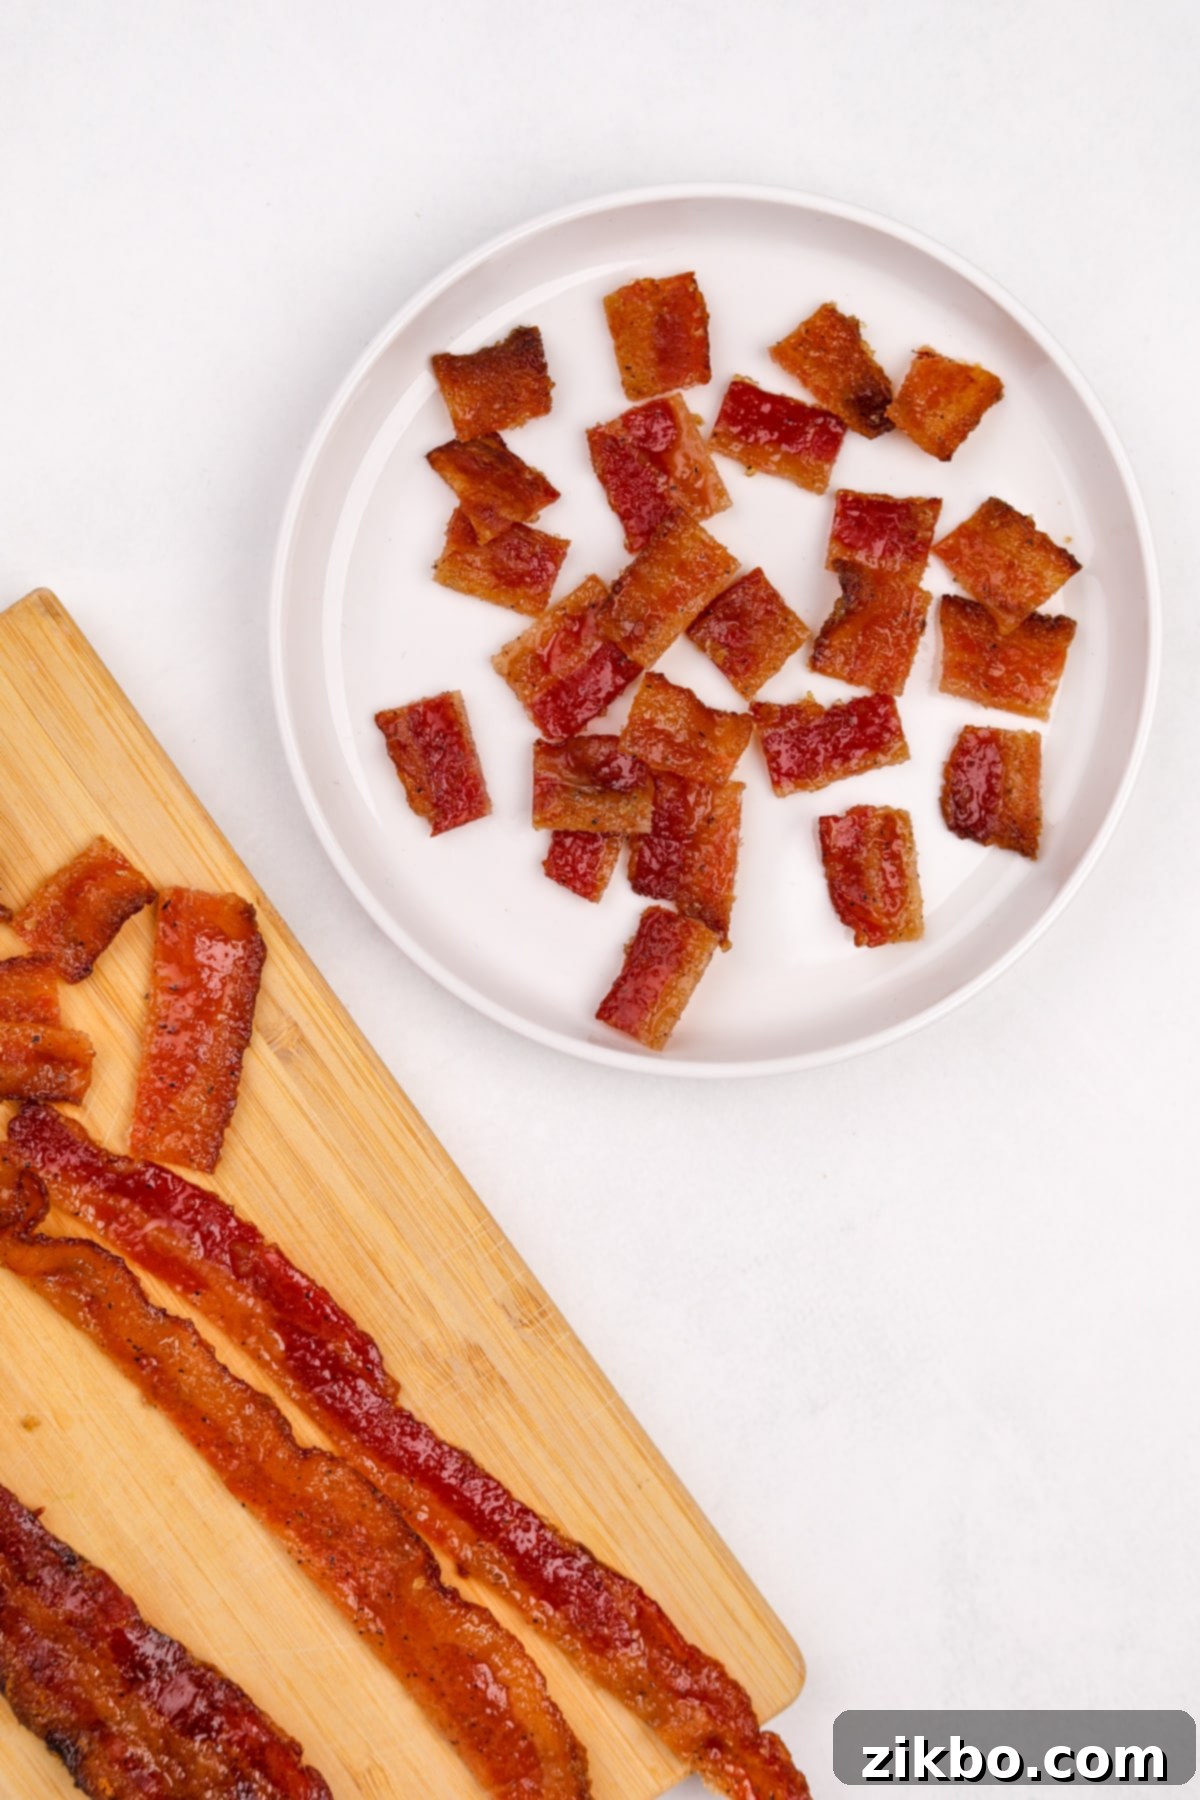
- Once the candied bacon has cooled and firmed up, use a sharp knife to cut each slice into small, roughly 1-inch cubes. If you prefer a more even distribution of bacon throughout the topping, you can finely chop the bacon into crumbles instead.

- Carefully take a small cube of candied bacon and gently wedge it into the center of the creamy yolk filling on each deviled egg. If using bacon crumbles, simply sprinkle them generously over the top of the filling.
- For a final touch of color and a hint of classic deviled egg charm, lightly garnish each egg with a sprinkle of paprika (if desired). Arrange your beautiful candied bacon deviled eggs on a serving platter and get ready for the compliments!
How to Store Deviled Eggs for Freshness
Deviled eggs are always best when fresh, but proper storage can extend their deliciousness for a short period.
- To store any leftover deviled eggs, carefully transfer them to an airtight container. Alternatively, arrange them on a platter and wrap them tightly with plastic wrap, ensuring no air can get in.
- Store the container or wrapped platter in the refrigerator for up to 3 days. While they remain safe to eat for this duration, deviled eggs are always freshest (and ideal for entertaining guests) within the first 12 hours of preparation.
- For optimal flavor and texture, it’s best to add the candied bacon and paprika garnish just before serving, especially if making them ahead.
Instant Pot Method for Easy Hard-Boiled Eggs
If you own an Instant Pot, making perfectly easy-to-peel hard-boiled eggs just got even simpler! I have a full step-by-step Instant Pot Deviled Eggs recipe post with more details, but here’s a quick rundown for preparing the eggs for this delicious appetizer using your pressure cooker:
- Add 1 cup of water to the bottom of a 6-quart Instant Pot (or 1 ½ cups if you have an 8-quart model).
- Carefully place your eggs in a tiered trivet or simply arrange them evenly over the trivet that came with your Instant Pot, ensuring they are not directly sitting in the water.
- Secure the lid on the Instant Pot and set the valve to the “sealing” position.
- Cook on manual pressure (or high pressure) for 4 minutes. This short cooking time is ideal for firm but not rubbery whites and perfectly cooked yolks.
- Once the cooking time is complete, allow the Instant Pot to perform a natural pressure release (NPR) for 5 minutes. This gentle release helps prevent cracking and ensures tender eggs.
- After the 5 minutes of NPR, carefully switch the valve to “venting” to quick-release any remaining pressure. Once the pin drops, you can safely open the lid.
- Immediately transfer the hot eggs to an ice bath and let them rest for 5 minutes. This stops the cooking process and makes them incredibly easy to peel.
- Peel the eggs as described in Step 1 of the main recipe, and then proceed with preparing the deviled eggs and candied bacon as directed.

Exciting Variations to Customize Your Deviled Eggs
While this candied bacon deviled egg recipe is fantastic as is, don’t hesitate to get creative! Here are some exciting variations to tailor them to your taste and occasion:
- Sweet & Spicy Adventure: For those who love a kick, swap out the regular candied bacon for million dollar bacon (or billionaire bacon). These variations are similar to candied bacon but incorporate crushed red pepper, additional black pepper, and sometimes a dash of cayenne pepper for a truly memorable spicy-sweet combination.
- Crumbled Bacon Topping: If you prefer the bacon flavor to be distributed more broadly, instead of cubes, finely crumble the cooked candied bacon. Sprinkle it generously over the entire surface of the yolk filling, ensuring every bite gets a hint of that amazing crunch and flavor.
- With a Jalapeño Twist: Add a vibrant, zesty element by placing a candied jalapeño ring (also known as “cowboy candy”) on top of each egg half alongside the bacon. If candied jalapeños aren’t available, thinly sliced pickled or fresh jalapeños can offer a delightful contrast and a hint of heat.
- Boosted Flavor Profile: Experiment with additional seasonings in the yolk mixture. Consider a dash of Worcestershire sauce for umami, a pinch of smoked paprika for deeper flavor, finely chopped green onions or chives for freshness, or even a tiny dash of maple syrup to enhance the sweet notes if you desire.
Thoughtful Substitutions for Every Preference
Whether you’re looking to lighten up the recipe, cater to dietary needs, or simply prefer different ingredients, these substitutions allow you to customize your deviled eggs without sacrificing flavor.
- Greek Yogurt for Mayonnaise: For a lighter, tangier, and protein-packed option, substitute plain Greek yogurt for all or part of the mayonnaise. This swap significantly reduces calories and boosts protein content, making it a fantastic choice for meal prep or a healthier appetizer.
- Avocado Oil Mayonnaise: If you prefer to avoid traditional vegetable oils, standard mayonnaise can easily be swapped for an avocado oil-based mayonnaise. You can even try making your own homemade avocado oil mayo for the freshest taste.
- No Mustard? No Problem: If mustard isn’t to your liking, you can simply omit it from the recipe. To replace the tangy element it provides, add about a ½ teaspoon of lemon juice, apple cider vinegar, or even pickle juice. These acidic additions will brighten the flavor of the yolk mixture.
- Using Miracle Whip: If Miracle Whip is your condiment of choice, you can certainly use it to make your deviled eggs. Since Miracle Whip already has a tangier and sweeter profile compared to traditional mayonnaise, I recommend starting by scaling back the amount of Dijon mustard slightly. Taste the mixture and then add more mustard back in, if desired, until it reaches your preferred balance of flavors.

We truly hope you loved this irresistible recipe for Deviled Eggs with Candied Bacon! Your feedback means a lot to us, so please let us know by leaving a 5-star review in the recipe card below or sharing your thoughts in the comments section. We’d also love to see your delicious creations! Tag me on Instagram @dashfordinner and share your photos with our community. Happy cooking!

Candied Bacon Deviled Eggs
Print
Pin
Rate
Appetizer, Holidays
American
25 minutes
28 minutes
53 minutes
12
servings
Dorothy Bigelow
Ingredients
Deviled eggs
-
12
eggs -
6
tablespoons
mayonnaise -
1 ½
teaspoons
dijon mustard -
⅛
teaspoon
onion powder -
⅛
teaspoon
salt
more to taste -
Pinch
of ground black pepper -
Paprika
for sprinkling
Candied Bacon
-
4
slices
bacon -
¼
cup
brown sugar -
⅛
teaspoon
black pepper
Instructions
Candied bacon:
-
Preheat the oven to 425ºF (218ºC). Line a sheet pan with parchment paper, and place an oven-safe baking rack on top of the parchment paper.
-
Place the bacon slices on the baking rack, keeping them evenly spaced with no overlapping.
-
Add the brown sugar and black pepper to a small bowl. Stir to combine.
-
Sprinkle ⅔ of the brown sugar and pepper mixture carefully on top of the bacon slices.
-
Place in the preheated oven and bake for 12 minutes.
-
Use a fork to flip the bacon slices over, then gently sprinkle on the remaining brown sugar and black pepper.
-
Return to the oven to cook for 4-6 minutes, or until crisp enough for your liking.
-
Remove from the oven and allow the bacon slices to cool while you prepare the deviled eggs.
Deviled eggs:
-
Bring a very large pot of water to a boil over high heat.
-
Add the eggs carefully to the water and boil for exactly 10 minutes. Meanwhile, prepare an ice bath by combining ice cubes and water in a large bowl.
-
Drain the water, then run cold tap water over the eggs.
-
Transfer the cooked eggs to the ice bath and allow them to rest for 3-4 minutes.
-
After the eggs have rested, remove one at a time for peeling. The best method for peeling is to hit it all over the surface with the back of a spoon, creating a cracked appearance. Then use your finger to remove a small piece of shell and membrane. Carefully wedge a small spoon under the shell and membrane, and rotate it around the egg to remove the shell. Rinse any excess shell off, then shake dry and set aside.
-
Repeat with all of the eggs. Once all of the eggs have been peeled, use a very sharp knife to slice each of them in half.
-
Carefully remove the cooked yolk from each egg, placing it in a medium-sized bowl.
-
Mash the bowl of cooked yolks with a fork (or use a food processor for a smooth texture).
-
Add the mayonnaise, dijon mustard, onion powder, salt, and pepper to the bowl of mashed yolks and mix well to combine. Taste and adjust to your preference.
-
Transfer the filling mixture to a piping bag fitted with a large piping tip, OR a freezer bag with the corner cut off.
-
Add approximately 2-3 teaspoons of filling into each egg half.
-
Once the candied bacon slices are cooled, use a sharp knife to cut them into small squares.
-
Sprinkle the filled eggs with paprika, then wedge a candied bacon square into each one for serving.
-
Serve and enjoy!
Did you try this recipe?
Tag me at @dashfordinner and share your photos!
Notes
Without a wire rack: You can bake the bacon on a parchment-lined baking sheet, but it does not crisp up as effectively as when using a raised baking rack. It will result in a softer, more pliable, and “glazed” texture rather than crispy. I tested both methods several times, and the wire baking rack consistently yielded superior crispness.
Instant Pot Deviled Eggs:For perfectly easy-to-peel hard-boiled eggs, cook them on high pressure for 4 minutes in your Instant Pot. Then, allow for a natural pressure release (NPR) for 5 minutes. Immediately transfer the eggs to an ice bath and let them rest for 5 minutes. After cooling, peel them and proceed with the recipe as written.
Make Ahead Tips: These delicious deviled eggs can be prepared up to 12 hours before your party or event for optimal freshness. After the 12-hour mark, they might start to “weep” slightly, affecting their texture and appearance. If you need to prepare them more than 12 hours in advance, I recommend boiling the eggs and preparing the yolk filling, but assemble the actual deviled eggs closer to the time you intend to serve them. For the very best results and presentation, always leave off the candied bacon and paprika garnish until just before serving.
Storage: To store any leftovers, transfer them to an airtight storage container and keep them in the refrigerator for up to 3 days. While they remain safe to eat for this period, they are undoubtedly at their peak flavor and texture within the first 24 hours.
Please note that some of my blog posts here at Dash for Dinner may contain affiliate links. If you make a purchase through these links, I will get a small commission at no additional cost to you. Please see my Disclaimer for more information.
