Easy No-Churn Mini Egg Ice Cream: The Ultimate 4-Ingredient Easter Dessert!
Get ready to indulge in pure Springtime bliss with this incredibly easy, **4-ingredient recipe** for **Mini Egg Ice Cream**. It’s a decadent, rich, and utterly delicious homemade treat that perfectly captures the festive spirit of the Easter season. Imagine silky smooth ice cream, whipped to soft peaks, generously speckled with crunchy, milk chocolate Cadbury Mini Eggs, then scooped into bowls, ready for everyone to enjoy. It’s not just a dessert; it’s a celebration in every spoonful!
Looking for more magically delicious frozen treats? Don’t forget to try out another family favorite: Lucky Charms Ice Cream! It’s another whimsical no-churn recipe that’s sure to bring a smile.

Cadbury Mini Eggs have held a special place in my heart for as long as I can remember. The anticipation of their arrival in stores during the late winter months was always a highlight, signaling that Spring and Easter were just around the corner. As soon as those iconic pastel bags appeared on shelves, I’d stock up, savoring them two at a time (especially those delightful **pink ones**!). There’s something uniquely charming about their crisp candy shell, creamy milk chocolate center, and vibrant colors that just screams “Spring.”
While my sweet tooth has mellowed slightly over the years, my fondness for these classic Springtime milk chocolate treats has never wavered. After the incredible reception to my Lucky Charms ice cream recipe, I knew immediately that a Mini Egg version was an absolute must-share. The moment I unveiled this creation, my family was beyond thrilled! There were cheers and requests for second (and third!) servings.
My husband, a self-proclaimed Ben & Jerry’s connoisseur, even declared it **the best ice cream he’s ever had**. Coming from him, that’s high praise indeed, and it speaks volumes about just how special this recipe is. I genuinely hope that this delightful, easy-to-make Mini Egg Ice Cream brings as much joy and deliciousness to your home as it has to ours. It’s truly the perfect sweet ending to any Easter meal or a fantastic treat for any warm Spring day.
Why You’ll Love This No-Churn Mini Egg Ice Cream Recipe:
- **No Ice Cream Maker Needed!** This is perhaps the biggest perk. Forget about bulky appliances, churning for hours, or worrying about special equipment. This is a truly no-churn recipe, meaning all you need is an electric mixer to whip your cream to airy perfection. It makes homemade ice cream accessible to everyone, simplifying the process without compromising on taste or texture.
- **The Ultimate Easter & Springtime Treat:** With its vibrant pastel colors and iconic chocolate egg pieces, this ice cream is the quintessential dessert for celebrating Easter and welcoming the joyful Spring season. It’s festive, fun, and a delightful, creative way to use up those beloved seasonal Cadbury Mini Eggs that everyone looks forward to each year.
- **Just 4 Simple Ingredients & Quick Prep!** You only need four basic ingredients to create this magical dessert, and the active preparation time is incredibly minimal – **less than 20 minutes!** This makes it perfect for busy hosts, impromptu gatherings, or anyone craving a quick and satisfying sweet fix without a lot of fuss or complicated steps.
- **No Raw Eggs:** This recipe is entirely free of raw eggs, egg whites, or egg yolks. This makes it a safe and worry-free option for those who avoid raw eggs due to dietary preferences, allergies, or health concerns, offering peace of mind along with deliciousness.
- **A Match Made in Heaven:** The combination of smooth, creamy homemade vanilla ice cream with the delightful crunch and rich milk chocolate flavor of Cadbury Mini Eggs is nothing short of **pure delight!** Each bite offers a wonderful textural contrast – soft, cold creaminess followed by the satisfying snap of the candy shell and the melt-in-your-mouth chocolate.
Key Ingredients for Your Homemade Mini Egg Ice Cream
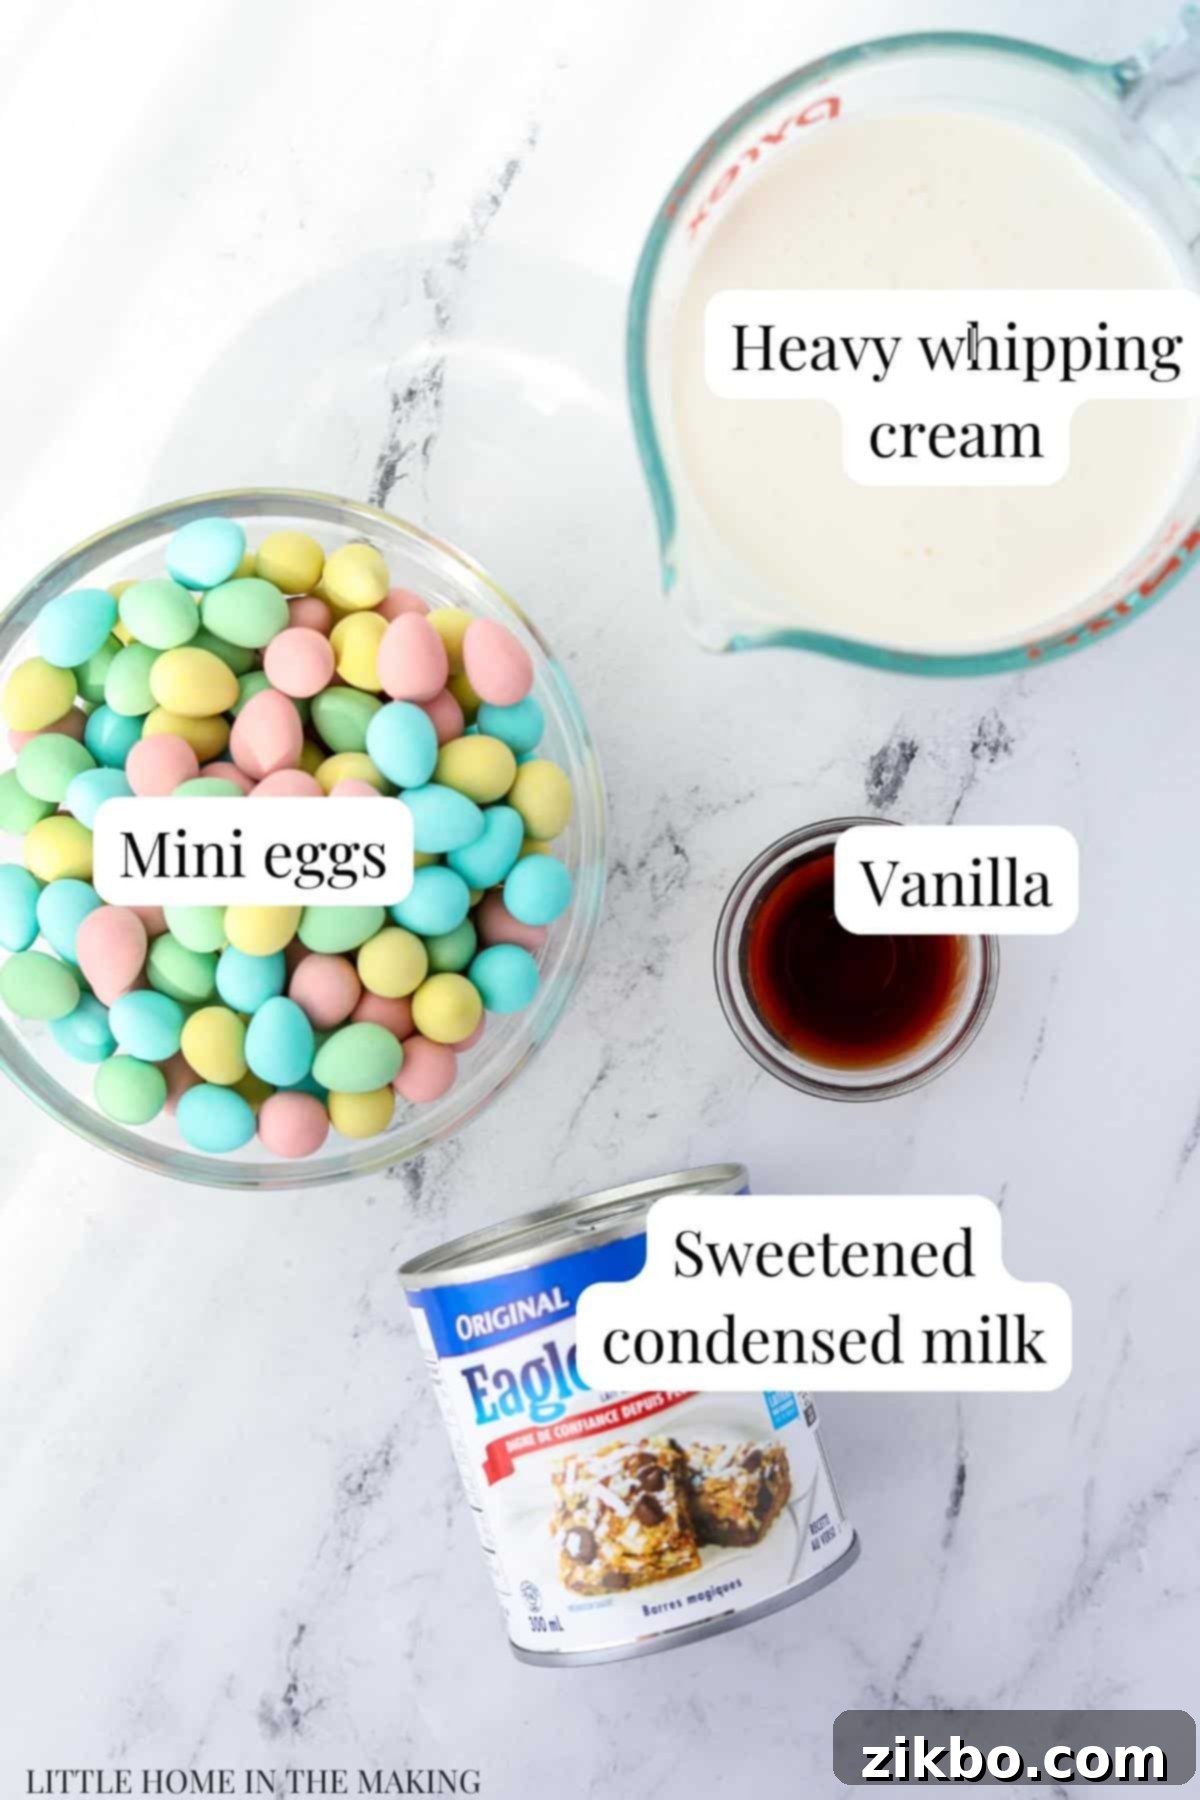
- **Cadbury Mini Eggs:** You’ll need about 1 ¾ cups of whole mini eggs, which equates to approximately 294 grams (or 10.5 ounces). These are undeniably the star of the show! For the best texture and distribution throughout the ice cream, I highly recommend crushing most of them into smaller pieces. You can easily do this with a rolling pin or the back of a large, sturdy knife. Their iconic crunchy candy shell and creamy milk chocolate interior add an irresistible dimension and a burst of color to every spoonful of your homemade treat.
- **Heavy Cream:** Also widely known as heavy whipping cream or double cream in some regions, this is the crucial ingredient that, when whipped, forms the airy, stable, and luscious base of your ice cream. You’ll need 2 cups of it, and it’s absolutely essential that it’s thoroughly chilled before you begin whipping. Cold cream whips faster, achieves greater volume, and holds its peaks better, ensuring a light, fluffy, and incredibly creamy texture for your no-churn ice cream.
- **Sweetened Condensed Milk:** This is the “secret ingredient” that makes no-churn ice cream possible and so incredibly delicious! You’ll need one standard can, which is typically about 14 ounces (or 397 grams). It plays a dual role: providing both the intense sweetness and the rich, creamy body that traditional ice cream bases get from eggs and sugar. Crucially, its high sugar content also helps to lower the freezing point of the mixture, preventing large, icy crystals from forming and resulting in a much smoother, more enjoyable ice cream.
- **Vanilla Extract:** Just a touch of pure vanilla extract is added to the mixture to create a delicious, aromatic vanilla ice cream base. This subtle yet powerful flavor enhances the overall sweetness and beautifully complements the rich, chocolatey notes of the Mini Eggs, providing a yummy, well-rounded backdrop without overpowering the main star of the dessert.
Essential Equipment & Tools:
Making this creamy Mini Egg ice cream is wonderfully simple, requiring minimal specialized equipment. Here’s a quick list of what you’ll need to get started:
- **Electric Mixer:** This is your primary tool for transforming the heavy cream into stiff, airy peaks. While it’s technically possible to whip cream by hand, an electric mixer makes the process much quicker, easier, and more efficient, guaranteeing consistent results. I highly recommend using either a powerful stand mixer fitted with a whisk attachment, an electric hand mixer, or an electric whisk to achieve the perfect consistency.
- **Loaf Pan or Freezer-Safe Container:** This is where your delicious ice cream will set and freeze. A standard 9×5 inch loaf pan is ideal for this recipe, but you could also opt for a dedicated ice cream container for potentially longer, more optimized storage and easier scooping. Just ensure your chosen container is freezer-safe and has a tight-fitting lid or can be thoroughly covered.
- **Silicone Spatula:** An essential tool for gently folding the delicate whipped cream into the condensed milk mixture. Its flexible nature allows you to scrape the bowl clean and incorporate ingredients without deflating the airy base, which is crucial for creamy no-churn ice cream.
- **Rolling Pin or Large Knife:** These are for efficiently crushing the Cadbury Mini Eggs into smaller, more manageable pieces before incorporating them into the ice cream. A sturdy cutting board is also helpful here.
- **Large Mixing Bowls:** You’ll need two large bowls: one for mixing the condensed milk and vanilla, and another (preferably chilled) for whipping the heavy cream.
Step-by-Step: How to Make Mini Egg Ice Cream
Prepare for Perfection: Chilling Your Loaf Pan
Before you dive into mixing your delightful ice cream, take a crucial moment to prepare your freezing container. I strongly recommend pre-chilling the loaf pan (or your chosen freezer-safe storage container) that will hold your ice cream base. Simply line it with parchment paper, leaving a slight overhang on the sides for easy removal later, and then place it in your freezer for at least 20 minutes before you start assembling the ice cream. This seemingly small but crucial step helps the ice cream freeze more quickly and efficiently. Rapid freezing minimizes the formation of large, undesirable ice crystals, which in turn ensures a much firmer, smoother, and incredibly creamy texture in the final product.
Through my own experiments, I’ve noticed a significant difference: ice cream frozen in an unchilled pan tends to be softer, icier, and takes considerably longer to firm up to that perfect scoopable consistency. A little pre-planning and chill time here truly goes a long way in achieving that perfectly scoopable, professional-quality homemade ice cream!
Crafting the Luscious Vanilla Ice Cream Base
Step one: Combine the Wet Ingredients. In a large, spacious mixing bowl, pour in the entire can of sweetened condensed milk. Add the vanilla extract to it. Using a whisk or a sturdy silicone spatula, mix these two ingredients thoroughly until they are well combined, smooth, and uniform. The vanilla should be evenly distributed throughout the condensed milk. Set this bowl aside for a moment, making sure it’s easily accessible for the next steps.
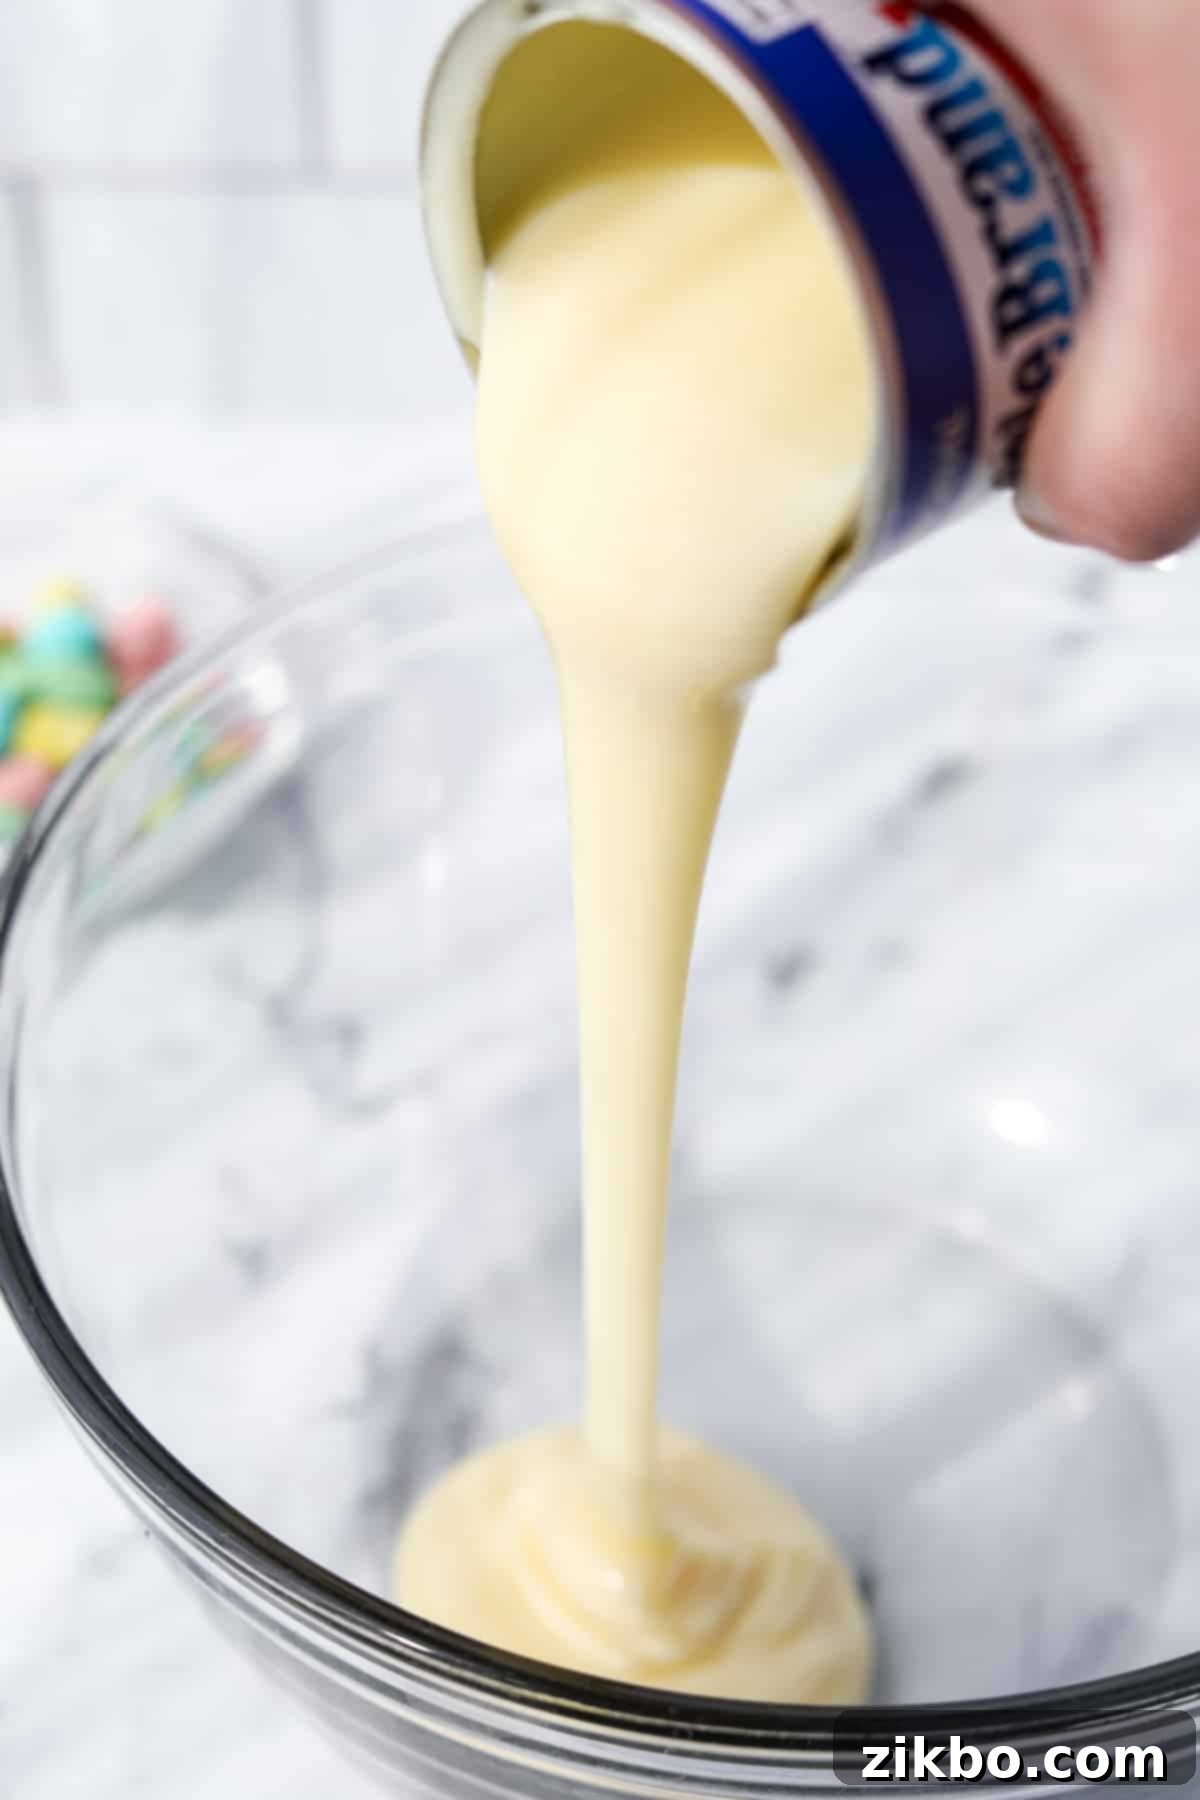
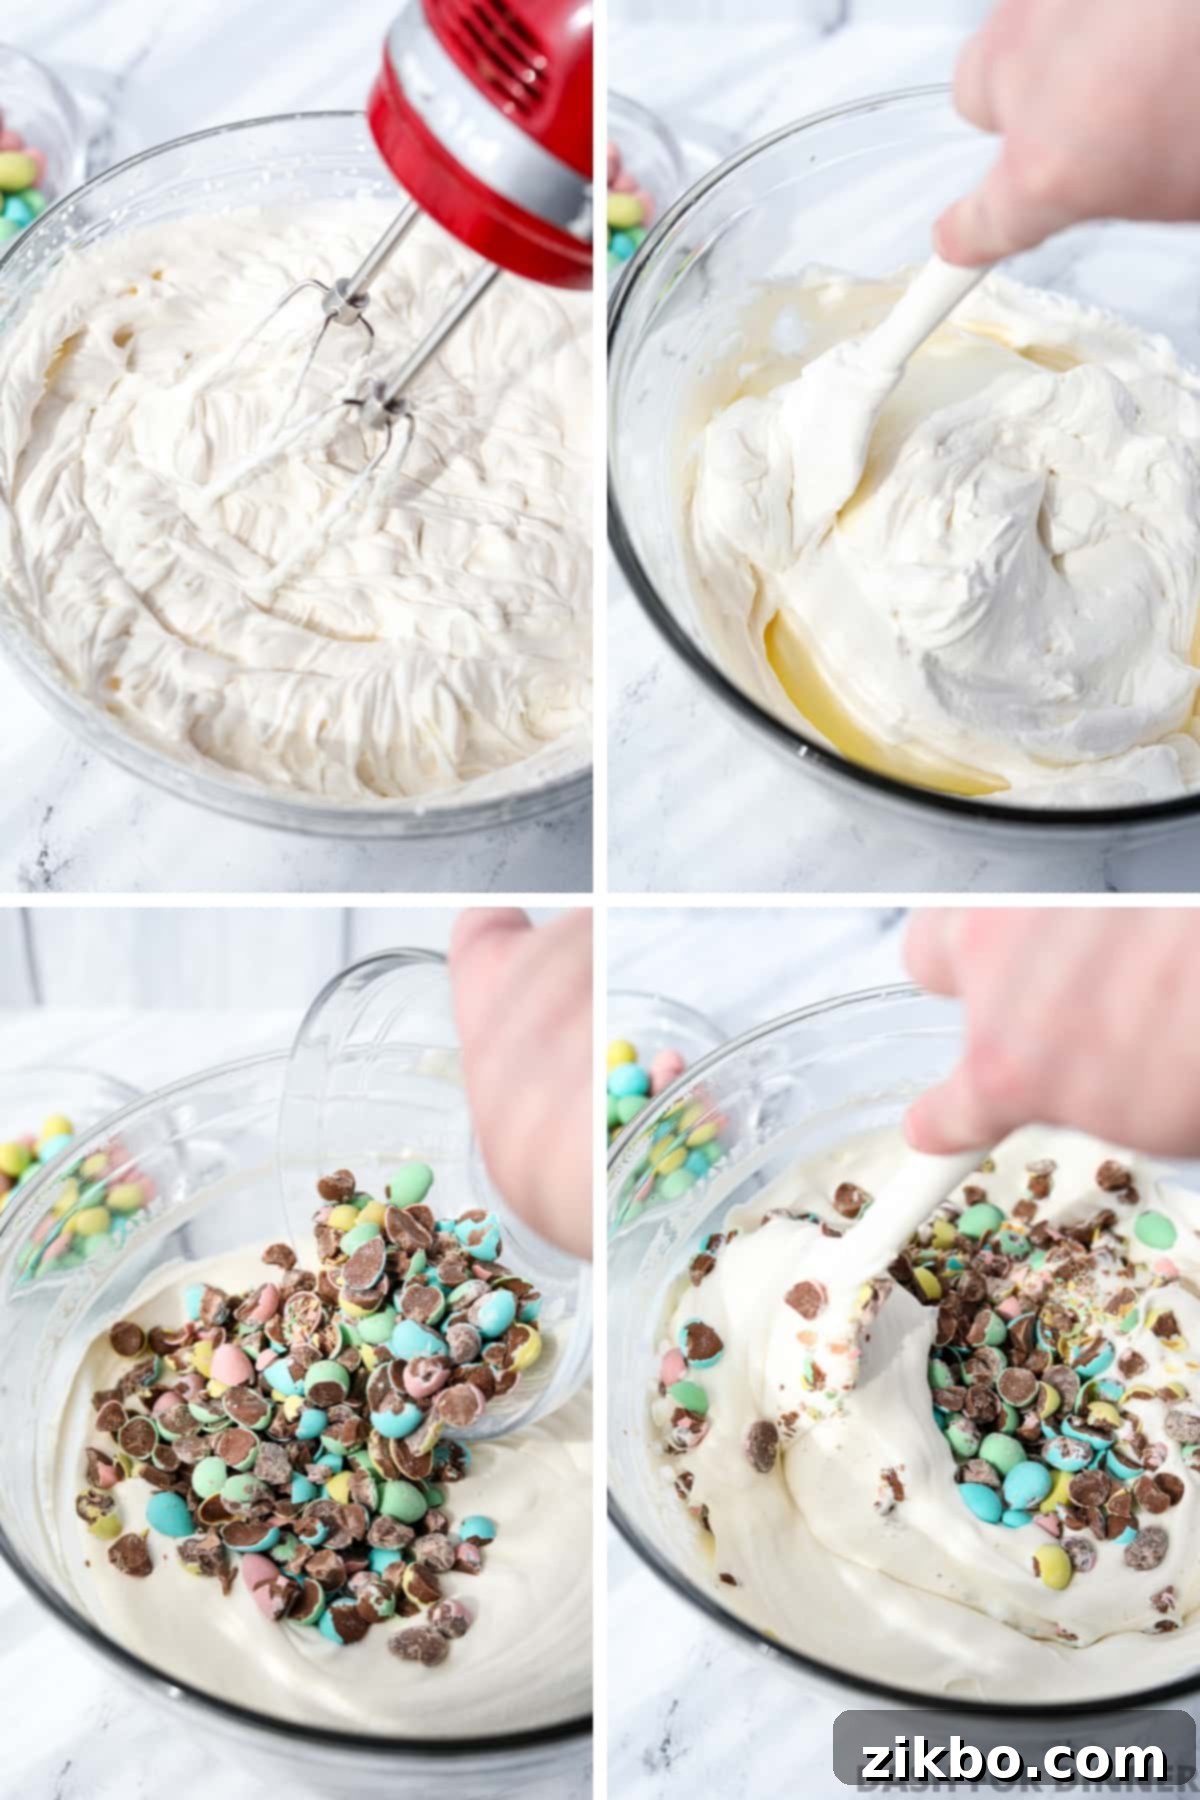
Step two: Whip the Heavy Cream. Grab another large, clean mixing bowl (ideally one that has also been chilled in the freezer for a few minutes, if possible, along with your whisk attachment if using a stand mixer). Pour your thoroughly cold heavy whipping cream into this bowl. Using an electric hand mixer on high speed, or a stand mixer fitted with the whisk attachment, beat the cream vigorously. Continue mixing until firm, stiff peaks form. This means the cream will hold its shape when the beater is lifted. This usually takes about 4-5 minutes, but keep a close eye on it – you want peaks that are stable but not grainy or over-whipped.
Step three: Gently Fold to Combine. Now, with great care, add the whipped cream into the bowl containing the sweetened condensed milk and vanilla mixture. Using a silicone spatula, gently fold the whipped cream into the condensed milk. The key here is to be very gentle, working in slow, sweeping motions from the bottom of the bowl upwards, over and over, to maintain as much of the air and volume in the whipped cream as possible. Continue folding until the mixture is beautifully smooth, uniform, light, and airy, with absolutely no streaks of unmixed condensed milk visible. This gentle folding ensures a light, creamy ice cream texture.
The Sweet Crunch: Adding Crushed Mini Eggs
Step four: Incorporate the Mini Eggs. It’s time for the star ingredient to make its grand entrance! Add the majority of your crushed Cadbury Mini Eggs to the light and creamy ice cream base. If you desire, you can reserve a small handful (about ¼ to ½ cup) of whole mini eggs for garnishing the top of your finished ice cream. Gently fold the crushed eggs into the ice cream mixture with your silicone spatula until they are evenly distributed throughout. This ensures that every single spoonful delivers that delightful candy crunch and burst of chocolatey flavor.
Quick Tips for Crushing Mini Eggs:
The easiest and most efficient way to crush your Mini Eggs is to place a small amount (about half a cup at a time) on a sturdy cutting board. Then, use the flat side of a large chef’s knife or a heavy rolling pin to firmly press down and crush the eggs into your desired smaller, bite-sized pieces. Another popular method is to place them in a sturdy zip-top bag, seal it, and then use a rolling pin to break them up.
Important Note on Choking Hazard: When preparing this delightful dessert for small children (especially those under 5 years of age), it is absolutely crucial to crush *all* of the mini eggs into very small, easily chewable pieces. Avoid including any whole mini eggs in or on the ice cream, as their round shape and hard candy shell can pose a significant choking hazard, similar to grapes or other small, round foods. Safety first when serving to young ones!
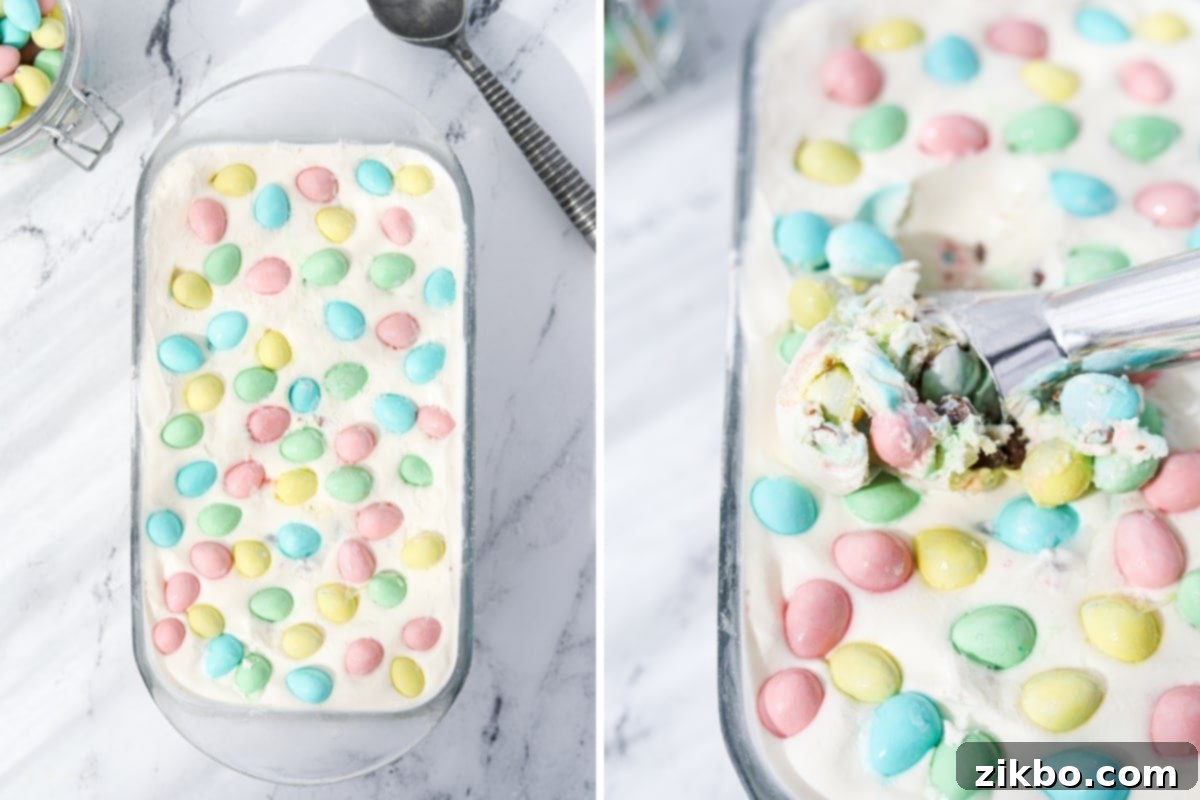
Step five: Transfer to Pan. Carefully spoon the entire ice cream mixture into your pre-chilled loaf pan or freezer-safe container. Use your silicone spatula to gently smooth the top into an even layer, ensuring a beautiful, uniform presentation once the ice cream is frozen solid.
Step six: Garnish and Cover. If you chose to reserve some whole mini eggs, now is the time to gently place them on top of the smoothed ice cream mixture, pressing them in slightly to secure them. Remember the vital safety note mentioned above: if you are making this for very young children, be sure to either omit this garnishing step or use only finely crushed mini eggs for topping.
Freezing Your Homemade Mini Egg Ice Cream to Perfection
Once your delightful ice cream mixture is snugly in the prepared loaf pan, cover it tightly with plastic wrap or aluminum foil. Ensure the wrap is pressed down gently onto the surface of the ice cream itself to minimize air exposure and prevent freezer burn. Then, place it in a flat, stable location in your freezer. In my experience, the regular freezer compartment of your kitchen refrigerator tends to work more effectively for the initial freeze compared to a deep freezer, as it typically maintains a more consistent, slightly less intense temperature, though results can certainly vary depending on your specific appliance.
You’ll need to **freeze the ice cream for at least 6 hours** to allow it to firm up properly. However, for the absolute best results and a perfectly scoopable, creamy consistency, I’ve found that **12 hours (or even simply letting it freeze overnight)** is truly the sweet spot. You’re aiming for ice cream that is firm enough to hold its shape beautifully when scooped, yet still wonderfully creamy and smooth, not rock-hard or overly icy. This extended chilling time allows all the ingredients to meld flavors, and for the texture to fully develop to its optimal state.
Once it has frozen sufficiently and is firm through the middle, your homemade Mini Egg Ice Cream is ready to be served! Scoop generous portions into bowls, perhaps with a little extra sprinkle of crushed Mini Eggs, and enjoy immediately, or keep it stored for future delightful moments.
Storing Your Homemade No-Churn Ice Cream
To keep your delicious Mini Egg Ice Cream fresh and free from the dreaded freezer burn, proper storage is absolutely key. For short-term storage, wrap any leftovers tightly in plastic wrap or aluminum foil directly in the loaf pan and keep it in the freezer for up to 1-2 weeks. This method is generally sufficient if you plan to consume the ice cream relatively quickly.
However, if you wish to store your homemade ice cream for a longer period, or to significantly reduce the chances of freezer burn and maintain optimal texture and flavor, I highly recommend transferring it to an airtight, dedicated freezer-safe container. With proper storage in a high-quality airtight container, your homemade ice cream can remain fresh and enjoyable for **up to 4 weeks.** For the absolute best results and a superior long-term storage solution, I personally recommend investing in specialized Tovolo ice cream containers. These are specifically designed to minimize air exposure and keep homemade ice cream at its peak creaminess for an extended period.

Top Tips for No-Churn Mini Egg Ice Cream Success
Achieving perfectly creamy, delicious no-churn ice cream is surprisingly simple, especially with a few smart techniques and best practices. Here are my top tips to ensure your Mini Egg Ice Cream turns out absolutely perfect every single time:
- **Always Pre-Freeze the Loaf Pan (or Container):** This tip is so important for texture that it bears repeating! I **highly recommend** that you place your loaf pan or chosen freezer-safe container in the freezer for at least 20 minutes before you even begin to add the ice cream mixture. A thoroughly chilled container helps the ice cream base start freezing immediately upon contact, which is crucial. This rapid initial freezing minimizes the formation of large, undesirable ice crystals, resulting in a much firmer, creamier, and faster-setting ice cream. It’s a simple extra step that makes a monumental difference in the luxuriousness of the final texture!
- **Chill Your Mixing Bowls Too:** For optimal whipping results and the creamiest ice cream, consider chilling the bowl you’ll be using for the heavy cream. Heavy cream whips best when it’s very cold. If you remember, place your mixing bowl (and even the whisk attachment for your stand mixer) in the freezer for about 15-20 minutes before you start. This extra chill factor can significantly help the cream whip up more quickly, achieve greater volume, and form firmer, more stable stiff peaks, all of which contribute to a lighter and smoother ice cream base.
- **Work Efficiently and Quickly:** Once your heavy cream is whipped and you’ve started combining ingredients, it’s important to work with a bit of speed and purpose. Don’t let your whipped cream or the combined ice cream base sit at room temperature for too long, as it can start to lose its airy volume and become less stable. To facilitate this, try to crush your mini eggs and prepare any other mix-ins while your loaf pan and mixing bowls are chilling. Having all your ingredients prepped and ready to go will allow you to mix, fold, and transfer the ice cream to the freezer swiftly, ensuring the best possible texture and preventing the Mini Eggs from sinking to the bottom.
- **Use Quality Ingredients:** Since this recipe relies on only four core ingredients, the quality of each really shines through in the final product. Opt for high-quality heavy cream and a pure vanilla extract for the most robust and delicious flavor profile.

Delicious Variations to Try
While this classic Mini Egg Ice Cream recipe is absolutely perfect as is, there are several exciting ways you can customize it to suit your taste, explore different flavor profiles, or experiment with other seasonal treats. Here are a few delightful variations to inspire your next batch:
- **Cadbury Creme Egg Ice Cream:** For another iconic Easter twist, substitute the Mini Eggs entirely with Cadbury Creme Eggs. If you can find the smaller “mini” Creme Eggs, they’re particularly perfect for this variation due to their size. Simply cut them in half or quarters just before gently folding them into the vanilla ice cream mixture. The rich, gooey fondant center of the Creme Eggs will create wonderful pockets of sweet, yolky surprise throughout the creamy ice cream, offering a different but equally decadent experience.
- **Lighter Version:** If you’re looking to reduce the richness of the ice cream slightly, you can opt to use a light or low-fat can of sweetened condensed milk instead of the regular full-fat kind. You could also reduce the quantity of Mini Eggs to approximately 1 cup to cut down on sweetness. Please note, however, that heavy whipping cream is indispensable for this no-churn method and cannot be substituted with lighter creams (like half-and-half or regular milk) because they simply lack the necessary fat content required to whip into stable peaks. Without those stiff peaks, your ice cream won’t set properly.
- **Chocolate Mini Egg Ice Cream:** For the ultimate chocolate lover, transform the vanilla base into a rich, deep chocolate one! This is incredibly simple to do: just whisk 2-3 tablespoons of unsweetened cocoa powder into the sweetened condensed milk mixture along with the vanilla extract (in step one of the instructions). This addition will create a wonderfully deep, chocolatey base that beautifully complements and enhances the milk chocolate flavor of the Cadbury Mini Eggs.
- **Using an Ice Cream Machine:** Although this recipe is specifically designed to be delightfully no-churn, you can absolutely use an ice cream maker if you prefer that method! To do so, simply combine the heavy cream, sweetened condensed milk, and vanilla extract in a bowl, mixing them well until fully incorporated. Transfer this combined mixture to the frozen bowl of your ice cream maker. Churn according to your specific machine’s instructions, which typically takes around 20-35 minutes, or until the mixture is whipped and thick, resembling a soft-serve consistency. During the last 1-4 minutes of churning, add in your crushed Mini Eggs and allow the machine to mix them thoroughly into the ice cream. Finally, transfer the churned ice cream to a freezable container and freeze for at least 4 hours, or until it reaches your desired firm consistency.

Frequently Asked Questions About Mini Eggs & No-Churn Ice Cream
In the United States, Cadbury Mini Eggs are typically a seasonal treat, primarily available during the Spring and Easter holidays, usually from late winter through Easter. However, in Canada and the United Kingdom, consumers are fortunate enough to find Mini Eggs available year-round in most grocery stores! If you’re looking for Cadbury Mini Eggs during the off-season in the US, you might have luck checking online retailers like Amazon, or visiting local specialty markets that import British and UK foods, which often stock them.
Yes, you can, depending on your location! Specifically, in Canada and the UK, Cadbury Mini Eggs are a year-round staple available in most grocery stores. It’s generally only Cadbury Creme Eggs that are typically limited to the Spring and Easter season across all regions. So, if you reside in Canada or the UK, your Mini Egg cravings can indeed be satisfied anytime!
While Cadbury Mini Eggs are not officially labeled or certified as gluten-free by the manufacturer, their ingredient list typically does not contain any gluten-containing components. This means they are likely suitable for consumption by individuals following a gluten-free diet or those with celiac disease who are not highly sensitive to potential cross-contamination. However, because they are not certified gluten-free, there’s always a slight, rare risk of cross-contamination during manufacturing processes. If you have a severe gluten allergy or celiac disease, it’s always best practice to check the most current packaging information or choose certified gluten-free alternatives if available.
Several factors can prevent no-churn ice cream from freezing to a firm, scoopable consistency. Firstly, ensure your heavy cream was whipped to truly stiff peaks; insufficient whipping will result in a looser, more liquid texture. Secondly, make sure your sweetened condensed milk ratio is correct, as it’s crucial for both sweetness and preventing ice crystallization. Thirdly, adequate freezing time (at least 6-12 hours) in a consistently cold freezer is essential. Lastly, important preparatory steps like pre-chilling your loaf pan and working quickly to keep the mixture cold before freezing can significantly help it set faster and firmer.
More Easy Dessert Recipes to Love
- Lucky Charms Ice Cream
- Lazy Cheesecake Salad
- No Bake Chocolate Chip Cheesecake
- Cuppa Cuppa Cake
- Berry Cheesecake Salad

Mini Egg Ice Cream
Print
Pin
Rate
Equipment
-
Stand mixer or electric hand mixer
-
9×5 inch Loaf pan or freezer-safe container
-
Silicone spatula
-
Rolling pin or large chef’s knife
Ingredients
- 2 cups heavy whipping cream chilled
- 14 ounces sweetened condensed milk
- 1 ½ teaspoons vanilla extract
- 1 ¾ cup Cadbury Mini Eggs 294 grams, crushed, plus extra for topping if desired
Instructions
-
Line a 9×5 inch loaf pan with parchment paper, leaving an overhang on the sides for easy lifting later. Place the prepared pan in the freezer to thoroughly chill while you prepare the ice cream base.
-
In a large mixing bowl, combine the sweetened condensed milk and vanilla extract. Stir well with a whisk or spatula until smoothly incorporated. Set this mixture aside.
-
Prepare your Cadbury Mini Eggs: Place them on a cutting board (or in a sturdy zip-top bag) and use the side of a large knife or a heavy rolling pin to gently crush the eggs into smaller, varied pieces. Reserve about ¼ to ½ cup of whole mini eggs for topping the ice cream, if desired (remembering the choking hazard note for small children).
-
In a separate, very cold large bowl (ideally chilled beforehand), pour the heavy cream. Using a stand mixer fitted with the whisk attachment (or an electric hand mixer), beat the heavy cream.
-
Mix the heavy cream on medium-high speed until firm, stiff peaks form. This means the cream will hold its shape when the whisk is lifted. Be careful not to overmix, which can result in a grainy texture.
-
Gently add the whipped cream to the bowl with the sweetened condensed milk and vanilla mixture. Using a silicone spatula, carefully fold the whipped cream into the condensed milk mixture until no streaks remain and the mixture is uniform and airy. Avoid aggressive stirring to maintain the volume of the whipped cream.
-
Pour in the crushed mini eggs (excluding any reserved for topping) and gently fold them into the whipped cream and condensed milk mixture until they are evenly distributed throughout the base. Work quickly to keep the mixture cold.
-
Transfer the ice cream base immediately to the prepared and chilled loaf pan, spreading it out into an even layer with your spatula.
-
If desired, carefully place the reserved whole mini eggs on top of the ice cream, pressing them in gently. Cover the loaf pan tightly with a layer of plastic wrap or aluminum foil, ensuring it touches the surface of the ice cream to prevent ice crystals from forming.
-
Place the covered loaf pan in the freezer for at least 6 hours. For the best, firmest, and most scoopable results, ideally, chill for 12 hours or even overnight.
-
Once fully frozen, scoop and serve your delightful homemade Mini Egg Ice Cream! Store any leftovers properly in the freezer for up to 2 weeks for optimal freshness.
Notes
Chilling the bowls: For the creamiest ice cream and easiest whipping, it’s a best practice to chill your mixing bowls (if freezer-safe) in the freezer beforehand for 15-20 minutes. This helps the heavy cream whip up faster and more effectively, contributing to a smoother ice cream base.
Storage: You may store your homemade no-churn ice cream for 1-2 weeks in a tightly wrapped loaf pan or other freezer-safe container. To achieve the best results and extend storage for 3-4 weeks while preventing freezer burn, transfer the fully frozen ice cream to an airtight container. For superior performance, I highly recommend specialized Tovolo ice cream containers, designed for optimal homemade ice cream preservation.
Nutrition
Please note that some of my blog posts here at Dash for Dinner may contain affiliate links. If you make a purchase through these links, I will get a small commission at no additional cost to you. Please see my Disclaimer for more information.
