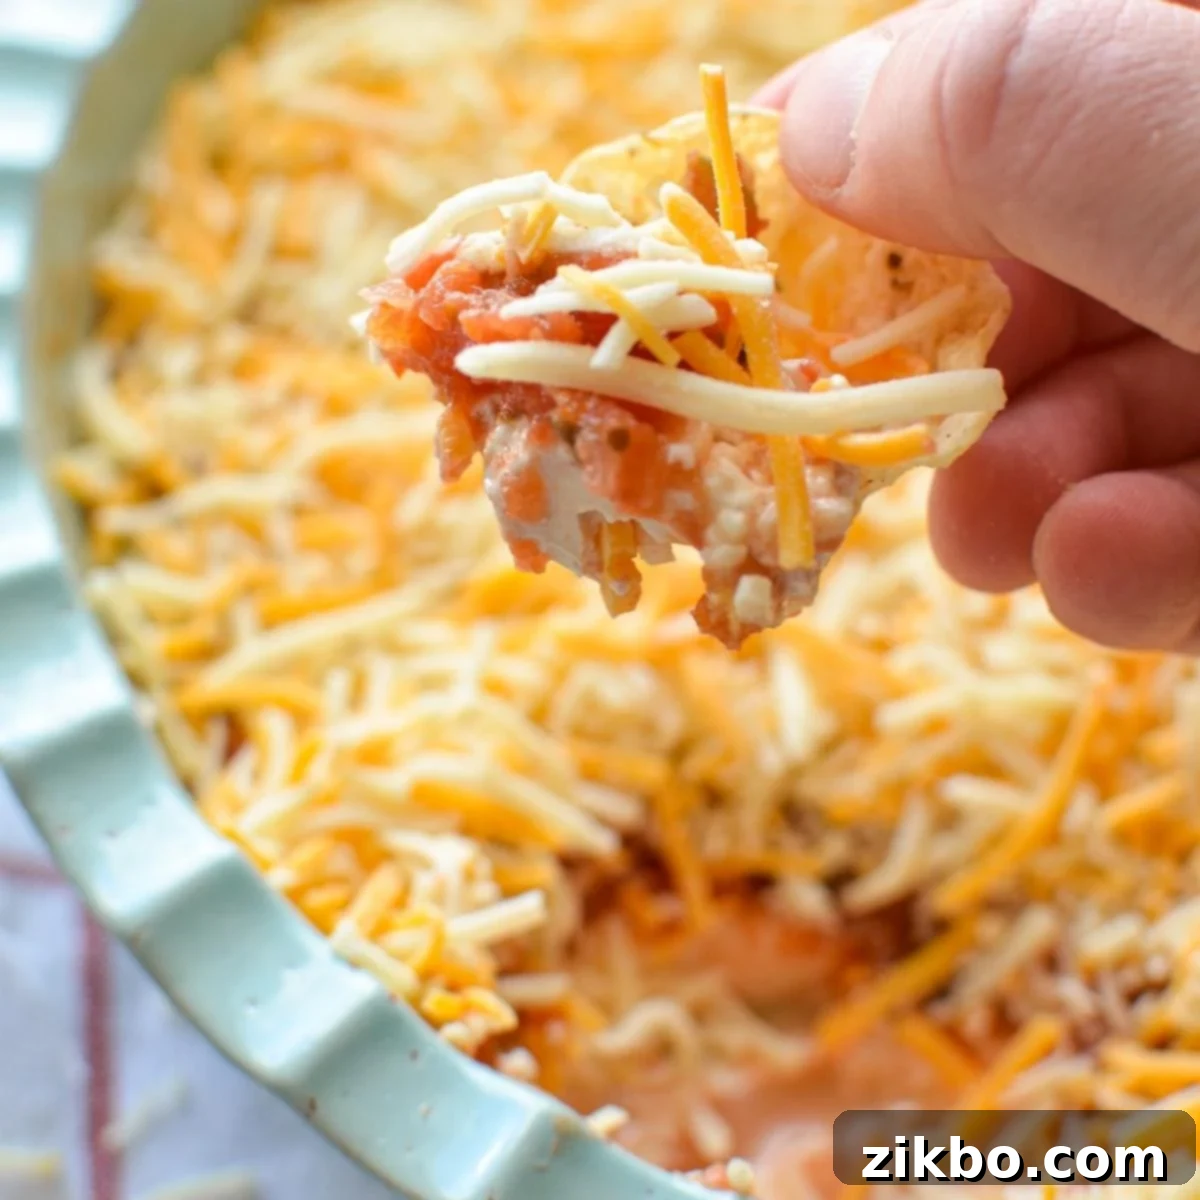
Easy 5-Ingredient Cream Cheese and Salsa Dip: The Ultimate Layered Party Appetizer
Looking for a show-stopping appetizer that’s unbelievably simple to prepare? This easy **Cream Cheese and Salsa Dip** is your answer! Requiring just **5 simple ingredients**, this recipe effortlessly creates three delectable layers of dipping perfection. Whether you prefer it chilled as a refreshing layered nacho dip or baked until it’s a warm, bubbly sensation, this versatile dish promises to be a crowd-pleaser every time. It’s the perfect blend of creamy, savory, and tangy flavors, making it an irresistible addition to any gathering, from casual get-togethers to festive celebrations.
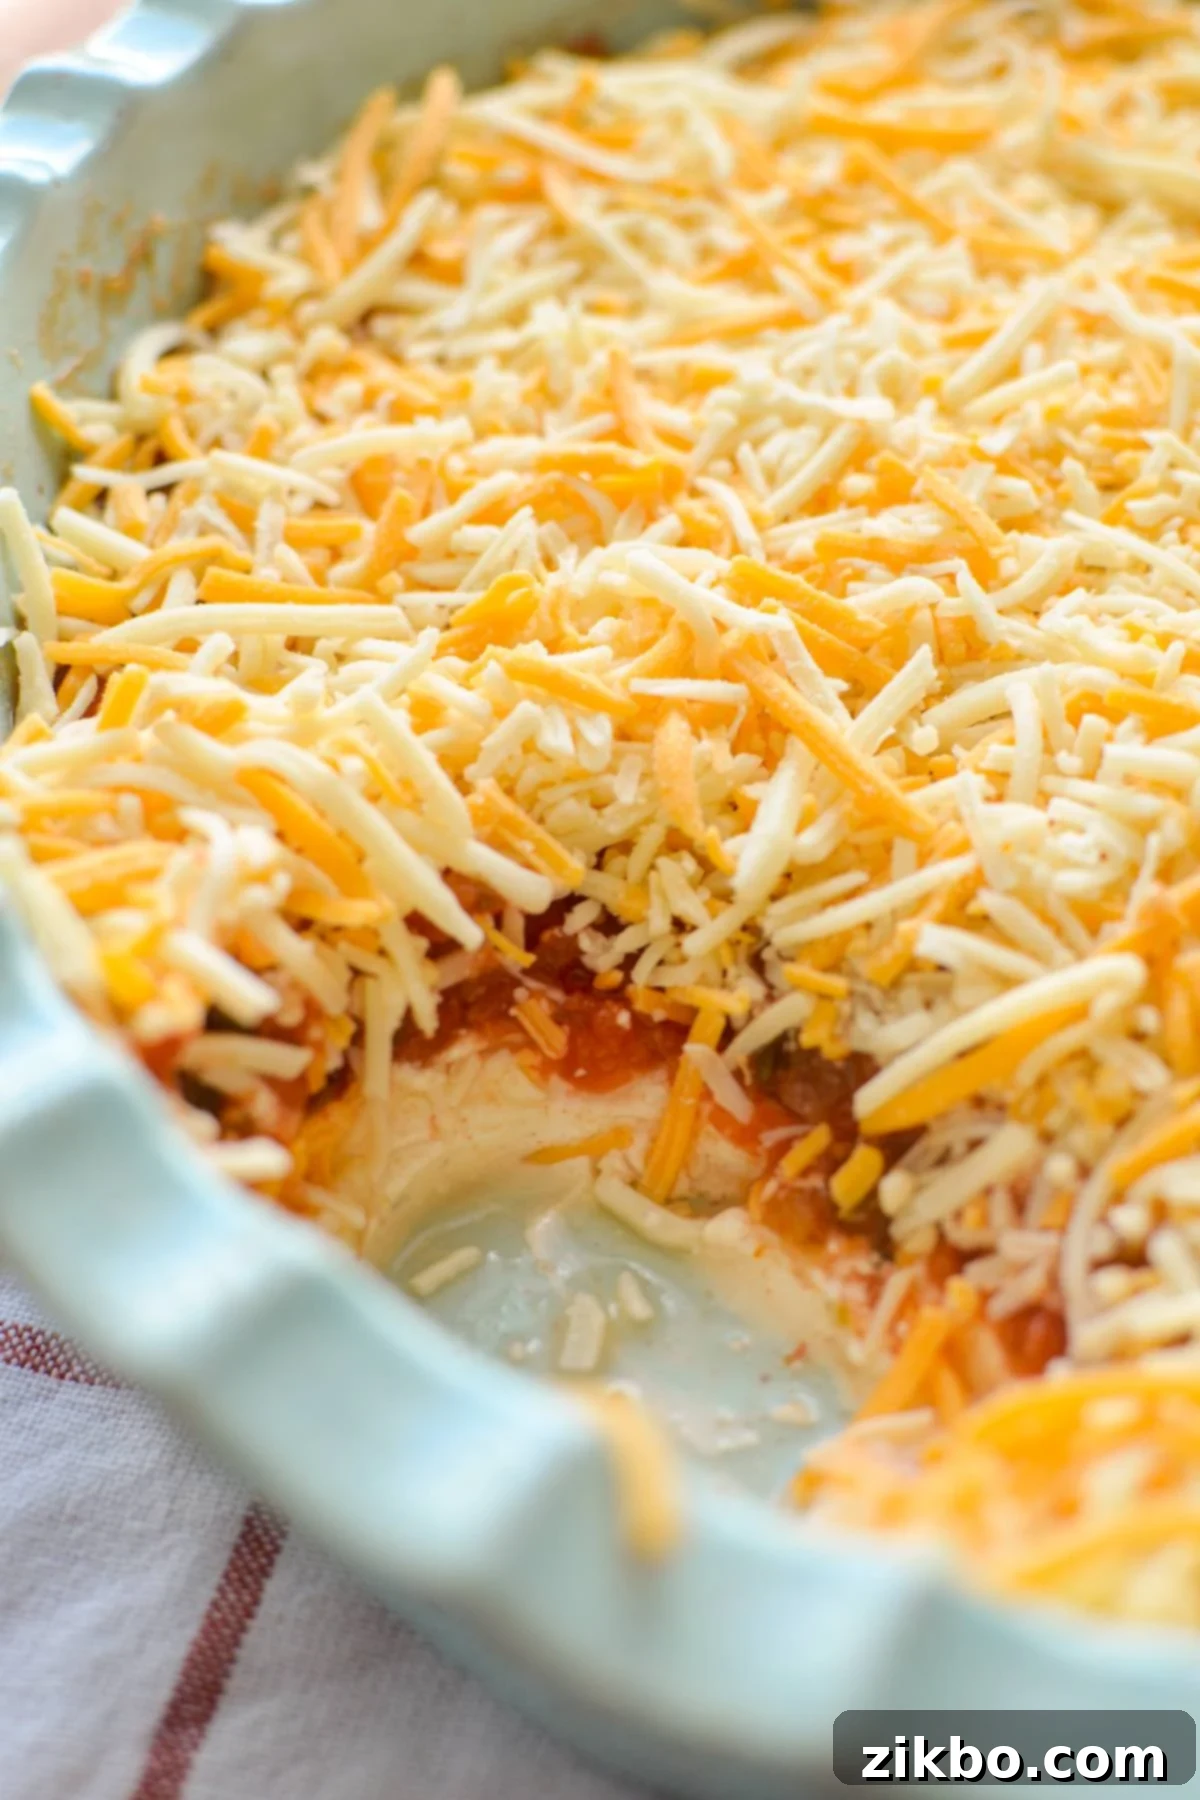
This incredibly easy layered cream cheese and salsa dip is designed for maximum flavor with minimal effort. It’s the ideal **last-minute appetizer or potluck offering**, consistently receiving rave reviews at parties, game nights, and holiday gatherings. You’ll be amazed at how such a straightforward recipe can deliver such phenomenal results, making it a staple in your recipe collection. Forget complicated, time-consuming dishes; this dip is a testament to the power of simple, high-quality ingredients coming together in harmonious layers.
But why save this delicious creation only for special events? Bring the party home and enjoy this dip with your family! Our family loves “appetizer nights” – we whip up a selection of easy appetizers and savor them while watching a movie or playing board games. This cream cheese and salsa dip fits perfectly into that tradition, offering a fun and delicious communal snack that everyone can enjoy. Plus, any rare leftovers can be stored for up to 2 days, making it convenient for those spontaneous snack attacks or for meal prep throughout the week!
Why You’ll Absolutely Adore This Layered Dip Recipe
This layered cream cheese and salsa dip isn’t just easy; it’s a culinary hack that delivers immense satisfaction with very little fuss. Here’s why this incredibly simple recipe will quickly become one of your favorite go-to dishes for any occasion:
- **Effortless & Budget-Friendly:** With a mere **5 simple, readily available ingredients**, this layered dip comes together quickly and won’t break the bank. You likely have most of these pantry staples in your kitchen right now, making it a perfect impromptu appetizer!
- **Quick Prep & Make-Ahead Friendly:** You’ll spend just about 10 minutes on prep work, and then it’s ready to chill or bake! This dip is also fantastic for making ahead, allowing you to assemble it hours in advance and simply pull it out when guests arrive. This flexibility is a huge bonus when planning parties or busy weeknight meals.
- **Guaranteed Crowd-Pleaser:** This dip consistently disappears fast at parties and potlucks. Its creamy texture, zesty salsa, and cheesy top layer make it universally appealing to all ages and palates. It’s truly a **crowd-pleasing favorite** that guests will rave about and ask for the recipe!
- **Infinitely Customizable:** This recipe offers incredible flexibility to suit your personal taste or dietary preferences. Add your favorite toppings like black olives, chopped green onions, fresh cilantro, or even a dollop of guacamole. Serve it refreshingly cold on a hot day, or bake it for a warm, comforting treat. You can even elevate it into a heartier dish by incorporating seasoned ground beef or shredded chicken, turning it into a more substantial layered taco dip.
Essential Ingredients for Your Perfect Cream Cheese Salsa Dip
Crafting this delightful layered dip begins with selecting the right ingredients. Each component plays a crucial role in achieving the optimal flavor and texture, ensuring a balanced and delicious result. Here’s a closer look at what you’ll need and some helpful tips for selecting and preparing each item:
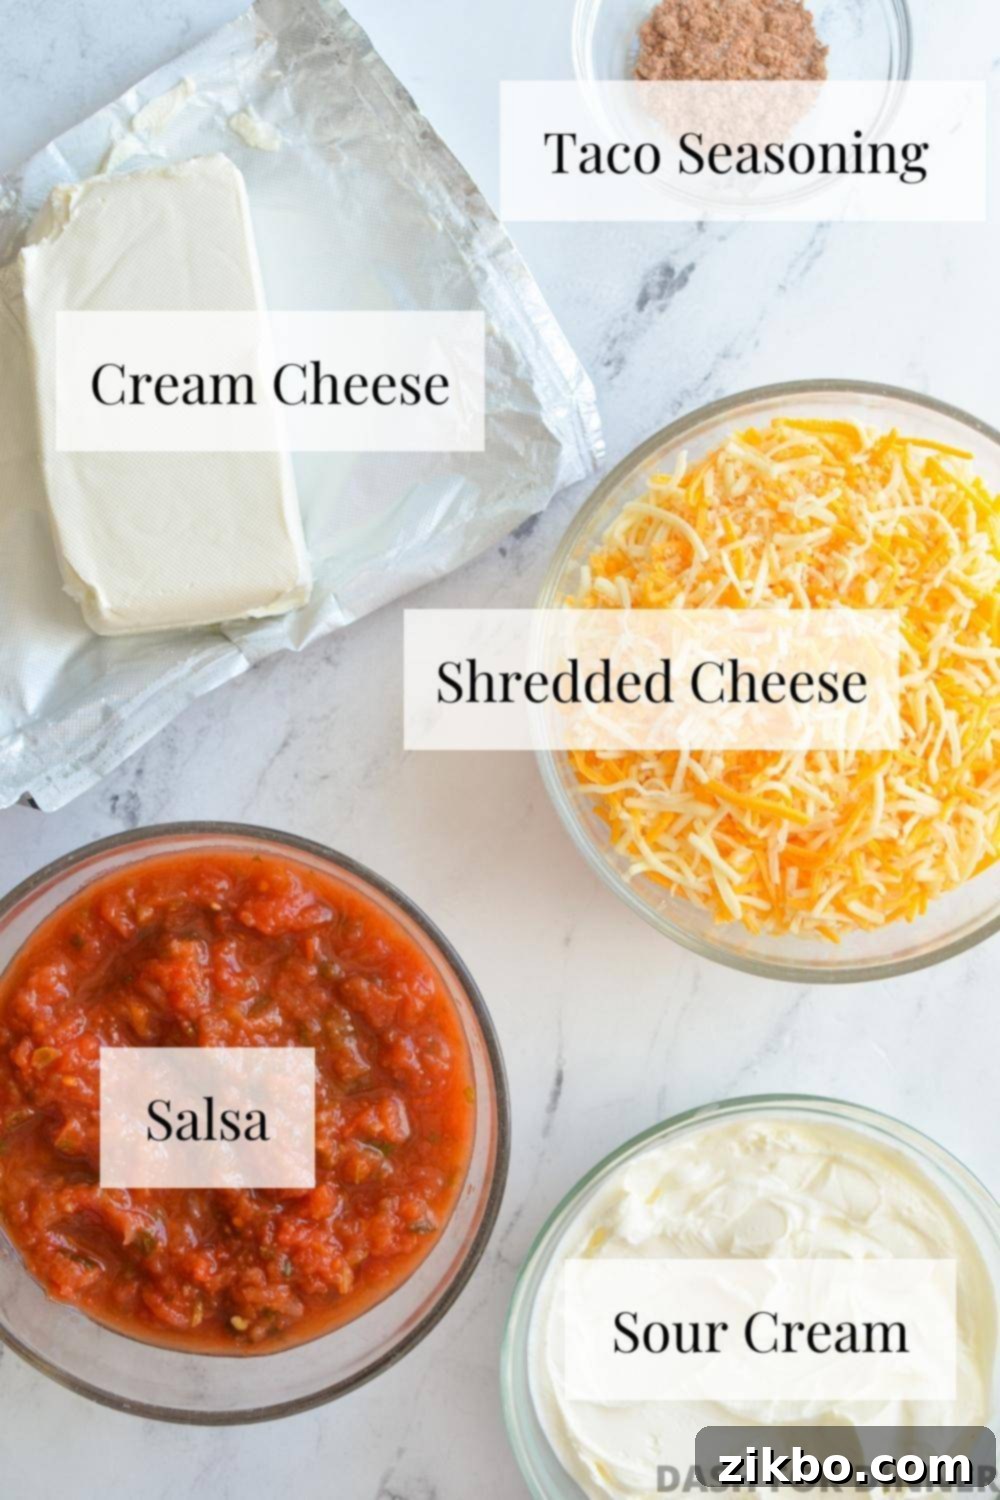
- Cream Cheese: You’ll need one 8-ounce block of full-fat cream cheese, thoroughly softened to room temperature. This is absolutely crucial for creating a smooth, lump-free base layer that spreads easily. I recommend taking it out of the fridge at least 2-3 hours before you plan to mix it. If you’re short on time, you can quickly soften it by placing the wrapped block in a sealed ziplock bag and immersing it in a bowl of very warm water for about 5-10 minutes until it feels pliable. **Important Note:** Do not substitute with whipped cream cheese or cream cheese that comes in a tub; its consistency is too airy and will not provide the firm, spreadable base required for this beautifully layered dip.
- Sour Cream: For the richest, creamiest base, I like to use a good quality, thick sour cream like Daisy brand. Its higher fat content contributes to a luscious texture. However, any standard full-fat sour cream will work perfectly well and contribute to the creamy texture and slight tang that expertly balances the other savory and zesty flavors in the dip.
- Taco Seasoning: This isn’t just a seasoning; it’s the secret ingredient that transforms the otherwise plain cream cheese and sour cream layer into a flavor-packed, aromatic base with that irresistible Tex-Mex essence. You’ll only need a small amount (1 ½ teaspoons) to infuse the dip with warmth and spice. Feel free to use your favorite store-bought blend for convenience or whip up my simple homemade taco seasoning recipe for an even fresher, more customizable flavor.
- Salsa: A chunky, thick salsa works best for this layered dip, as it holds its distinct layer beautifully and adds delightful textural contrast. If your favorite salsa is on the thinner or more liquidy side, don’t worry! You can easily strain off the excess liquid. Simply place the salsa in a fine-mesh strainer set over a bowl for a few minutes. This prevents a watery dip, ensuring that your layers remain vibrant and distinct rather than bleeding into each other.
- Shredded Cheese: While I often advocate for shredding your own cheese for superior melting, this is one instance where pre-shredded cheese is a fantastic, practical choice, especially for party serving! Pre-shredded cheese often has a light coating (like cellulose) that prevents it from clumping, which means it won’t “sweat” as much at room temperature and maintains a better texture over time. I typically use a Mexican blend cheese (a combination of Monterey Jack and cheddar), but feel free to use your preferred variety like sharp cheddar, Colby Jack, or even a spicy pepper jack for an extra kick of flavor and heat.
For precise quantities of each ingredient and detailed, step-by-step instructions, please refer to the comprehensive recipe card located further down in this post!
How to Effortlessly Assemble This Irresistible Cream Cheese Salsa Dip
Creating this layered dip is incredibly straightforward, involving just a few simple steps. You’ll be amazed at how quickly you can assemble such a flavorful and impressive appetizer, perfect for any gathering!
Step 1: Preparing the Creamy, Seasoned Base Layer
To begin, gather your softened cream cheese, sour cream, and taco seasoning. Add all three ingredients into a medium-sized mixing bowl. It’s paramount that your cream cheese is truly at room temperature; this ensures a silky-smooth, lump-free base that will spread beautifully.
Using an electric hand mixer (or a sturdy whisk and some dedicated elbow grease), **beat the softened cream cheese together with the sour cream and taco seasoning**. Continue to mix until the mixture is completely smooth, uniform in consistency, and free of any stubborn lumps. Don’t forget to scrape down the sides of the bowl periodically with a rubber spatula to ensure all ingredients are thoroughly combined and no pockets of unmixed cream cheese remain.
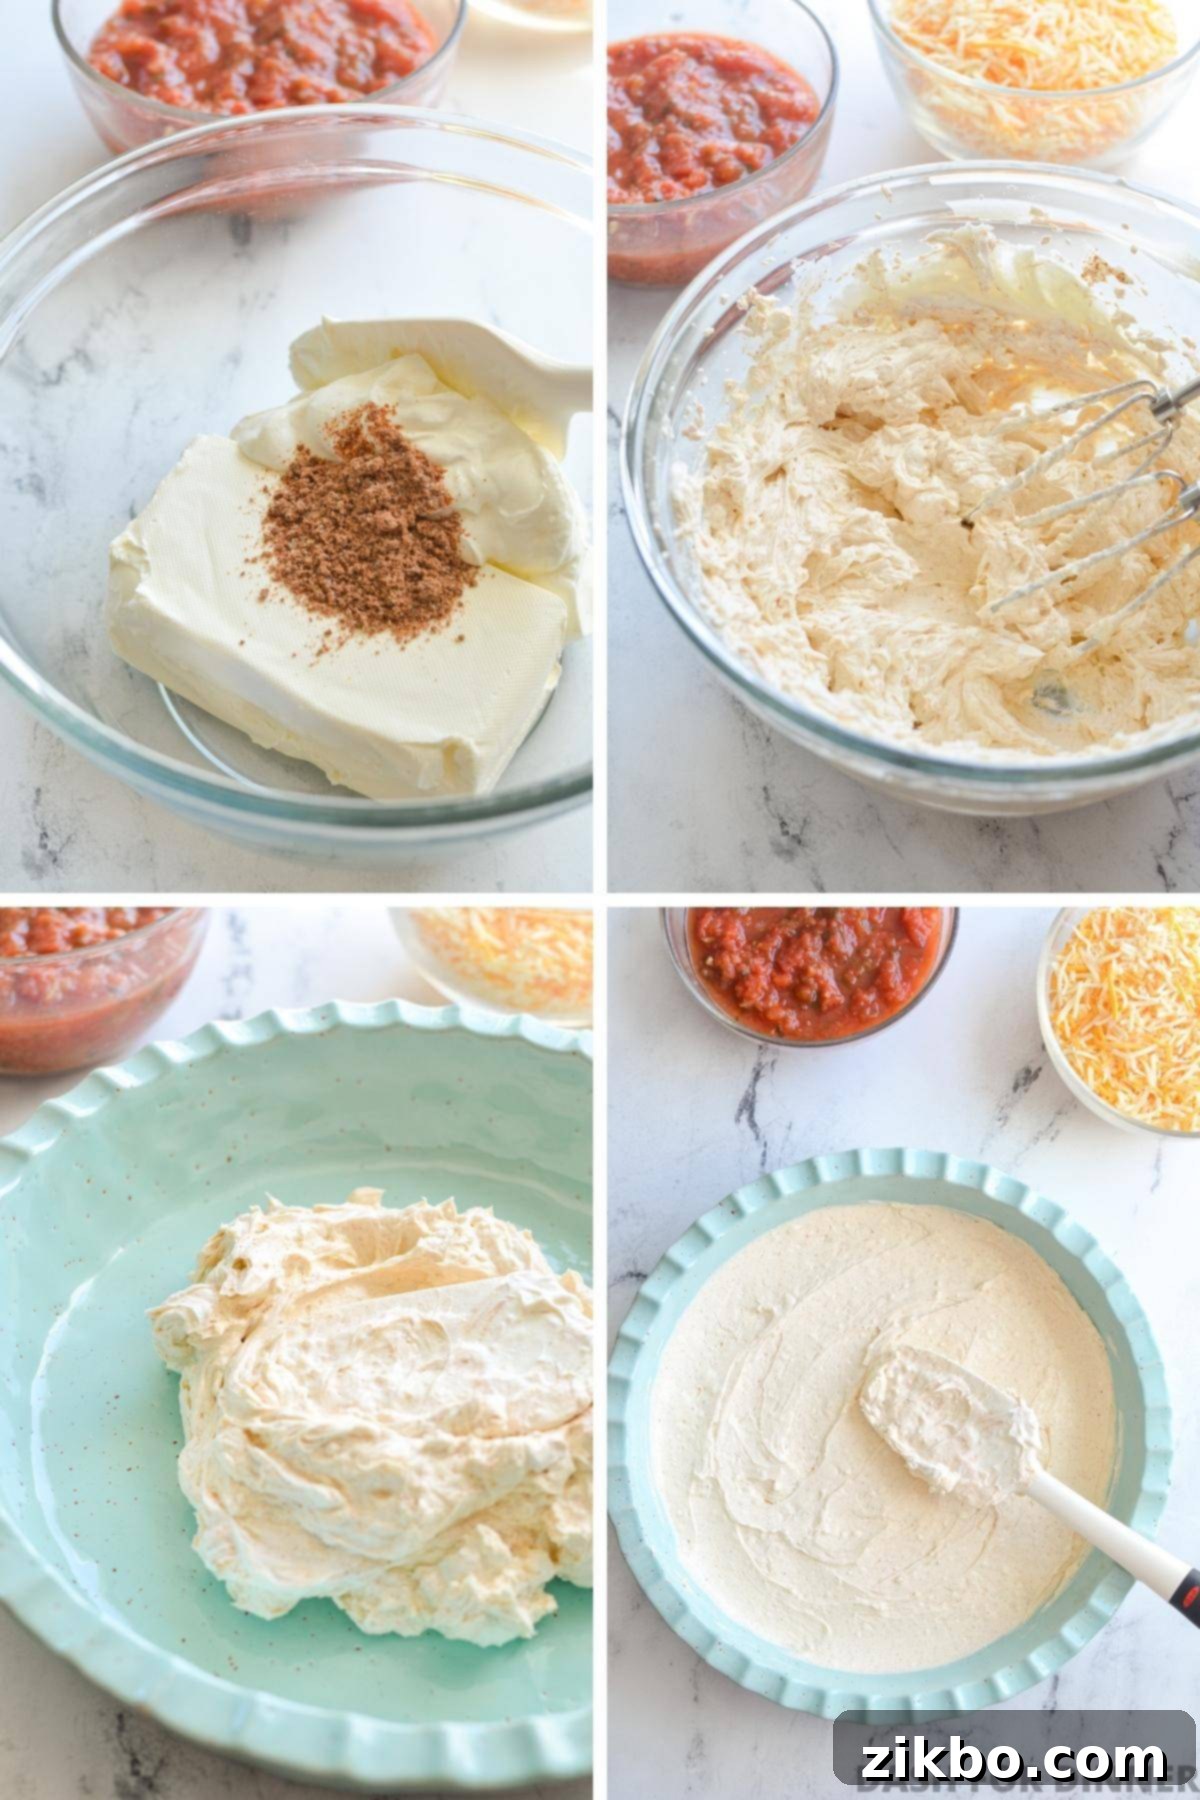
Once your creamy base is perfectly smooth, carefully transfer this mixture to the bottom of a 9-inch round or square baking dish (or any shallow serving dish of similar size). Use a spatula to gently spread it out into an even, consistent layer, ensuring it covers the entire bottom surface of the dish from edge to edge. A smooth, even base provides the perfect foundation for the subsequent layers.
A quick tip on consistency: If your cream cheese was *very* soft – almost on the verge of melting – and the resulting mixture feels exceptionally loose or runny, it’s a wise move to **refrigerate this base layer for about 30 minutes** before adding the salsa. This brief chilling period will help it firm up slightly, preventing the salsa from sinking or mixing into it. If the cream cheese was just soft enough to mix easily but still held its shape relatively well, you can confidently move straight to adding the salsa without any issues.
Step 2: Adding the Vibrant Salsa Layer with Care
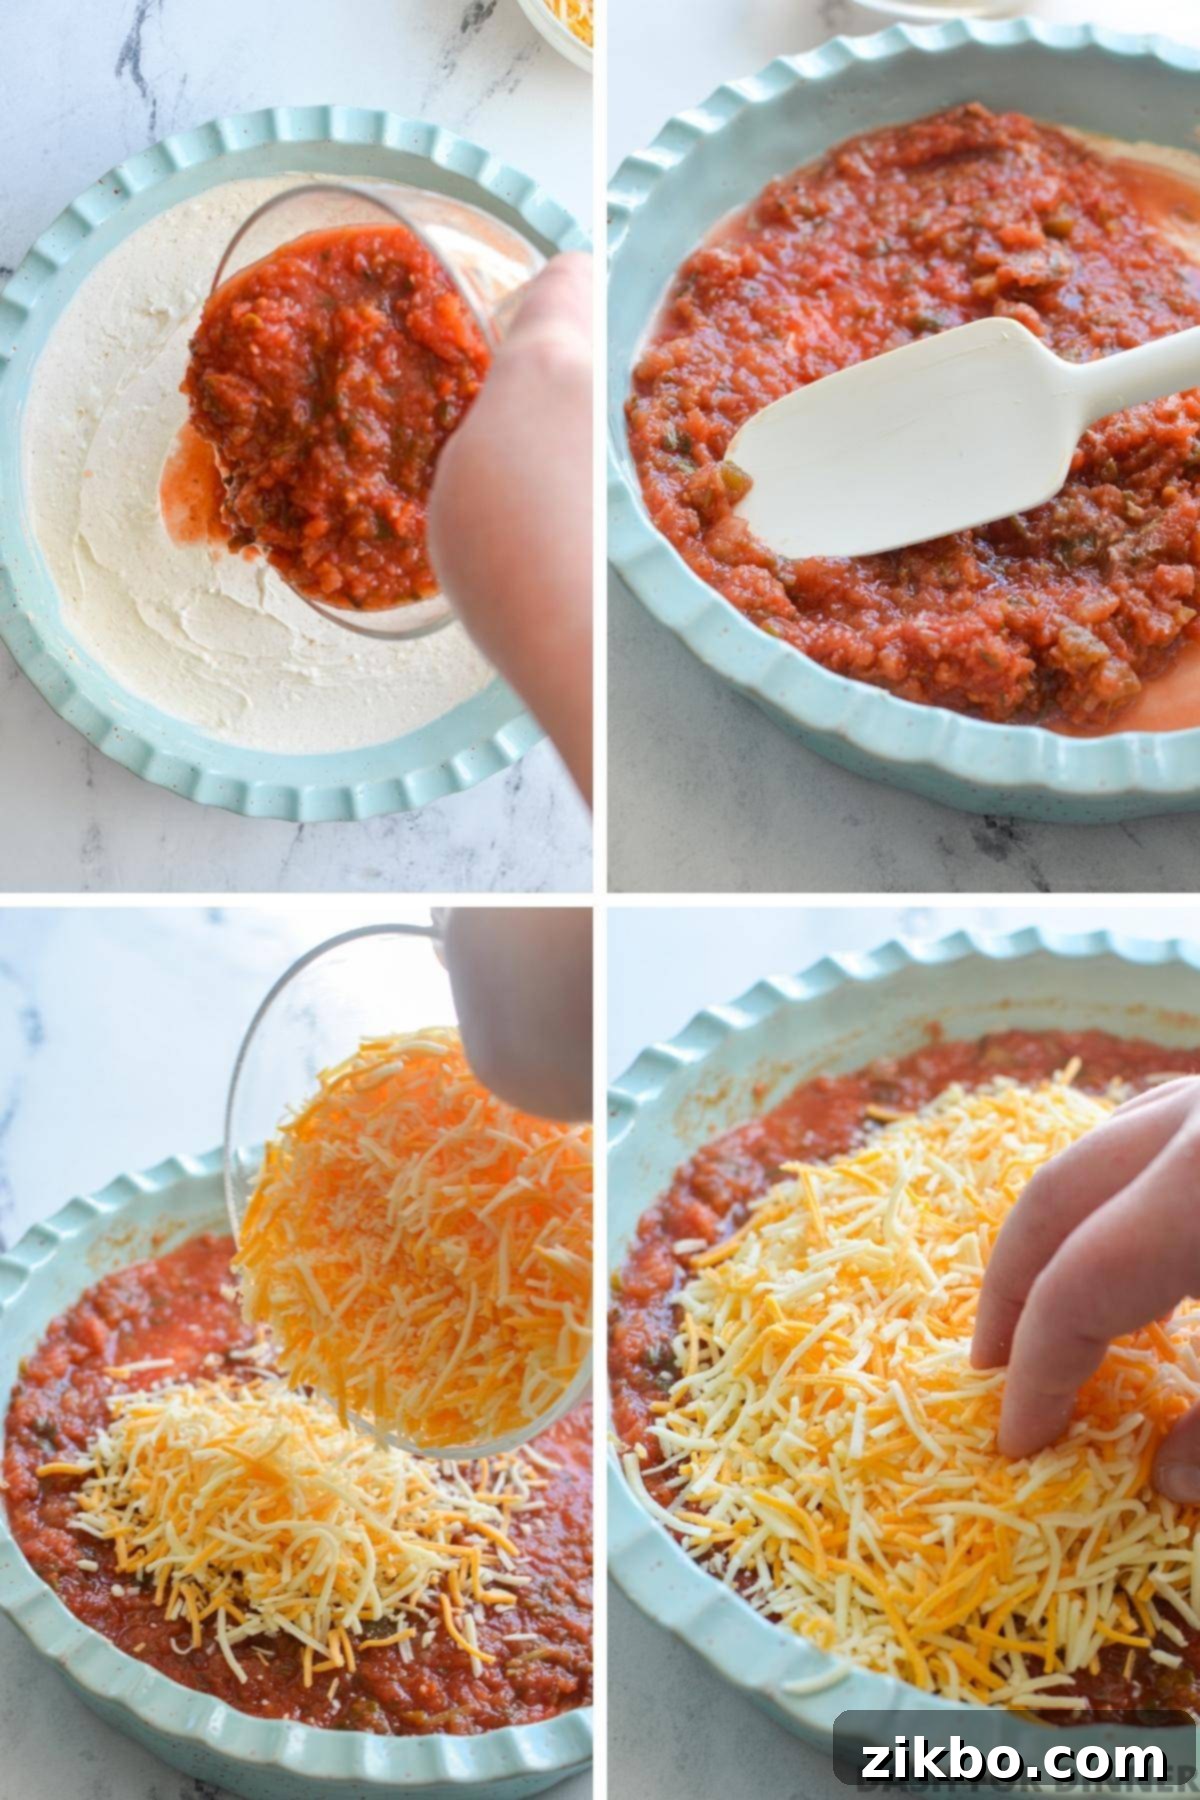
Now it’s time to introduce the bright, zesty, and flavorful salsa! **Pour your chosen salsa directly on top** of the prepared cream cheese layer. Using the back of a spoon or a small spatula, gently spread the salsa into an even, distinct layer over the creamy base. The key here is to be gentle and careful not to disturb or mix into the cream cheese layer beneath, maintaining those beautiful, clean layers.
As emphasized in the ingredients section, if your salsa is particularly liquidy or watery, I highly recommend performing the draining step first. Simply place the salsa in a fine mesh strainer set over a bowl for a few minutes. The excess liquid will drain away, leaving you with a thicker, richer salsa that will sit beautifully atop your dip without creating a watery mess or making your creamy base soggy. While I sometimes omit this step for certain photos (as seen in some older images), I’ve consistently found that straining the salsa yields a much better, less watery result, especially when I make the video tutorial for this recipe!
Step 3: Finishing with a Generous Cheesy Topping
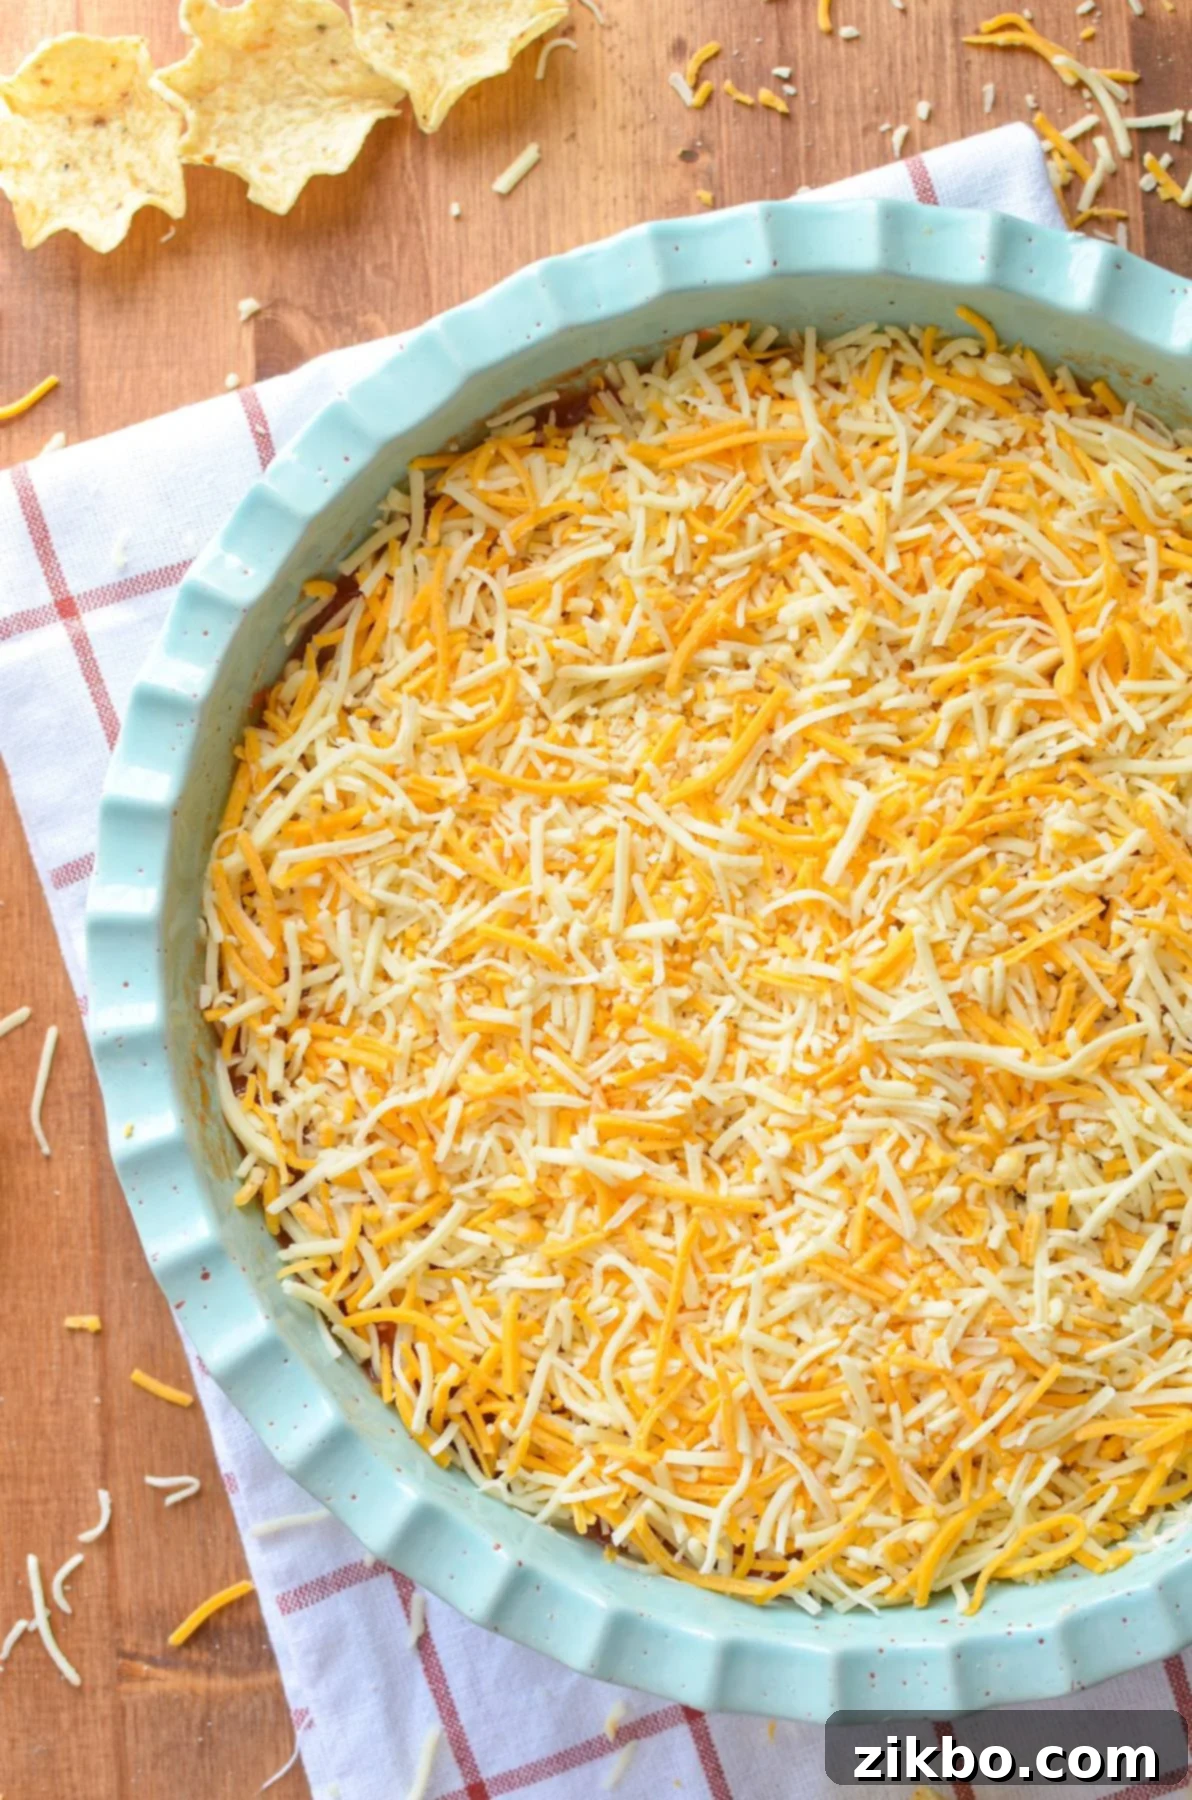
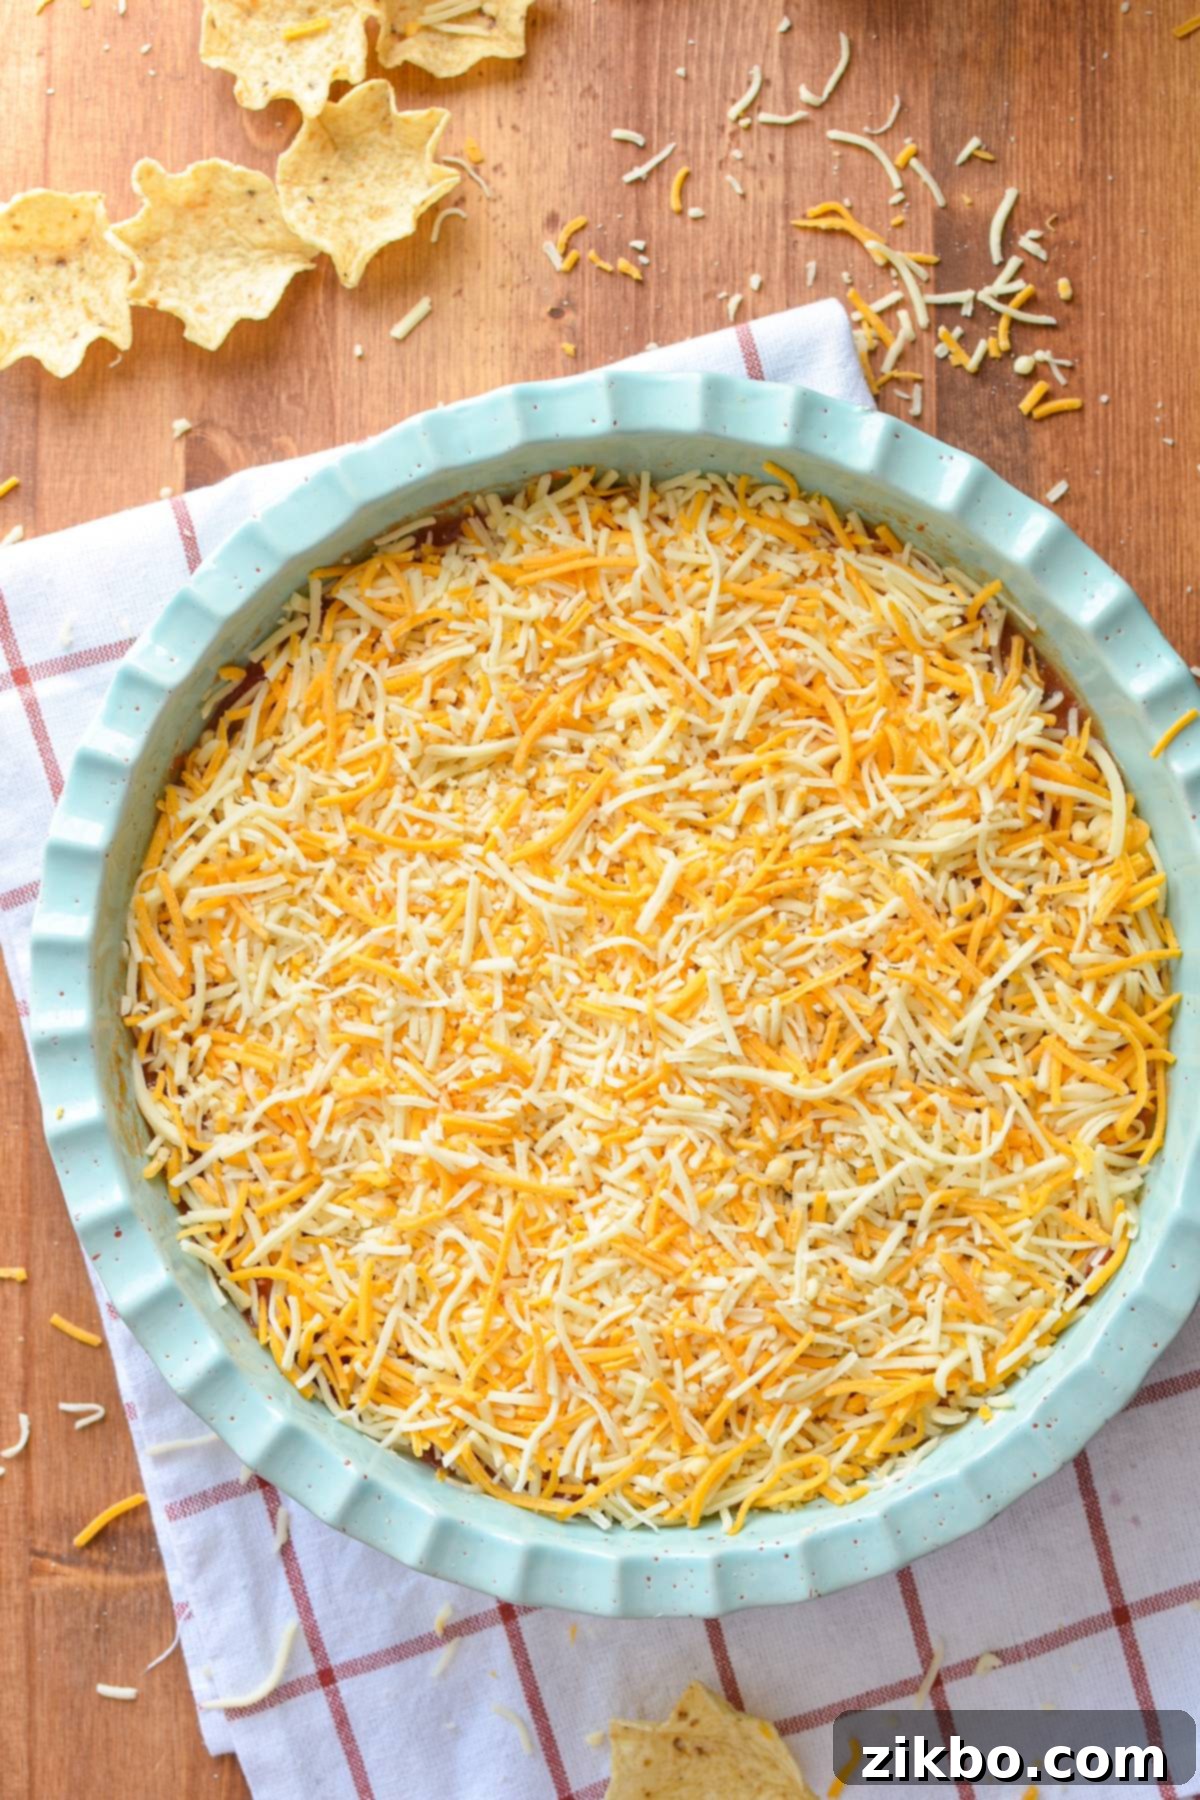
Finally, once the salsa layer is smoothly and evenly in place, it’s time for the crowning glory: a generous blanket of cheese! Generously **sprinkle the shredded cheese** evenly over the entire surface of the salsa. Make sure to spread it right up to the edges of the dish, creating a beautiful, complete, and inviting top layer.
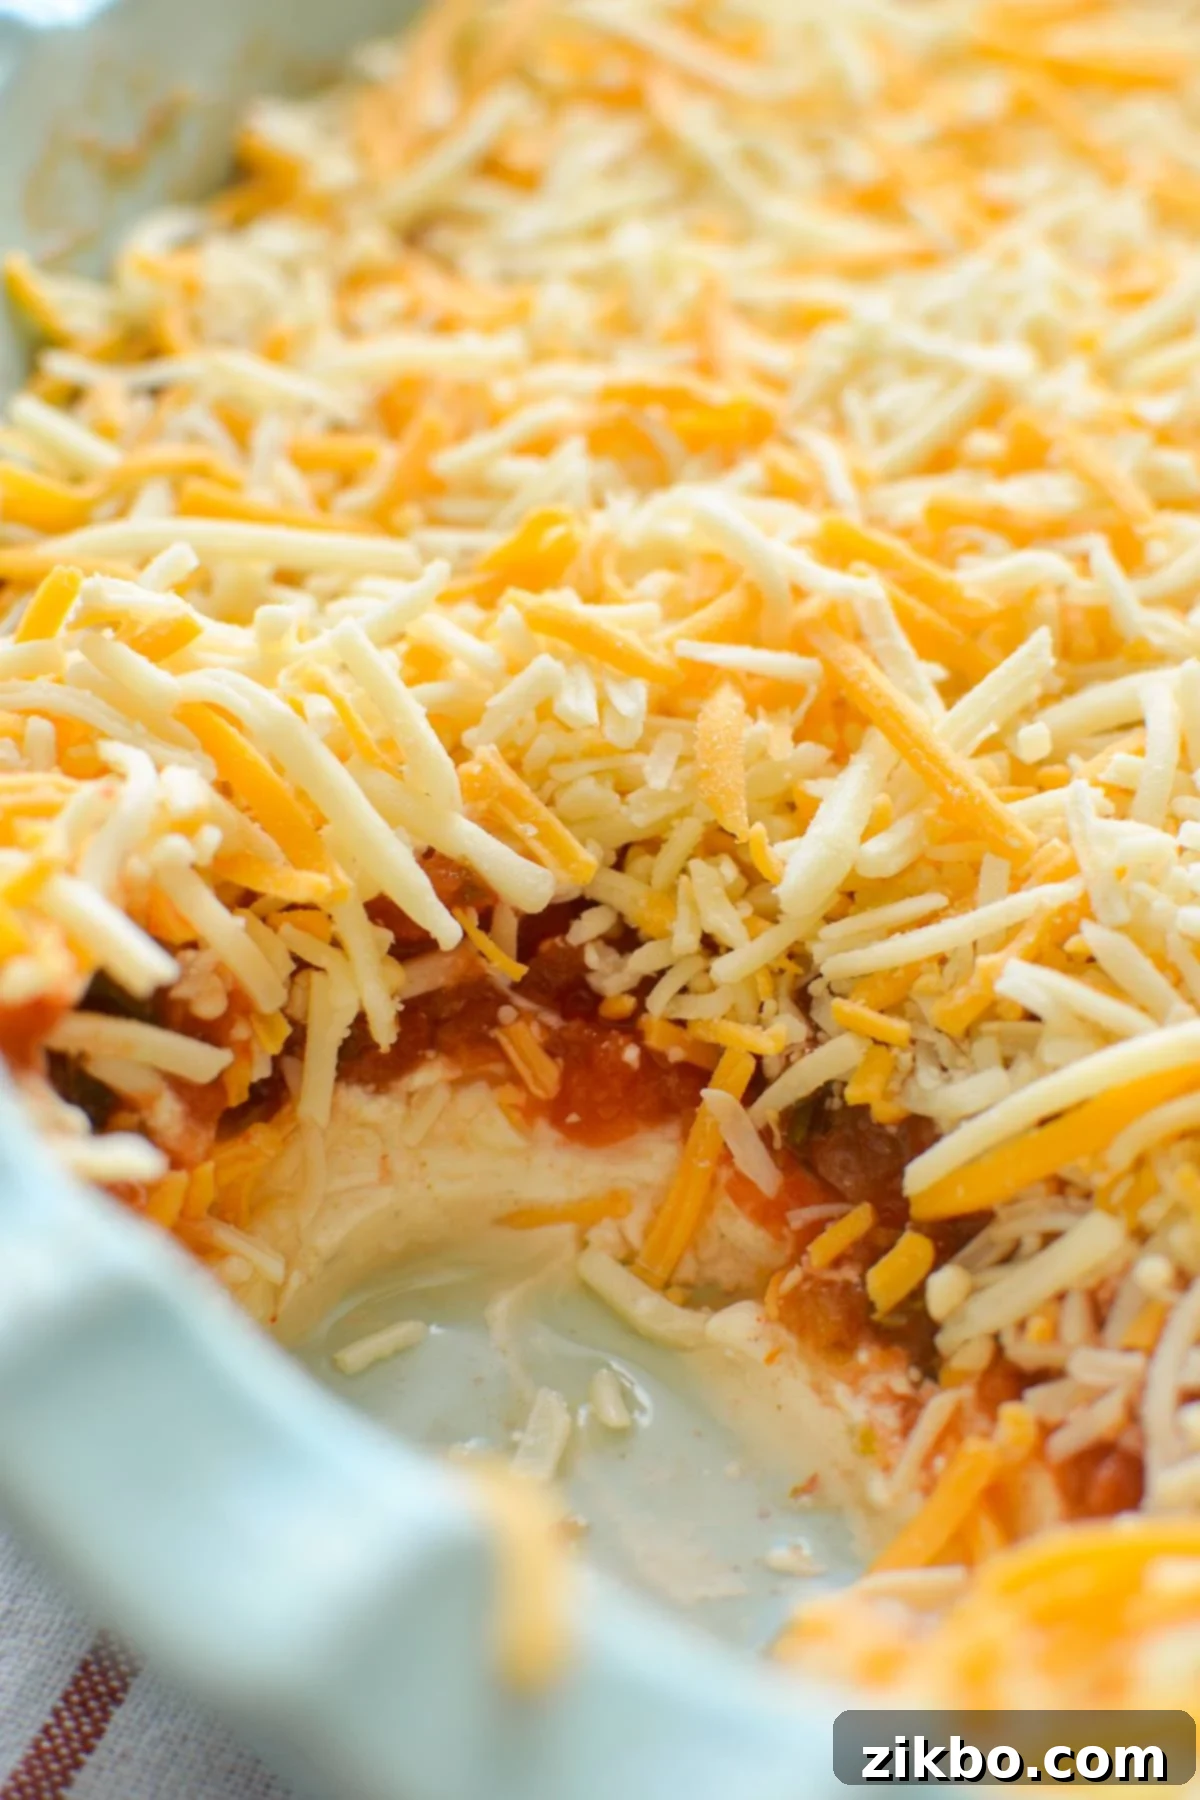
The ultimate goal for this magnificent layered dip is to ensure that with every scoop, your guests get a delightful combination of all three layers: a bit of the creamy, seasoned cream cheese mixture, a burst of zesty, flavorful salsa, and, of course, plenty of that deliciously melted (if baked) or perfectly shredded cheese! This trifecta of textures and tastes is what makes this dip so incredibly addictive.
For the absolute best serving experience, I highly recommend refrigerating the finished dip for about 30 minutes to an hour before serving. This chilling time allows the layers to set slightly, making for cleaner scoops and a more refreshing taste, especially if you’re serving it cold. If you’re opting to bake it for a warm dip, you can proceed directly to the oven after assembling.
What to Serve with This Amazing Layered Taco Dip:
The beauty of this creamy, zesty, and cheesy layered dip lies in its incredible versatility. It pairs wonderfully with a wide array of dippers, offering something to satisfy every preference and occasion. Here are some of our top recommendations for what to serve alongside this irresistible taco dip:
- **Scoop Tortilla Chips:** Their unique, cupped shape is absolutely perfect for scooping up generous amounts of all three delicious layers – ensuring you get a taste of everything in one bite!
- **Classic Corn Tortilla Chips:** A timeless and ever-popular choice, classic corn tortilla chips offer a satisfying crunch and a salty complement that enhances the creamy and zesty flavors of the dip.
- **Pita Chips:** For a slightly different texture and a more robust crunch, pita chips are a fantastic alternative. Their sturdiness holds up exceptionally well to even the heartiest scoops of dip.
- **Celery Ribs:** A wonderful low-carb and refreshing option, crisp celery ribs provide a delightful, cool counterpoint to the rich and savory dip.
- **Bell Pepper Strips:** Colorful and crunchy bell pepper strips (using red, yellow, or orange varieties for maximum visual appeal) add a fresh, sweet, and vibrant element to your dipping experience.
- **Cucumber Slices:** For another light and refreshing vegetable option, cool cucumber slices offer a delicate crunch that contrasts beautifully with the creamy dip.
Appetizers and Dips That Perfectly Pair with Layered Salsa Dip
If you’re hosting a larger gathering, putting together a snack spread, or simply love having a variety of delicious options, this cream cheese and salsa dip complements many other popular party foods. Consider pairing it with these fantastic appetizers to create an unforgettable spread:
- **Nachos:** Elevate your nacho bar by serving this dip alongside a platter of traditional nachos. It adds an extra layer of creamy, cheesy, and zesty flavor that takes your nacho experience to the next level.
- **Bacon-Wrapped Jalapeño Peppers:** The smoky, spicy kick and savory crunch of bacon-wrapped jalapeño peppers would be a fantastic contrast to the cool, creamy, and mild flavors of this layered dip.
- **Jalapeño Popper Dip:** For the ultimate spicy cheese lover, offering both this layered dip and a hot, bubbling jalapeño popper dip provides a delightful variety of heat levels and textures.
- **Fresh Guacamole:** A vibrant, homemade guacamole is always a welcome addition, providing another classic Mexican-inspired flavor profile that complements the salsa beautifully.
- **Classic Bean Dip:** Pair this cream cheese and salsa dip with another layered favorite, like a classic bean dip, for a hearty and satisfying dip duo that’s sure to please.
- **Buffalo Chicken Dip:** For those who love a bit of a kick and savory chicken, a creamy, spicy buffalo chicken dip offers a completely different but equally addictive experience, balancing out your dip selection.
- **Churros and Cream Cheese Frosting:** While not a savory pairing, if you’re offering a full appetizer and dessert spread, a sweet treat like churros with a rich cream cheese frosting provides a delightful dessert option to round out your offerings.

Making Ahead and Smart Storage for Your Layered Dip
One of the absolute best features of this layered cream cheese and salsa dip is how easily it can be prepared in advance. This makes party planning a breeze and significantly reduces stress on the day of your event. Plus, it stores surprisingly well for continued enjoyment!
How to Make Cream Cheese Salsa Dip Ahead of Time:
- **Short-Term Prep (Up to 8 Hours in Advance):** For same-day serving or if you plan to serve within 8 hours, you can fully assemble all three delicious layers of the dip. Once assembled in your serving dish, tightly cover the dish with plastic wrap, ensuring it’s completely airtight to prevent drying out. Store it in the refrigerator for up to 8 hours. This allows the flavors to meld together beautifully, often making the dip even more delicious!
- **Long-Term Prep (More Than 8 Hours, Up to 48 Hours in Advance):** If you need to prepare your dip more than 8 hours in advance (e.g., the day before), I recommend preparing only the cream cheese and sour cream base layer. Spread it into your dish, then wrap it very tightly with plastic wrap and store it in the refrigerator for up to 48 hours. When you’re ready to serve, remove the base layer from the fridge and let it sit at room temperature for about 30 minutes to soften slightly. Then, just before serving, add the salsa and shredded cheese layers. This method prevents the salsa from making the base watery over extended periods, ensuring the freshest taste and best texture.
Storing Leftover Layered Nacho Dip
- Any leftover dip should be covered tightly with plastic wrap or transferred to an airtight container. Promptly store it in the refrigerator to maintain freshness and safety.
- For the absolute best taste and texture, try to consume your remaining taco dip within 8-12 hours of its initial serving. This is when the layers will still be at their prime, and the flavors most vibrant.
- It is generally considered safe to store this dip for 1-2 days. However, please note that over extended storage, the salsa may start to “weep” some liquid, and the textures might become slightly softer or more integrated. While it will still be perfectly fine and safe to eat, the freshness and distinctness of the layers might diminish a little. A quick gentle stir of the top layer can sometimes help redistribute any moisture.
Exciting Variations and Delicious Substitutions to Try:
This simple cream cheese and salsa dip recipe is a fantastic canvas for culinary creativity! Don’t hesitate to experiment with these variations and substitutions to suit your personal taste, dietary preferences, or the occasion:
- **Baked Cream Cheese Salsa Dip (Hot & Bubbly):** Transform your refreshing cold dip into a warm, comforting appetizer! Prepare all layers of your dip as directed, but use an oven-safe 9-inch round or square baking dish. Bake in a preheated 375ºF (190ºC) oven for 25-35 minutes, or until the cheese is beautifully melted, bubbly, and the dip is heated through to the center. For an extra golden-brown, irresistibly bubbly topping, broil for 1-2 minutes at the very end of the cooking time, keeping a very close eye on it to prevent any burning.
- **With Seasoned Ground Beef (Heartier Taco Dip):** For a more substantial, meal-worthy dip that’s packed with savory flavor, consider adding seasoned ground beef. Brown half a pound of lean ground beef with 1 teaspoon of taco seasoning until it’s fully cooked through. Drain any excess fat thoroughly to prevent greasiness. Once your salsa layer is spread, add the seasoned ground beef on top, then finish with the shredded cheese. You can serve this as a hearty cold dip, or bake it for 25-35 minutes at 375ºF (190ºC) for a warm, savory, and truly satisfying experience, making it a complete layered taco dip!
- **Add Black Beans or Corn:** For extra texture, fiber, and vibrant flavor, consider adding a layer of drained and rinsed canned black beans or corn (canned, drained, or frozen and thawed) after the salsa layer. These additions make the dip even more robust and colorful.
- **Amplify the Spice Factor:** If you love a little heat, amp up the spice by using a hot or extra-hot salsa. You could also finely dice fresh or pickled jalapeños and mix them into the cream cheese layer, or sprinkle a pinch of cayenne pepper over the salsa for an extra kick.
- **Fresh and Flavorful Toppings:** Before serving, elevate the dip with fresh garnishes! Sprinkle with finely chopped fresh cilantro, diced red onion for a sharp bite, chopped green onions for mild oniony freshness, or even a dollop of creamy fresh guacamole for added richness, color, and classic Mexican flavor.
- **Experiment with Different Cheeses:** While a Mexican blend cheese is fantastic, feel free to experiment with other cheeses. Monterey Jack, sharp cheddar, Colby, or Pepper Jack (for a spicy twist) are all excellent alternatives for the top layer, each offering a slightly different flavor profile and melting quality.
Frequently Asked Questions About Layered Dips
Making a delicious layered dip for nachos is quite simple and follows a general principle of building complementary textures and flavors in distinct layers. You typically start with a rich and creamy base, which in this recipe is a mixture of softened cream cheese, sour cream, and taco seasoning, spread as the foundational layer. On top of this, you add a vibrant, zesty, and flavorful layer of salsa. Finally, it’s crowned with a generous blanket of shredded cheese, which can be served cold or baked until bubbly. From there, you can customize with other favorite toppings like fresh guacamole, seasoned black beans, corn, chopped fresh vegetables (diced tomatoes, red onions, black olives), or even a layer of seasoned ground beef for a more substantial “7-layer dip” feel. The key is to build layers that offer contrast in taste and texture, creating a dynamic and exciting dipping experience with every scoop.
Salsa is an incredibly versatile condiment that pairs beautifully with a wide variety of cheeses, both mild and robust, depending on the desired flavor profile. Some of the most popular and delicious cheese choices that complement salsa include: **Cheddar**, which offers a sharp, tangy flavor; **Queso Blanco** or **Cotija**, providing a crumbly, salty, and distinctly Mexican profile; **Monterey Jack**, known for its mild flavor and excellent melting qualities; **Queso Fresco**, a fresh, milky, and slightly salty cheese that doesn’t melt; and **Manchego**, a Spanish sheep’s milk cheese with a buttery, nutty taste. For this particular cream cheese and salsa dip, a Mexican blend (which commonly includes cheddar and Monterey Jack) is a fantastic, readily available option that offers both appealing flavor and great meltability if you choose to bake the dip, or a pleasant texture if serving cold.
While you *can* attempt to mix cream cheese and salsa directly, it often presents a challenge in achieving the right consistency and texture. Cream cheese is a high-fat dairy product, and its fat content tends to repel the watery nature of salsa. This can result in a separated, sometimes curdled-looking, and less uniform mixture that isn’t as appealing or smooth. For a much better and more professional result that ensures distinct, appealing layers and consistent texture, it’s highly recommended to layer the ingredients. Start with a cream cheese base (often mixed with sour cream and seasoning for extra flavor and spreadability), followed by a separate, vibrant layer of salsa. This layering method allows you to enjoy the individual flavors and textures of each component, creating a more visually appealing and delicious layered dip.
Discover More Easy Party Food Recipes You’ll Love:
If you loved the simplicity, versatility, and undeniable deliciousness of this easy cream cheese and salsa dip, then you’re in for a treat! We specialize in creating effortless, crowd-pleasing recipes that are perfect for any gathering, big or small. Explore some of our other top picks for stress-free entertaining and delightful family meals:
- No Bake Chocolate Chip Cheesecake: A decadent, rich, and creamy dessert that comes together without ever needing to turn on your oven – perfect for hot summer days or busy schedules.
- No Bake Nutella Pie: An intensely rich, wonderfully creamy, and undeniably addictive pie for all chocolate-hazelnut lovers, requiring zero baking time.
- Air Fryer Jalapeño Poppers: Achieve perfectly crispy, spicy, and cheesy jalapeño poppers in minutes with your air fryer – a quick and easy take on a classic appetizer.
- Instant Pot Deviled Eggs: Get perfectly cooked hard-boiled eggs every single time, making these nostalgic party favorites even easier to prepare for gatherings.
- Lazy Cheesecake Salad: A fruity, creamy dessert “salad” that’s surprisingly simple to assemble and always a hit with kids and adults alike, perfect for potlucks or picnics.

Ultimate Layered Cream Cheese and Salsa Dip
Print
Pin
Rate
Ingredients
- 8 oz brick style cream cheese softened to room temperature for smooth mixing
- 1 cup sour cream full-fat recommended for best texture
- 1 ½ teaspoons taco seasoning store-bought or homemade blend
- 1 ½ cups thick salsa drain if too liquidy for best layering
- 2 cups shredded Mexican blend cheese or your favorite cheddar/Monterey Jack variety
Instructions
-
In a medium-sized bowl, combine the thoroughly softened cream cheese, sour cream, and taco seasoning. Ensure cream cheese is at room temperature for the best results.
-
Using an electric hand mixer (or a sturdy whisk), beat the mixture until it is completely smooth and uniform in consistency. Scrape down the sides of the bowl as needed to ensure all ingredients are fully incorporated.
-
Carefully spread the smooth cream cheese mixture evenly into the bottom of a 9-inch round or square baking dish, creating a solid base layer.
-
**Optional Chill Step:** If your cream cheese mixture feels very soft or loose, refrigerate this first layer for about 30 minutes to firm up slightly before proceeding. If it holds its shape well, you can move directly to the next step.
-
**Salsa Preparation:** If your salsa is thin or watery, pour it through a fine-mesh strainer set over a bowl for a few minutes to remove any excess liquid. Discard the collected liquid.
-
Gently spread the drained (or naturally chunky) salsa in an even layer over the cream cheese and sour cream base, being careful not to disturb the bottom layer.
-
Finally, generously sprinkle the shredded cheese evenly over the salsa layer, making sure it covers the entire surface right up to the edges of the dish.
-
Serve immediately for a fresh and delightful taste, or for the best results and well-set layers, refrigerate the dip for at least 30 minutes before enjoying.
-
**For a Hot & Bubbly Dip:** Prepare as above in an oven-safe dish. Bake in a preheated 375ºF (190ºC) oven for 25-35 minutes, or until the cheese is melted, bubbly, and the dip is hot throughout. For an extra golden top, broil for 1-2 minutes at the end, watching carefully.
Notes
Making Ahead for Convenience: For same-day serving (within 8 hours), you can fully assemble all layers of the dip. Cover the dish tightly with plastic wrap and refrigerate. For longer lead times (up to 48 hours), prepare only the cream cheese and sour cream base, then cover and refrigerate. Add the salsa and shredded cheese just before serving, allowing the base to soften at room temperature for about 30 minutes first.
Baked Cream Cheese Salsa Dip Variation: To enjoy this dip warm, prepare it in an oven-safe 9-inch round or square baking dish. Bake in a preheated 375ºF (190ºC) oven for 25-35 minutes, or until it’s gloriously bubbly and hot throughout. For an extra golden and crispy top, broil for 1-2 minutes at the very end, watching carefully to prevent burning.
Hearty Ground Beef Addition: Elevate your dip by adding a layer of seasoned ground beef. Brown half a pound of lean ground beef with 1 teaspoon of taco seasoning, then drain all excess fat. Layer it directly after the salsa and before the cheese. This variation can be served cold or baked at 375ºF (190ºC) for 25-35 minutes for a hot, satisfying dip.
Homemade Taco Seasoning Recipe: Craft your own blend for fresh flavor! This recipe yields approximately 2 ½ – 3 Tablespoons, with 1 ½ teaspoons used in the dip. Store any unused seasoning in an airtight container for future use.
1 tablespoon chili powder
1 ½ teaspoons ground cumin
1 teaspoon salt
1 teaspoon cornstarch (or arrowroot powder for gluten-free)
½ teaspoon paprika
¼ teaspoon garlic powder
¼ teaspoon onion powder
¼ teaspoon dried oregano
Nutrition
Please note that some of my blog posts here at Dash for Dinner may contain affiliate links. If you make a purchase through these links, I will get a small commission at no additional cost to you. Please see my Disclaimer for more information.
