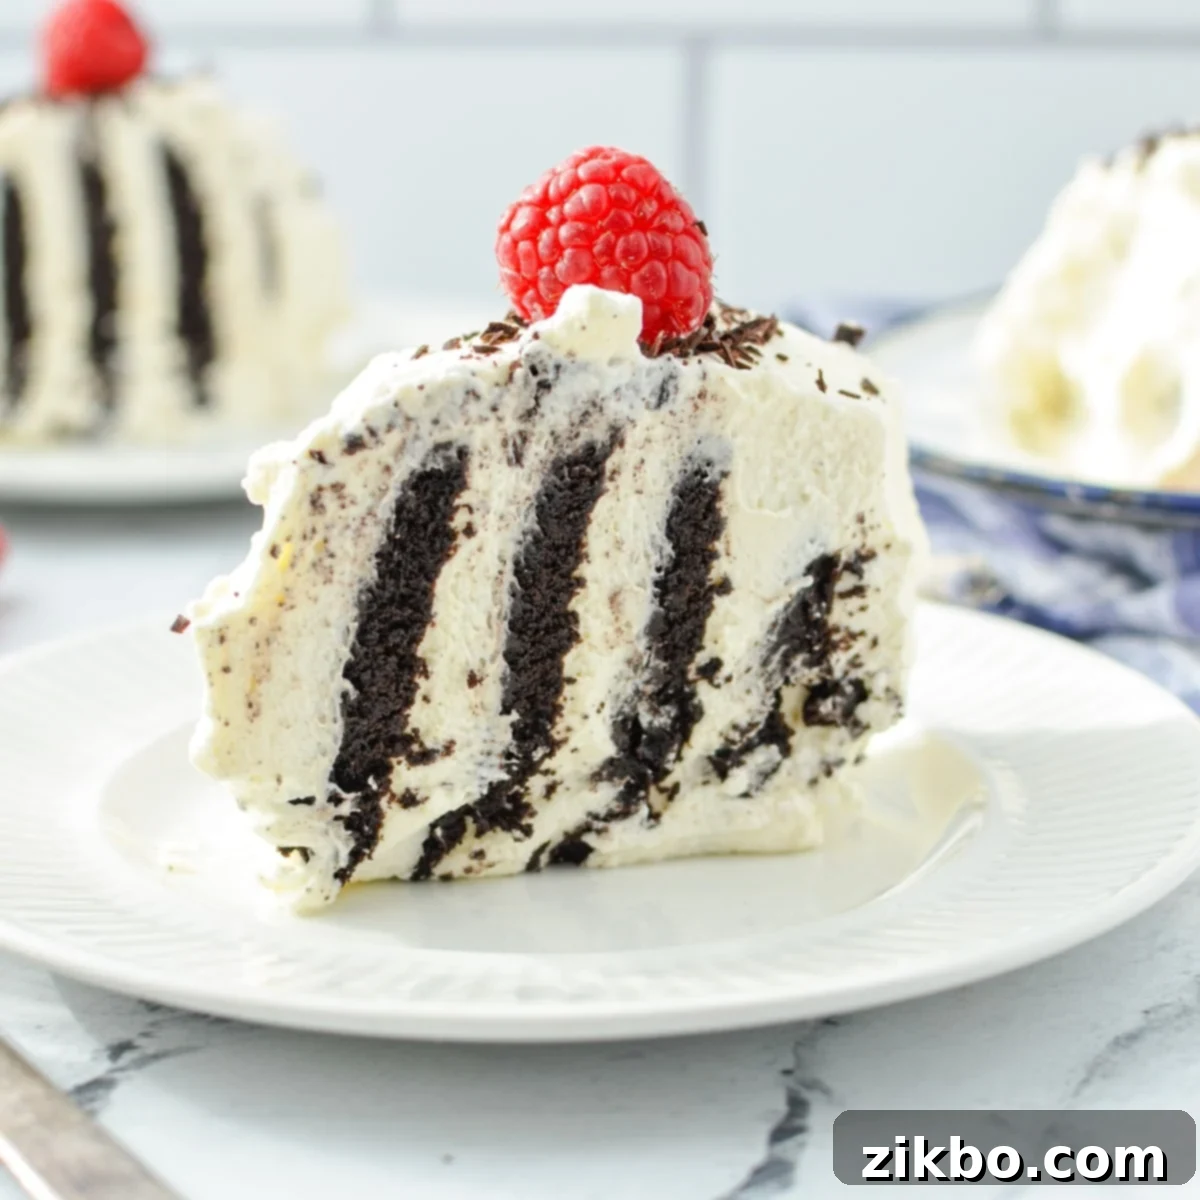
Irresistible No-Bake Chocolate Wafer Icebox Cake (Zebra Cake) – An Easy 4-Ingredient Dessert
Prepare to be amazed by this effortlessly delicious Chocolate Wafer Icebox Cake, also widely known as Zebra Cake or the Famous Chocolate Wafer Icebox Cake. This no-bake masterpiece requires just four simple ingredients, making it the perfect dessert for those scorching summer days, busy weeknights, or any special occasion that calls for a touch of chocolatey indulgence without the fuss.
Crafted from layers of crisp chocolate wafer cookies and luscious homemade whipped cream (though a convenient shortcut option is available!), this cake transforms into a tender, cake-like delight after a good chill in the refrigerator. It’s an easy dessert that promises big flavor with minimal effort, becoming a beloved family favorite in no time.
What Exactly is a Zebra Cake and Where Did It Come From?
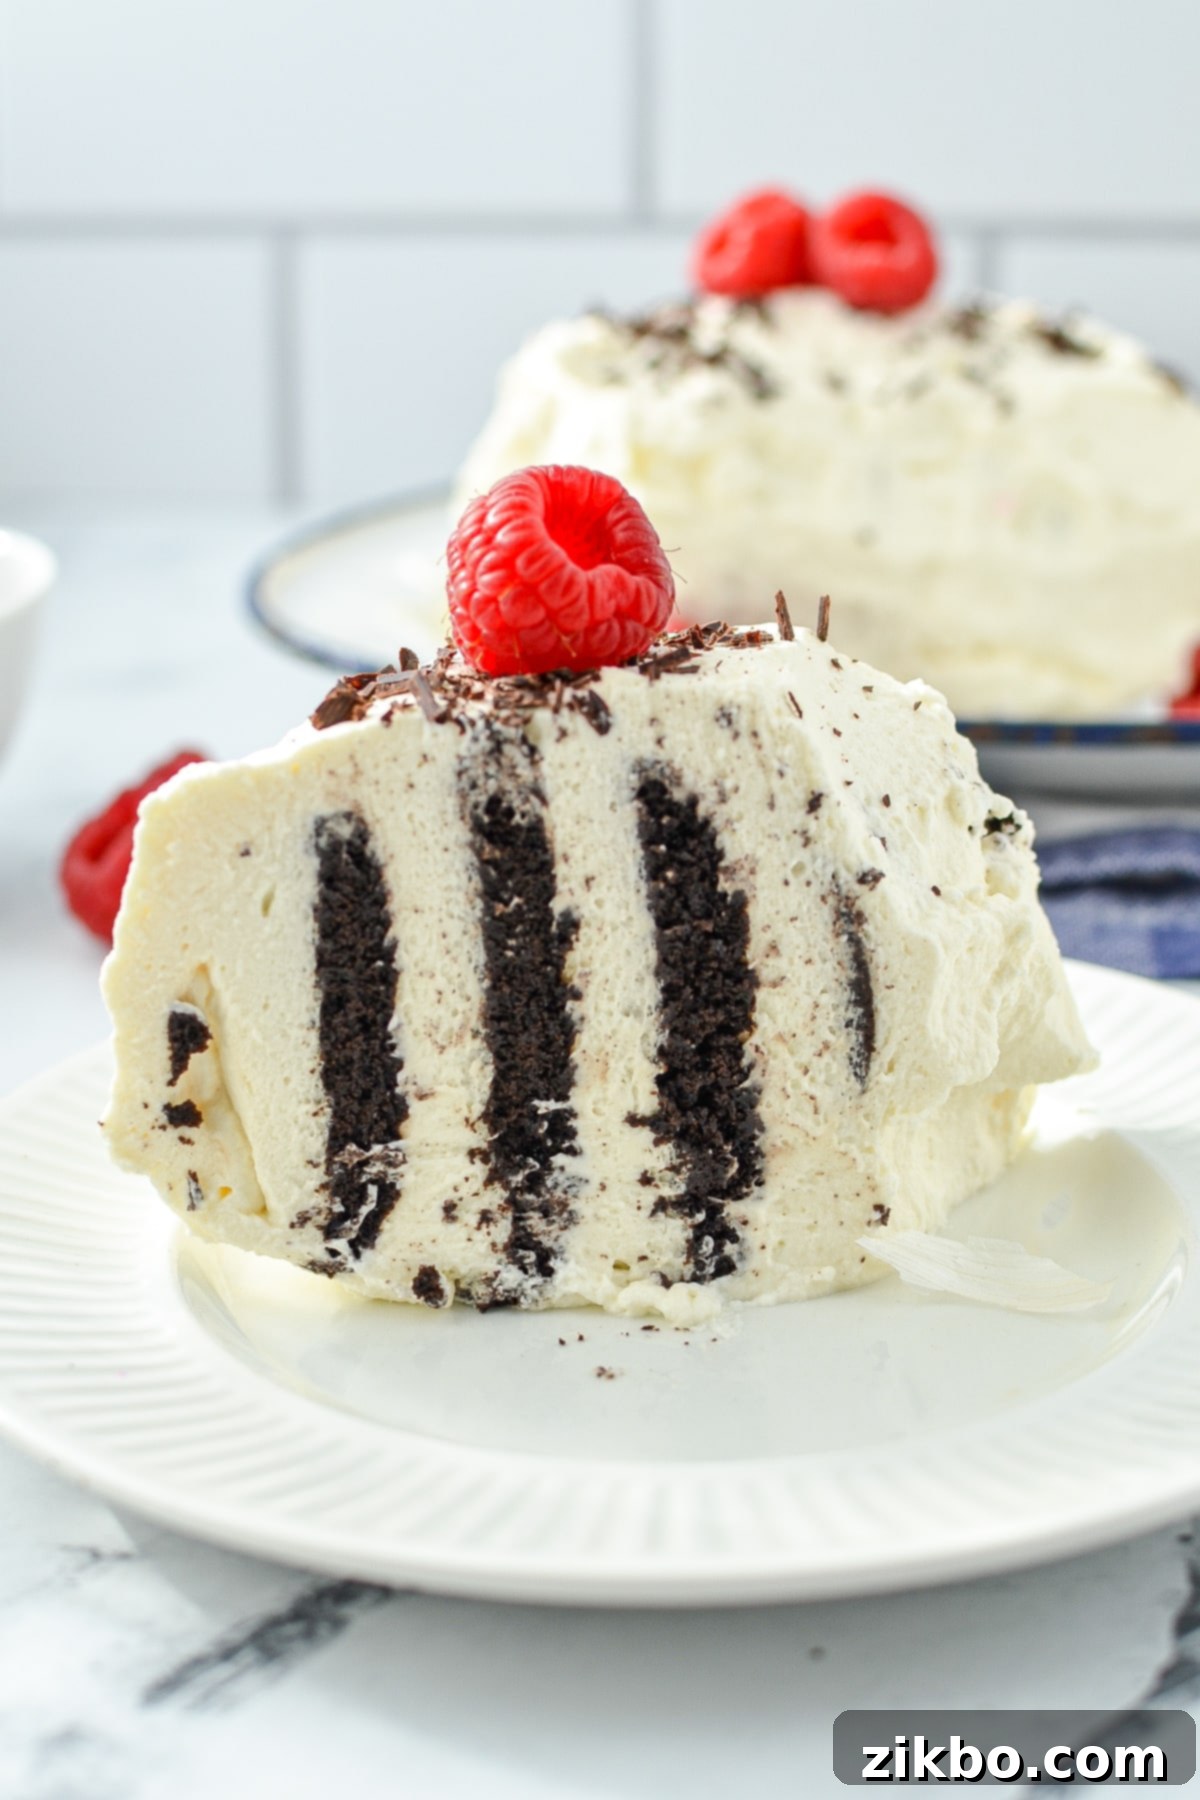
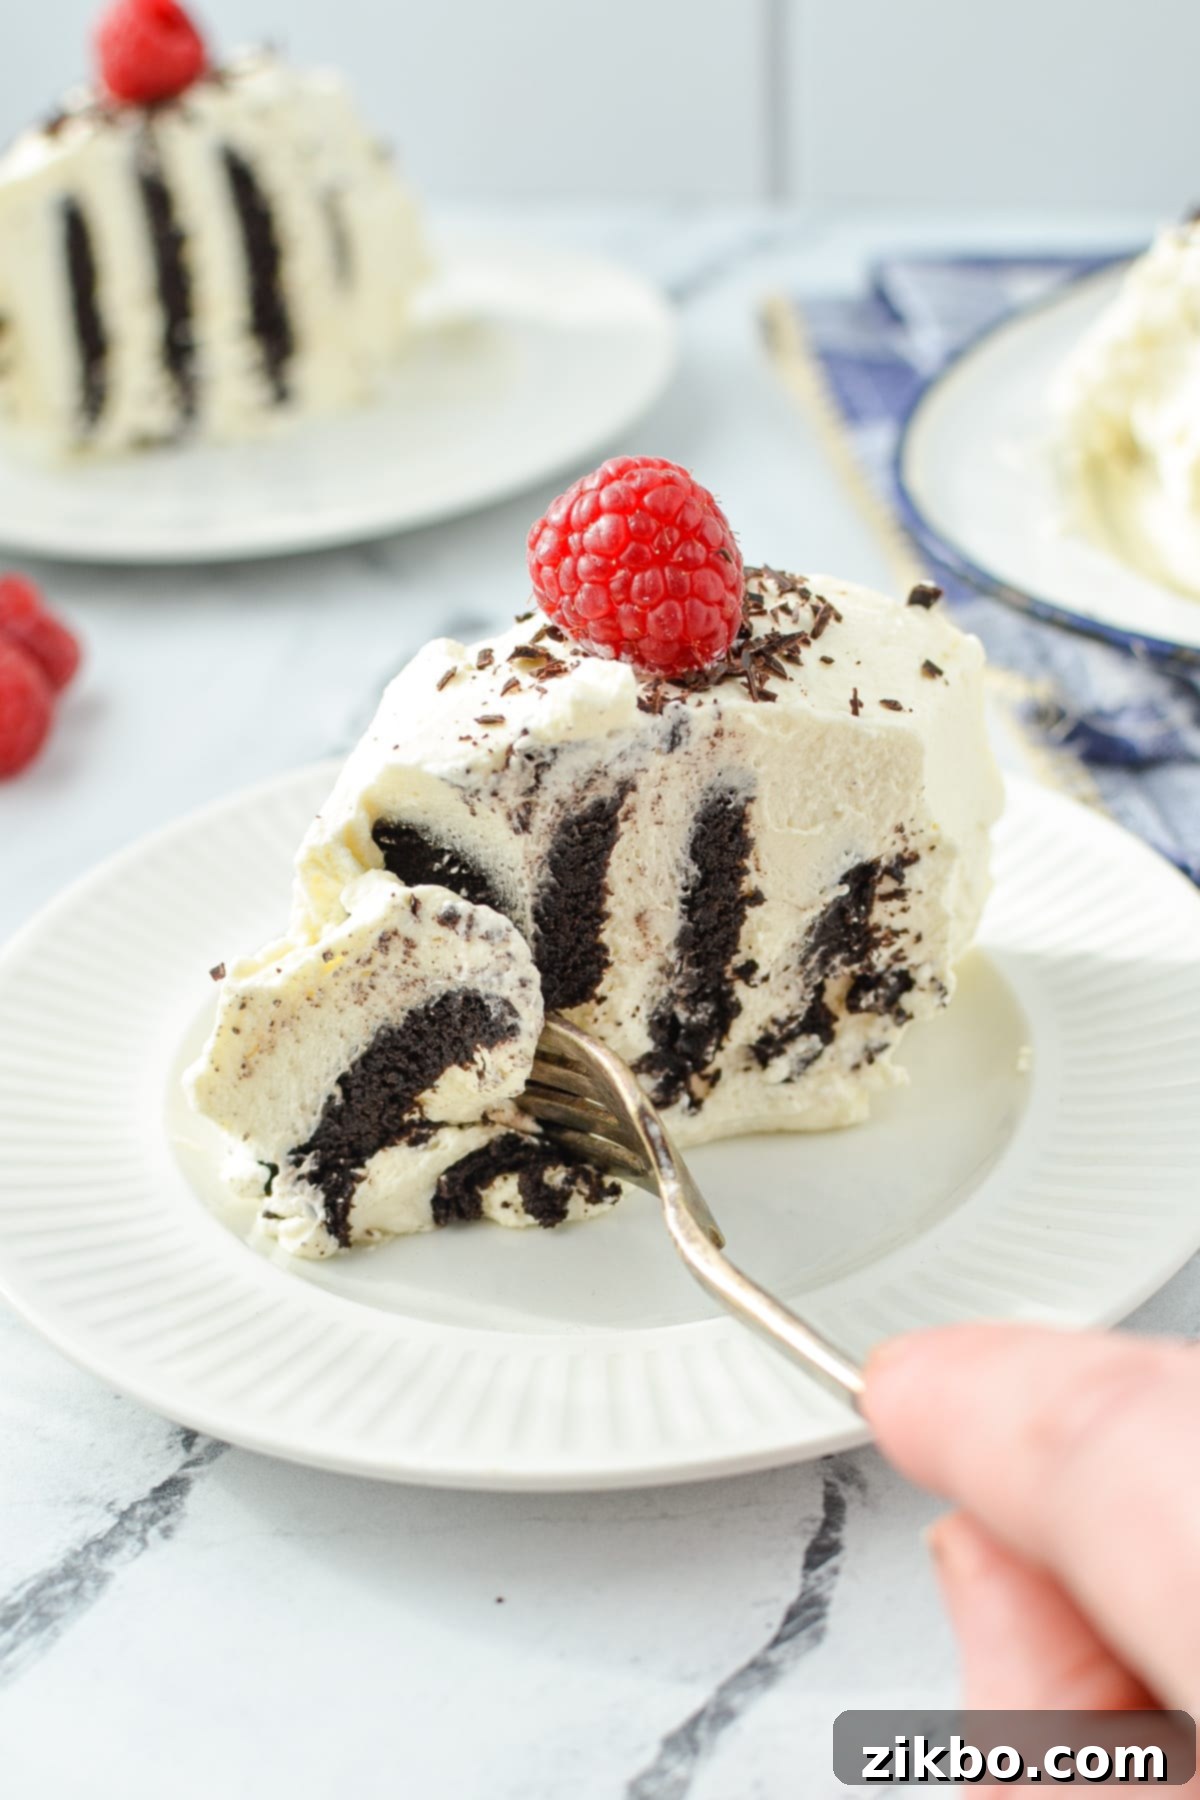
The intriguing name “Zebra Cake” isn’t just a playful moniker; it hints at the beautiful striped pattern revealed when this icebox cake is sliced diagonally. The dark chocolate wafers create distinct layers against the bright white whipped cream, truly resembling the stripes of a zebra. But beyond its modern appeal, this dessert boasts a fascinating history rooted in practicality and resourcefulness.
My first encounter with this simple yet ingenious dessert came while exploring various Depression-era recipes. This period of history, not so far in the past, often captivates me, particularly because both my husband and I had grandparents who lived through it. Their stories of making do with less often inspire a deep appreciation for the creativity born out of necessity.
Icebox cakes, like this chocolate wafer variety, surged in popularity during the Great Depression and later during World War II. During these challenging times, increased poverty and the implementation of sugar rations meant that families had limited access to certain ingredients. A significant portion of national supplies, including sugar, was redirected overseas to feed troops, leaving home cooks to get inventive in the kitchen. Easy recipes that utilized readily available, pre-packaged ingredients like cookies and crackers became incredibly popular. The “icebox” itself refers to a precursor to modern refrigerators – an insulated cabinet cooled by blocks of ice delivered weekly. These simple, no-bake creations provided a much-needed sweet treat without requiring precious oven fuel or scarce baking ingredients, epitomizing the era’s ingenuity.
The Ultimate Easy No-Bake Dessert for Modern Life
While the Zebra Cake originated from historical necessity, its enduring popularity today stems from our equally demanding, albeit different, lifestyles. In our fast-paced world, balancing work, commutes, family commitments, and digital screen time often leaves little room for elaborate meal preparation, especially when it comes to desserts. That’s where this incredible no-bake chocolate wafer icebox cake truly shines.
This dessert, made exclusively with chocolate wafer cookies and whipped cream, requires absolutely zero oven time. Forget preheating, baking, or cooling down your kitchen on a hot day. The process is wonderfully straightforward: simply assemble the layers, pop it in the fridge, and then, after a period of chilling, it’s ready to slice and serve! It’s an ideal solution for anyone seeking a delicious homemade dessert without the complexities of traditional baking.
But the true magic? It doesn’t just look good and save time; it tastes absolutely phenomenal! The texture and flavors are reminiscent of a very simplified Black Forest cake, offering a delightful blend of rich chocolate and creamy sweetness without the kirsch. My husband has even requested this as his birthday cake on multiple occasions, a testament to its irresistible appeal. Its simplicity makes it a total cinch to make, ensuring you can enjoy a decadent dessert even on your busiest days. I am confident that once you try it, you and your loved ones will adore this easy chocolate wafer icebox cake as much as we do!
Simple Ingredients for a Spectacular Cake
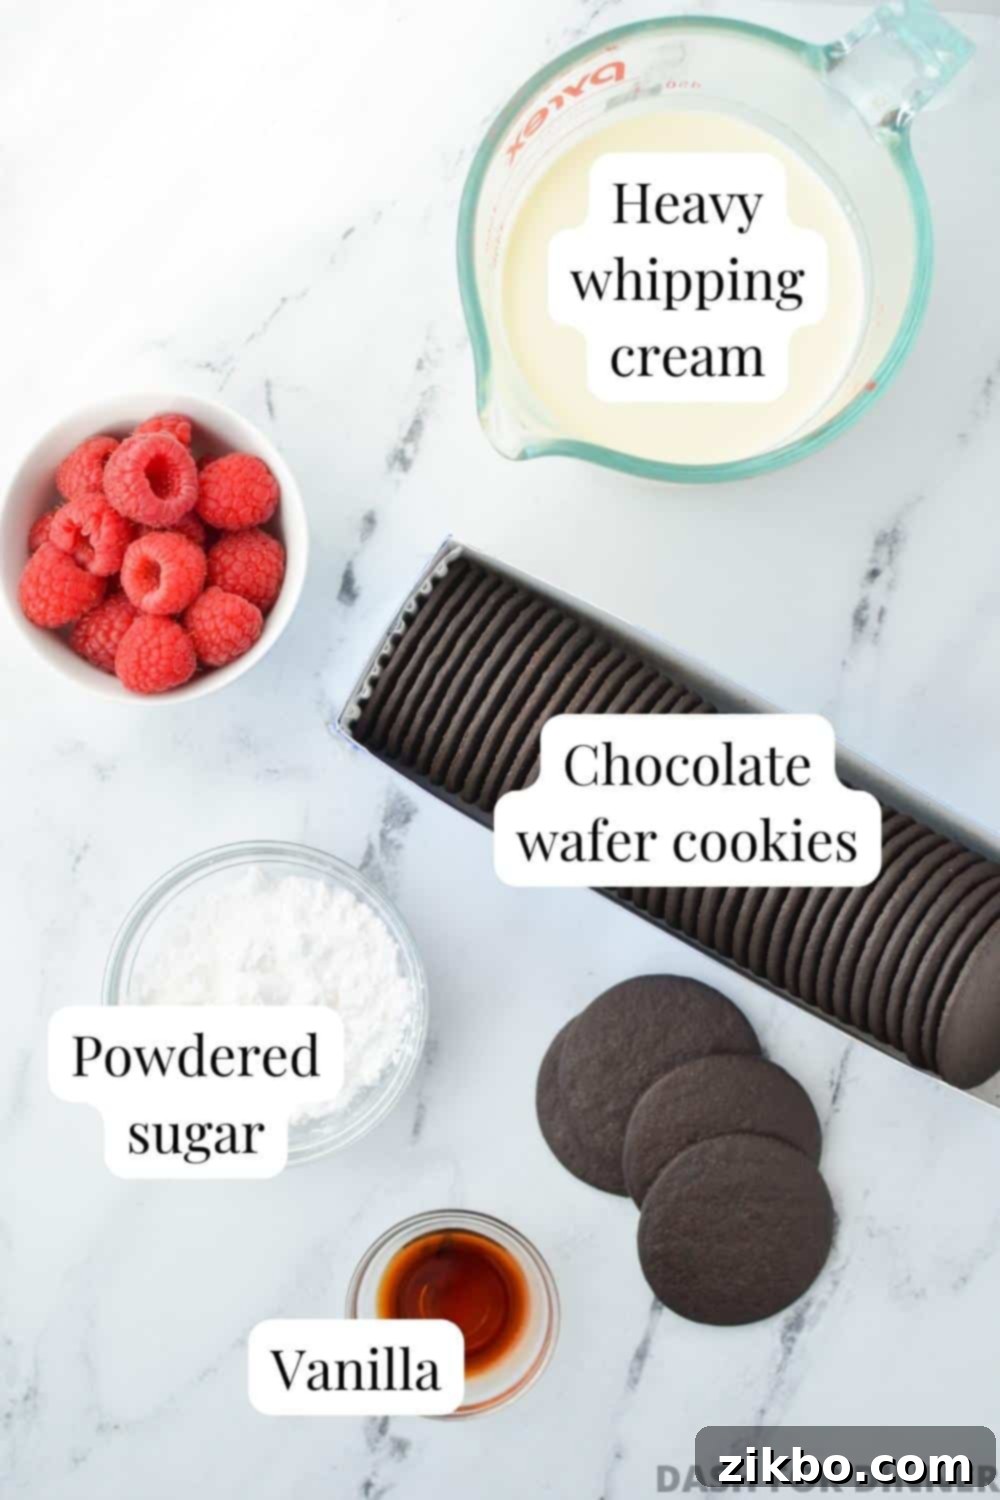
One of the many charms of this Famous Chocolate Wafer Icebox Cake is its incredibly short ingredient list. You’ll only need four core items to create this crowd-pleasing dessert. Here’s a breakdown of what you’ll need:
- Chocolate Wafer Cookies: These are the star of the show! In the US, look for Nabisco’s “Famous Chocolate Wafers,” and in Canada, Christie’s “Chocolate Wafers” are the equivalent. They are typically found in the cookie aisle of most grocery stores, sometimes alongside graham crackers. These thin, dark chocolate cookies are essential because their crisp texture and cocoa flavor are perfect for absorbing the whipped cream and transforming into a tender, cake-like consistency.
- Heavy Whipping Cream: For that wonderfully rich and airy homemade whipped cream, heavy cream is non-negotiable. It needs to have a fat content of at least 36% to whip up properly into stiff peaks that hold their shape, giving your cake structure and luxurious creaminess. For the best results, ensure your cream is thoroughly chilled before whipping.
- Sugar: I highly recommend using powdered sugar (also known as confectioners’ sugar) for whipping cream. Its fine texture dissolves instantly, resulting in a super smooth, velvety whipped cream. Furthermore, powdered sugar contains a small amount of cornstarch, which acts as a stabilizer, helping the whipped cream hold its shape longer. While regular granulated sugar can be used, the texture might be slightly less refined, and the whipped cream might be a little less stable.
- Vanilla Extract: A splash of good quality vanilla extract is optional but highly recommended. It beautifully enhances the sweetness of the cream and complements the rich chocolate flavor of the wafers, adding a depth of flavor that elevates the entire cake.
Time-Saving Shortcut Option:
If you’re really pressed for time or prefer a ready-made option, you can easily streamline the recipe:
- Cool Whip: Instead of making homemade whipped cream from scratch, you can substitute the heavy cream, sugar, and vanilla with one (8-ounce) tub of thawed frozen whipped topping, such as Cool Whip. Just make sure it’s completely thawed before you begin assembly for the best texture. This shortcut saves you a few minutes and still delivers a delightful result.
Optional Garnishes for a Flawless Finish
While the cake is delicious on its own, a few simple garnishes can elevate its appearance and add extra bursts of flavor and texture:
- Chocolate Shavings: A sprinkle of elegant chocolate shavings adds a touch of sophistication and extra chocolatey goodness.
- Fresh Raspberries or Strawberries: The vibrant color and tartness of fresh berries, especially raspberries or strawberries, provide a beautiful contrast to the rich chocolate and cream.
- Mint Leaves: A few fresh mint leaves can add a pop of color and a refreshing aromatic touch.
- Cocoa Powder: A light dusting of unsweetened cocoa powder creates a simple yet elegant finish.
- Mini Chocolate Chips: For an extra layer of chocolate texture and fun.
- Crushed Leftover Cookies: Crumble a few extra chocolate wafers for a textural garnish.
- Chocolate or Caramel Drizzle: A light drizzle of chocolate syrup or caramel sauce can add an extra layer of sweetness and visual appeal.
How to Assemble Your No-Bake Chocolate Wafer Icebox Cake
Making this icebox cake is a simple process, broken down into two main parts: preparing the whipped cream and then assembling the layers. Follow these steps for a perfect Zebra Cake every time.
Mastering the Whipped Cream
Homemade whipped cream is surprisingly easy and tastes far superior to store-bought varieties. Here’s how to achieve perfectly stiff peaks:
- Prepare Your Equipment: Pour the well-chilled heavy cream into the bowl of a stand mixer fitted with the whisk attachment. Alternatively, use a large mixing bowl with an electric hand mixer. Ensure your bowl and whisk are clean and dry.
- Add Flavor and Sweetness: Add the powdered sugar and vanilla extract to the heavy cream.
- Whip to Perfection: Begin whipping the cream, sugar, and vanilla on low speed, gradually increasing to high speed. Continue to whip until stiff peaks form. This usually takes about 3-4 minutes, but watch it carefully. Stiff peaks mean that when you lift the whisk, the cream holds its shape firmly without collapsing. Be careful not to over-whip, or you’ll end up with butter!
- Ready to Use: Stop the mixer. Your freshly whipped cream is now ready to be used as directed in the cake assembly.
Building Your Beautiful Zebra Cake
PRO TIP: To make cleanup a breeze and easily transfer your finished cake, line your serving platter with a few strips of parchment paper before you begin assembly. You can gently pull them out from under the cake once it’s chilled.
Step One: Create a Base. Start by smoothing about ½ to 1 cup of your prepared whipped cream (or thawed Cool Whip) onto the center of your chosen serving platter. Form a long, rectangular shape, approximately 1 ½ inches wide. This will act as the foundation for your cookie log, helping to secure it.
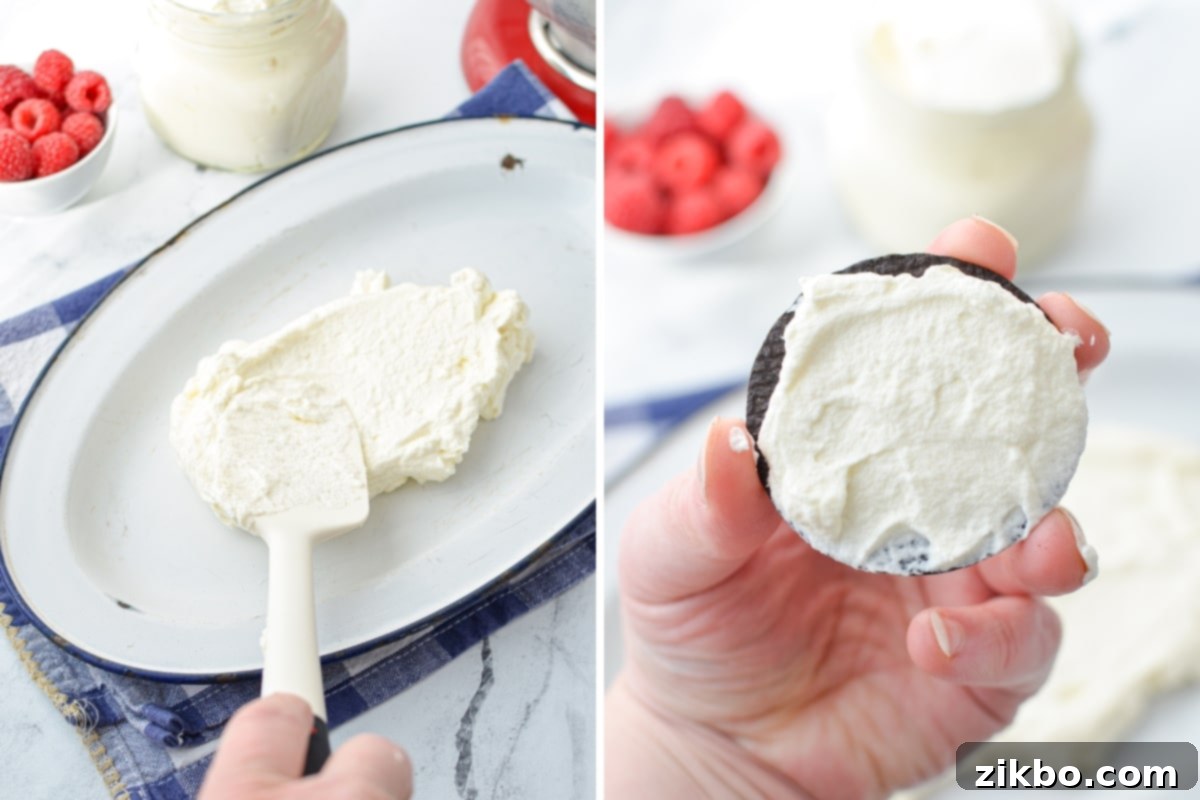
Step Two: Assemble the First Sandwich. Take one chocolate wafer cookie and spread a generous, heaping tablespoon of whipped cream evenly over one side. Carefully sandwich it with another chocolate wafer cookie, cream-side down. This creates your first cookie-cream-cookie unit.
Step Three: Form the Log. Place this sandwiched cookie unit upright onto the whipped cream rectangle you created in Step One. Position it so its rounded sides are facing left and right. Continue this process: spread another cookie with cream, press it against the side of the previous cookie, and place it on the base. Repeat, forming a continuous log of alternating cookies and cream.
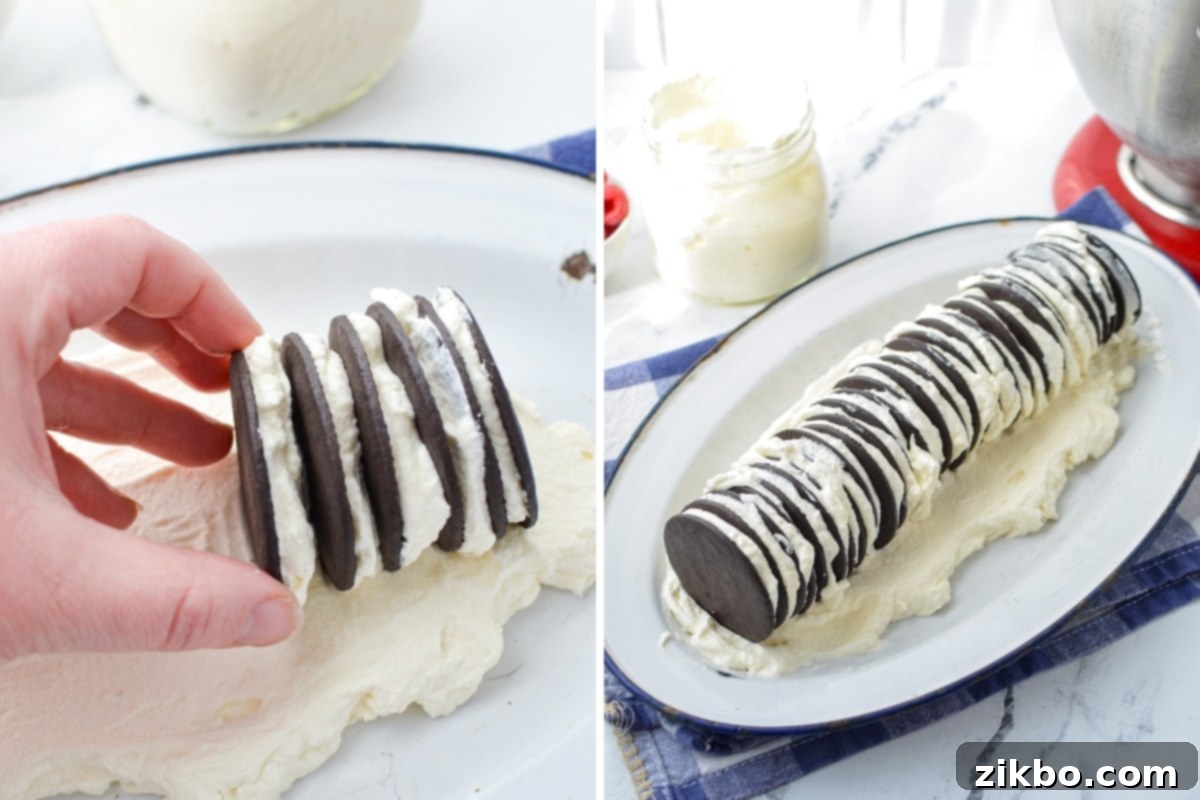
Step Four: Continue Layering. Keep spreading each crisp chocolate wafer cookie with whipped cream and attaching it to the end of your growing log. Continue this pattern until your serving platter is filled to your desired length or you have used up all your chocolate wafer cookies. The cookies will be standing on their edges, connected by generous layers of cream.
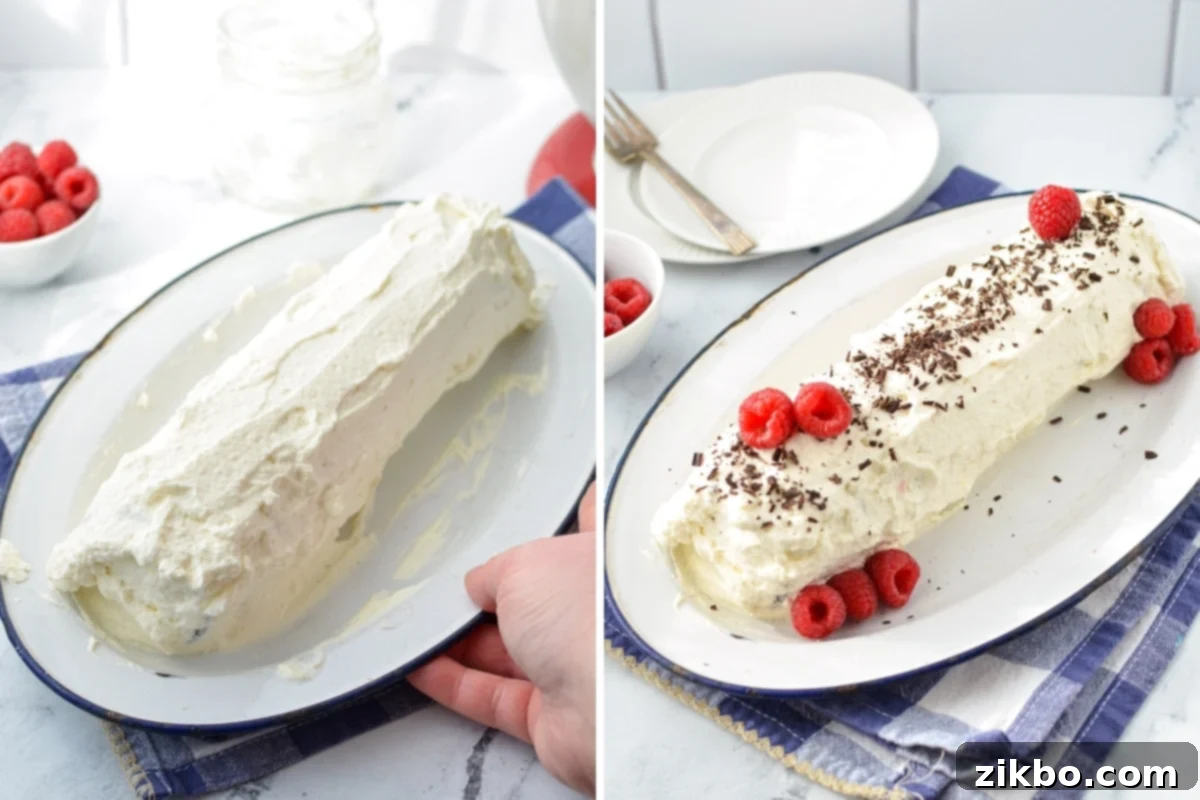
Step Five: Encase the Log. Once your log of chocolate wafer cookies is complete, use the remaining whipped cream to generously cover the entire log. Spread it smoothly over the top and all exposed sides, ensuring every cookie is completely encased in a luxurious blanket of cream. This not only creates a beautiful, uniform appearance but is also crucial for the cookies to absorb moisture evenly during chilling.
The Essential Chilling Period
The chilling phase is perhaps the most critical step for any no-bake icebox cake, and this Zebra Cake is no exception. This period in the refrigerator is what miraculously transforms the firm, crisp black cocoa wafers into a wonderfully tender, decadent cake-like texture. During this time, the creamy moisture from the whipped cream gradually soaks into each chocolate wafer cookie, softening them to a delightful consistency that is perfect for slicing. Without adequate chilling, your cake will remain a stack of cookies and cream, rather than a cohesive dessert.
- Chill for Optimal Results: For the best texture and flavor, allow your cake to chill for approximately 8-12 hours. While a little less or a little more time will still yield a good result, this timeframe ensures the cookies are perfectly softened and the flavors have fully melded.
- Plan Ahead: I often like to assemble this cake in the morning to enjoy it as a delightful dessert with our evening meal. If you’re planning to serve it for an afternoon party or a birthday celebration, preparing it the night before and letting it chill overnight is an excellent strategy.
- Gentle Wrapping for Protection: To prevent the whipped cream from getting squashed or picking up fridge odors, wrap the cake gently in plastic wrap. A helpful trick is to poke a few toothpicks into the cake (ensuring they don’t go all the way through) and then drape the plastic wrap over them. This creates a small tent, preventing direct contact between the plastic wrap and the delicate whipped cream frosting.
The Fun Part: Decorating Your Masterpiece
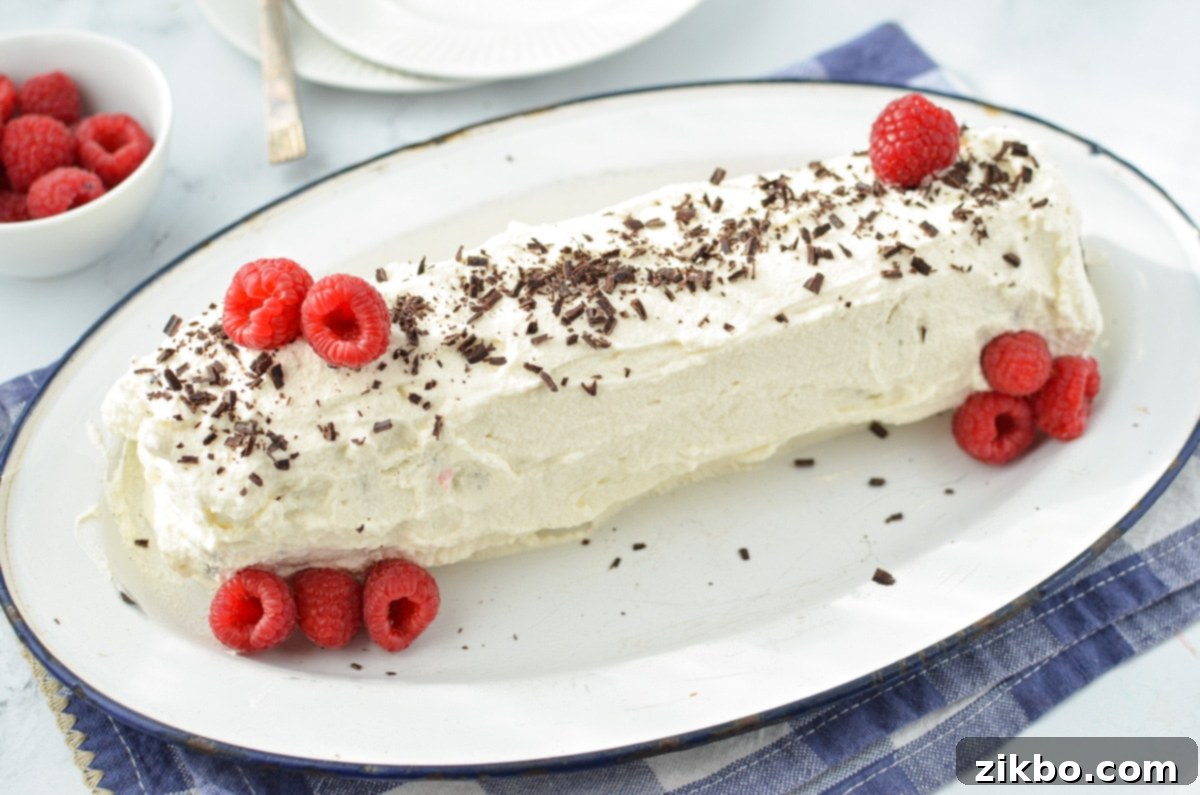
Once your no-bake chocolate icebox cake has had its essential chilling time and is ready to make its grand debut, it’s time for the creative touch of decorating! This is where you can personalize your Zebra Cake and make it truly your own. While the cake itself is beautiful in its simplicity, a few garnishes can enhance its visual appeal and add an extra layer of flavor and texture. Just remember to add your chosen decorations right before serving to keep them looking fresh and vibrant.
Here are some delightful ideas to inspire your decorating:
- Elegant Chocolate Shavings: Use a vegetable peeler or a sharp knife to create delicate curls of your favorite chocolate bar. Sprinkle them generously over the top of the cake.
- Fresh Berries for Contrast: Bright, juicy fresh raspberries or sliced strawberries not only add a pop of vibrant color but also a wonderful tartness that beautifully cuts through the richness of the chocolate and cream.
- A Hint of Mint: Place a few fresh mint leaves strategically on top for a refreshing aroma and a natural green accent.
- A Dusting of Cocoa Powder: For a sophisticated and subtle finish, lightly dust the top of the cake with unsweetened cocoa powder using a fine-mesh sieve.
- Playful Mini Chocolate Chips: Sprinkle mini chocolate chips for added texture and a delightful crunch.
- Crushed Cookie Crunch: If you have any leftover chocolate wafer cookies, crush them finely and sprinkle them over the top for an extra layer of chocolatey texture.
- Decadent Drizzles: A thin drizzle of chocolate syrup or caramel sauce can add a beautiful pattern and an extra touch of sweetness.
HINT: To save time and keep your garnishes fresh, prepare your decorations ahead of time. Place shaved chocolate, berries, etc., in small, airtight containers and store them in the fridge until just before serving.
The Art of Slicing and Serving
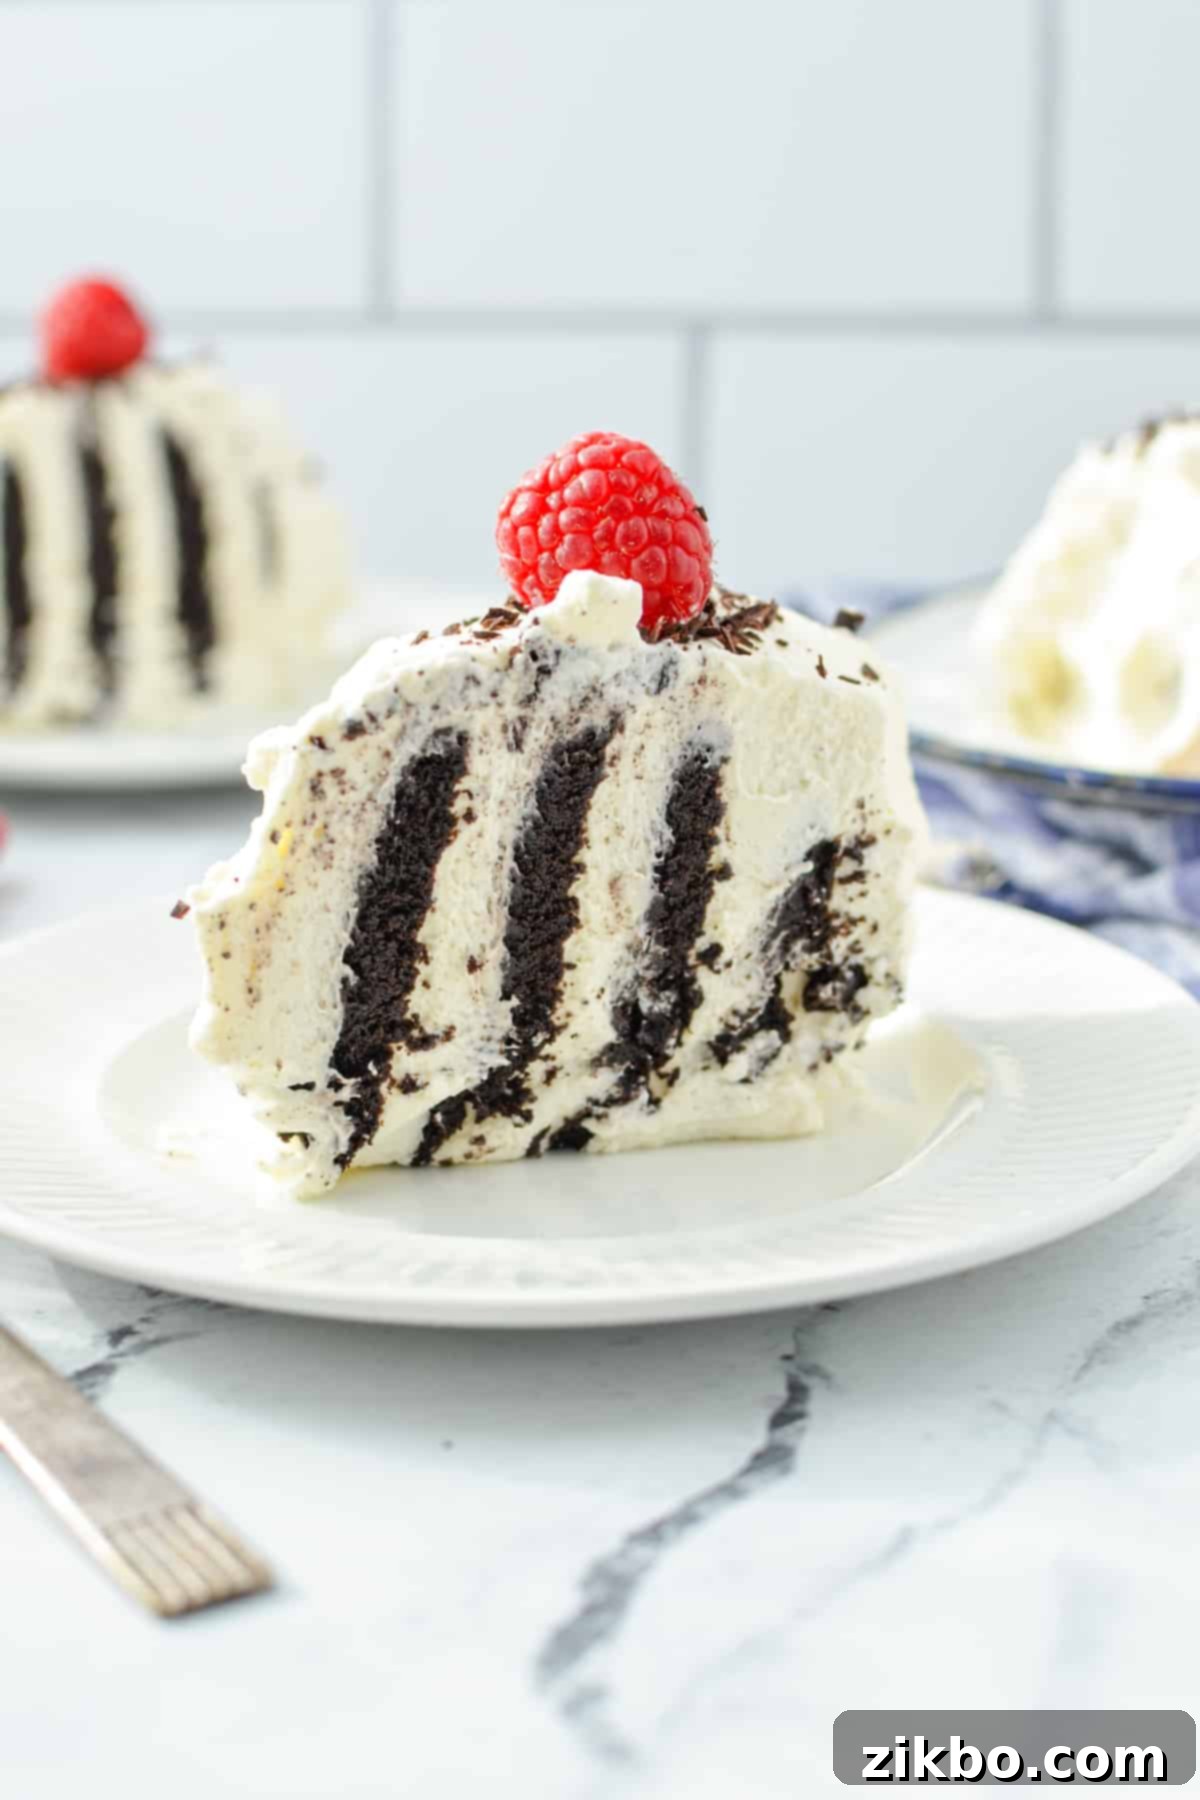
When your chilled and decorated cake is ready to impress, the final step is to slice and serve. This seemingly simple action holds the secret to revealing the cake’s signature charm. For the most stunning presentation and to truly live up to its “Zebra Cake” name, you must cut the cake diagonally.
It’s absolutely crucial to slice it diagonally because this specific cutting technique is what exposes the beautiful, alternating layers of dark chocolate wafer and white whipped cream on the interior of each slice. This creates that striking striped pattern that gives the cake its unique and memorable appearance. Using a long, sharp knife, make clean, swift cuts at an angle, wiping the blade between slices for the cleanest presentation. Serve immediately and watch your guests marvel at the simplicity and beauty of this incredible dessert.
Exciting Variations and Simple Substitutions
While the classic Chocolate Wafer Icebox Cake is a timeless treat, its adaptable nature means you can easily customize it to suit your taste, dietary needs, or what you have on hand. Don’t be afraid to experiment with these delicious variations and substitutions:
- With Oreo Cookies (Oreo Icebox Cake): For a twist on the classic, swap out the chocolate wafer cookies for Oreo cookies. For the best result, gently separate the Oreo halves and scrape off the cream filling. You can then layer the whipped cream in an 8×8 baking dish or a springform pan, followed by a layer of the separated cookie halves. Alternate layers of whipped cream and cookie halves, ensuring you finish with a generous layer of whipped cream on top. The result is a rich, creamy, and satisfying Oreo dessert.
- With Graham Crackers (Graham Cracker Icebox Cake): If you love the classic s’mores flavor, try using graham crackers instead of chocolate wafers. You can assemble it in the traditional log style, creating a rectangular cake, or layer it into a baking dish, alternating layers of whipped cream and single layers of graham crackers. The graham crackers will soften similarly, offering a different, subtly sweet and honey-like flavor profile.
- With Cool Whip (Instant Icebox Cake): As mentioned previously, for a truly effortless approach, substitute the homemade whipped cream ingredients (heavy cream, sugar, and vanilla) with an 8-ounce container of frozen whipped topping. Just be sure to thaw it completely in the refrigerator before you begin assembling your cake to ensure a smooth, spreadable consistency.
- With Cream Cheese (Cream Cheese Icebox Cake): For a richer, tangier, and more stable whipped topping, incorporate cream cheese. Soften half of an 8-ounce brick of cream cheese (4 oz) at room temperature, then whip it until it’s light and fluffy. Gently fold this whipped cream cheese into most of an 8-ounce container of thawed Cool Whip (or about 2 cups of homemade whipped cream). Use this delightful cream cheese blend in place of the regular whipped cream in the recipe. It adds a wonderful depth and slightly tart flavor that pairs beautifully with the chocolate.
- Gluten-Free Chocolate Wafer Icebox Cake: For those with gluten sensitivities, you don’t have to miss out! The key is finding or making gluten-free chocolate wafer cookies. While they might be harder to find pre-made, several fantastic recipes exist for homemade gluten-free chocolate wafers. Gluten Free on a Shoestring has a great recipe that can be used in place of the store-bought ones, allowing everyone to enjoy this classic treat.
Recipe FAQ’s for Your No-Bake Delight
The term “icebox” harks back to an era before widespread electric refrigerators. Homes were equipped with insulated cabinets, or “iceboxes,” which were kept cool by large blocks of ice delivered weekly. These ingenious contraptions allowed families to store perishable foods, including leftovers and ingredients needed for the week. Icebox cakes were revolutionary at the time because they didn’t require baking. Instead, they were made by assembling layers of prepared cookies, crackers, or even sliced bread with whipped cream or custard, and then chilling the entire “cake” in the icebox. The magic happened during this chilling process: the cookies would absorb moisture from the creamy layers, softening and transforming into a delightful, cake-like consistency without ever touching an oven. It was a practical and delicious solution for households without ovens or during hot weather.
Icebox cakes, particularly those made from packaged cookies and whipped cream, enjoyed immense popularity during the challenging times of the Great Depression and the World War II era (roughly the 1930s and 1940s). During these periods, economic hardship and government-imposed sugar and fuel rations made traditional home baking more difficult and expensive. Housewives, ever resourceful, discovered that by layering readily available packaged cookies (which often didn’t require precious sugar rations) with whipped cream, they could create a delicious, no-bake dessert. Food manufacturers quickly caught on to this trend, often printing “icebox cake recipes” directly on their cookie tins or cracker boxes, actively encouraging women to buy these pre-packaged items. This made previously “unpopular” or utilitarian items like chocolate wafers and graham crackers staples for creating easy, impressive desserts that stretched limited resources.
Absolutely! In fact, making this chocolate wafer icebox cake ahead of time is not only possible but highly recommended. The extended chilling period (8-12 hours, or even overnight) is essential for the cookies to fully soften and for the flavors to meld beautifully. This makes it an ideal dessert for entertaining, as you can prepare it the day before your event, allowing you to focus on other preparations closer to serving time. Just ensure it’s gently covered with plastic wrap to prevent it from drying out or absorbing fridge odors.
More Delicious No-Bake Desserts to Try
If you love the ease and deliciousness of this Chocolate Wafer Icebox Cake, you’re in for a treat! Explore more no-bake recipes that are perfect for any occasion:
- No Bake Chocolate Chip Cheesecake
- Lazy Cheesecake Salad
- No Bake Nutella Pie
- Berry Cheesecake Salad
- No Bake Peanut Butter Bars
If you loved this recipe for No Bake Chocolate Wafer Icebox Cake, let me know by leaving a 5-star review in the recipe card or comment below! You can also tag me on Instagram @dashfordinner. Your feedback and photos truly make my day!
Chocolate Wafer Icebox Cake (Zebra Cake)
Print
Pin
Rate
Equipment
-
Stand mixer or electric hand mixer
Ingredients
- 1 package chocolate wafer cookies (9 ounces)
Whipped Cream
- 1 ½ cups heavy whipping cream chilled
- 3 tablespoons powdered sugar
- 1 teaspoon vanilla extract
For Garnish
- Shaved chocolate (optional)
- Fresh raspberries or strawberries (optional)
Instructions
-
Add chilled heavy cream to a large bowl or the bowl of a stand mixer, along with the powdered sugar and vanilla extract.
-
Using an electric hand mixer or the whisk attachment for a stand mixer, whip the cream and other ingredients on medium-high speed until moderate peaks form, about 3-4 minutes. Stop the mixer and scrape down the sides of the bowl as needed.
-
You will know the whipped cream is ready when you can pull the whisk portion out of the whipped cream and it holds its shape for at least 30 seconds before falling.
-
Add about ½-1 cup of whipped cream to the center of a serving platter, spreading it down the middle into a 1 ½” wide rectangle.
-
Place a heaping spoonful of whipped cream on each chocolate wafer cookie, sandwiching them together in a log on top of the line of whipped cream on the serving tray.
-
Spread the remaining whipped cream on top of the line of chocolate wafer cookies, smoothing it out into an even layer so that it covers all of the cookies.
-
Wrap it gently with plastic wrap (try not to allow it to touch the cake) and place it in the fridge to chill for 8-12 hours.
-
Remove the zebra cake from the refrigerator and garnish it with shaved chocolate and fresh berries.
-
Slice the cake diagonally, creating striped pieces (like a Zebra), serve and enjoy.
Notes
Nutrition
Please note that some of my blog posts here at Dash for Dinner may contain affiliate links. If you make a purchase through these links, I will get a small commission at no additional cost to you. Please see my Disclaimer for more information.
