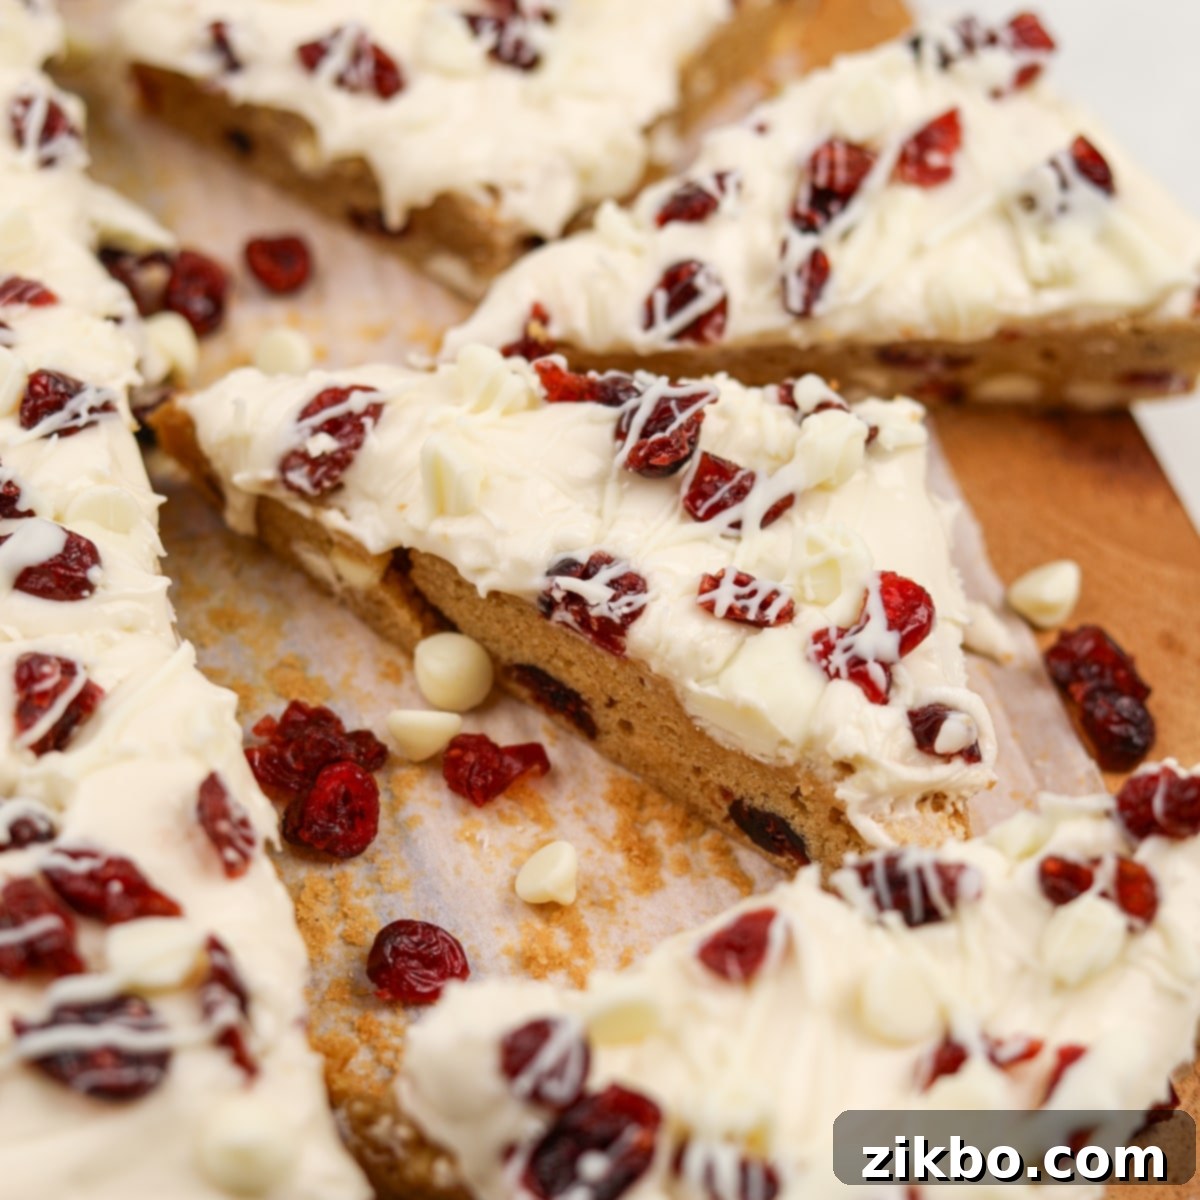
The Ultimate Starbucks Copycat Cranberry Bliss Bars: Better Than the Original!
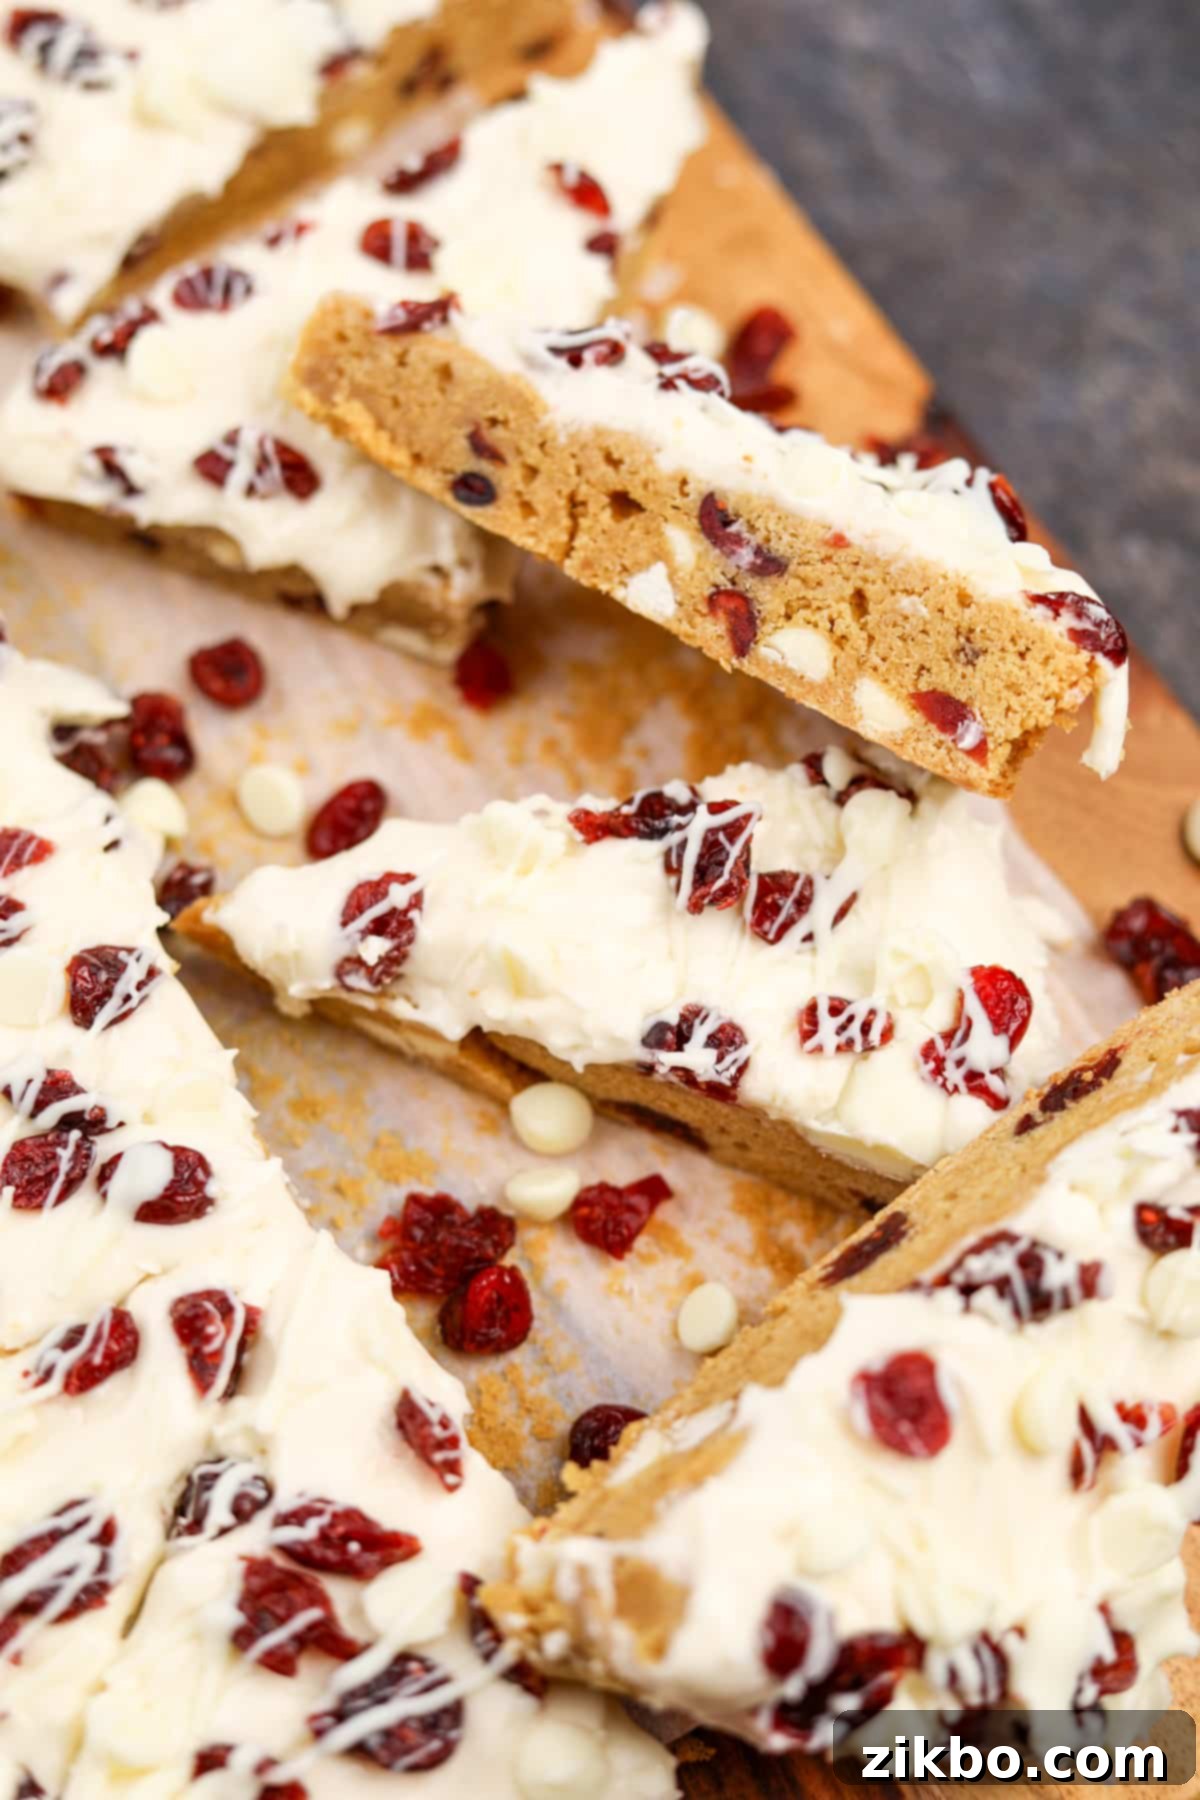
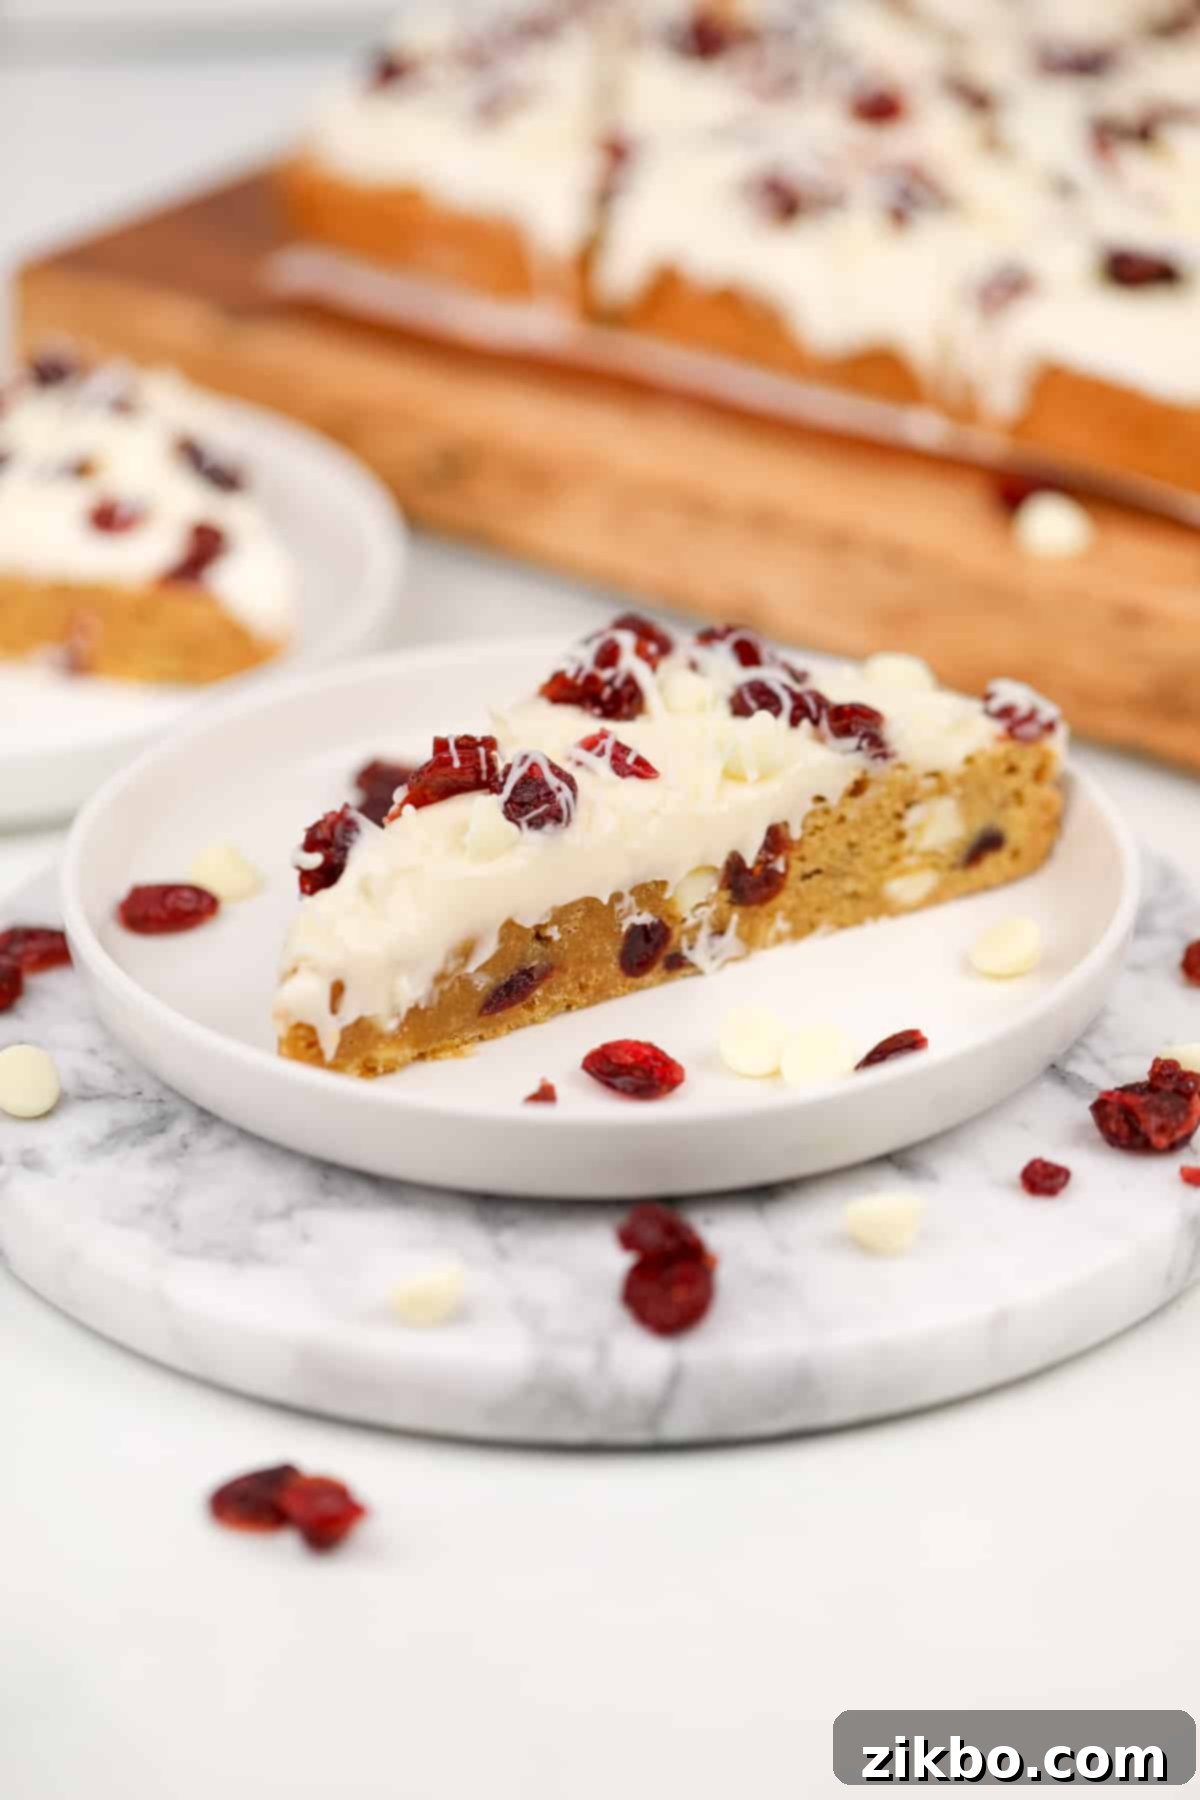
Indulge in the iconic holiday flavor with these incredible **copycat Starbucks Cranberry Bliss Bars**. Featuring a rich, buttery blondie base studded with white chocolate chips and vibrant dried cranberries, these bars are elevated with a luscious, orange-flavored cream cheese frosting and a delicate white chocolate drizzle. Forget the seasonal rush at your local coffee shop; we firmly believe this homemade version surpasses the original in every delightful way!
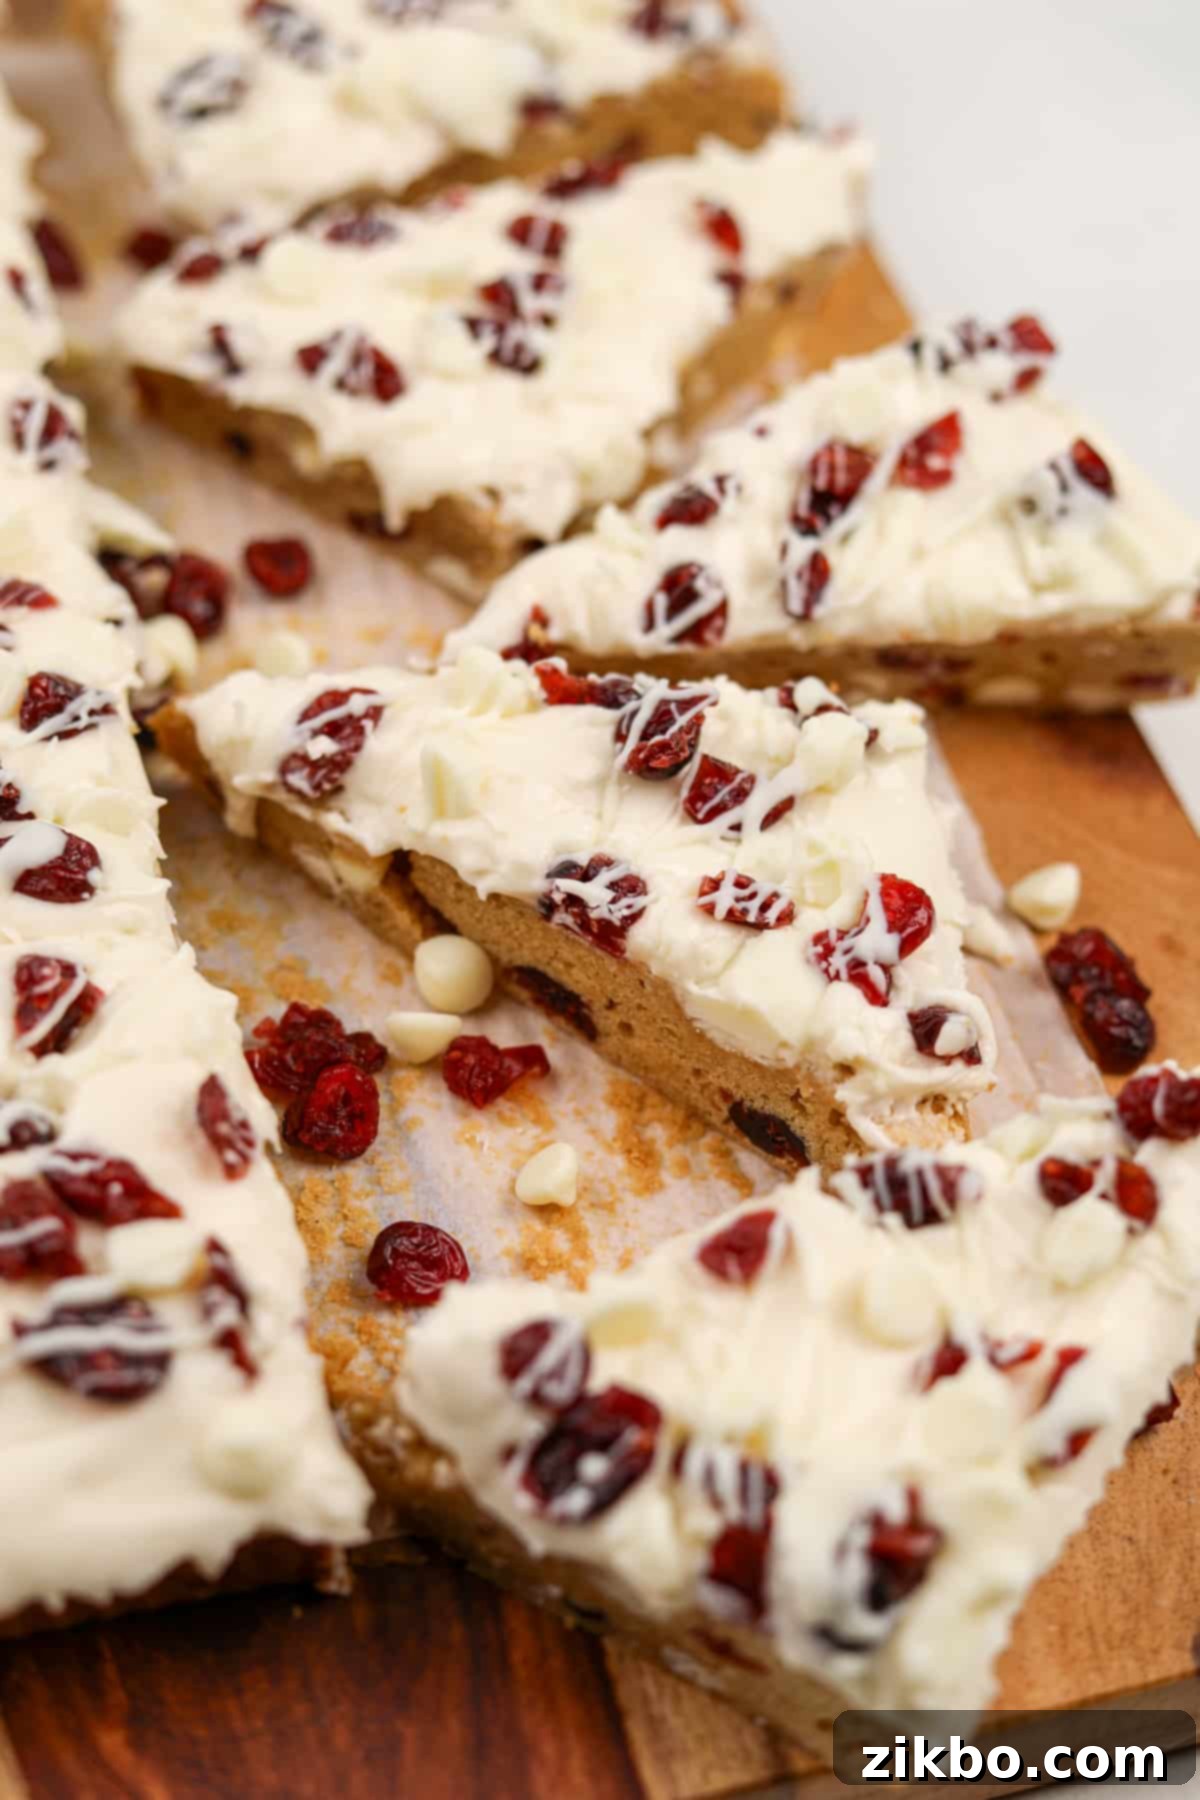
My love affair with Starbucks’ Cranberry Bliss Bars began over a decade ago. Back then, I worked long shifts at the bustling mall, and a giant Java Chip Frappuccino was my essential fuel for the day. One crisp November morning, a new, inviting sight caught my eye in the chilled display case: these alluring triangular “bars.” Intrigued, I decided to treat myself. To say it was **love at first bite** would be a massive understatement; the blend of sweet, tangy, and creamy was simply captivating.
I quickly introduced my boyfriend (now my wonderful husband) to this new obsession, and he too fell head over heels. Soon, I realized my burgeoning **cravings were quickly outpacing my budget**, so I embarked on a mission: to perfectly recreate them at home. It became a delightful culinary challenge, experimenting with various ratios and ingredients to capture that elusive “bliss” in every bite.
Years have passed since my mall days. Now, we enjoy a serene life in the quiet countryside, a peaceful existence with just one minor drawback: the nearest Starbucks is a full hour’s drive away. But that’s perfectly fine! Through dedicated effort, I’ve perfected many of my favorite recipes (including their famous bacon and gruyere egg bites), and today, I am thrilled to share with you **my tried, tested, and truly perfected recipe for homemade Cranberry Bliss Bars**. I am confident that your family will cherish these festive treats as much as mine does, making them a staple for your holiday season and beyond!
Why You’ll Adore This Homemade Cranberry Bliss Bar Recipe
There are countless reasons why this copycat recipe will become your new favorite holiday tradition. From superior taste to sheer convenience, prepare to be delighted:
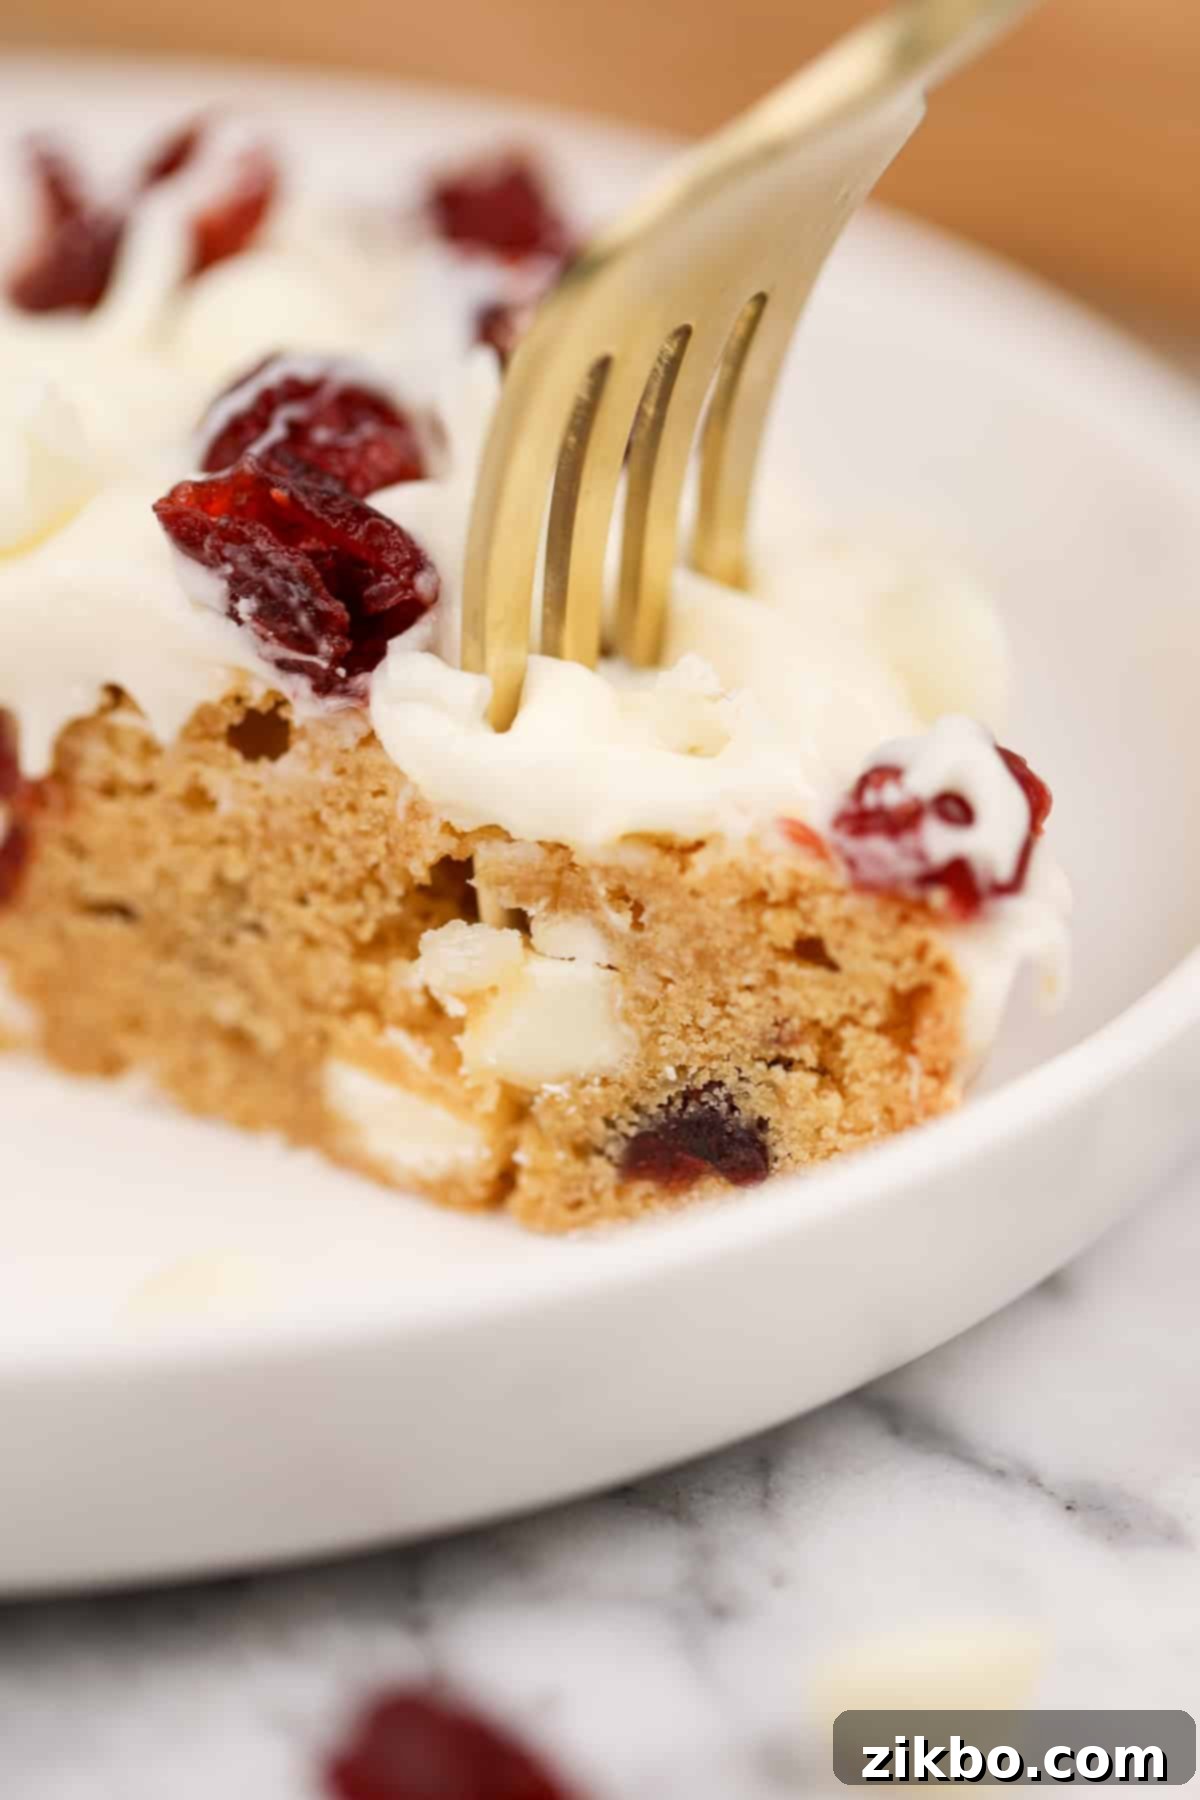
- Unbeatable Flavor, Even Better Than the Original: While Starbucks’ version is undeniably good, crafting these bars at home allows you to use fresh, high-quality ingredients that truly shine. Imagine chewy, moist blondies generously packed with premium white chocolate and plump dried cranberries. These are then generously crowned with a light, fluffy, and perfectly balanced orange-infused cream cheese frosting, a scattering of additional vibrant cranberries, and a beautiful, artful drizzle of melted white chocolate. Every element is carefully chosen to create a superior flavor and texture experience.
- Surprisingly Simple to Prepare: Don’t let the length of the recipe deter you – I’ve meticulously detailed each step to ensure your absolute success, even if you’re a novice baker. The process is straightforward and enjoyable, resulting in professional-looking and tasting bars with minimal fuss. It’s a perfect recipe for beginners and seasoned bakers alike, promising a rewarding outcome.
- Perfect for Freezing (Yes, Even with Frosting!): Planning ahead for the holiday season or just want to have a stash for unexpected cravings? These cranberry cookie bars freeze exceptionally well! You can bake a large batch, freeze them, and thaw as needed. The cream cheese frosting and dried cranberry topping maintain their integrity beautifully, allowing you to enjoy fresh-tasting bliss bars whenever the mood strikes. They’re a fantastic make-ahead option for festive gatherings or a personal treat.
Essential Ingredients & Equipment for Cranberry Bliss Bars
Gathering your ingredients and tools before you start baking will ensure a smooth and enjoyable process. Here’s what you’ll need to create these delectable bars:
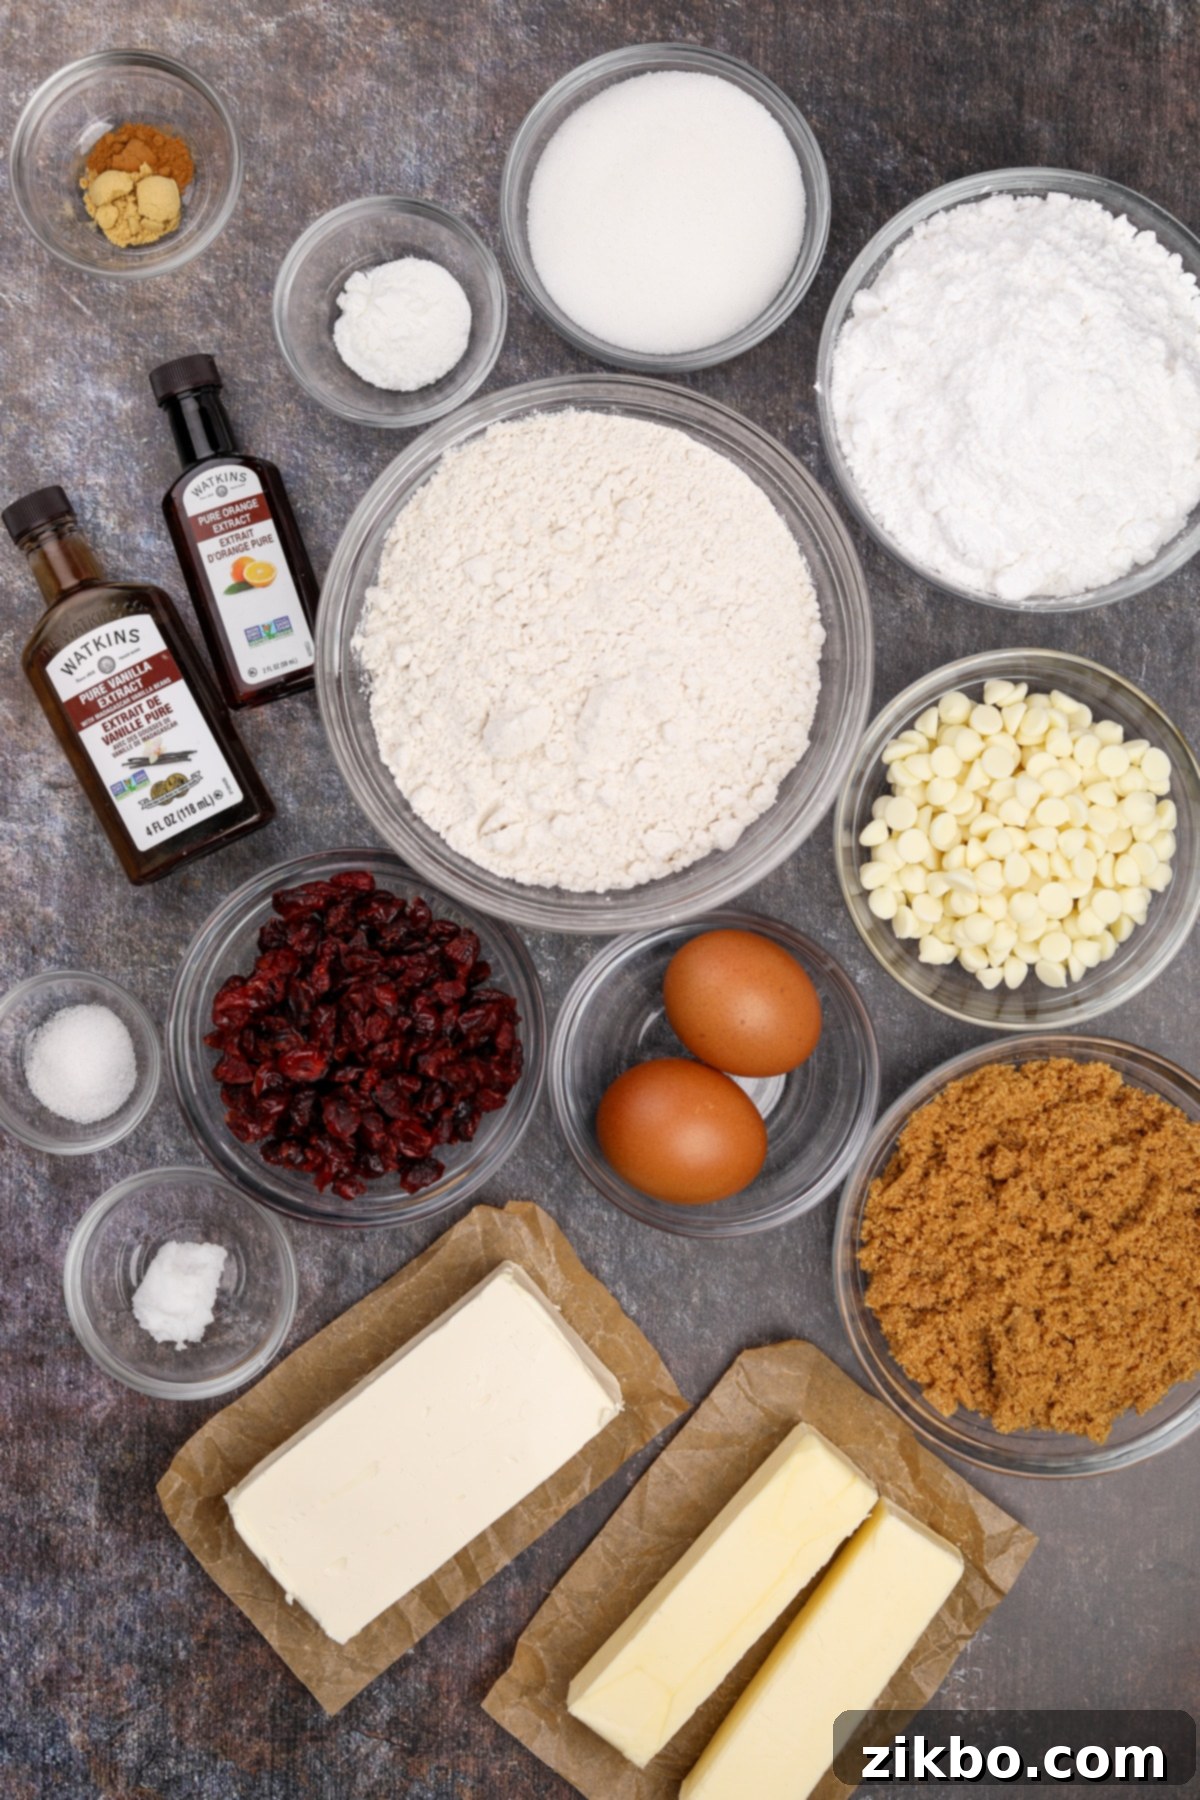
Key Ingredients for the Blondie Base:
- All-Purpose Flour: Standard all-purpose flour provides the perfect structure for our chewy blondies. For a gluten-free option, we highly recommend Bob’s Red Mill 1-to-1 baking flour, which yields excellent results without compromising on texture or flavor.
- Butter: You’ll need 1 cup (2 sticks) of melted butter for the blondie base. While we often test with salted butter, unsalted butter works perfectly fine here; just be sure to adjust the added salt slightly if using salted. Melting it first helps create that signature chewy texture.
- Eggs: Two large eggs are essential for binding the ingredients and adding richness. Using room temperature eggs is a pro tip; they incorporate more smoothly into the batter, leading to a more consistent and even bake.
- White and Brown Sugar: A harmonious blend of both white and packed brown sugar is key. White sugar contributes to the crisp edges, while brown sugar adds depth of flavor, moisture, and that delightful chewiness that defines a perfect blondie.
- Vanilla and Orange Extracts: These extracts are the secret to the Bliss Bar’s signature flavor. Vanilla provides a warm, classic sweetness, while a hint of orange extract in both the base and the frosting brightens the entire profile, mimicking the original’s unique zest.
Other Essential Base Ingredients:
- Dried Cranberries: These add a burst of tartness and beautiful color throughout the blondie.
- White Chocolate Chips: Melty pockets of sweet white chocolate are a must-have in every bite.
- Ground Ginger: A subtle warmth from ginger elevates the spice profile, complementing the cranberry and orange.
- Cinnamon (Optional): A touch of cinnamon can add another layer of cozy, festive spice if you desire.
- Baking Powder: Our leavening agent, ensuring a perfectly risen, tender blondie.
- Salt: A pinch of salt balances the sweetness and enhances all the other flavors.
For the Frosting and Topping:
- Cream Cheese: One 8-ounce package of brick-style cream cheese, softened to room temperature, is crucial for a smooth, lump-free frosting. Avoid spreadable cream cheese from a tub, as it has a different consistency.
- Powdered Sugar: The base for our fluffy frosting, ensuring a silky smooth texture and perfect sweetness.
- Vanilla and Orange Extract: A second dose of these extracts intensifies the delightful aroma and taste in the creamy topping.
- Dried Cranberries: Finely chopped cranberries sprinkled on top add a beautiful visual appeal and a final touch of tart chewiness.
- White Chocolate Chips (for melting): Used to create the elegant drizzle, adding another layer of sweet indulgence.
- Coconut Oil (or shortening): A small amount helps the white chocolate melt smoothly and makes it easier to drizzle without seizing.
Recommended Baking Equipment:
- Baking Pan: A metal baking pan (specifically a 9 X 13-inch USA Pan is excellent) is recommended over glass. Metal pans conduct heat more efficiently, leading to a more even bake and perfectly golden-brown edges.
- Parchment Paper: Absolutely essential for easy removal of the bars from the pan and minimal cleanup. Always line your pan with a slight overhang on the sides.
- Electric Mixer: Whether you use a hand mixer or a stand mixer, an electric mixer will make quick work of creaming the frosting ingredients into a smooth, airy consistency.
- Sharp Knife: A good, sharp knife is vital for clean, precise cuts when slicing your chilled bars into their iconic triangular shapes.
Crafting Your Homemade Starbucks Cranberry Bliss Bars: Step-by-Step
Follow these detailed instructions to create delicious Cranberry Bliss Bars that will impress everyone!
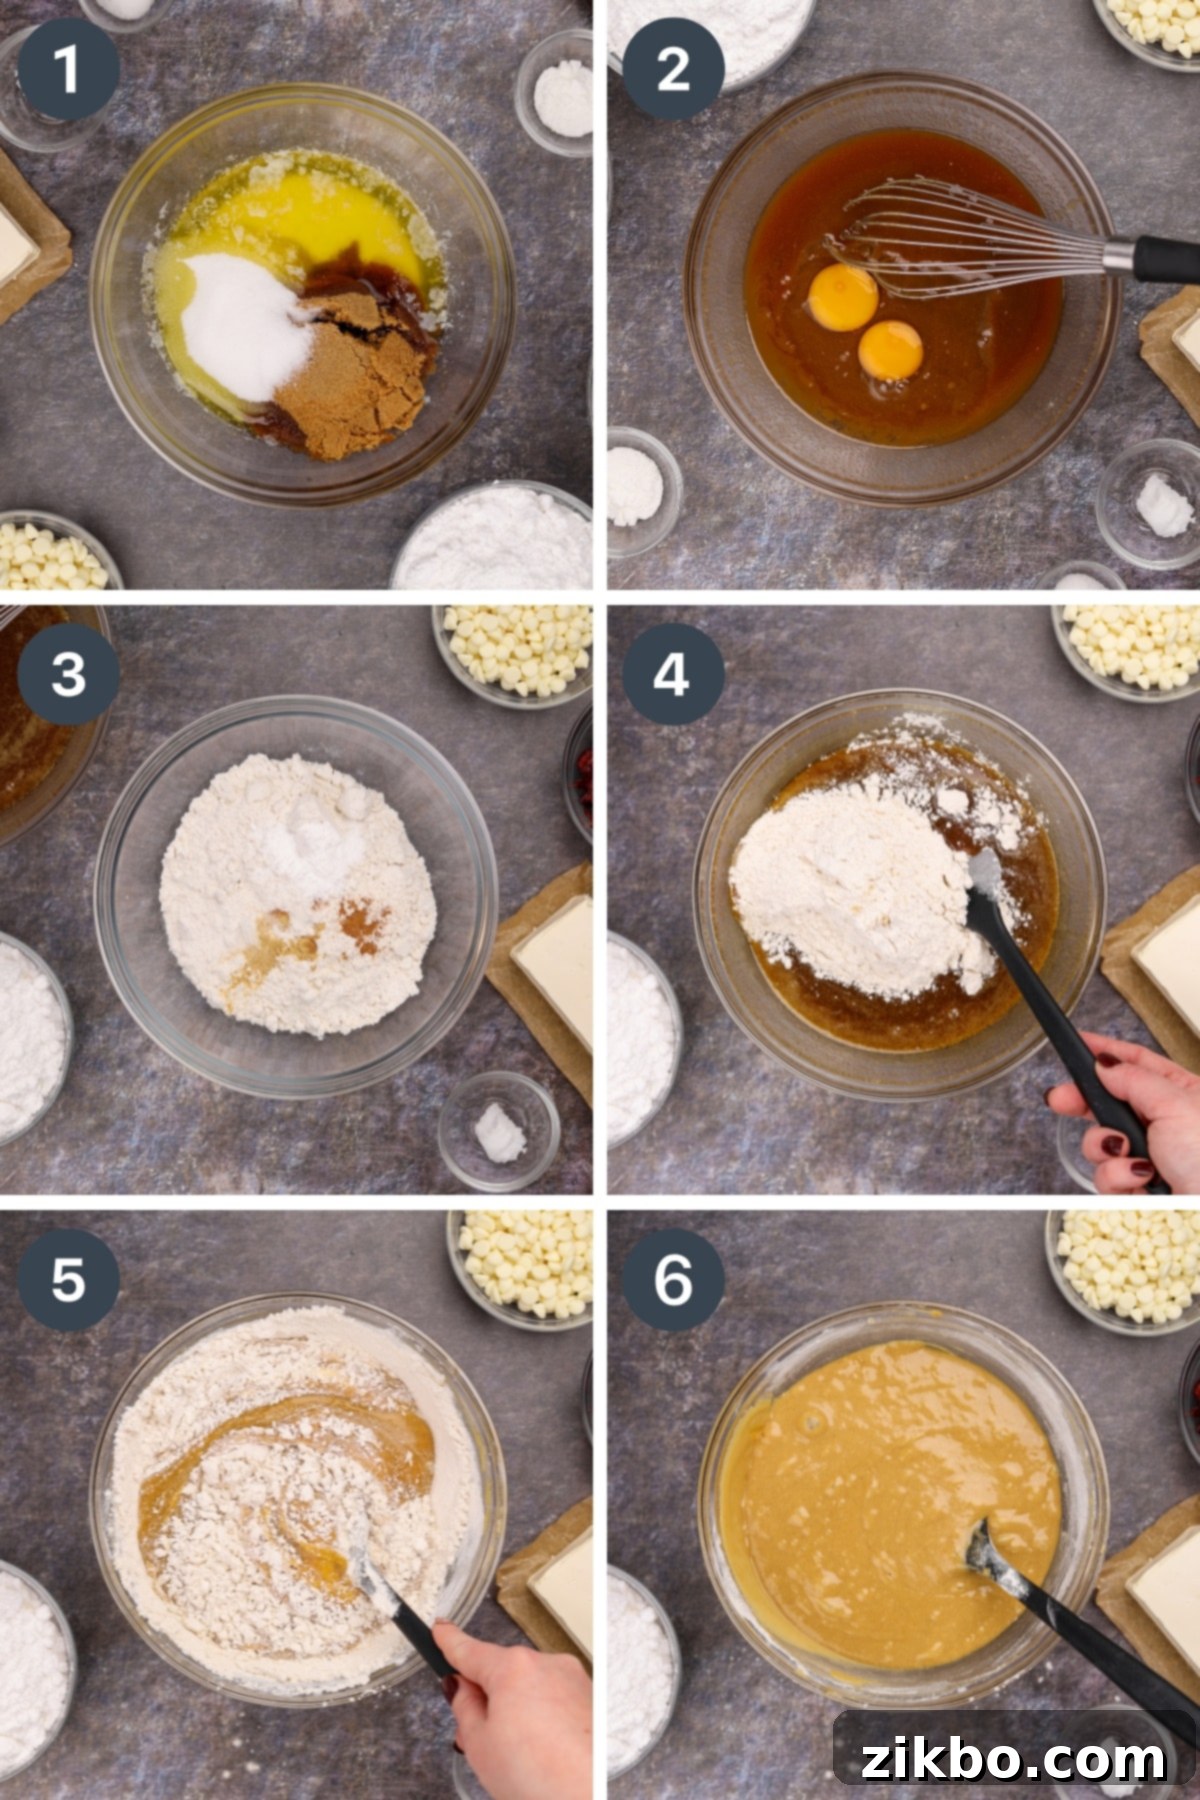
Preparing the Blondie Base:
- Melt the Butter: Begin by melting the butter in a large, microwave-safe bowl. Heat it in 30-second intervals, stirring between each, until fully melted but not boiling.
- Combine Wet Ingredients: To the melted butter, add both the white sugar and the packed brown sugar. Whisk these together vigorously until well combined and smooth. The sugars should be mostly dissolved into the warm butter.
- Incorporate Eggs and Extracts: Add the two large eggs (preferably at room temperature), 1 teaspoon of orange extract, and 1 teaspoon of vanilla extract to the butter and sugar mixture. Whisk thoroughly until the eggs are fully incorporated and the mixture is light and uniform. Set this wet mixture aside.
- Mix Dry Ingredients: In a separate, medium-sized bowl, combine the all-purpose flour, baking powder, salt, ground ginger, and cinnamon (if you’re using it). Whisk these dry ingredients together thoroughly to ensure they are evenly distributed.
- Gently Combine Wet and Dry: Gradually add the dry ingredients to the wet ingredients, folding them in with a silicone spatula just until *barely* combined. It’s crucial not to overmix the batter at this stage, as overmixing can lead to tough blondies. Fold until all the flour streaks disappear, but no more.
Adding the Cranberries and White Chocolate:
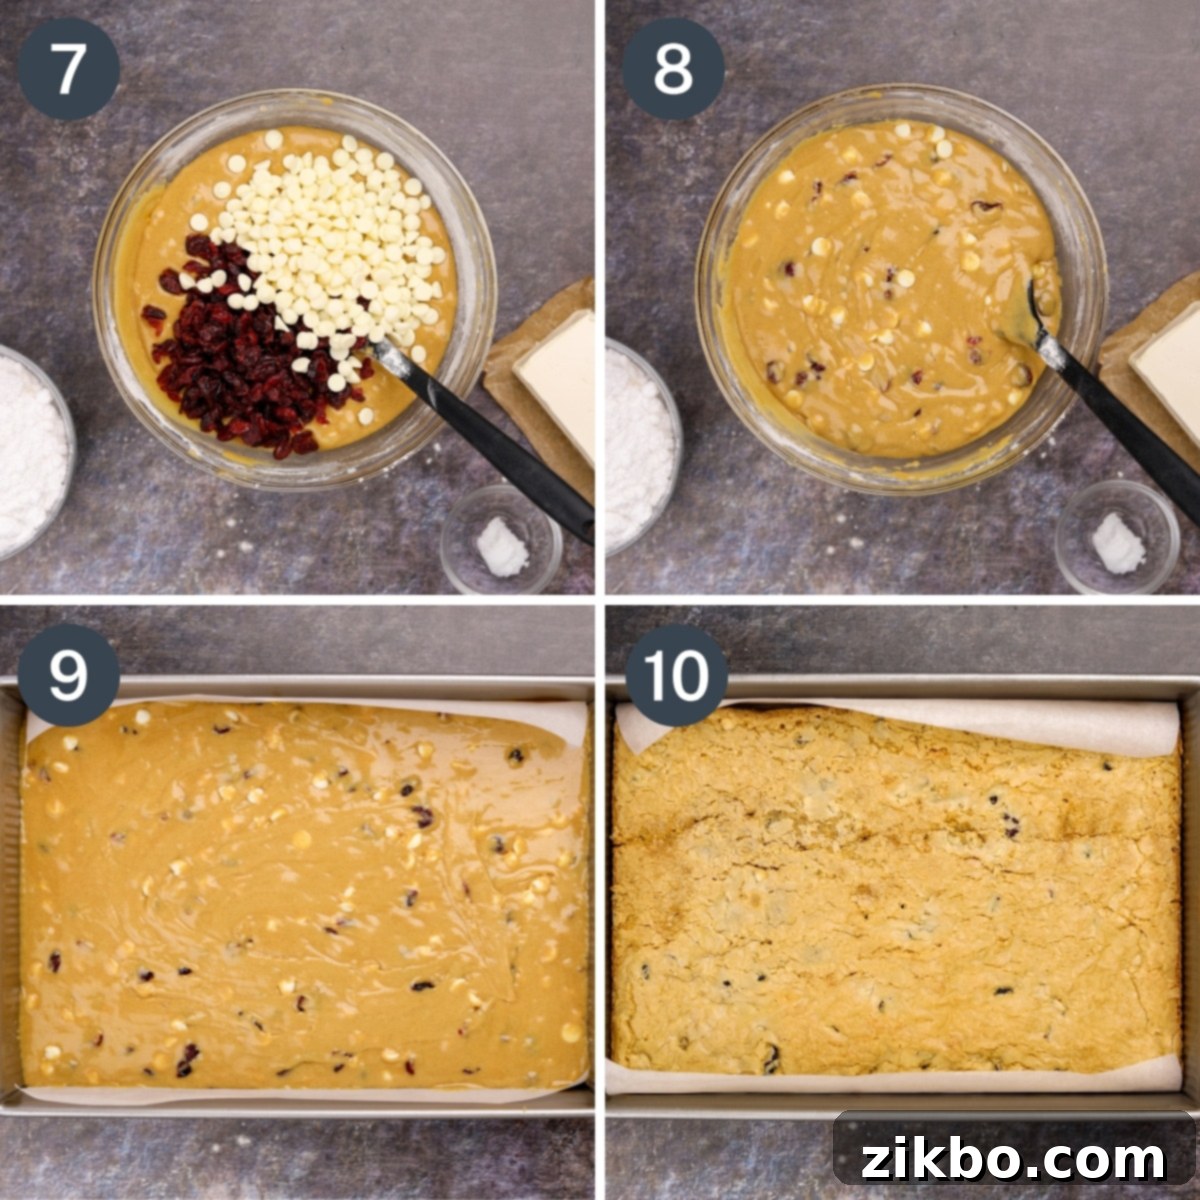
- Fold in Mix-ins: Once your batter is perfectly combined (remember, don’t overwork it!), gently fold in ¾ cup of white chocolate chips and ¾ cup of dried cranberries. Distribute them evenly throughout the batter.
- Prepare for Baking: Spread the enriched batter evenly into your parchment-lined 9×13-inch (23×33 cm) metal baking pan. Use your spatula to smooth the top into an even layer, ensuring it reaches all the way to the edges of the pan for uniform thickness.
-
Bake to Perfection: Bake in your oven, preheated to 350ºF (177ºC), for 22-26 minutes. The blondies are done when a toothpick inserted into the center comes out mostly clean, with just a few moist crumbs attached. Avoid overbaking, as this can dry them out.
- Initial Cooling: Once baked, remove the pan from the oven and allow the blondie base to cool completely in the pan for at least 1 hour. This helps it firm up and prevents crumbling. You can also cool for 30 minutes in the pan, then carefully lift the parchment paper to transfer the blondie to a wire rack for another 30 minutes to cool faster.
- Crucial Chilling: For the best results and easiest frosting application, cover the cooled blondie bars and transfer them to the refrigerator to chill for 1-2 hours, or ideally, even longer. A thoroughly chilled base is key to a clean frosting layer and firm bars.
Pro Tip: The Importance of Chilling Your Blondie Base
For flawlessly frosted and perfectly sliced Cranberry Bliss Bars, chilling the blondie base is not just recommended, it’s essential! When warm, the blondie base can be quite fragile and prone to cracking or tearing during frosting. A well-chilled base (I recommend **at least 1-2 hours, but 3-4 hours or even overnight is truly ideal**) becomes much firmer and easier to handle, providing a sturdy foundation for your creamy frosting. This simple step makes all the difference in achieving bakery-quality results.
Creating the Dreamy Frosting and Finishing Touches
-
Whip Up the Frosting: In a large mixing bowl, combine one 8-ounce package of brick-style cream cheese (softened to room temperature), ½ teaspoon of vanilla extract, and ½ teaspoon of orange extract. Using an electric mixer (handheld or stand mixer), beat on medium-low speed until the mixture is light, smooth, and fluffy.
- Tip for Perfect Frosting: Ensure your cream cheese is truly at room temperature (about 1.5 to 2 hours out of the fridge) before mixing. This prevents lumps and ensures a perfectly smooth, spreadable consistency.
- Add Powdered Sugar: Gradually add the powdered sugar, about ½ cup at a time, mixing on low speed until each addition is fully incorporated and the frosting is lump-free. Scrape down the sides of the bowl as needed to ensure everything is well mixed. Continue until all the powdered sugar is blended in and the frosting is thick and creamy.
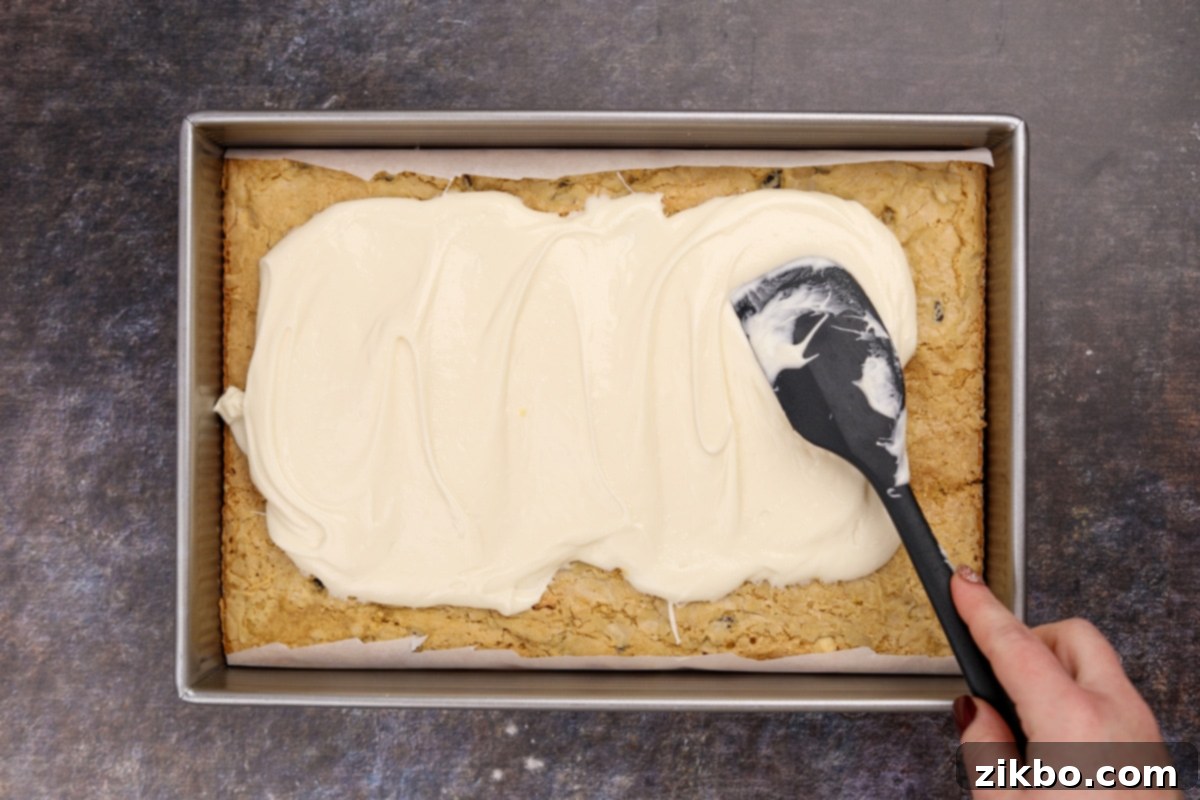
- Frost the Bars: Carefully spread the prepared cream cheese frosting over the chilled blondie base layer. Work slowly and gently to avoid tearing the surface of the blondie. If your cream cheese was properly softened, this step should be relatively easy. Smooth the frosting into an even layer all the way to the edges.
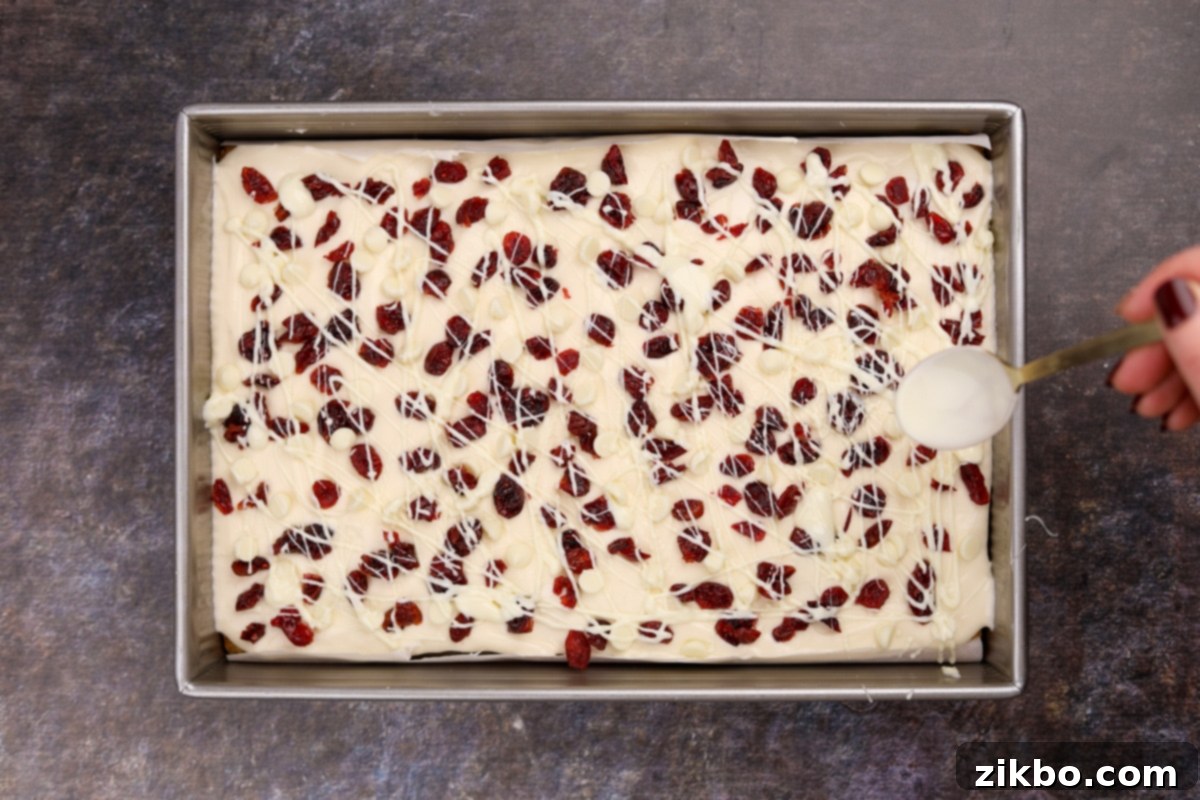
- Top with Dried Cranberries: Evenly sprinkle ½ cup of finely chopped dried cranberries over the entire surface of the cream cheese frosting. These add a beautiful pop of color and an extra layer of texture.
-
The White Chocolate Drizzle: In a small, microwave-safe bowl, combine ¼ cup of white chocolate chips with ½ teaspoon of coconut oil (or shortening). Melt this mixture in 10-15 second intervals, stirring gently and thoroughly after each burst. White chocolate can seize easily if overheated, so proceed with caution. You want it just melted enough to be smooth and easily drip from a spoon.
- Once perfectly melted, use a spoon to artistically drizzle the white chocolate over the top of the bars in a zig-zag pattern. This creates a visually appealing and delicious finish.
- Final Chill: Once drizzled, cover the baking pan and return it to the refrigerator to chill for at least another 1 hour. For the firmest texture and best slicing experience, chilling overnight is highly recommended.
Precise Slicing for Perfect Triangles
Once your Cranberry Bliss Bars are thoroughly chilled and firm, they are ready for their iconic triangular cut. Follow these steps for professional-looking results:
- Remove from Pan: Gently remove the entire slab of bars from the baking pan by lifting the parchment paper edges. Transfer it to a clean cutting board.
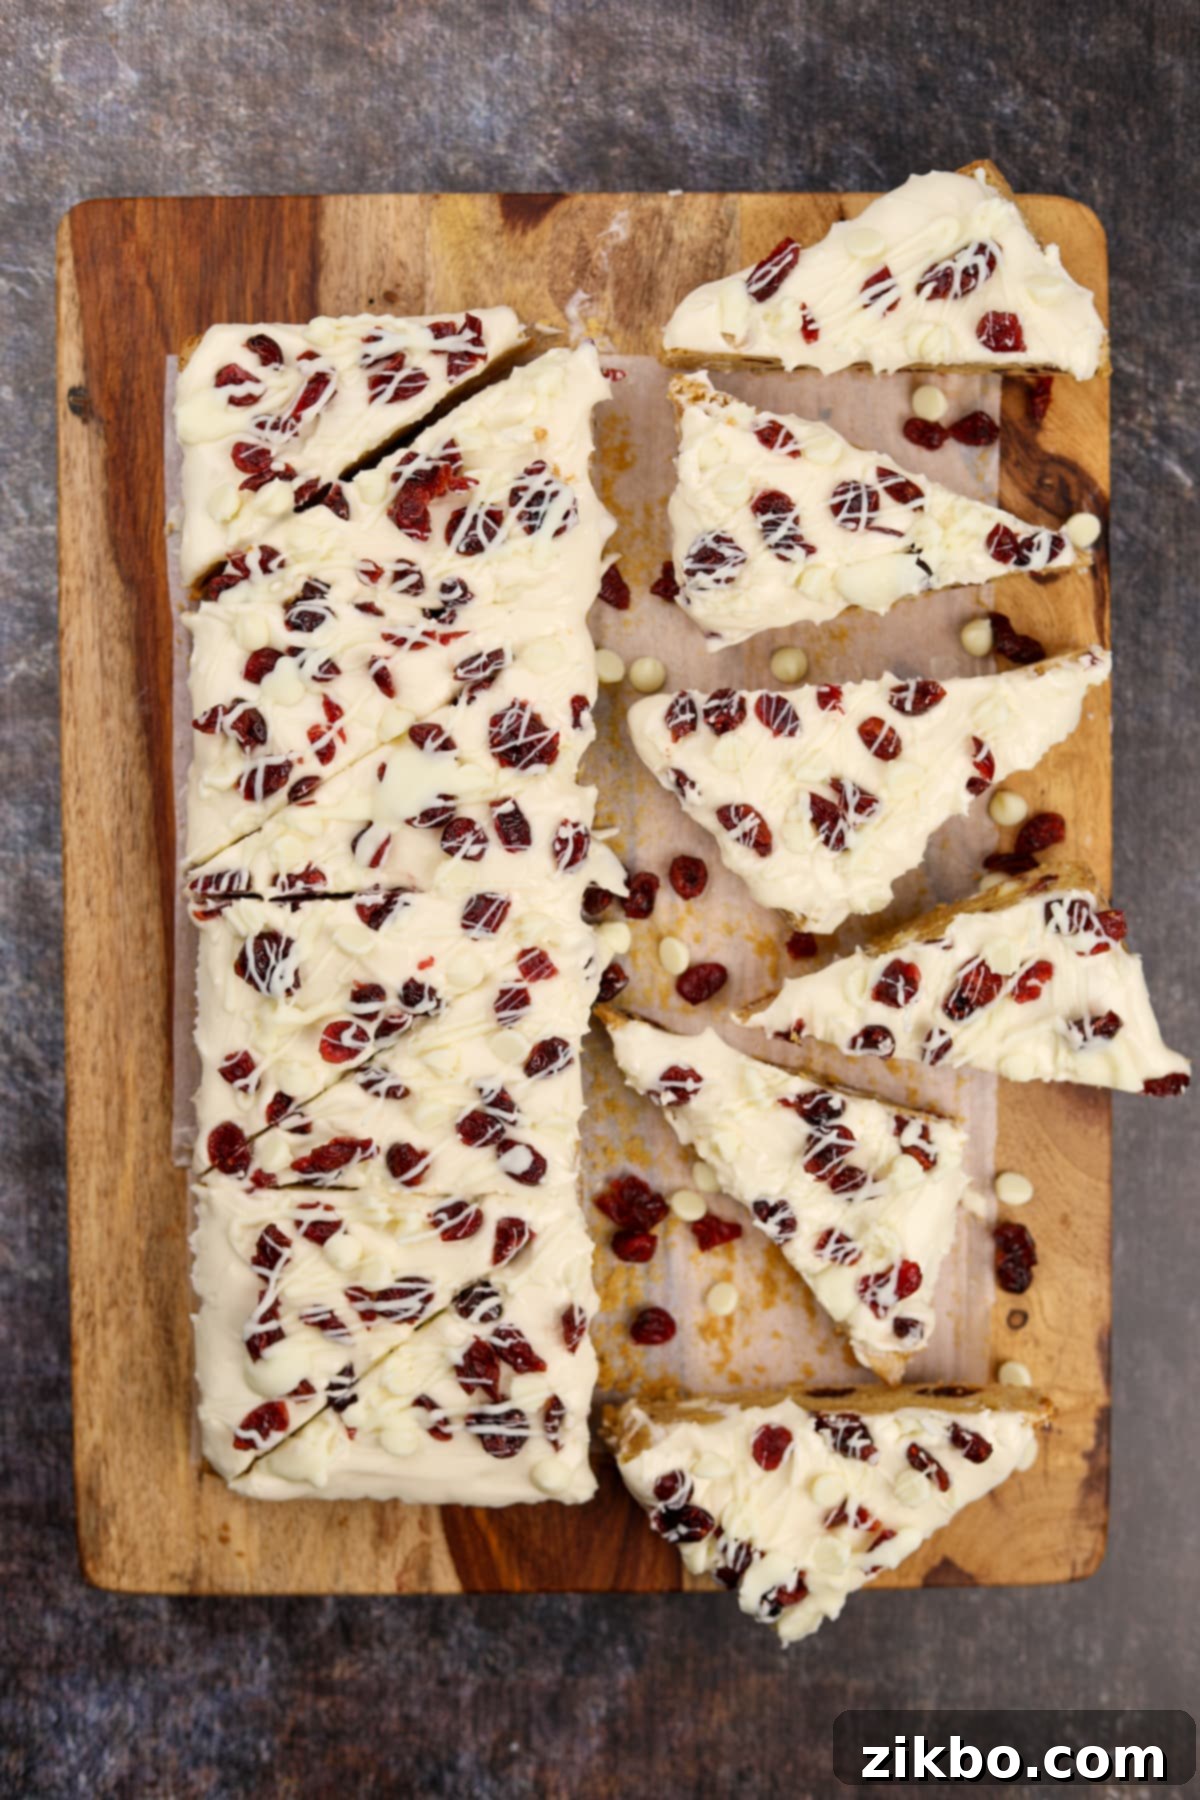
- Initial Cuts: Use a sharp knife to first slice the bars **in half lengthwise**. Then, slice the resulting two long halves in half widthwise. Next, slice each of those widthwise halves into half again. At this point, you should have **8 equal rectangular segments**.
- Create Triangles: Take each of those 8 rectangular segments and slice it **in half diagonally**. This will yield 16 perfectly shaped triangular Cranberry Bliss Bars.
Now, serve your magnificent homemade Cranberry Bliss Bars and revel in the bliss!
Storing and Freezing Your Cranberry Bliss Bars
To keep your homemade Cranberry Bliss Bars fresh and delicious for as long as possible, proper storage is crucial, especially due to the dairy-based cream cheese frosting.
Once sliced, transfer the bars to an airtight container. To prevent them from sticking together, place sheets of waxed paper or parchment paper between each layer. These homemade delights can be stored **in the refrigerator for up to 3 days**. They are not suitable for prolonged storage at room temperature, as the cream cheese frosting requires refrigeration. In fact, they taste best when served chilled, allowing the flavors to meld beautifully and the frosting to remain firm.
Can You Freeze Cranberry Bliss Bars? Absolutely!
Yes, Cranberry Bliss Bars are excellent candidates for freezing, making them a perfect make-ahead treat. They freeze remarkably well, even with the cream cheese frosting and dried cranberry topping intact!
I recommend **flash-freezing** them first. Arrange the individual bars in a single layer on a parchment-lined baking tray and place them in the freezer until they are solid. Once frozen solid, you can transfer them to a freezer-safe airtight container, using parchment paper to separate layers, or wrap them individually in plastic wrap and then place them in a larger sealed and labeled freezer bag. To enjoy, simply thaw them in the refrigerator for a few hours or at room temperature for about 30 minutes. Unwrap them before thawing if individually wrapped.
Expert Tips for Blissful Baking Success
Achieve perfection with your homemade Cranberry Bliss Bars by following these pro tips:
- Elevate the Decadence: For an even more luxurious experience, feel free to add extra white chocolate chips to the topping, or incorporate complementary garnishes. Think finely diced candied orange peel for an intensified citrus note, or perhaps a sprinkle of candied walnuts for added crunch and richness.
- Skip Fresh Orange Zest on Top: For years, I used grated orange zest because I loved its vibrant color. However, I learned that unless the zest is completely dry, it tends to cause pooling, bleeding color, and unwanted liquid on the frosting. To achieve that beautiful orange aesthetic without compromise, I now recommend using **candied orange peel** or **dried orange zest** as a garnish. Save the fresh zest for the blondie batter or frosting itself!
- Don’t Panic if They Crack: The blondie base layer, especially when still warm, can be somewhat delicate. If your bars crack during transfer or cooling, don’t worry! You can gently press the cracked pieces back together. Once the bars are thoroughly chilled, the crack will usually set and become less noticeable. Plus, the generous layer of creamy frosting will expertly hide any minor imperfections, leaving you with beautifully presented bars.
Creative Variations and Simple Substitutions
While the classic Cranberry Bliss Bar is a favorite, these delicious treats are also incredibly versatile! Here are some ideas to customize your batch:
- Go Gluten-Free: Easily adapt this recipe by swapping out regular all-purpose flour for your favorite 1-to-1 gluten-free baking mix. I’ve personally tested this recipe with Bob’s Red Mill 1-to-1 baking flour, and the results were phenomenal! My husband even brought a batch to a work function, and everyone raved about them, completely unaware they were gluten-free. Just remember that gluten-free baking sometimes requires an extra few minutes in the oven, so always rely on the toothpick test for doneness.
- Valentine’s Day Delight: Starbucks sometimes features their Cranberry Bliss Bars around Valentine’s Day. To add an extra romantic touch to your homemade version, consider using a sharp heart-shaped cookie cutter to cut out individual hearts from the chilled blondie base before decorating with the frosting, dried cranberries, and white chocolate drizzle. It’s a sweet gesture for your loved ones!
- Strawberry Bliss Bars: For a delightful twist on the original, swap the dried cranberries for freeze-dried strawberries. These will provide a similar tangy burst of fruit flavor and a beautiful pink hue, perfect for a spring or summer celebration, or simply to enjoy a different fruity profile.
Frequently Asked Questions (FAQ) About Cranberry Bliss Bars
Traditionally, these delightful orange and cranberry bars are a seasonal offering at Starbucks, typically appearing during the fall and winter holiday months. However, when you make your own at home using this copycat recipe, you can enjoy their festive flavors any time of year you desire!
No, due to the dairy-based cream cheese frosting, both Starbucks’ Cranberry Bliss Bars and your homemade copycat versions should always be stored in the refrigerator. They will spoil if left out at room temperature for more than 1-2 hours. Always keep them chilled for food safety and optimal taste and texture.
Melting white chocolate chips can be tricky, as they are very prone to seizing and becoming hard if overheated. To prevent this, combine ¼ cup of white chocolate chips with ½ teaspoon of coconut oil (or shortening) in a small, microwave-safe bowl. Heat in 10-15 second intervals, stirring gently and thoroughly after each session. Continue until the chocolate begins to melt easily as you stir. The ideal consistency is when the melted chocolate drizzles smoothly from a spoon with minimal effort. Patience and low heat are key here!
The orange flavor is a signature element that truly sets Cranberry Bliss Bars apart. It provides a bright, zesty counterpoint to the sweetness of the white chocolate and the tartness of the cranberries. The orange extract (or zest in the batter) adds a complex, aromatic depth that prevents the bars from being overly sweet and gives them their distinctive “blissful” character, making them incredibly festive and memorable.
More Holiday Favorites You’ll Love
- Homemade Cranberry Sauce
- Sweet Potato Casserole with Pecans
- Oven Roasted Whole Chicken
- Cranberry Pretzel Salad
If you absolutely loved this recipe for homemade Cranberry Bliss Bars, please let me know by leaving a 5-star review in the recipe card below or sharing your thoughts in the comments! You can also tag me on Instagram @dashfordinner to share your beautiful creations. Your feedback truly makes my day!
Cranberry Bliss Bars (Starbucks Copycat Recipe)
Print
Pin
Rate
Dessert, Desserts
American
35
minutes
25
minutes
3
hours
4
hours
16
bars
428
kcal
Dorothy Bigelow
Ingredients
-
1
cup
butter
melted (2 sticks, salted) -
1
cup
packed brown sugar -
½
cup
white sugar -
2
eggs -
1
teaspoon
vanilla extract -
1
teaspoon
orange extract -
1
teaspoon
baking powder -
½
teaspoon
salt -
½
teaspoon
ground ginger -
⅛
teaspoon
ground cinnamon
(optional) -
2
cups
all purpose flour
or gluten-free flour -
¾
cup
white chocolate chips -
¾
cup
dried cranberries
Cream cheese frosting:
-
8
ounces
cream cheese
brick-style (1 package), softened to room temperature -
1 ½
cups
powdered sugar -
½
teaspoon
vanilla extract -
½
teaspoon
orange extract
Topping:
-
½
cup
dried cranberries
chopped -
¼
cup
white chocolate chips
for melting -
½
teaspoon
coconut oil
or shortening
Instructions
-
Preheat the oven to 350ºF (177ºC) and line a 9X13” (23x33cm) baking pan with parchment paper.
-
Pour the melted butter into a large bowl, along with the brown sugar and white sugar. Whisk well to combine.
-
Add the eggs, 1 teaspoon vanilla extract, and 1 teaspoon orange extract; whisk until completely incorporated.
-
In a separate bowl, add in the baking powder, salt, ground ginger, cinnamon (if using), and flour. Whisk to combine.
-
Pour the dry ingredients into the wet ingredients and fold them in with a silicone spatula, just until combined and lump-free (be careful to not overmix the batter).
-
Add ¾ cup of white chocolate chips and ¾ cup of dried cranberries into the batter and fold them in until evenly distributed.
-
Spread the mixture into the prepared baking pan, smoothing it into an even layer.
-
Bake in the pre-heated oven for 22-26 minutes, or until a toothpick comes out mostly clean with a few moist crumbs.
-
Remove from the oven and cool for 1 hour, then transfer to the fridge to chill for 1-2 hours (or the in freezer for 20-40 minutes). See notes* for tips.
The Frosting:
-
Beat the cream cheese, ½ teaspoon of vanilla extract, and ½ teaspoon orange extract with a handheld electric mixer (or stand mixer) on medium-low speed until smooth and creamy.
-
Add the powdered sugar a little bit at a time, mixing on low speed until it’s incorporated into the cream cheese. Continue to add the powdered sugar in several additions, scraping down the sides of the bowl as necessary.
-
Gently spread the cream cheese frosting on top of the cooled cranberry and white chocolate bars, smoothing it out evenly.
Topping:
-
Chop the cranberries coarsely, and sprinkle them over the surface of the cream cheese frosting.
-
White chocolate drizzle. Add the white chocolate chips to a microwave-safe bowl, along with the coconut oil (or shortening).
-
Heat in the microwave for 15 seconds, then swirl the bowl or stir it gently with a spoon. Heat in 10 second intervals, stirring after each interval, until the chocolate begins to melt. Stir until the chocolate melts completely and easily drips from a spoon.
-
Use a spoon to drizzle the white chocolate on top of the cranberry bliss bars, working in a zig-zag pattern.
-
If you have difficulty getting the chocolate to drizzle, heat it for another 5 seconds and stir well, then try again. Be very careful not to overheat the chocolate, as white chocolate can and will clump together if it is overheated.
-
Place the bars in the fridge to chill for at least 1-2 hours (or in the freezer for 20-40 minutes), or overnight if possible.
Slicing:
-
Carefully remove the bars from the pan using the sides of the parchment liner.
-
Make a cut lengthwise, cutting the bars in half. Then slice it in half widthwise, and each of those halves in half again (you should have 8 square bars).
-
Slice each bar in half diagonally, leaving you with a total of 16 bars (well…triangles).
-
Transfer to an airtight container and keep in the refrigerator for up to 3 days. Freeze for up to 3 months.
Did you try this recipe?
Tag me at @dashfordinner and share your photos!
Notes
Freezing: Place the bars on a parchment-lined baking sheet. Place the baking sheet in the freezer. Once the bars are frozen solid, transfer them to an airtight container and use parchment paper to separate the layers (or wrap the bars individually and place them in a freezer bag; unwrap before thawing).
Gluten-free: I’ve tested this recipe using Bob’s Red Mill 1-to-1 baking mix in place of the flour and it works perfectly! Like with most gluten-free baking, you may need to add an extra few minutes to the baking time; the best way to know if they are done is to use the toothpick test.
*Cooling tips: I like to slide the bars carefully out of the baking pan by lifting the parchment paper. The bars can crack easily doing it this way, so you have to be really gentle. If they crack you can firmly press them together; once chilled the crack should be mostly healed. Once the bars are ready to chill in the fridge (or freezer), I recommend placing them back in the cooled pan first – this helps to hold their shape. If you have the time, I highly recommend making the bars the day before so the topping has plenty of time to chill.
Nutrition
Calories:
428
kcal
|
Carbohydrates:
58
g
|
Protein:
4
g
|
Fat:
21
g
|
Saturated Fat:
13
g
|
Polyunsaturated Fat:
1
g
|
Monounsaturated Fat:
6
g
|
Trans Fat:
0.5
g
|
Cholesterol:
68
mg
|
Sodium:
258
mg
|
Potassium:
103
mg
|
Fiber:
1
g
|
Sugar:
45
g
|
Vitamin A:
578
IU
|
Vitamin C:
0.1
mg
|
Calcium:
72
mg
|
Iron:
1
mg
Please note that some of my blog posts here at Dash for Dinner may contain affiliate links. If you make a purchase through these links, I will get a small commission at no additional cost to you. Please see my Disclaimer for more information.
