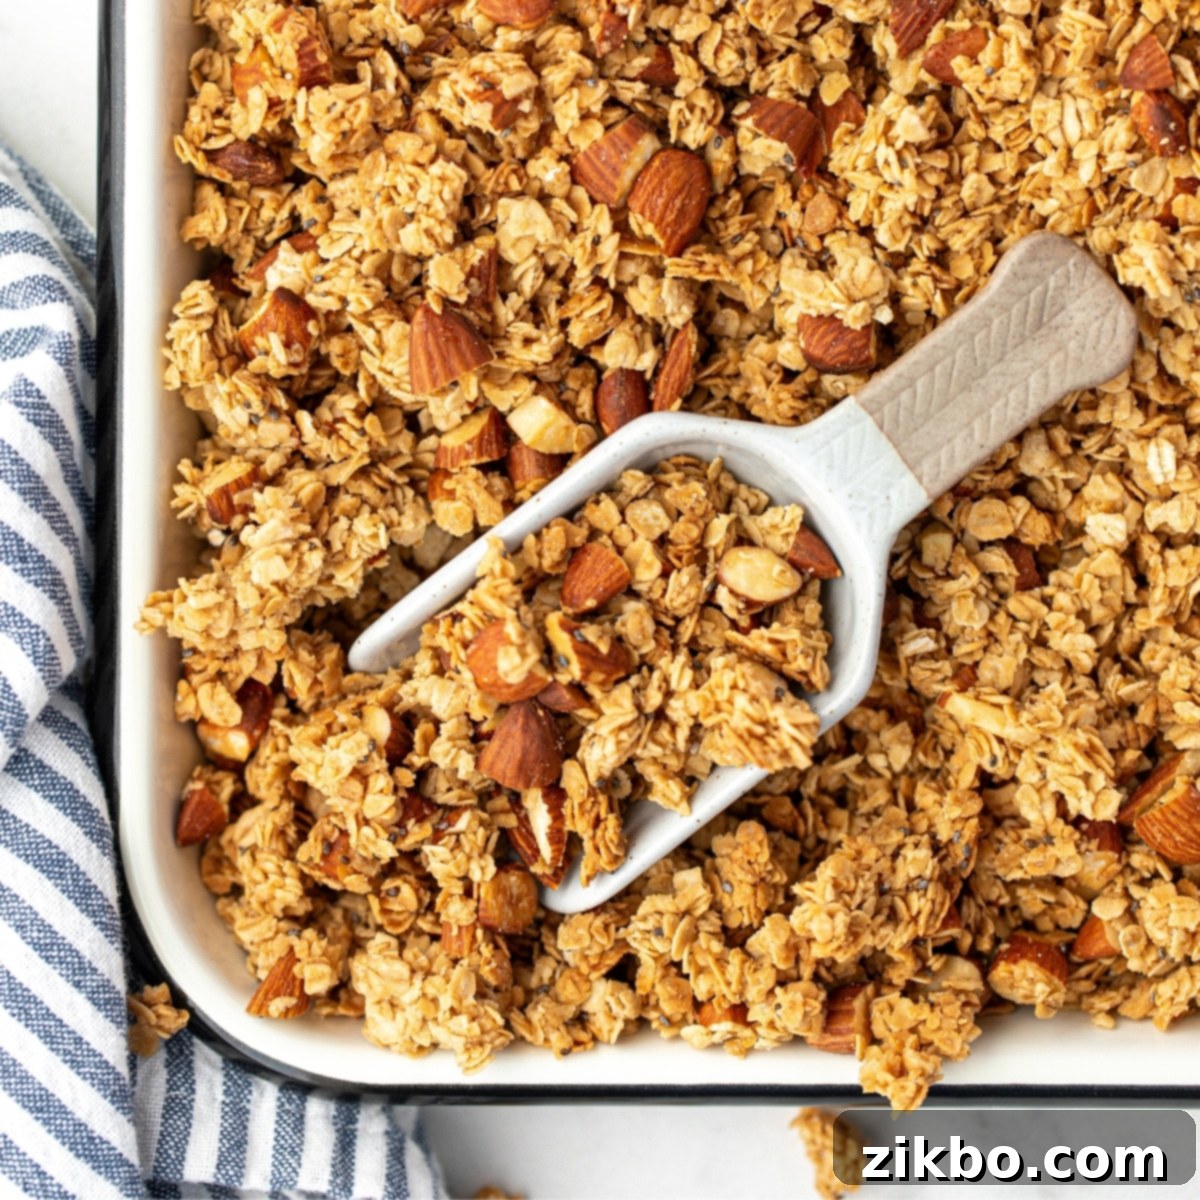
The Ultimate Homemade Honey Almond Granola Recipe: Crunchy, Healthy & Easy
Ready to elevate your breakfast game? This **honey almond granola recipe** is not just made with simple, wholesome ingredients; it tastes *infinitely* better than any bag you’ll find at the grocery store. Plus, making it yourself is incredibly cost-effective, saving you money without sacrificing flavor or quality.
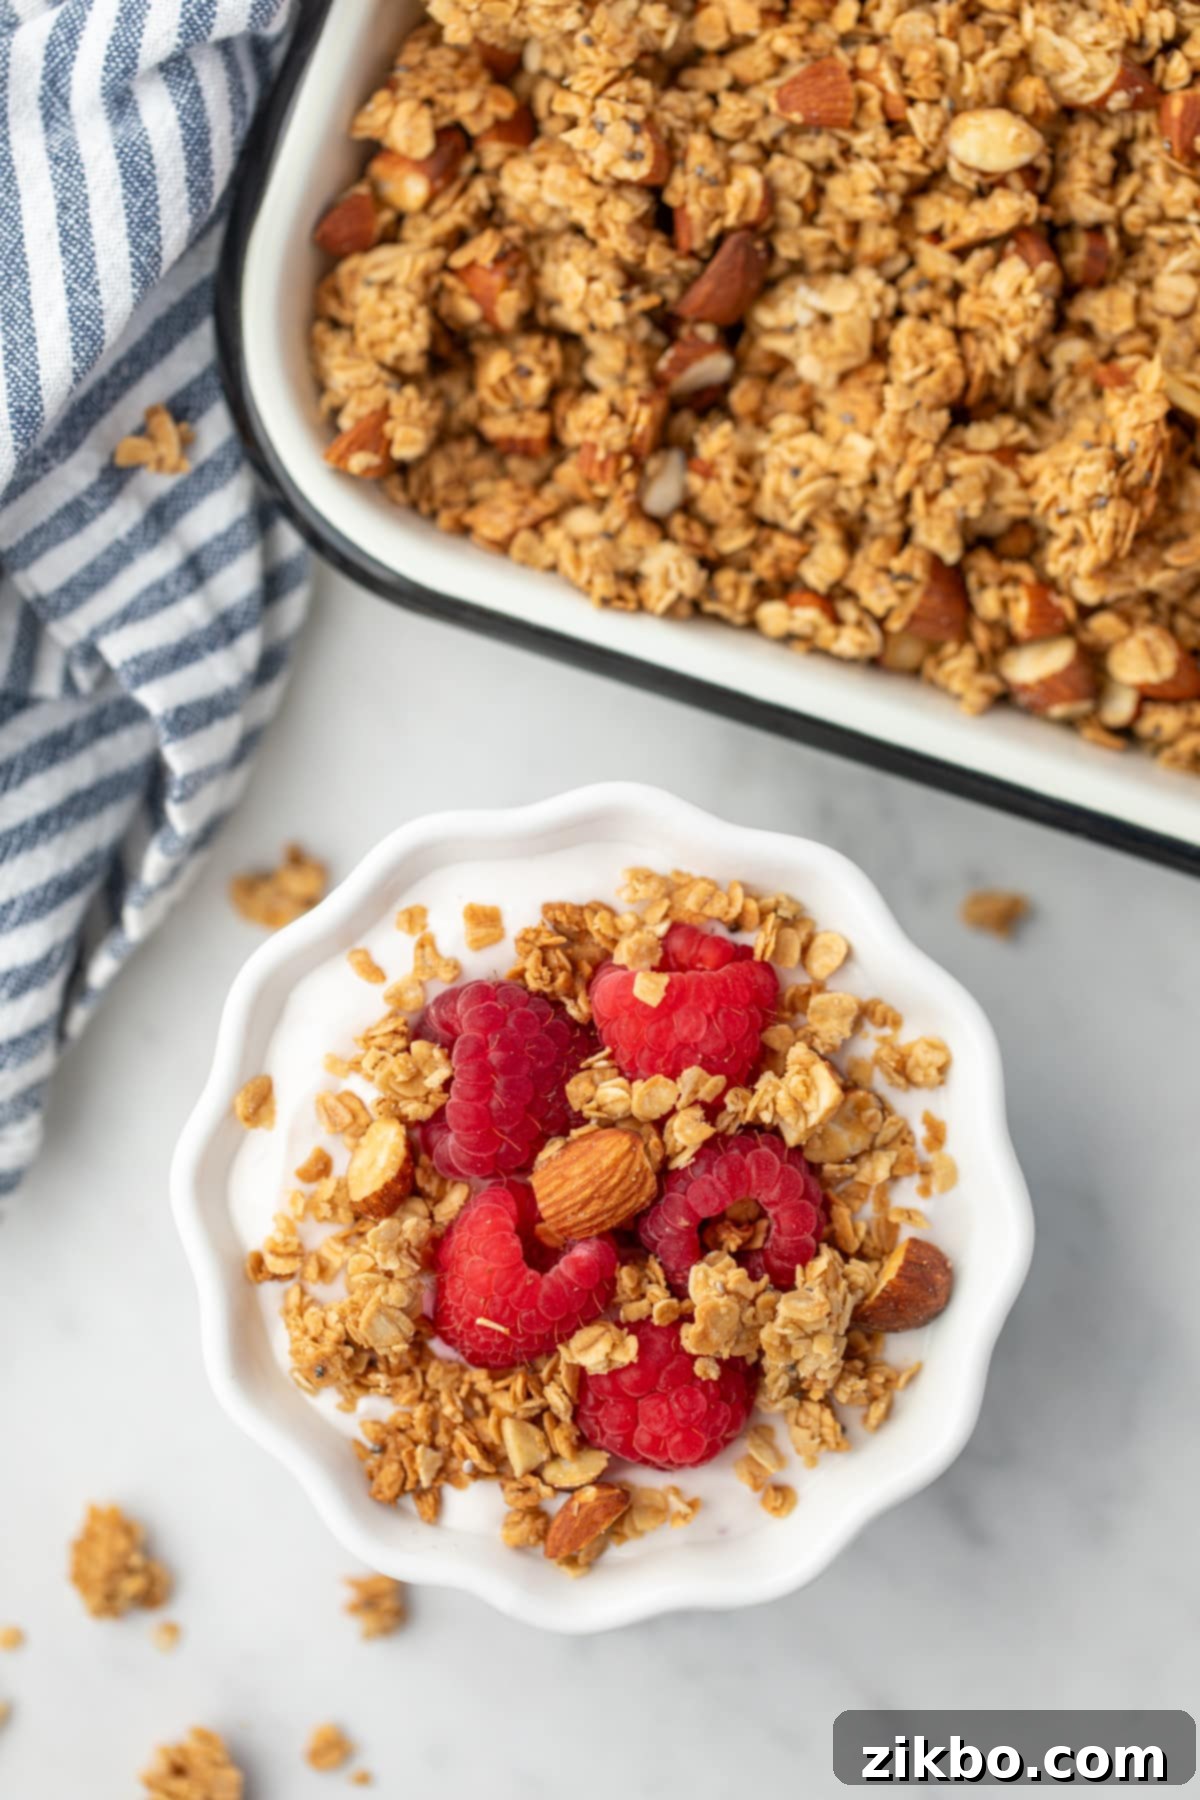
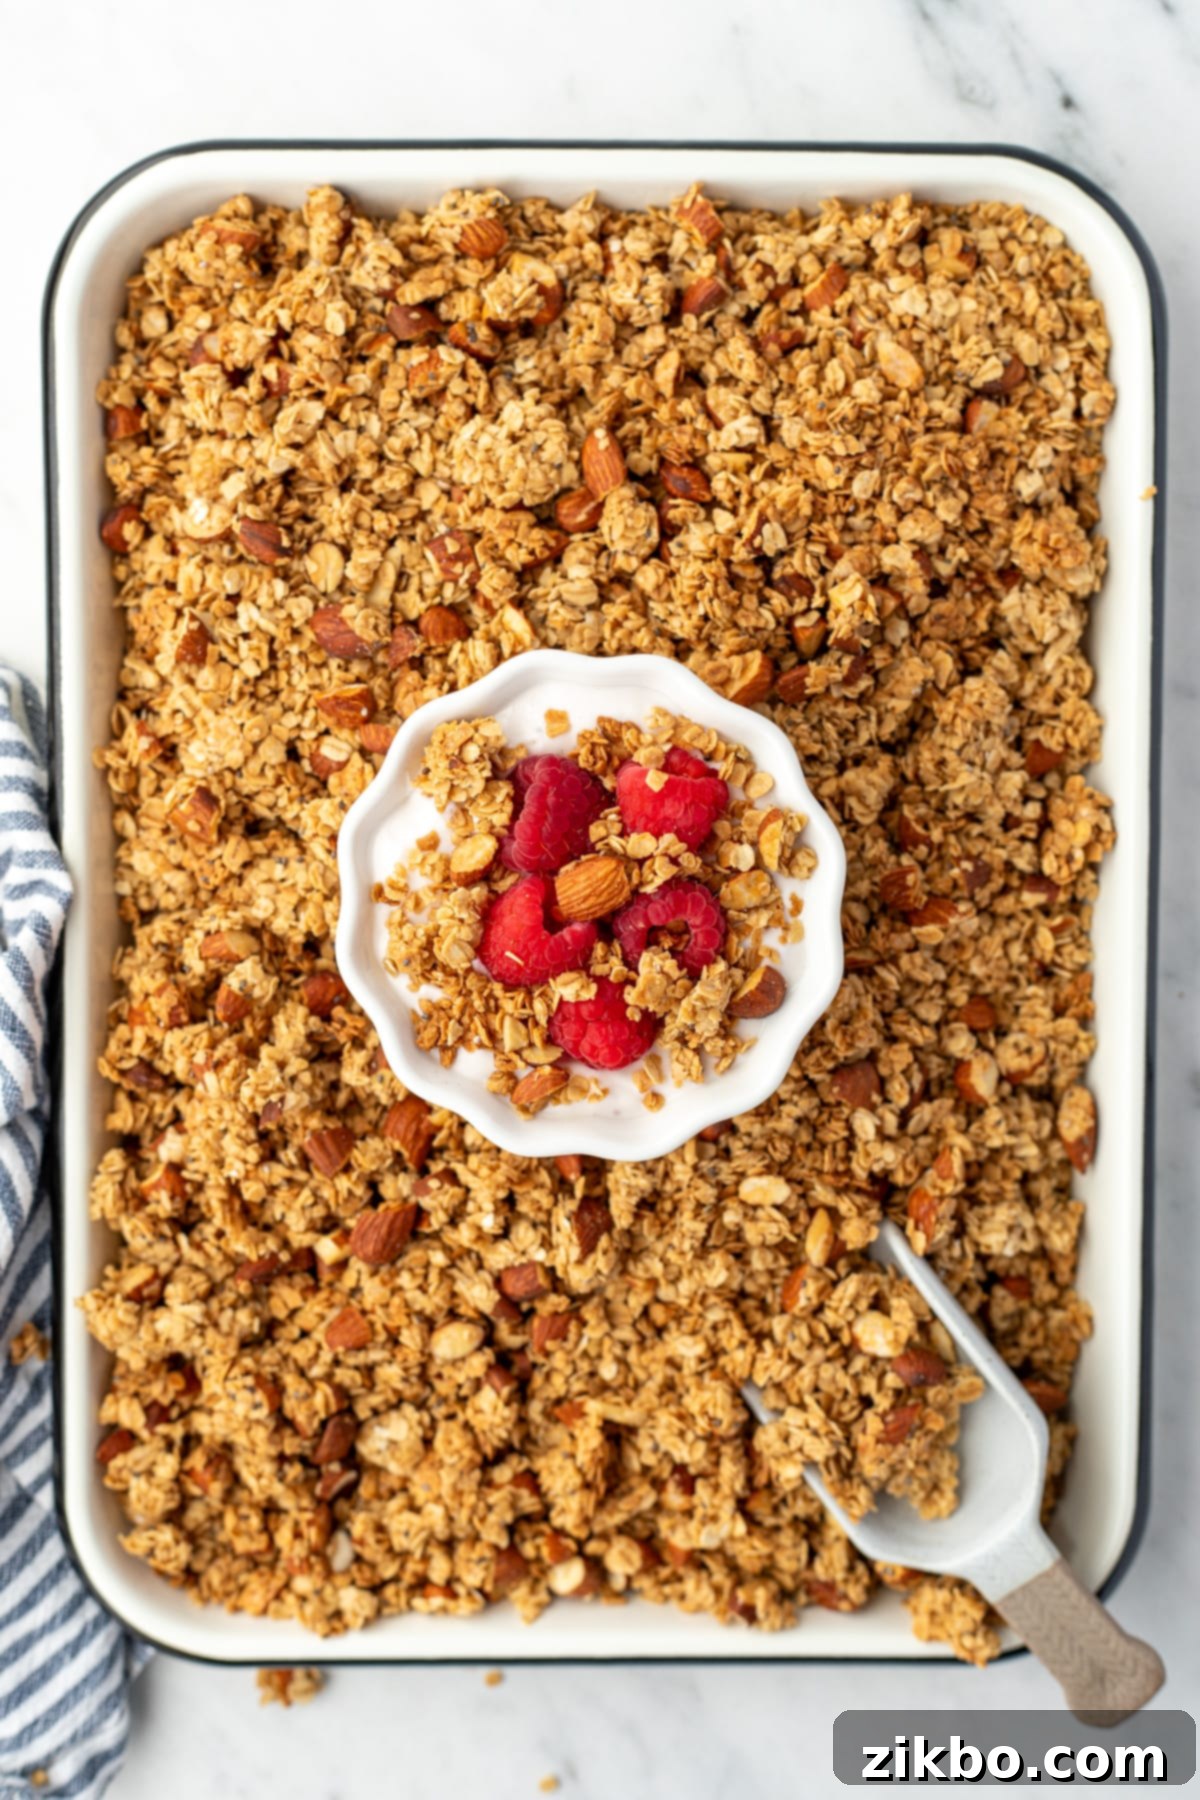
Versatile and utterly delicious, you can enjoy this homemade granola in countless ways. Serve it alongside fresh seasonal fruit, sprinkle it generously over a creamy bowl of yogurt, or simply enjoy it with milk as a hearty, satisfying breakfast cereal alternative. It’s the perfect way to kickstart your day or fuel up with a wholesome snack!
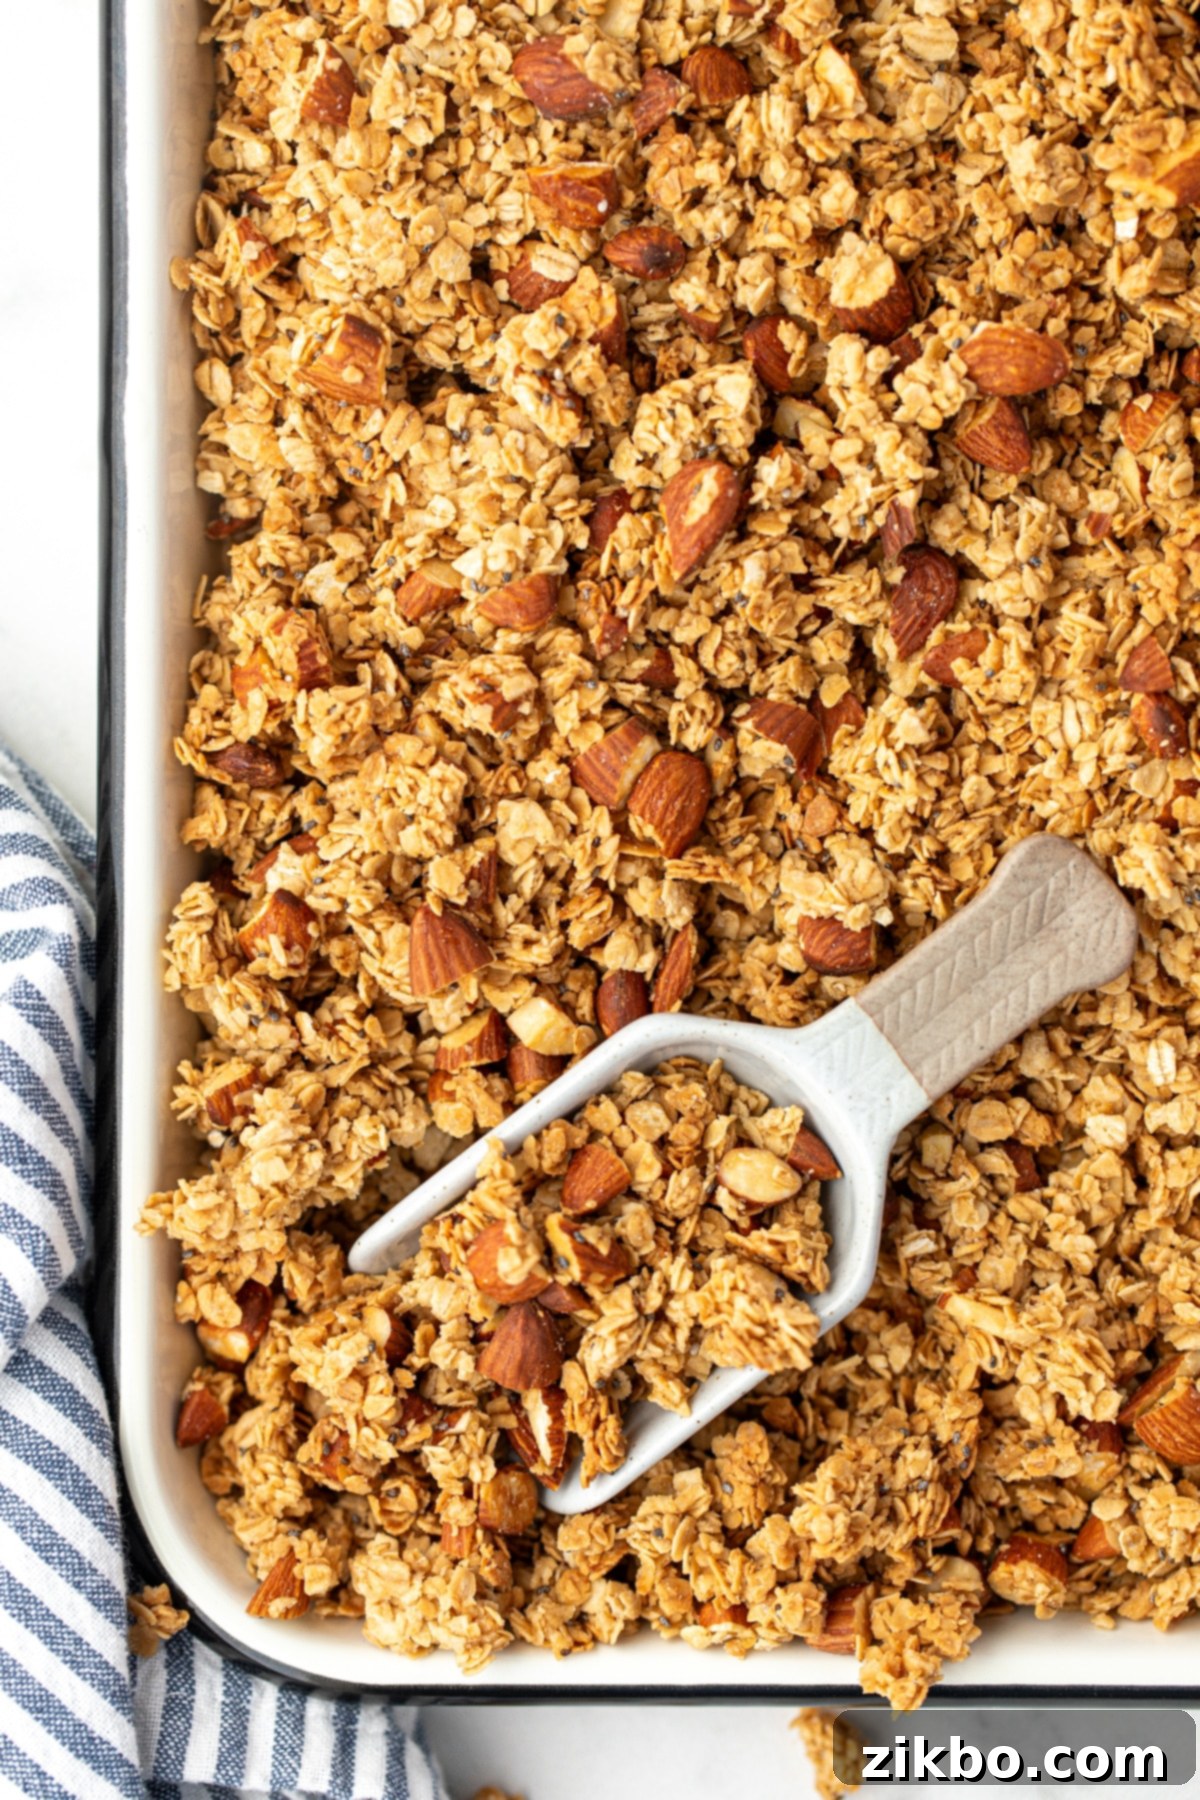
I’ve been a devoted homemade granola enthusiast for well over a decade – perhaps closer to 15 years now! Through countless batches, I’ve always strived to replicate the magic of my favorite store-bought option, Nature’s Path Honey Almond Granola. For years, I tweaked my trusty recipe, trying to capture that elusive perfect crunch and balanced sweetness, but it always fell just short.
The turning point came when I decided to truly **reverse-engineer the granola-making process** by meticulously analyzing the ingredients list of that beloved store-bought bag. What followed were MANY attempts – and believe me, I mean *many* – but the dedication paid off! I finally cracked the code, and now, in my humble opinion, my homemade granola isn’t just as good as the store-bought version; we genuinely think it’s quite a bit better! This recipe delivers on all fronts: incredible flavor, perfect crunch, and that satisfying homemade goodness.
Why You’ll Love This Homemade Granola
There are countless reasons to fall in love with making your own granola at home, and this honey almond version truly shines. Here’s why this recipe will become a permanent fixture in your kitchen:
- Fantastic for Meal Prep: This recipe yields a generous batch of granola, enough to last for several weeks. Investing a little time upfront means you’ll have delicious, healthy breakfasts and snacks ready to go for busy mornings or afternoon cravings. Store it in a large airtight container or pre-portion it into small bags or mason jars for ultimate convenience.
- Incredibly Budget-Friendly: Say goodbye to expensive store-bought bags! The cost of ingredients for this homemade granola is significantly lower, making it an excellent way to save money on your grocery bill. You get more granola for less, and you control the quality of every ingredient.
- Perfect for Quick & Easy Meals: Whether you’re rushing out the door or enjoying a leisurely morning, this granola is your best friend. Sprinkle it over creamy Greek yogurt with fresh berries for a vibrant parfait, enjoy it as a classic cereal with your favorite milk, or simply grab a handful as a satisfying, energy-boosting snack on the go.
- Healthier Choice: By making granola yourself, you have complete control over the ingredients. You can avoid excessive sugars, unhealthy oils, and artificial additives often found in commercial brands. This recipe uses natural sweeteners like honey and a controlled amount of brown sugar, alongside wholesome oats and almonds, giving you a nutritious boost.
- Fully Customizable: While this honey almond base is phenomenal on its own, it’s also a perfect canvas for customization. Add your favorite dried fruits, seeds, or spices to truly make it your own – we’ll explore more options further down!
Key Ingredients for the Perfect Granola
Creating truly exceptional granola starts with understanding the role each ingredient plays. This recipe uses a carefully selected blend to achieve that irresistible crunch and delightful flavor profile.
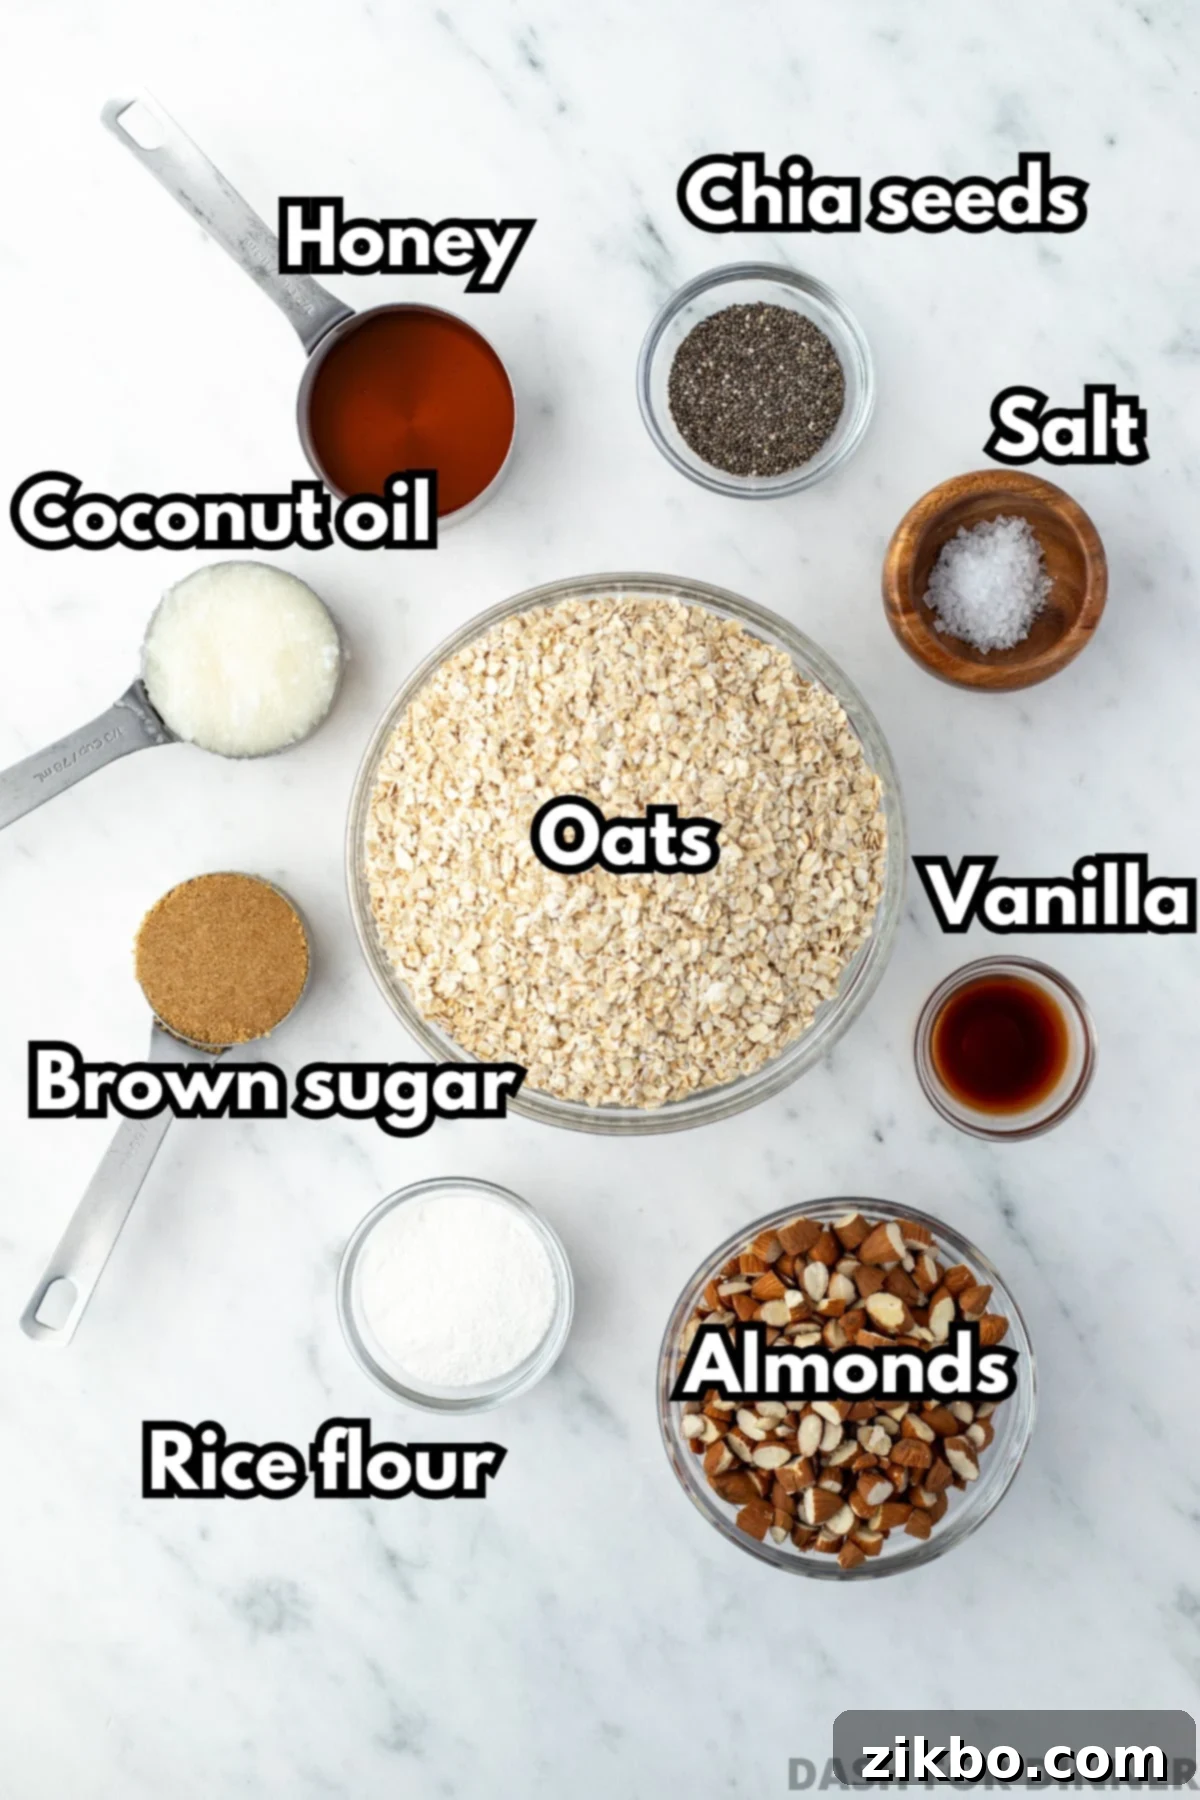
- Oats: This is the foundation of our granola. After extensive testing (and we mean *many* rounds!), we **highly recommend using quick oats** for this recipe. They absorb the liquid binders more efficiently and result in a wonderfully crisp, clump-forming granola that traditional rolled oats often struggle to achieve. While rolled oats can be used in a pinch, you’ll find the texture to be different. If only rolled oats are available, a quick pulse in a blender or food processor can break them down to a more “quick oat” like consistency. *Avoid instant oats, as they become mushy.*
- Almonds: You’ll need about 1 cup of chopped almonds. We suggest purchasing whole almonds and chopping them yourself just before baking. This not only ensures the highest level of freshness and a more robust flavor but also allows for varying sizes, adding fantastic texture to your granola. You can lightly toast them before adding for an even deeper nutty flavor.
- Coconut Oil (or Avocado Oil): This acts as a crucial binder and helps with browning and crispiness. We recommend using **refined coconut oil** because it is unflavored, allowing the honey and almond flavors to shine without any coconut taste. If coconut oil isn’t available or preferred, a neutral-flavored avocado oil can be used as a suitable alternative.
- Honey: The star of our “honey almond” show! Honey provides natural sweetness, a wonderful aroma, and helps bind the granola together. There’s no substitute for its unique flavor in this particular recipe.
- Rice Flour (Optional, but Highly Recommended): This is truly our secret ingredient and a game-changer for achieving that perfect, dry, and crunchy texture. Rice flour helps to absorb any excess moisture from the honey and oils, preventing the granola from becoming chewy or sticky. It was the missing piece in our quest for the BEST homemade granola! While optional, we strongly encourage you to include it for superior results.
You Will Also Need:
- Brown Sugar: While honey provides much of the sweetness, a touch of brown sugar adds depth, a subtle caramel note, and contributes to the granola’s golden-brown color and crisp clusters. It’s optional if you prefer less sweetness, but highly recommended for the best flavor balance.
- Chia Seeds (Optional): These tiny seeds add a nutritional boost, extra fiber, and a slight textural element. They also help a tiny bit with binding.
- Vanilla Extract: A splash of vanilla enhances all the other flavors, adding a warm, aromatic note that rounds out the granola beautifully.
- Sea Salt: A pinch of sea salt is essential. It balances the sweetness of the honey and brown sugar, making the flavors pop and preventing the granola from tasting overly sweet.
How to Make Perfectly Crunchy Honey Almond Granola
Crafting this homemade honey almond granola is a simple, rewarding process. With natural sweeteners like honey (and a touch of brown sugar) paired with wholesome oats, it’s a truly nourishing treat. Our absolute favorite way to savor it is layered with creamy Greek yogurt and vibrant berries in a convenient mason jar, making it ideal for delicious breakfasts on-the-go!
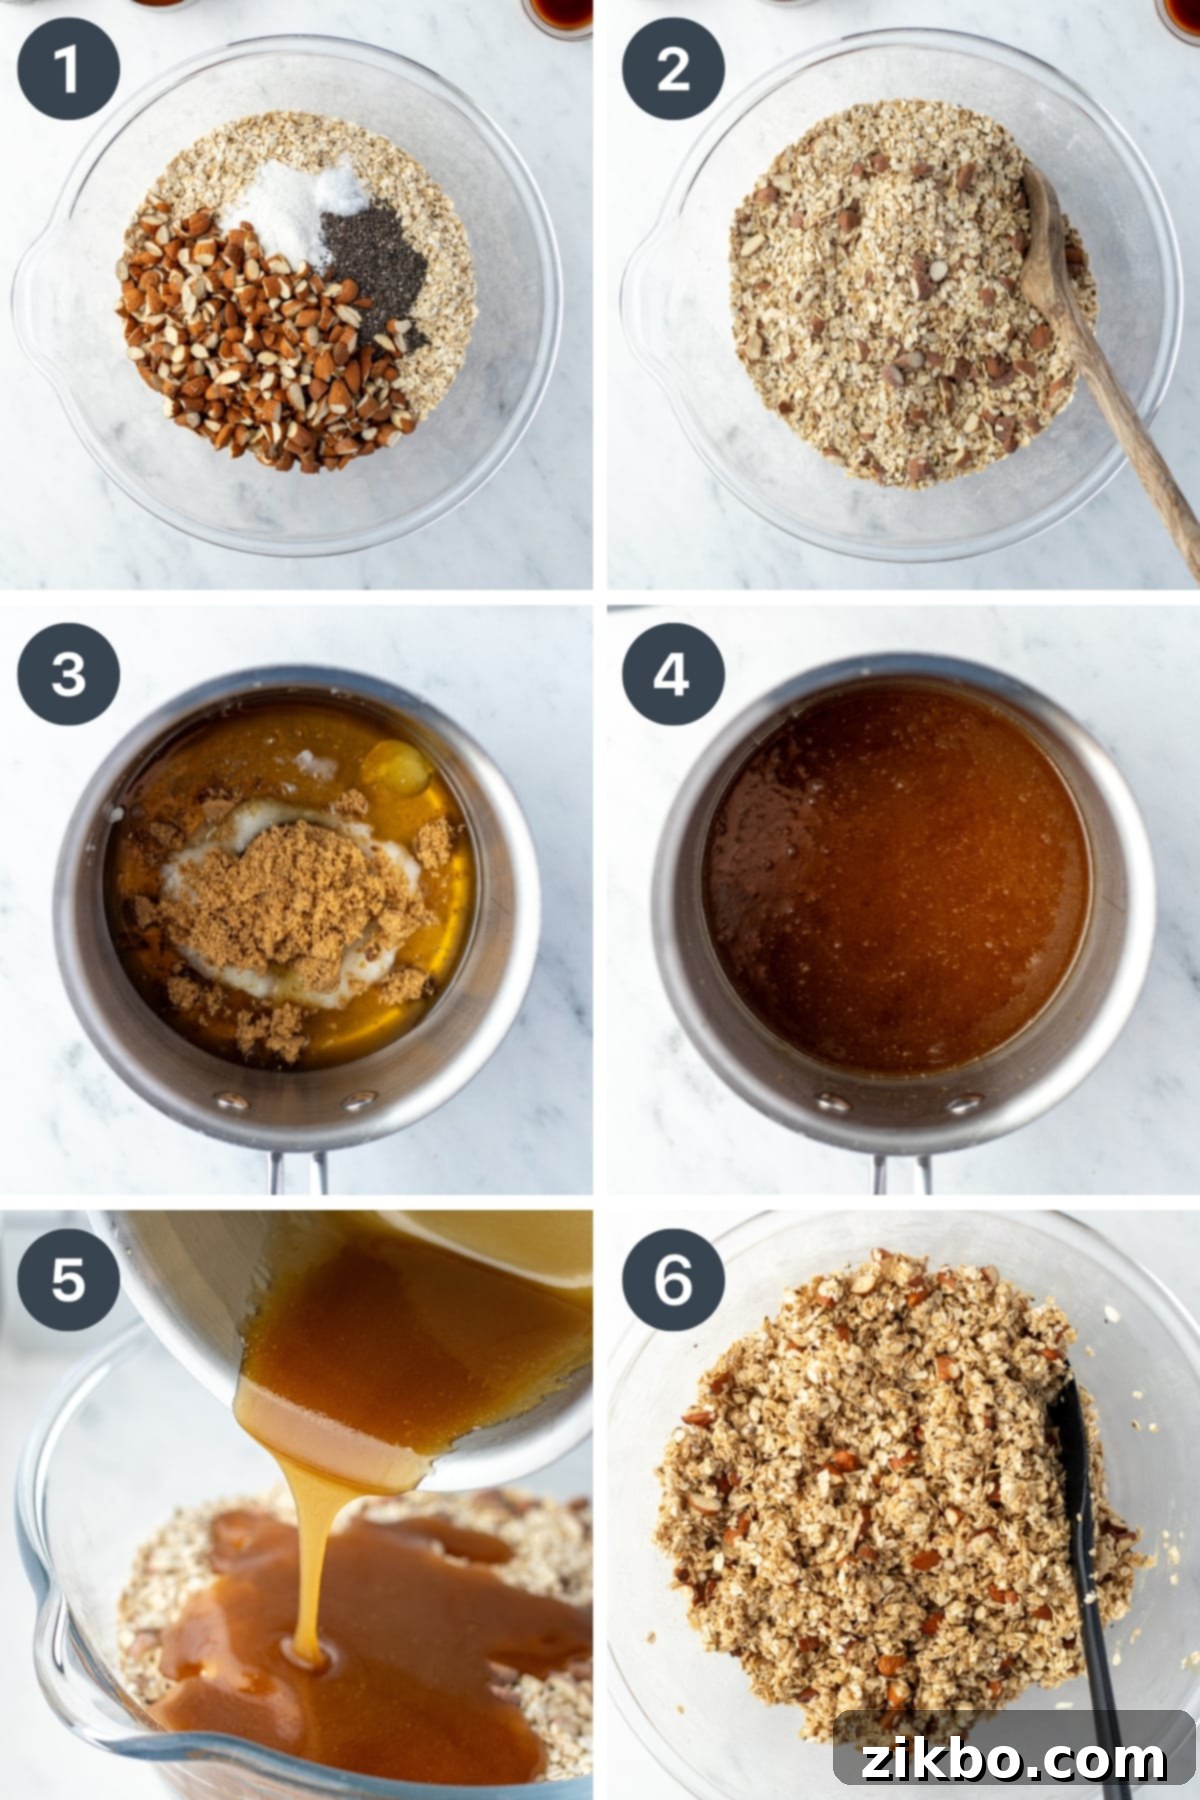
- Prepare Your Dry Ingredients: In a very large mixing bowl, combine the quick oats, chopped almonds, rice flour (if using), chia seeds (if using), and sea salt. Use a spatula or spoon to stir all of these dry ingredients together thoroughly until they are completely combined and evenly distributed.
- Create the Liquid Sweetener Mixture: In a small saucepan, add the coconut oil, honey, and brown sugar. Place the saucepan over low-medium heat, whisking continuously. The goal is to gently warm the mixture until the coconut oil melts, the honey becomes more fluid, and the brown sugar completely dissolves, resulting in a smooth, uniform consistency. Be careful not to boil it.
- Add Vanilla: Once the wet ingredients are smooth and well combined, remove the saucepan from the heat. Stir in the vanilla extract. Adding it off the heat preserves its delicate flavor.
- Combine Wet and Dry: Pour the warm honey and coconut oil mixture evenly over the oats and other dry ingredients in the large bowl.
- Coat Thoroughly: Using a silicone spatula, gently fold the honey mixture into the oats. Continue to fold until all the dry ingredients are lightly and evenly coated with the liquid binder. Ensure there are no dry patches at the bottom of the bowl.
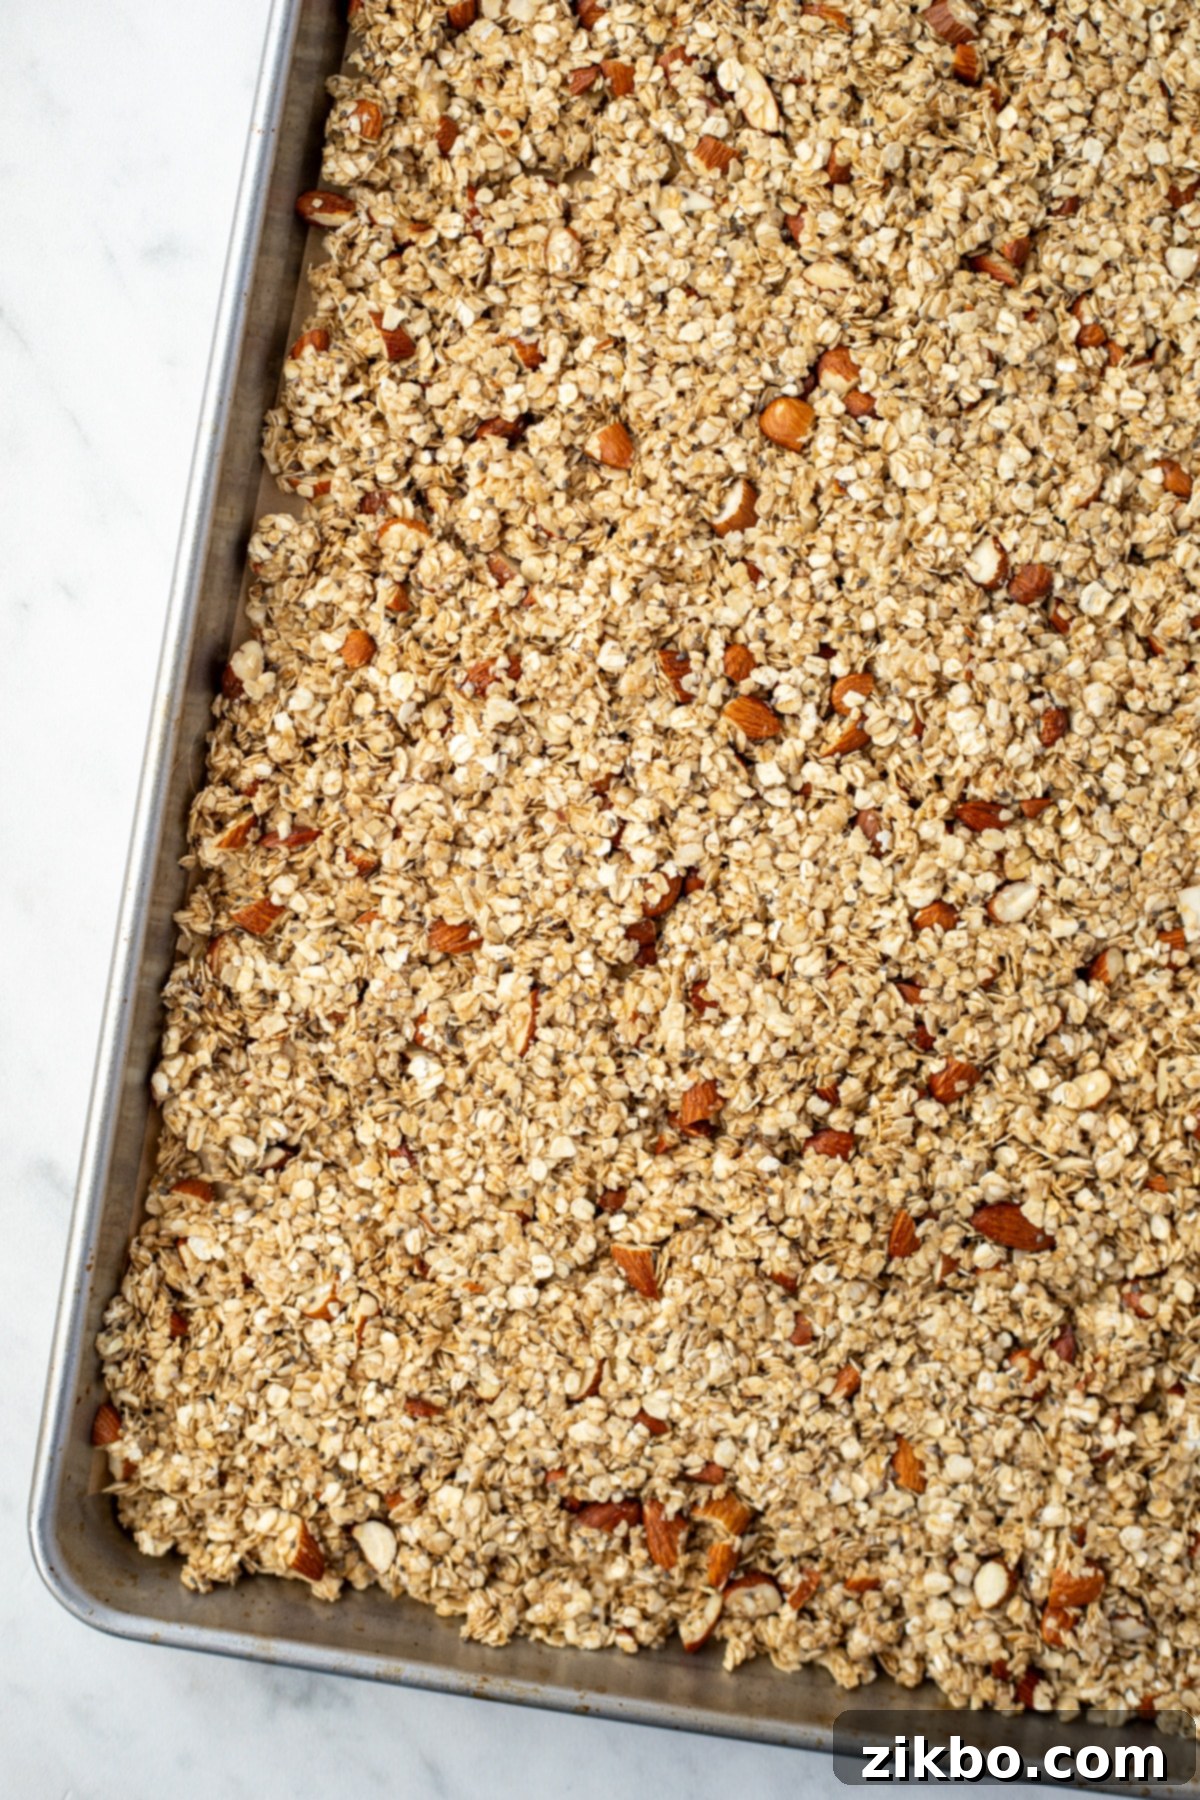
- Spread on Baking Sheet: Preheat your oven to 325ºF (160ºC). Line a large, rimmed baking sheet with parchment paper. Transfer the granola mixture onto the prepared baking sheet and spread it out into a single, even layer. This ensures consistent baking and crispiness.
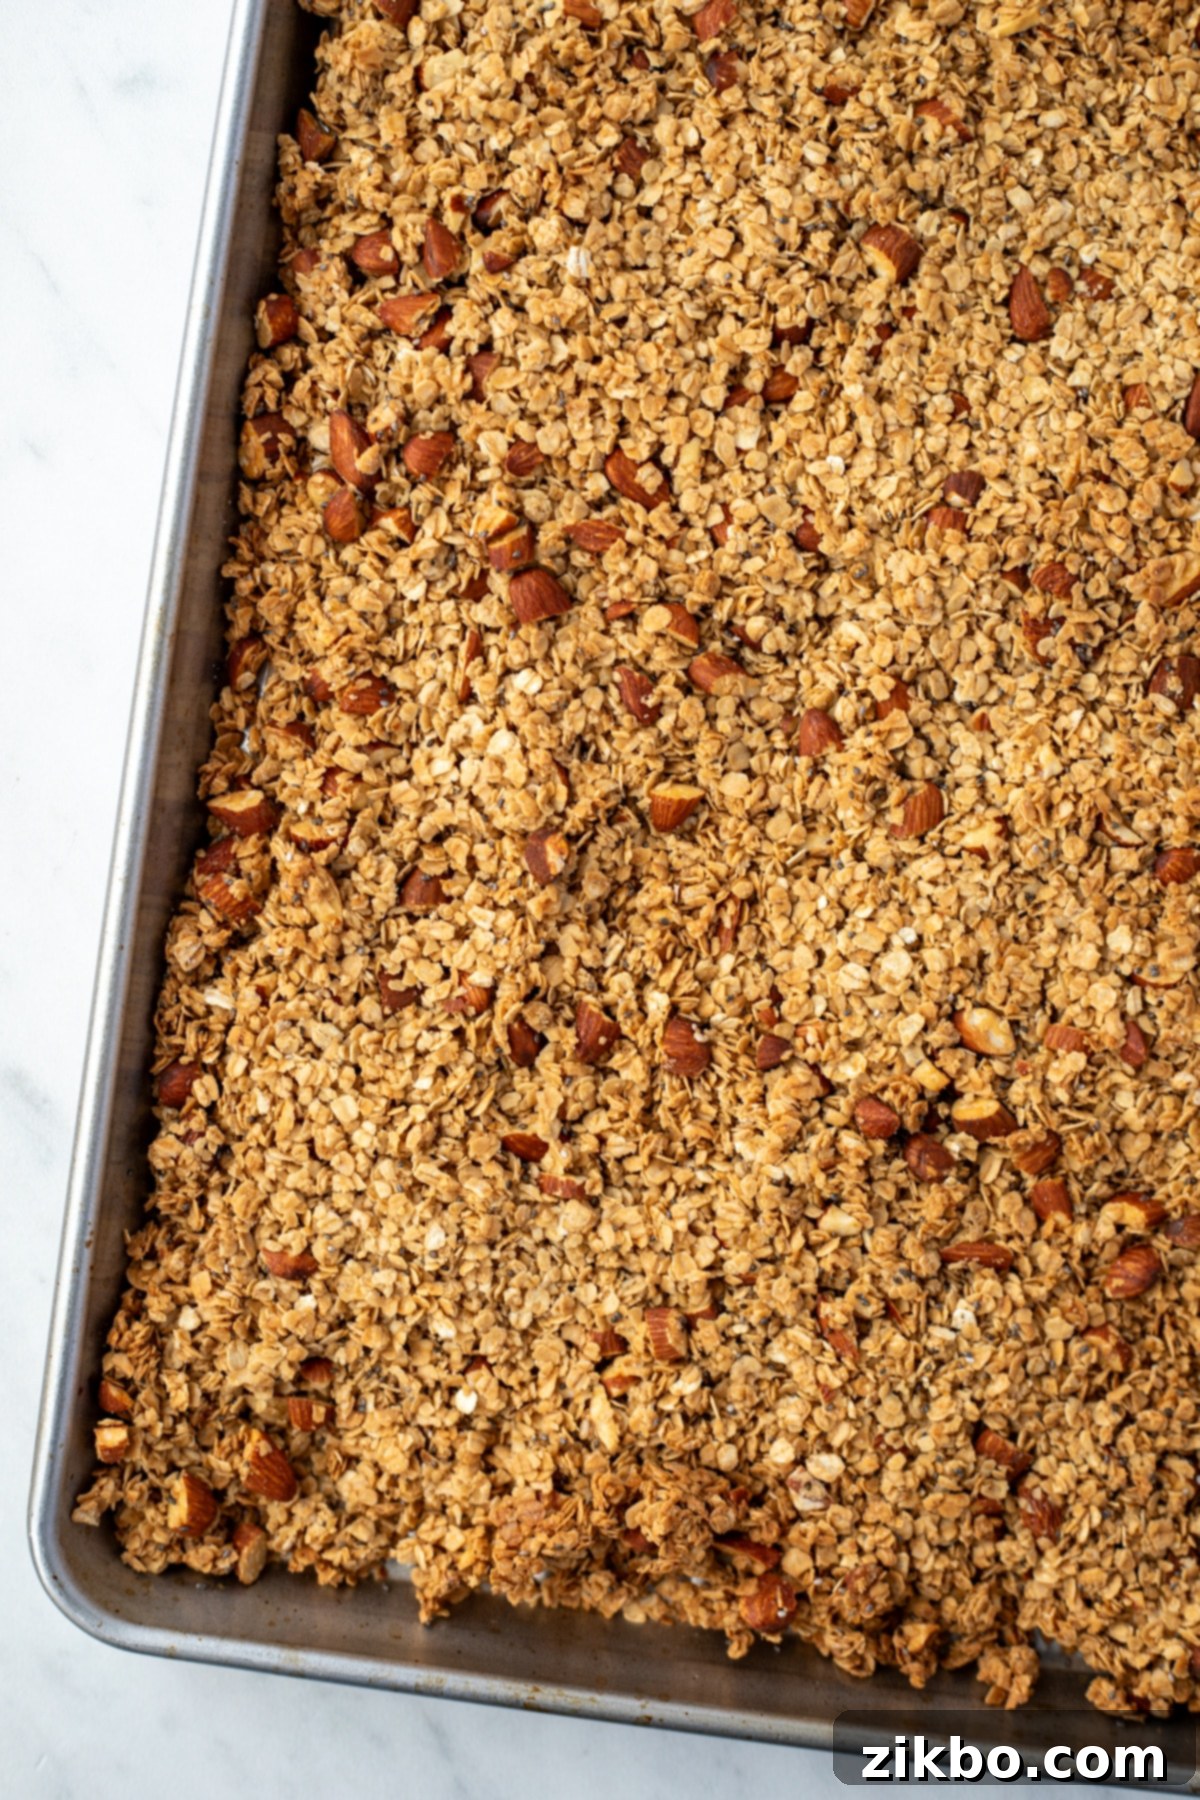
- Bake to Golden Perfection: Bake in the preheated oven for **25-30 minutes**. During the baking process, stir the granola twice (at the 10-minute and 20-minute marks) to ensure even browning. However, **do not stir during the last 8-10 minutes of baking**. This crucial step allows the granola to form those desirable clusters. Bake until it is beautifully golden brown with lightly toasted edges.
The Secret to Crunchy Granola: Proper Cooling
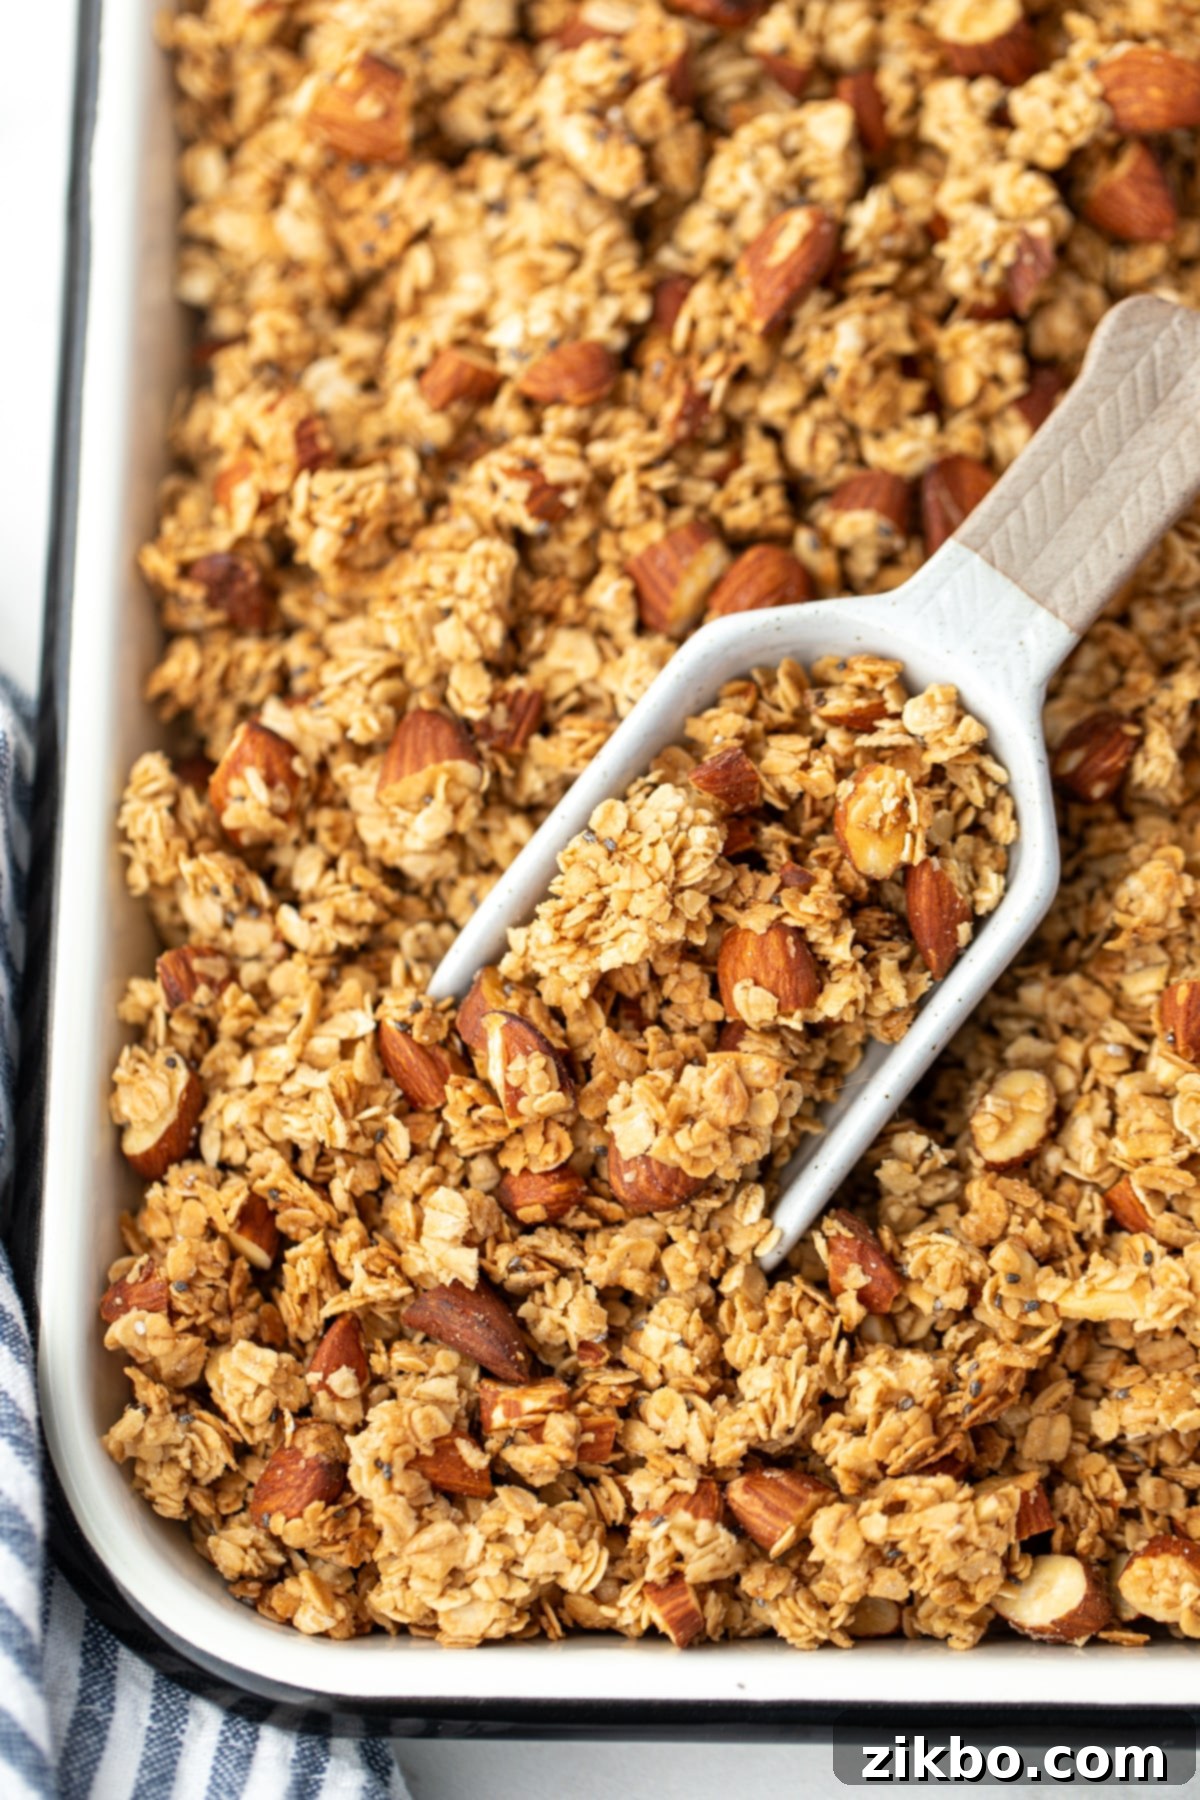
This step is often overlooked, but it’s **absolutely critical** for achieving truly crunchy, clumpy granola. Once your granola comes out of the oven, resist the urge to stir it immediately. Allow it to **cool undisturbed for 1-2 hours** on the baking sheet. During this time, it will continue to crisp up and form clusters.
After this initial cooling period, you can gently stir it to break up any excessively large chunks, leaving some lovely clusters for texture. Then, let it continue to cool completely to room temperature for another hour or so, stirring once or twice more if needed. It’s vital that the granola is not just cool, but also completely dry to the touch before storing. Any residual warmth or moisture is the enemy of crispness and can lead to premature spoilage.
Storing Your Homemade Granola for Lasting Freshness
Proper storage is key to maintaining the delightful crunch and freshness of your homemade granola. Follow these steps carefully to ensure your delicious creation lasts for weeks.
- It is paramount that your granola has **completely cooled down and is perfectly dry** after baking. This cannot be stressed enough. Any residual warmth or moisture will lead to sogginess and spoilage.
- After a total cooling time of **2-3 hours** (or more, if needed), your granola should be ready for storage. It should feel firm, crisp, and completely dry to the touch.
- If, after the cooling time, it still feels warm or moist, allow it to continue cooling and drying at room temperature, spread thinly on the baking sheet, **until it feels both cool and dry to the touch.** You can even leave it overnight if your climate is humid.
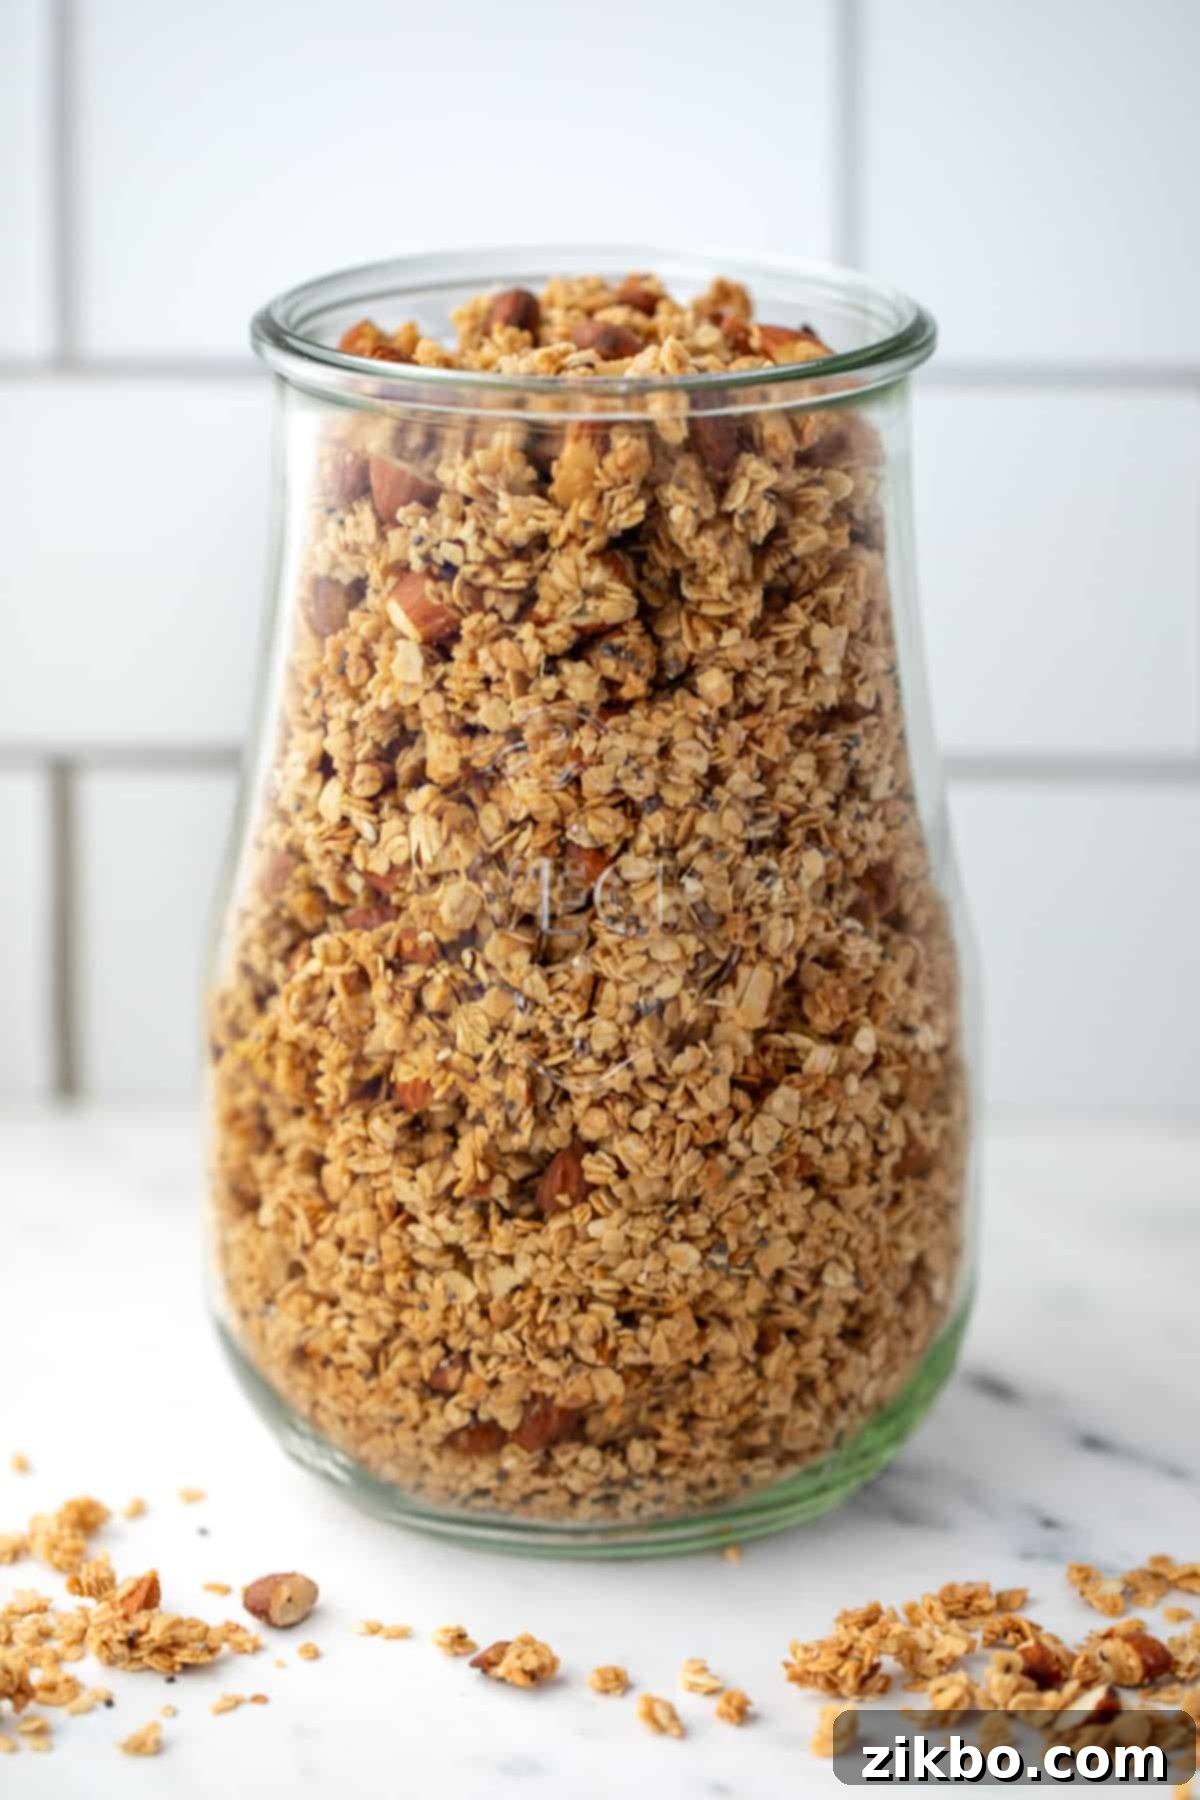
- Once thoroughly cooled and dry, transfer the granola to a large glass jar or any other airtight container. Glass jars are often preferred as they look lovely and provide a good seal.
- For best results and to ensure any final traces of moisture escape, leave the lid off the container for an additional **30-60 minutes** before sealing.
- Finally, secure the lid tightly. Store your homemade granola at room temperature, in a cool, dry place away from direct sunlight, for **1 to 3 weeks**.
- For longer storage, granola freezes exceptionally well. Once completely cooled and dry, transfer it to a freezer-safe bag or container and freeze for up to 3 months. Thaw at room temperature before enjoying.
Important Note: Always inspect your stored granola before consumption. Discard it immediately if you notice any signs of spoilage, such as condensation inside the container, visible moisture, mold growth, an off smell, or an unusual taste.
Customizing Your Granola: Swaps and Substitutions
One of the best things about making granola at home is the endless possibilities for customization! This honey almond base is fantastic as is, but feel free to get creative and make it truly your own. Just remember to maintain the dry-to-wet ingredient ratio for the best results.
Adding Dried Fruit: If you adore granola with chewy dried fruit pieces, you can absolutely include them! However, for optimal texture and to prevent them from burning or becoming overly hard, it’s crucial to **add dried fruit *after* the granola has cooked and cooled completely**. For an extra tip, toss the dried fruit in a small amount of rice flour (or cornstarch) before mixing it into the cooled granola; this helps prevent clumping and sticking.
Maple Syrup for Honey: If you prefer the distinct flavor of maple syrup or need a vegan alternative, you can easily swap the honey for pure maple syrup in a 1:1 ratio. The primary difference you’ll notice is that maple syrup is typically a tad less sweet than honey. As long as you keep the brown sugar in the recipe, the sweetness level will still be wonderfully balanced.
Rolled Oats vs. Quick Oats: We’ve rigorously tested this recipe with both types of oats. While using traditional old-fashioned rolled oats will still yield a perfectly good granola, the results are **significantly better, with a superior crunch and more clusters, when quick oats are used**. If you only have rolled oats on hand, a quick pulse or two in a blender or food processor can help break them down slightly, achieving a texture closer to quick oats and providing similar results.
Other Custom Swaps & Add-ins: The beauty of homemade granola lies in its adaptability! Feel free to swap out the almonds for other nuts like pecans, walnuts, cashews, or even mixed nuts. You can also incorporate various seeds such as pumpkin seeds, sunflower seeds, or flax seeds for added nutrition and texture. While we recommend keeping the oats as the primary base, you can substitute up to 1 cup of the oats with other add-ins like quinoa puffs, puffed rice cereal, or additional seeds. Remember to add delicate ingredients like chocolate chips *after* the granola has cooled.
Spices: Warm spices like cinnamon, nutmeg, ginger, or even a pinch of cardamom can transform the flavor profile. Add these with the dry ingredients.
Dietary Adaptations for Everyone
This versatile honey almond granola recipe can be easily adapted to suit various dietary needs without compromising on flavor or texture. Here are a few simple swaps:
- Gluten-Free: To make this recipe completely gluten-free, simply ensure you use certified gluten-free oats. Additionally, if you have severe celiac disease or a gluten allergy, always check the packaging of your nuts and other ingredients to confirm that gluten is not listed as a “contains” or “may contain” allergen due to cross-contamination in processing facilities.
- Vegan: For a delicious vegan version, simply swap out the honey for an equal amount (1:1 ratio) of agave syrup or pure maple syrup. The rest of the ingredients in this recipe are naturally plant-based.
- Dairy-Free: Good news! This recipe is inherently dairy-free as it calls for coconut oil (or avocado oil) and contains no other dairy products. No substitutions needed here!
- Honey as the Only Sweetener: If you’re looking to reduce refined sugar, I’ve successfully made this recipe omitting the brown sugar entirely. It turns out perfectly fine and still tastes wonderful! However, be aware that it will be noticeably less sweet than the version with brown sugar. Attempting to increase the honey to compensate for the lost sweetness from brown sugar isn’t recommended, as too much liquid can negatively impact the final crispy texture of the granola due to moisture issues.
Must-Try Breakfast and Snack Recipes:
- Strawberry Cheesecake Yogurt Bowl
- Spinach and Feta Mini Frittatas
- Monster Cookie Protein Bars
- Pumpkin Pie Overnight Oats
If you loved this recipe for homemade honey almond granola, please let me know by leaving a 5-star review in the recipe card below or dropping a comment! You can also tag me on Instagram @dashfordinner. Your feedback means the world!
Honey Almond Granola
Print
Pin
Rate
Ingredients
- 4 cups quick oats*
- 1 cup chopped almonds
- 1 ½ tablespoons chia seeds (optional)
- 2 tablespoons rice flour** or rice starch (optional, but recommended)
- ½ teaspoon salt
- ⅓ cup coconut oil refined (unflavored)
- ½ cup honey
- ¼ cup brown sugar (optional, but highly recommended***)
- 1 teaspoon vanilla extract
Instructions
-
Preheat the oven to 325ºF (160ºC) and line a rimmed baking sheet with parchment paper.
-
Add the quick oats, almonds, chia seeds, rice flour, and salt to a very large bowl and mix well until thoroughly combined.
-
Add the coconut oil, honey, and brown sugar to a small saucepan. Heat over low-medium heat, stirring constantly, until all of the ingredients come together into a smooth consistency and the brown sugar has dissolved. Do not let it boil.
-
Remove the saucepan from the heat and stir in 1 teaspoon of vanilla extract.
-
Pour the warm honey mixture on top of the oat mixture, and use a silicone spatula to fold it in until everything has been lightly and evenly coated in the honey and oil mixture. Ensure no dry spots remain.
-
Transfer the granola to the parchment-lined baking sheet and spread it out into an even layer for consistent baking.
-
Bake in the oven for 25-30 minutes, stirring the granola 2-3 times during cooking (e.g., at 10 and 20 minutes). However, do not stir during the last 8-10 minutes of baking; this allows clusters to form. Bake until the granola is golden brown with lightly toasted edges.
-
Remove from the oven and do not stir. Allow the granola to cool undisturbed on the baking sheet for about 1-2 hours. At first, the granola will appear soft or “wet,” but as it cools, it will dry out and crisp up. This step is crucial for crunch!
-
After 1-2 hours of initial cooling, gently stir the granola to break up any very large chunks (we love leaving some in for great texture!). Then, allow it to cool completely to room temperature on the baking sheet for another hour or so, stirring occasionally to ensure even cooling and drying.
-
Once the granola is completely cooled to room temperature and no longer moist or warm to the touch, transfer it to a large glass jar or an airtight container. Leave the lid off for an additional 30-60 minutes to allow any final residual warmth or moisture to escape before sealing.
-
Cover tightly and store at room temperature for 1-3 weeks. If the granola feels moist or sticks together, your storage time will be limited as it has not dried enough. Use it immediately, or store in the freezer until ready to use for longer preservation.
Notes
*Type of Oats: We have tested this recipe COUNTLESS times with various oats. While old-fashioned rolled oats can be used and will yield good results, we consistently found that **quick oats produce a far superior texture**, leading to crunchier granola and more desirable clusters. In side-by-side comparisons, our testers overwhelmingly preferred the granola made with quick oats. We highly recommend using quick oats (but definitely not instant oats) in this recipe. If you only have rolled oats on hand, you can pulse them a few times in a blender or food processor to break them down into smaller pieces, resembling “quick oats,” which will give you a closer result.
**Do I need to use Rice Flour/Rice Starch? This ingredient is a secret weapon for perfect granola! It helps A LOT with moisture absorption from the honey and oil, and is highly recommended for achieving the ideal crunchy, non-sticky texture, even if it’s an obscure ingredient for some households. That being said, you can certainly make the recipe without it, but you’ll find the granola might be a bit chewier and more prone to sticking together. If you omit it, plan to consume the granola more quickly to avoid spoilage due to higher moisture content.
***Honey Only Granola: I’ve tested this recipe using ONLY honey as the sweetener, omitting the brown sugar. It turns out perfectly fine and is a great option if you prefer less refined sugar. However, it never quite reached the same desired level of sweetness on its own. Increasing the volume of honey beyond the ½ cup does not work well due to the added moisture causing texture issues. So, while a perfectly good granola is made with just ½ cup of honey and no added brown sugar, expect a slightly less sweet profile.
Coconut Oil: In my many years of granola making, I have consistently found that coconut oil tends to be the best choice for achieving great texture and flavor. I highly recommend using **refined coconut oil** for this recipe; this type has a neutral flavor and won’t impart a coconut taste to your granola. If you do not have refined coconut oil, a neutral-flavored oil such as avocado oil, sunflower oil, or even vegetable oil can work in a pinch.
Storage: The most crucial step for storage is ensuring your granola is **completely cooled and thoroughly dried** before transferring it. Once it’s cool and dry, move it to an airtight container. For best practice, leave the lid off for an additional 30-60 minutes to allow any last bit of warmth or moisture to escape, then secure the lid tightly. Store at room temperature for 1-3 weeks. Discard the granola if there are any signs of spoilage, such as moisture or condensation inside the container, visible mold, or an off-smell or taste.
Nutrition
Please note that some of my blog posts here at Dash for Dinner may contain affiliate links. If you make a purchase through these links, I will get a small commission at no additional cost to you. Please see my Disclaimer for more information.
