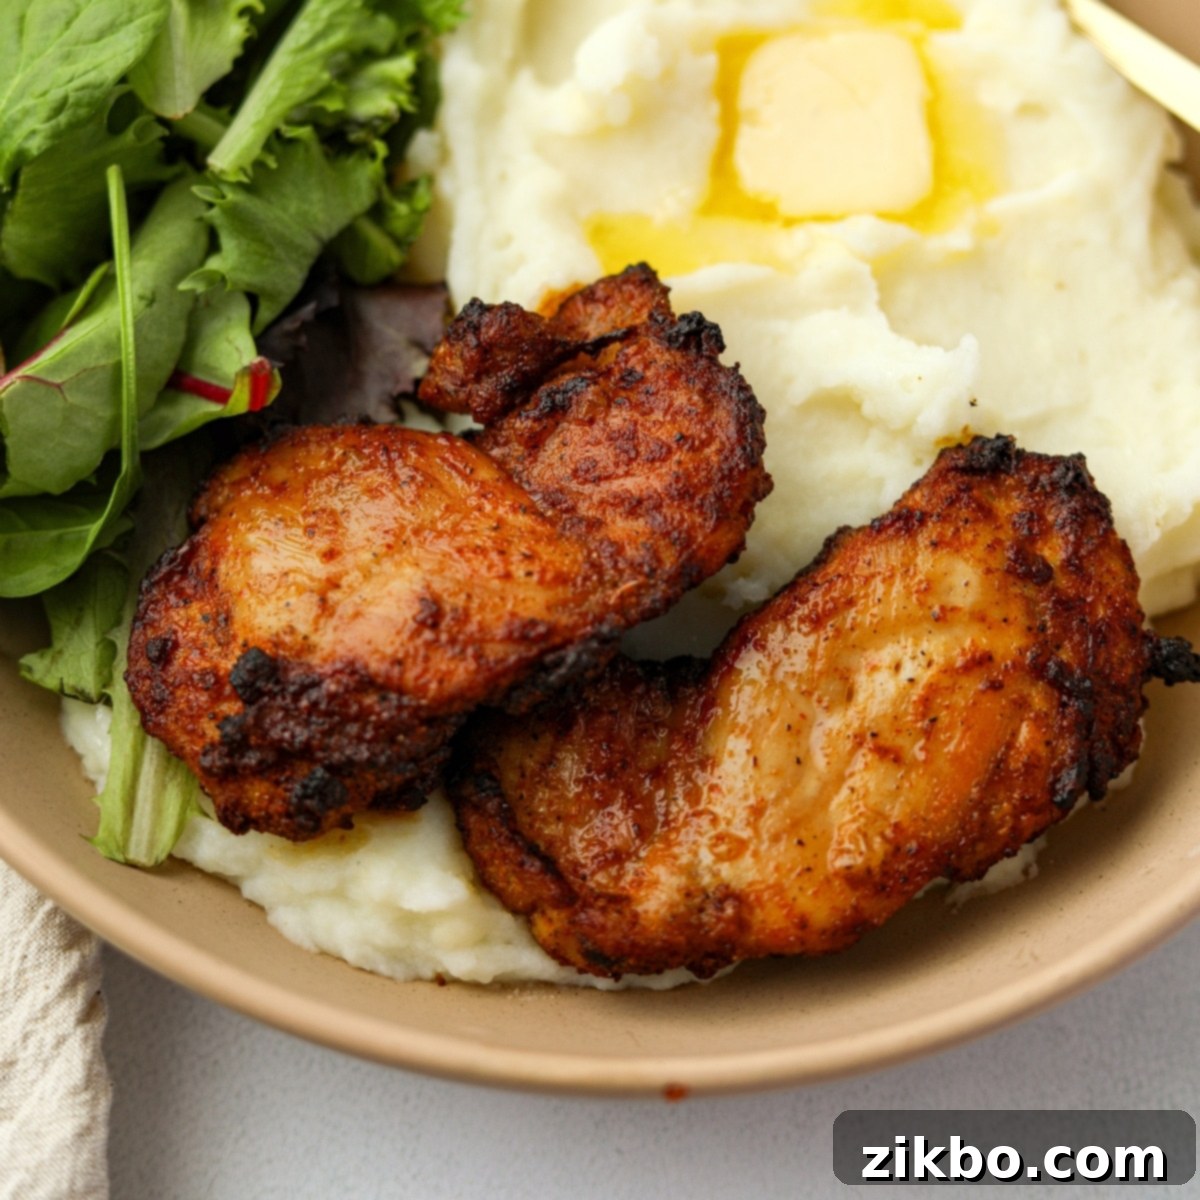
Air Fryer Boneless Skinless Chicken Thighs: Your Go-To Recipe for Juicy, Crispy Perfection
Prepare to fall in love with your air fryer all over again with this incredibly easy and outrageously delicious recipe for **Air Fryer Boneless Skinless Chicken Thighs**. Forget dry, bland chicken – we’re talking about succulent, flavor-packed chicken thighs with irresistibly crispy edges, all made with just a few pantry staples. The best part? These culinary wonders are ready in under 25 minutes, making them the ultimate solution for any busy weeknight dinner or a simple, satisfying meal prep component.
If you’ve been captivated by the unparalleled crispiness of air fryer chicken wings, get ready for a revelation. Cooking other cuts of chicken in the air fryer, especially boneless, skinless thighs, is truly a **game-changer**. It unlocks a new level of convenience and flavor that traditional cooking methods often can’t match. Trust us; once you try it, you’ll be hooked!

This recipe builds upon the same fantastic seasoning blend and cooking method we’ve perfected for our unbreaded chicken tenders, chicken bites, and meal prep chicken. It’s a proven, all-purpose flavor combination that guarantees delicious results every time. While this guide focuses on boneless, skinless thighs for maximum speed, this method also works beautifully for bone-in chicken thighs – you’ll just need a slight adjustment in cooking time, which we’ll cover in detail.
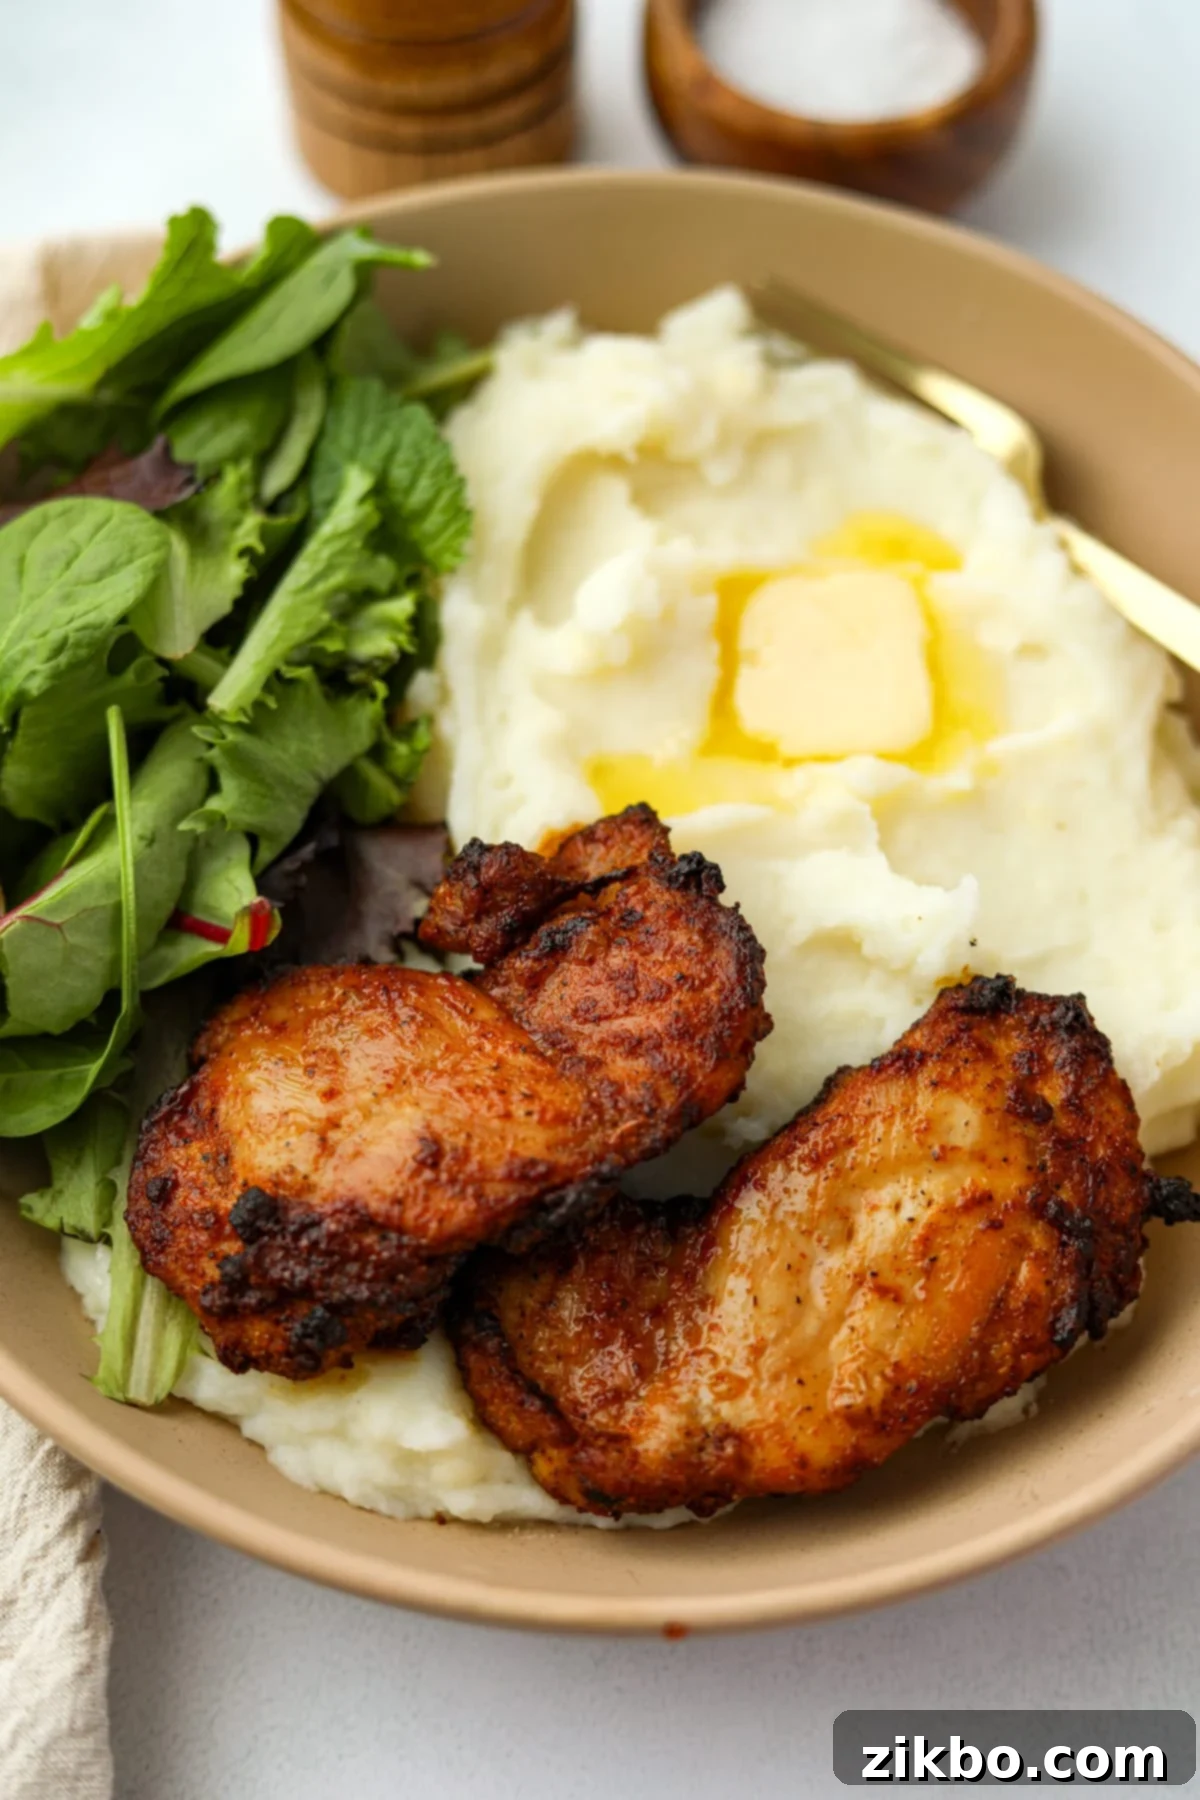
Juicy air-fried chicken thighs are incredibly versatile. They pair wonderfully with a myriad of side dishes, and their tender texture makes them ideal for slicing or chopping. Imagine them elevating your salads, enriching your rice bowls, or nestled warmly inside tortillas for a quick taco night. The air fryer method consistently delivers perfectly cooked chicken, making it your secret weapon for consistently delicious meals.
Why You’ll Love This Air Fryer Chicken Thigh Recipe
There are countless reasons why this air fryer chicken thigh recipe will become a staple in your kitchen. It’s not just about convenience; it’s about consistently delivering mouthwatering results that satisfy everyone at the table.
- Effortless & Quick: Say goodbye to extensive prep work. This recipe requires minimal ingredients and comes together incredibly fast, perfect for those evenings when time is of the essence but you still crave a homemade meal. No marinating needed, just season and cook!
- A Family Favorite: The versatility of these chicken thighs is a huge plus, especially for families with varying tastes. Serve them whole, slice them up for younger eaters, or offer a variety of dipping sauces for an unbreaded chicken nugget experience. Everyone finds something to love!
- Taste & Texture Perfection: If your ideal chicken thigh is both exceptionally juicy on the inside and boasting delightfully crispy edges on the outside, this recipe is for you. The air fryer works its magic to achieve that perfect contrast of textures.
- Meal Prep Champion: This boneless chicken thigh recipe is not only budget-friendly but also highly adaptable, making it an excellent choice for weekly meal planning. Cook a larger batch at the start of the week, and enjoy delicious, healthy protein additions to your meals for days.
- Healthier Cooking: Using an air fryer means you need less oil compared to traditional frying, resulting in a lighter, yet equally satisfying, meal. It’s a fantastic way to enjoy delicious chicken without the extra fat.
Essential Ingredients for Flavorful Thighs
The beauty of this recipe lies in its simplicity. You don’t need a long list of exotic ingredients to create incredibly flavorful chicken thighs. Here’s what you’ll need:
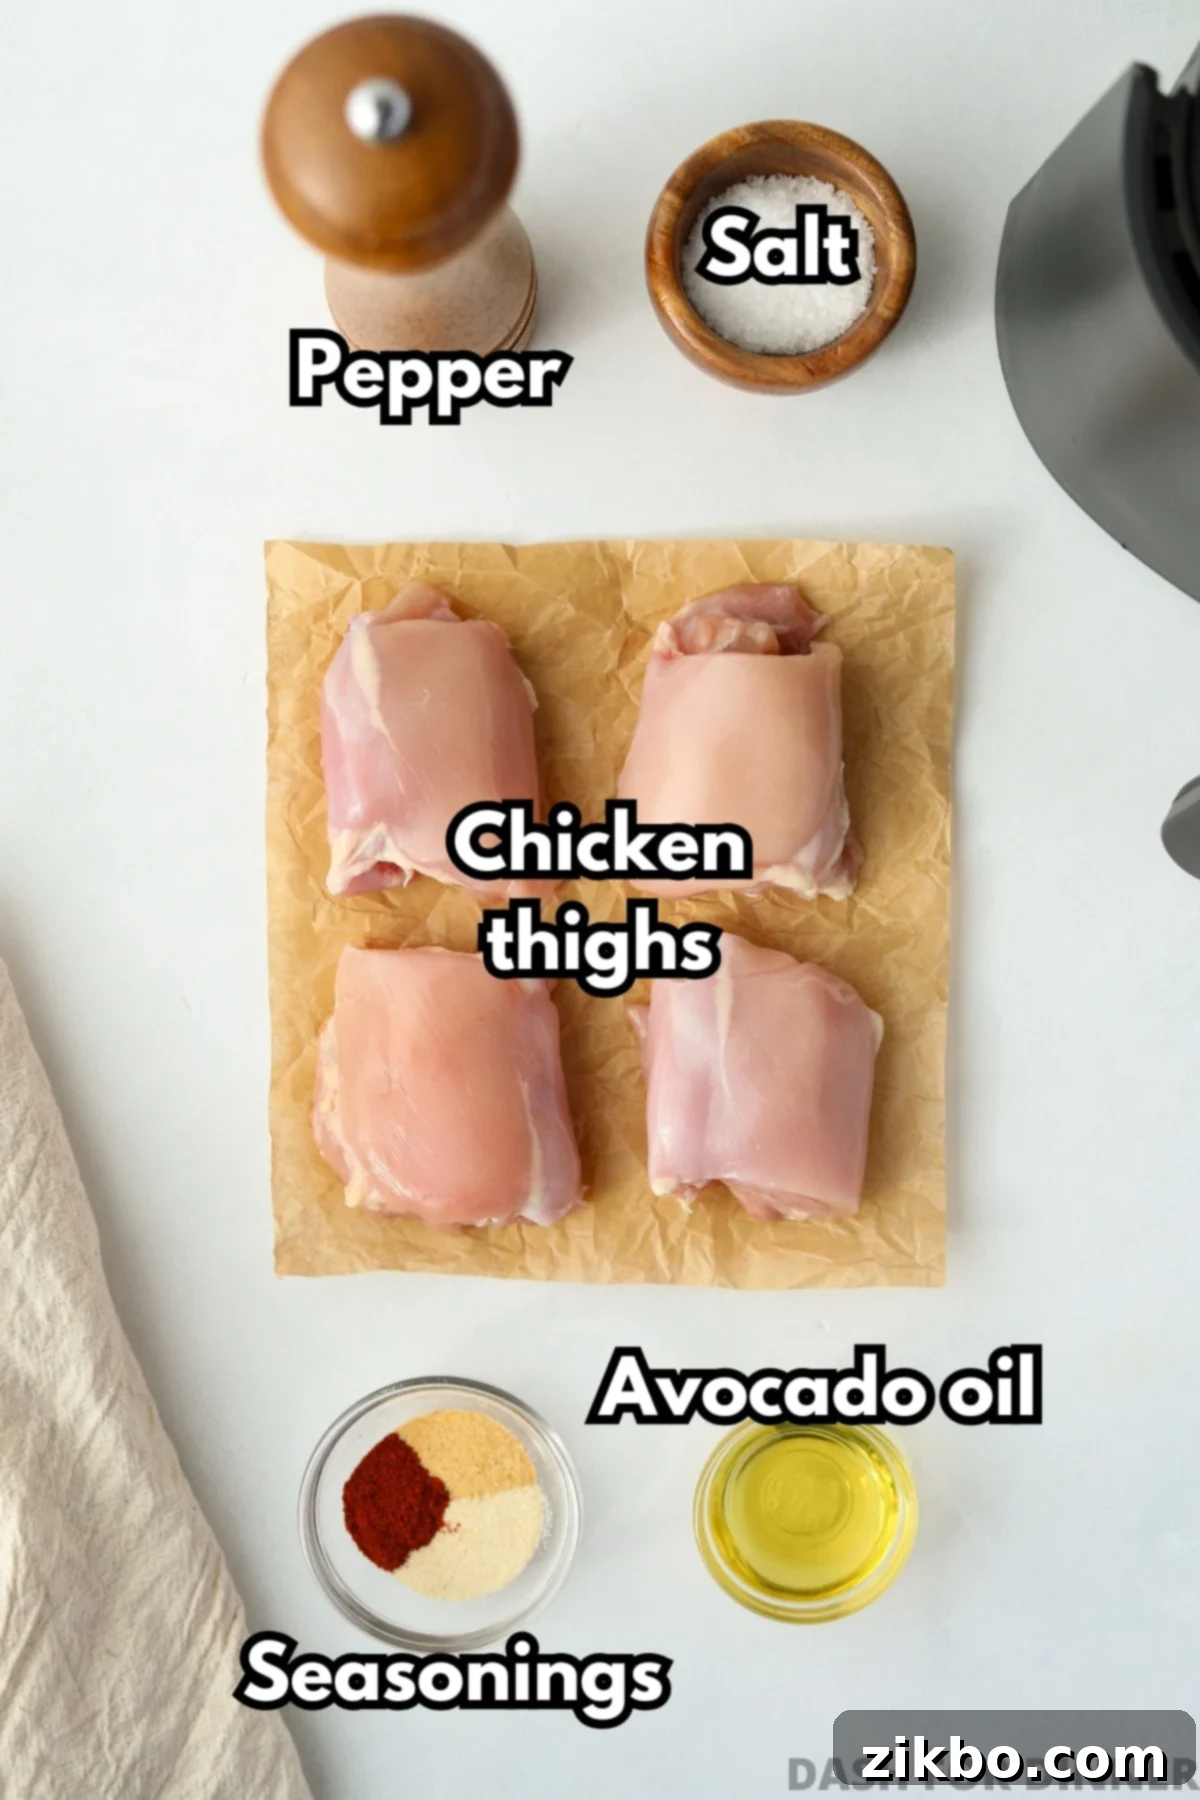
- Boneless, Skinless Chicken Thighs: These are our preferred choice for their quick cooking time and naturally moist texture. If you have bone-in thighs, you can debone them or leave the bone in. Leaving the skin on bone-in thighs can add extra flavor and crispiness, but will require longer cooking. Refer to the specific instructions for bone-in thighs further down. Aim for uniform thickness for even cooking.
- Avocado Oil: This is our top recommendation for air frying and roasting chicken, as it has a high smoke point and contributes to beautifully crispy edges. If avocado oil isn’t available, olive oil or vegetable oil are excellent substitutes.
- Simple Seasonings:
- Garlic Powder: A foundational flavor that enhances almost any savory dish.
- Onion Powder: Adds a subtle, sweet, and pungent aroma, complementing the garlic.
- Paprika: Provides a mild, earthy flavor and a lovely reddish-orange hue to the chicken, making it look as good as it tastes.
- Flaky Salt or Kosher Salt: This is where the magic happens! Flaky salts like Maldon or kosher salt adhere better to the chicken, provide a superior crunch, and distribute flavor more evenly compared to fine table salt. It truly elevates the final taste.
- Black Pepper: A classic seasoning that adds a touch of warmth and mild spice.
Essential Equipment
To make this recipe a breeze, you’ll need just two key pieces of kitchen equipment:
- Air Fryer: The star of this recipe! Any model will work, but ensure it’s clean and preheated for best results.
- Meat Thermometer: An absolute must-have for food safety and perfect doneness. It’s the only reliable way to ensure your chicken is cooked through without overcooking it.
Step-by-Step Instructions: Perfect Air Fryer Chicken Thighs
This incredibly simple method for air fryer boneless chicken thighs is one you’ll want to master. It’s ideal for quick weeknight dinners, efficient meal prep, and provides a budget-friendly way to enjoy delicious, healthy chicken.
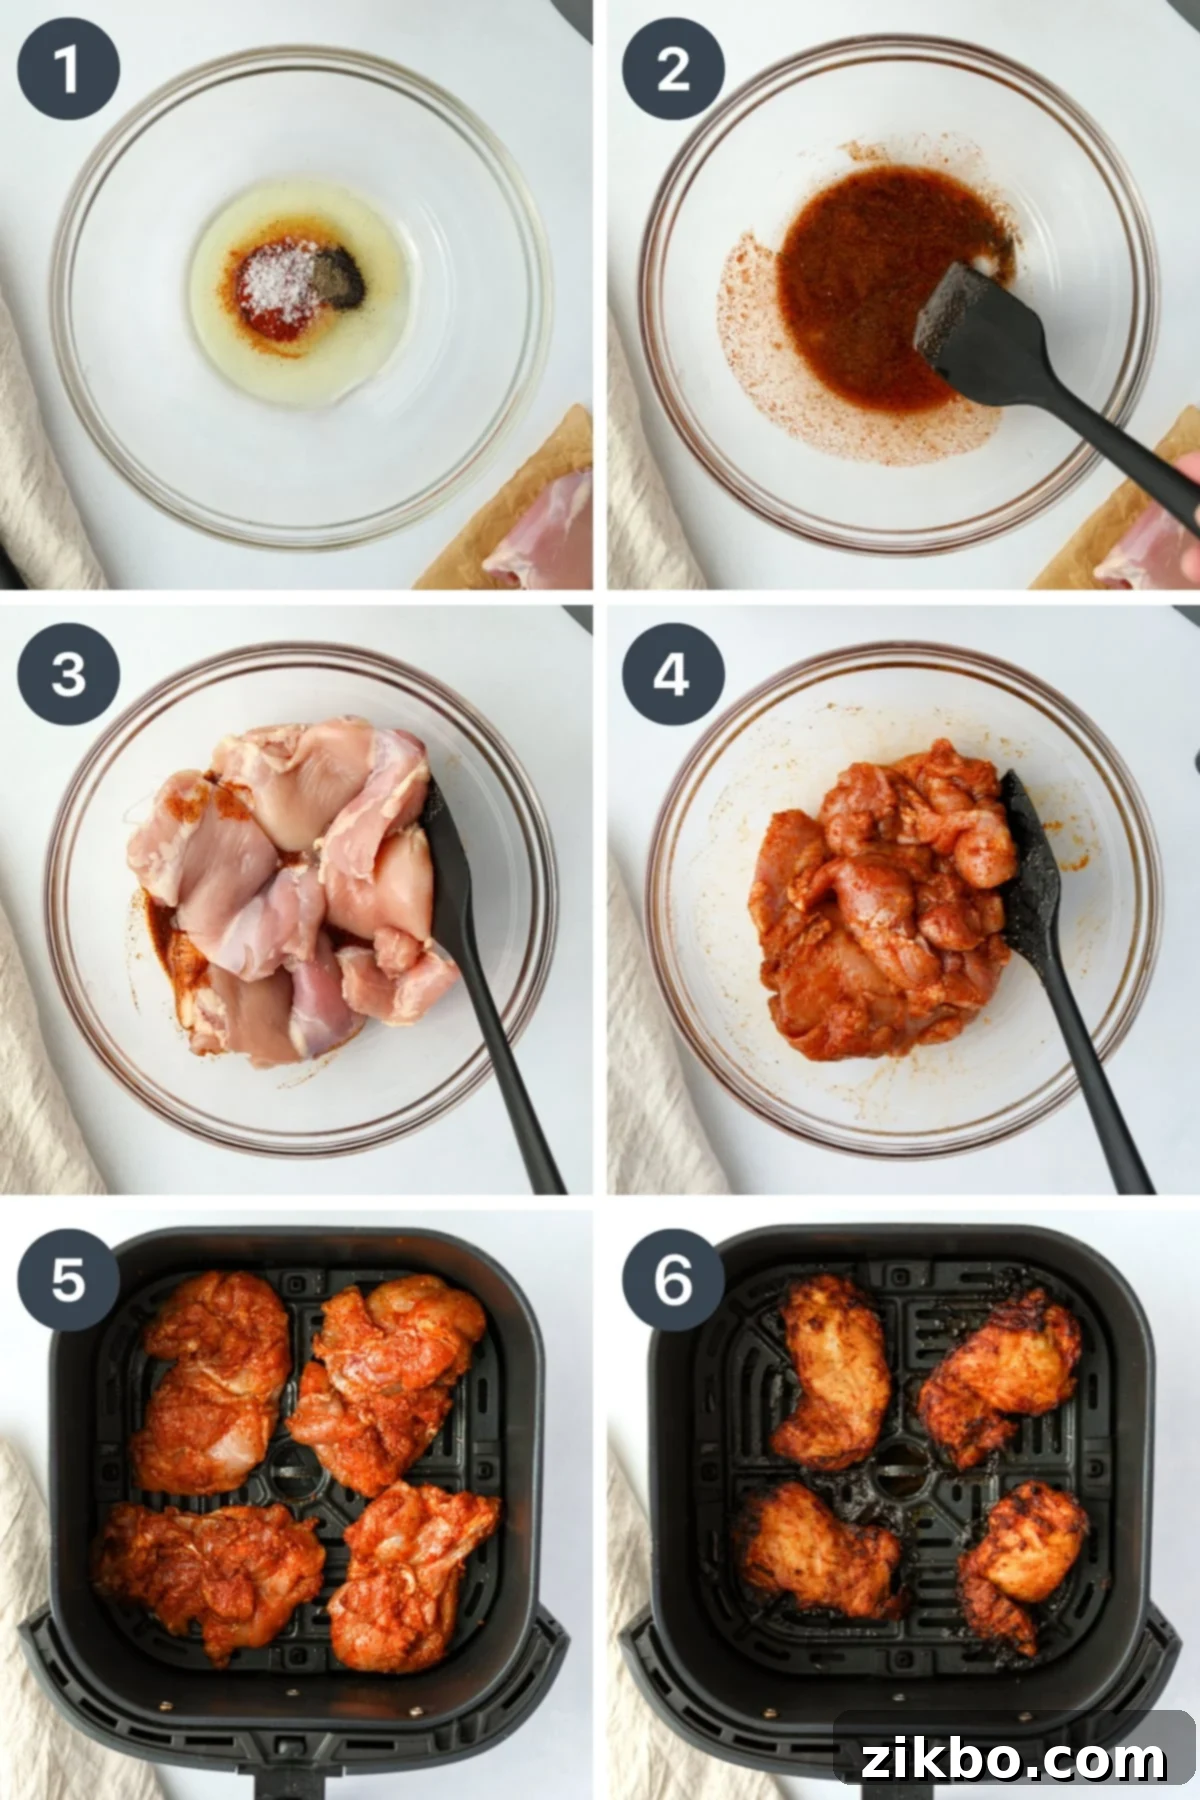
- Prepare the Seasoning Paste: In a large mixing bowl, combine the avocado oil with all the dry seasonings:
- 1 tablespoon avocado or olive oil
- ¾ teaspoon garlic powder
- ¾ teaspoon onion powder
- ¾ teaspoon paprika
- ¾ teaspoon flaky salt or kosher salt
- ¼ teaspoon black pepper
Whisk these ingredients thoroughly until they form a thin, paste-like consistency. This paste will ensure every part of the chicken thigh is evenly coated with flavor.
- Prep the Chicken: Gently pat the boneless, skinless chicken thighs dry with a paper towel. This step is crucial for achieving those desirable crispy edges. Add the patted-dry chicken thighs (approximately 4-5 pieces, or 1 pound) to the bowl with the seasoning paste.
- Coat the Chicken: Use tongs or your hands to thoroughly stir and coat each piece of chicken in the seasoned oil mixture. Ensure every surface is covered for maximum flavor.
- Optional Flavor Boost (Dry Brine): For an even deeper flavor profile, let the seasoned chicken “dry brine” in the bowl for 5-15 minutes at room temperature while your air fryer preheats. This allows the salt and spices to penetrate the meat.
- Preheat Your Air Fryer: Preheat your air fryer to **380-400ºF (190-204ºC)** for at least 3 minutes. Preheating is essential for immediately searing the chicken and achieving that crispy exterior.
- Temperature Tip: Use the higher temperature (400ºF) for thicker chicken thighs to ensure they cook through without drying out the exterior, and the lower temperature (380ºF) for thinner pieces.
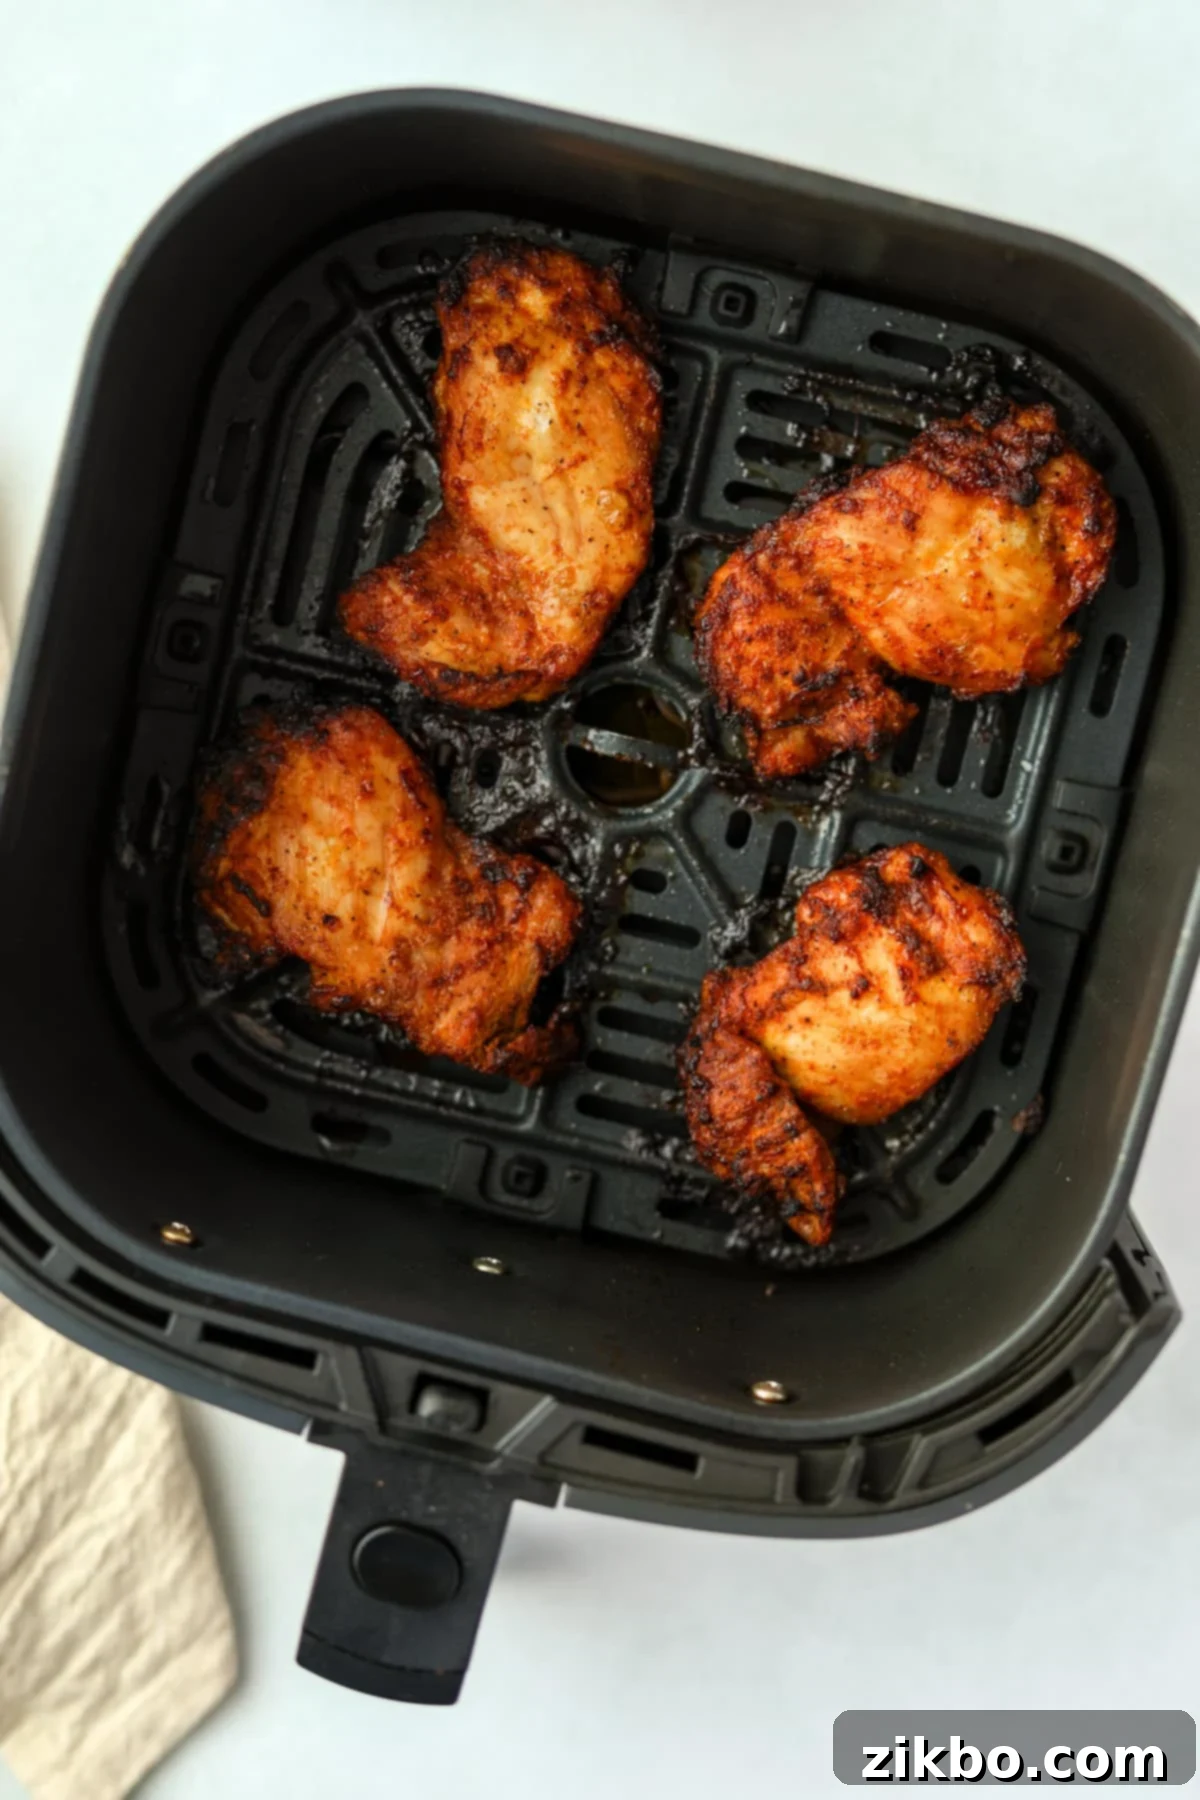
- Arrange Chicken in Air Fryer: Carefully place the seasoned chicken thighs into the preheated air fryer basket in a single layer, smooth side down (this would be the skin side if it had skin). Ensure there is at least 1 inch of space between each piece to allow for proper air circulation. Do not overcrowd the basket; cook in batches if necessary.
- Air Fry to Perfection: Cook for **14-17 minutes**. This range accounts for variations in thickness and air fryer models. At the 7-minute mark (or halfway through), **flip the chicken thighs**. This step is absolutely essential for even cooking and achieving crispiness on both sides. Continue cooking until the thickest portion of each piece reaches a minimum internal temperature of 165ºF (74ºC) when checked with a meat thermometer. Many prefer dark meat like thighs cooked to 175ºF (79.4ºC) for optimal tenderness.
Once cooked, carefully remove the chicken from the air fryer basket. Transfer it to a plate or cutting board and allow it to rest for about 5 minutes before serving. This resting period allows the juices to redistribute, ensuring incredibly tender and moist chicken. If cooking a larger batch, work in single-layer portions to avoid steaming the chicken instead of crisping it.
Adapting the Recipe: Bone-in Chicken Thighs
While this recipe is optimized for boneless, skinless chicken thighs, you can certainly use bone-in, skin-on thighs with a few simple adjustments to the cooking time and temperature. Bone-in cuts often result in juicier meat, and the skin provides extra flavor and crispiness if cooked correctly.
For bone-in, skin-on chicken thighs:
- Preheat: Begin by preheating your air fryer to a slightly higher temperature: **400ºF (200ºC)** for at least 3 minutes, or according to your air fryer manufacturer’s specific instructions.
- Batch Cooking: To ensure even cooking and crispy skin, limit your batch size to just 3-4 thighs at a time. Three pieces are often ideal to prevent overcrowding.
- Cooking Time: Cook bone-in thighs for a longer duration, typically **20-25 minutes**. Start by placing the chicken skin-side down in the air fryer basket. This allows the skin to render some fat and become beautifully crispy. Flip the pieces halfway through cooking (around the 10-12 minute mark) to ensure both sides cook evenly and the skin finishes extra crispy.
- Check Doneness: As always, use a reliable meat thermometer to verify doneness. The chicken is ready when the thickest portion of each piece (avoiding the bone) reaches a minimum internal temperature of 165ºF (74ºC). For dark meat, many prefer a slightly higher temperature of 175ºF (79.4ºC) for peak tenderness.
- Rest: After cooking, remove the chicken from the air fryer and let it rest for 5 minutes before serving. This crucial step helps keep the meat juicy.
Storing Leftovers & Meal Prep Ideas
This air fryer chicken thigh recipe is fantastic for making ahead and enjoying throughout the week. Properly storing and reheating your leftovers will keep them fresh and delicious.
Storing Leftovers
To store, allow the cooked chicken to cool completely to room temperature. Transfer the cooled chicken thighs to an airtight container and refrigerate for up to 3 days. For convenient reheating, simply warm individual portions in the microwave or a toaster oven until heated through.
For longer storage, these chicken thighs freeze exceptionally well! Once completely cooled, transfer them into a freezer-safe bag or container. Ensure as much air as possible is removed from the bag to prevent freezer burn. Label with the date and freeze for up to 3 months. To reheat from frozen, thaw in the refrigerator overnight, then reheat in the microwave or air fryer until warmed through.
Creative Meal Prep & Serving Ideas
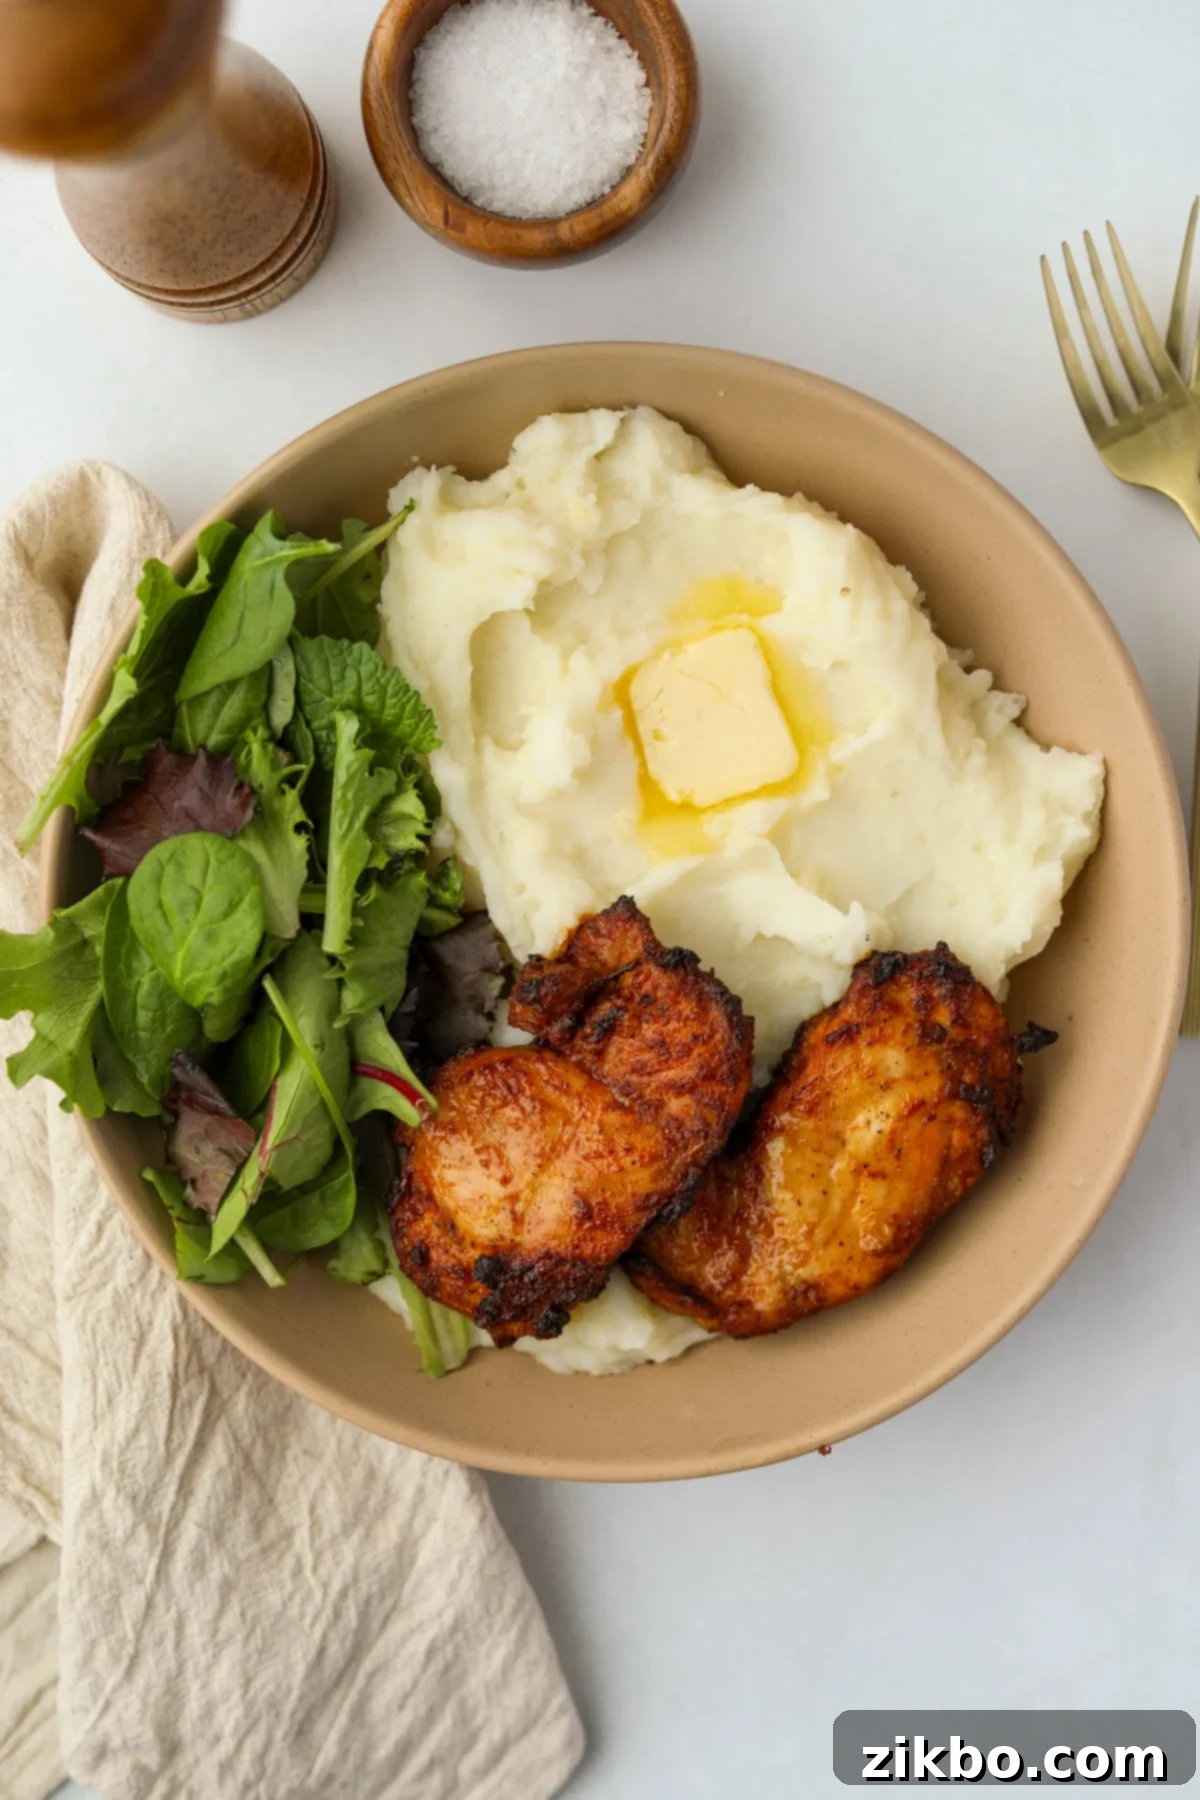
These flavorful chicken thighs are satisfying enough to be enjoyed on their own – try dipping them in your favorite BBQ sauce or a creamy ranch! But their versatility truly shines when incorporated into various meals throughout the week. Here are some ideas to inspire your meal prep:
- Salad Topper: Slice or dice the cooled chicken and add it to your favorite greens for a protein-packed lunch. A Caesar salad or a Mediterranean-inspired salad would be excellent choices.
- Grain Bowls: Build wholesome and customizable grain bowls with a base of rice, quinoa, farro, or couscous. Top with sliced chicken, roasted vegetables, a drizzle of sauce, and fresh herbs.
- Chicken Salad: Chop the cooked thighs into small pieces and mix with mayonnaise, celery, grapes, walnuts, and your preferred seasonings for a delicious chicken salad sandwich filler or cracker spread.
- Power Plates: For simple general meal prep, pair your air fryer chicken thighs with steamed or roasted vegetables (like broccoli, asparagus, or bell peppers) and a healthy carbohydrate source such as air fryer sweet potato cubes, brown rice, or quinoa.
- Tacos or Wraps: Shred or slice the chicken and use it as a filling for soft tacos, burritos, or lettuce wraps, alongside your favorite salsa, avocado, and toppings.
- Pasta Dishes: Cut into bite-sized pieces and toss with pasta, pesto, and cherry tomatoes for a quick and satisfying dinner.
Expert Tips for Air Fryer Chicken Thigh Success
Achieving perfectly cooked, juicy, and crispy chicken thighs in the air fryer is simple when you know a few key tricks. These expert tips will help you get flawless results every time:
- Adjust for Thicker Pieces: Chicken thighs vary significantly in size and thickness. If you have particularly large or thick thighs, increase the air fryer temperature to 400ºF (204ºC) and be prepared for a slightly longer cooking time. For very thick pieces, you can also gently flatten them slightly before seasoning by placing them in a plastic bag and using a meat mallet or a heavy cast iron pan to create a more uniform thickness. This promotes even cooking.
- Always Use a Meat Thermometer: This cannot be stressed enough. A reliable meat thermometer is your best friend in the kitchen. It eliminates guesswork, ensuring your chicken is safely cooked without being overdone and dry. Visual cues alone are not always accurate.
- Check Internal Temperature Correctly: When testing for doneness, insert the meat thermometer into the thickest part of the chicken thigh, being careful not to touch any bones (if present), as bone temperature can give a false reading. Chicken needs to reach a minimum internal temperature of 165ºF (74ºC) to be safe for consumption. However, for dark meat like chicken thighs, many chefs and home cooks find that cooking them to 175ºF (79.4ºC) results in an even more tender and succulent texture, as the collagen breaks down more effectively.
- Don’t Overcrowd the Basket: Air fryers work by circulating hot air around the food. If the basket is too full, air cannot circulate properly, leading to steamed rather than crispy chicken. Cook in a single layer, leaving space between each piece. If you’re cooking for a crowd, work in batches.
- Flip for Even Crisping: Flipping the chicken halfway through the cooking time is crucial. This ensures both sides are exposed to the direct heat and air, resulting in even browning and crispiness.
- Rest the Chicken: After cooking, always let your chicken thighs rest for 3-5 minutes before slicing or serving. This allows the juices to redistribute throughout the meat, guaranteeing maximum moisture and tenderness.
- Pat Dry for Crispier Skin: Even with boneless, skinless thighs, patting them thoroughly dry with paper towels before seasoning helps achieve a crispier exterior by removing surface moisture.
Recipe Substitutions & Variations
This recipe is incredibly flexible! Feel free to customize the seasonings, oils, or even the protein to suit your preferences and what you have on hand.
- Seasoning Blends: Don’t limit yourself to the classic blend! Experiment with your favorite spices or pre-made seasoning mixes. Popular choices include Ranch seasoning, steakhouse rubs, Italian seasoning, Cajun seasoning, lemon pepper, or even a smoky BBQ rub. Just remember to check if your chosen blend already contains salt, and adjust accordingly.
- Oil Alternatives: While avocado oil is preferred for its high smoke point and neutral flavor that contributes to crispy edges, you can use other oils. Olive oil is a popular and healthy choice, or opt for vegetable oil if that’s what you have.
- Other Proteins: The same seasoning blend and air frying method can be adapted for a variety of other proteins!
- Chicken Breast: Air fryer chicken breast is a lean and quick option.
- Chicken Tenders or Cutlets: These thinner cuts will cook even faster.
- Pork Chops: Thin-cut pork chops can also benefit from this method.
- Salmon Fillets: While not poultry, salmon cooked in the air fryer with similar seasonings is incredibly flaky and moist.
Important Note: Always consult the USDA recommended internal temperatures for each specific cut and type of meat to ensure food safety.
More Delicious Air Fryer Chicken Recipes to Try
If you’ve enjoyed the ease and deliciousness of these air fryer boneless skinless chicken thighs, you’ll love exploring more ways to use your air fryer for chicken. Here are some of our other top-rated air fryer chicken recipes:
- Air Fryer Meal Prep Chicken
- Air Fryer Chicken and Vegetables
- Air Fryer Chicken Bites
- Air Fryer Chicken Fajitas
If you tried this recipe for air fryer boneless skinless chicken thighs and loved it, please let us know! Leave a 5-star review in the recipe card below or drop a comment to share your experience. We love seeing your culinary creations – don’t forget to tag us on Instagram @dashfordinner!

Air Fryer Boneless Skinless Chicken Thighs
Print
Pin
Rate
Ingredients
- 1 pound boneless skinless chicken thighs (about 4-5 pieces)
- 1 tablespoon avocado oil
- ¾ teaspoon garlic powder
- ¾ teaspoon onion powder
- ¾ teaspoon paprika
- ¾ teaspoon flaky salt or kosher salt
- ¼ teaspoon black pepper
Instructions
-
Combine Seasonings: Add the avocado or olive oil to a large bowl, along with the garlic powder, onion powder, paprika, flaky salt, and black pepper. Stir well to form a thin paste.
-
Coat Chicken: Pat the chicken thighs dry with paper towels, then add them to the bowl with the seasoning paste. Use tongs to toss and fold until each thigh is fully and evenly coated.
-
Optional Dry Brine: For enhanced flavor, allow the seasoned chicken to sit at room temperature for 10-15 minutes while your air fryer preheats.
-
Preheat Air Fryer: Preheat your air fryer to 380ºF (190ºC). If you have thicker chicken pieces, preheat to 400ºF (204ºC). Ensure it’s hot for at least 3 minutes before adding chicken.
-
Arrange in Basket: Transfer the chicken pieces to the preheated air fryer basket, placing them smooth sides down. Ensure there’s about 1 inch of space between each chicken thigh. Cook in batches if necessary to avoid overcrowding.
-
Air Fry: Air fry for a total of 14-17 minutes. At the 7-8 minute mark (halfway through), flip the chicken pieces using tongs to ensure even cooking and crispiness on both sides.
-
Check Doneness: The chicken is done when a meat thermometer inserted into the thickest part of each piece registers a minimum internal temperature of 165ºF (74ºC).
-
Rest & Serve: Carefully remove the cooked chicken from the air fryer and let it rest on a plate or cutting board for 3-5 minutes before serving. Enjoy!
Notes
Thicker pieces: For exceptionally thick chicken thighs, you may need to increase the cooking temperature to 400ºF and/or extend the cooking time. To ensure even cooking, you can gently flatten thicker thighs before seasoning: place them in a sturdy plastic storage bag and lightly pound them with a meat mallet or the bottom of a heavy cast iron pan until they are of a more uniform thickness.
Larger batches: This recipe can easily be doubled, tripled, or quadrupled to feed more people. However, to ensure proper air circulation and even cooking, always cook the chicken in batches of 4-5 pieces, ensuring they are in a single layer and not touching in the air fryer basket.
Bone-in, skin-on chicken thighs: Preheat your air fryer to 400ºF (200ºC). Cook 3-4 thighs at a time for 20-25 minutes. Start with the skin side down, then flip halfway through cooking to get crispy skin. Chicken is done when it reaches a minimum internal temperature of 165ºF (74ºC) in the thickest part (avoiding the bone). Remember to rest the chicken for 5 minutes before serving.
Nutrition
Please note that some of my blog posts here at Dash for Dinner may contain affiliate links. If you make a purchase through these links, I will get a small commission at no additional cost to you. Please see my Disclaimer for more information.
