Easy 4-Ingredient Chili Cheese Dip: The Ultimate Party Appetizer Recipe
Get ready to impress your guests with minimal effort! This incredibly easy and utterly delicious 4-ingredient Chili Cheese Dip is the perfect centerpiece for your next party, game day gathering, or even a simple cozy night in. Featuring a luscious layer of softened cream cheese and a hint of sour cream, generously topped with hearty canned chili, and crowned with a blanket of gooey, melty shredded cheese, this dip is designed to be a showstopper. Prepare for a chorus of rave reviews – this cheesy sensation is an instant classic!
If you love simple yet sensational appetizers, be sure to explore my popular and super easy Layered Cream Cheese and Salsa Dip – another fantastic 4-ingredient recipe that vanishes fast!

When it comes to unforgettable appetizers, dips consistently claim the top spot. There’s something universally satisfying about dunking your favorite chip, cracker, or toasted baguette into a warm, rich, and utterly delicious concoction. This isn’t just any dip; it’s a celebration of comfort food in an easy-to-share format.
This homemade chili cheese dip is exceptionally good, boasting layers of creamy texture and incredibly melty cheese that will have everyone reaching for more. But the true magic lies in its simplicity. It calls for just 4 basic ingredients and smartly utilizes canned chili, making prep an absolute breeze. This means less time in the kitchen and more time enjoying the party or game with your loved ones.
Whether you opt for your trusted brand of canned chili or repurpose delicious leftovers from a homemade batch, the secret ingredient is always love – and convenience! No one needs to know how effortlessly this cheesy dip came together, but everyone will certainly appreciate its comforting, satisfying, and undeniably addictive flavor. It’s the ultimate crowd-pleaser that fits any occasion.
Why You’ll Love This Easy Chili Cheese Dip Recipe:
This 4-ingredient chili cheese dip isn’t just another appetizer; it’s a testament to how simple ingredients can create extraordinary flavors. Here are just a few reasons why this recipe will become a permanent fixture in your entertaining arsenal:
- **The Perfect Party Appetizer:** Whether you’re planning a laid-back weekend get-together, hosting an elegant party, or gearing up for the big game, this dip is the ultimate crowd-pleaser. Its inviting aroma and gooey texture make it irresistible, ensuring your snack table is the highlight.
- **Unbeatable Simplicity:** With just 4 core ingredients, this recipe is incredibly straightforward. You can have it assembled and ready for the oven in as little as 5 minutes, allowing you to focus on other preparations or simply relax and enjoy your event.
- **Versatile Serving Options:** This warm, hearty dip pairs beautifully with a wide array of dippers. Think classic tortilla chips, sturdy corn chips, crispy pita chips, or even an assortment of fresh, crunchy vegetables for a lighter option. It’s adaptable to everyone’s preferences.
- **Multiple Cooking Methods:** Flexibility is key! This chili cheese dip can be prepared effortlessly in the oven for that perfectly golden, bubbly top, quickly in the microwave for instant gratification, or even in the slow cooker to keep it warm and melty for extended periods during longer events.
Essential Ingredients for Your Chili Cheese Dip
Creating this irresistible chili cheese dip requires only a handful of readily available ingredients. The quality of these few components will truly make your dip shine. Here’s a detailed look at what you’ll need and some tips for choosing the best:
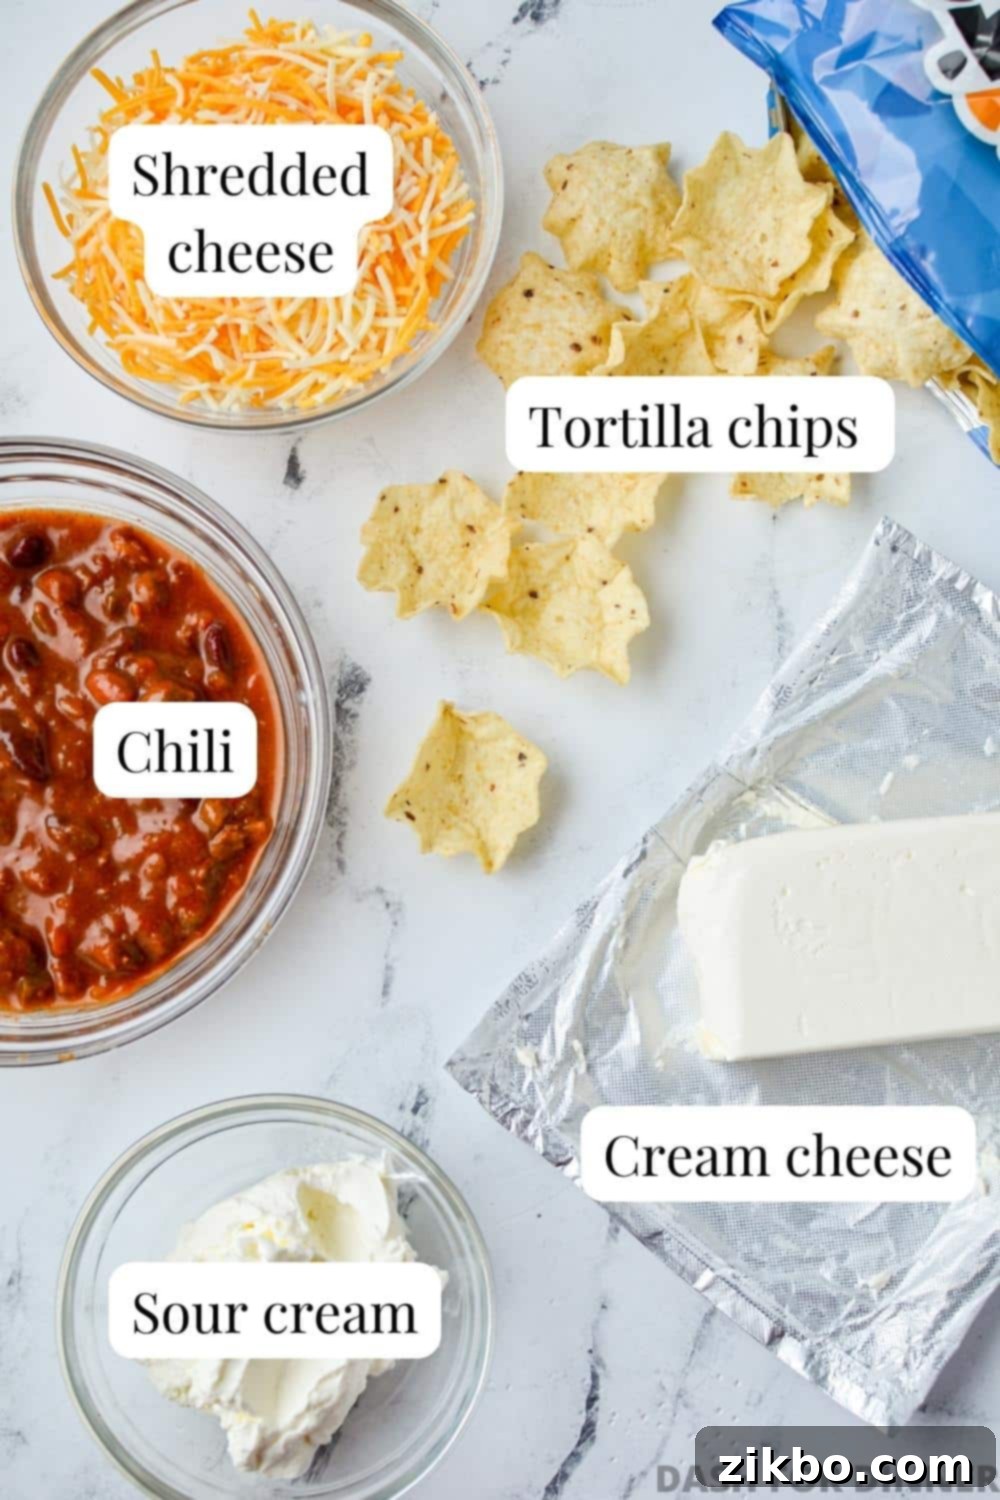
- Chili: You’ll need one standard 15-ounce can of chili for this recipe, which typically yields about 1 ½ cups. The beauty of canned chili is its convenience, but feel free to substitute with approximately 1 ½ cups of your favorite homemade chili if you have it on hand. For specific dietary needs:
- Keto or Low-Carb: Opt for an all-meat chili, ensuring it has no beans or added sugars.
- Vegetarian: Many brands offer delicious vegetarian canned chili options, or use your homemade meatless chili.
Consider a chili with a medium spice level for broader appeal, or go bold with a spicy variety if your crowd enjoys heat!
- Cream Cheese: An 8-ounce brick of full-fat cream cheese is essential for the rich, creamy base. For the smoothest possible texture and easiest blending, it’s highly recommended to allow your cream cheese to soften at room temperature for at least 30-60 minutes before mixing. While not strictly essential, this step prevents lumps and ensures a more homogenous layer. I strongly advise against using cream cheese that comes in a tub, as its whipped consistency and higher water content don’t hold up as well to heating and can result in a thinner, less stable dip.
- Sour Cream (Optional, but Recommended): A half-cup of thick sour cream adds a delightful tang and helps create an even creamier, spreadable base layer. While the recipe can technically be made without it (just use an extra half brick of cream cheese for consistency), it truly elevates the flavor and texture. Look for a full-fat, thick sour cream, ideally one with a consistency similar to Greek yogurt, such as Daisy brand. This thickness ensures it blends perfectly with the cream cheese and doesn’t thin out the dip.
- Shredded Cheese: For ultimate ease and balanced flavor, a 1 ½ cup of shredded Mexican cheese blend is an excellent choice. These blends typically include Monterey Jack, Cheddar, Asadero, and Queso Blanco, which melt beautifully and offer a complex, savory profile. However, feel free to personalize your dip by using your favorite shredded cheese! Great alternatives include Monterey Jack, Colby Jack, sharp cheddar cheese, pepper jack for a kick, or even a combination for multi-layered flavor. Pre-shredded cheese works wonderfully, but shredding your own from a block can sometimes provide a meltier result.
- Tortilla Chips (for serving): No dip is complete without the perfect dipper! Classic tortilla chips are always a hit, but corn chips or sturdy pita chips also work wonderfully. For those following keto or low-carb diets, fantastic alternatives include crisp celery sticks, colorful mini bell peppers, cucumber slices, or specially formulated Quest chips. Consider serving a variety of options to cater to all tastes!
Recommended Equipment:
While this recipe is incredibly simple, having the right tools can make the process even smoother and ensure a perfect outcome. Here’s what you’ll need:
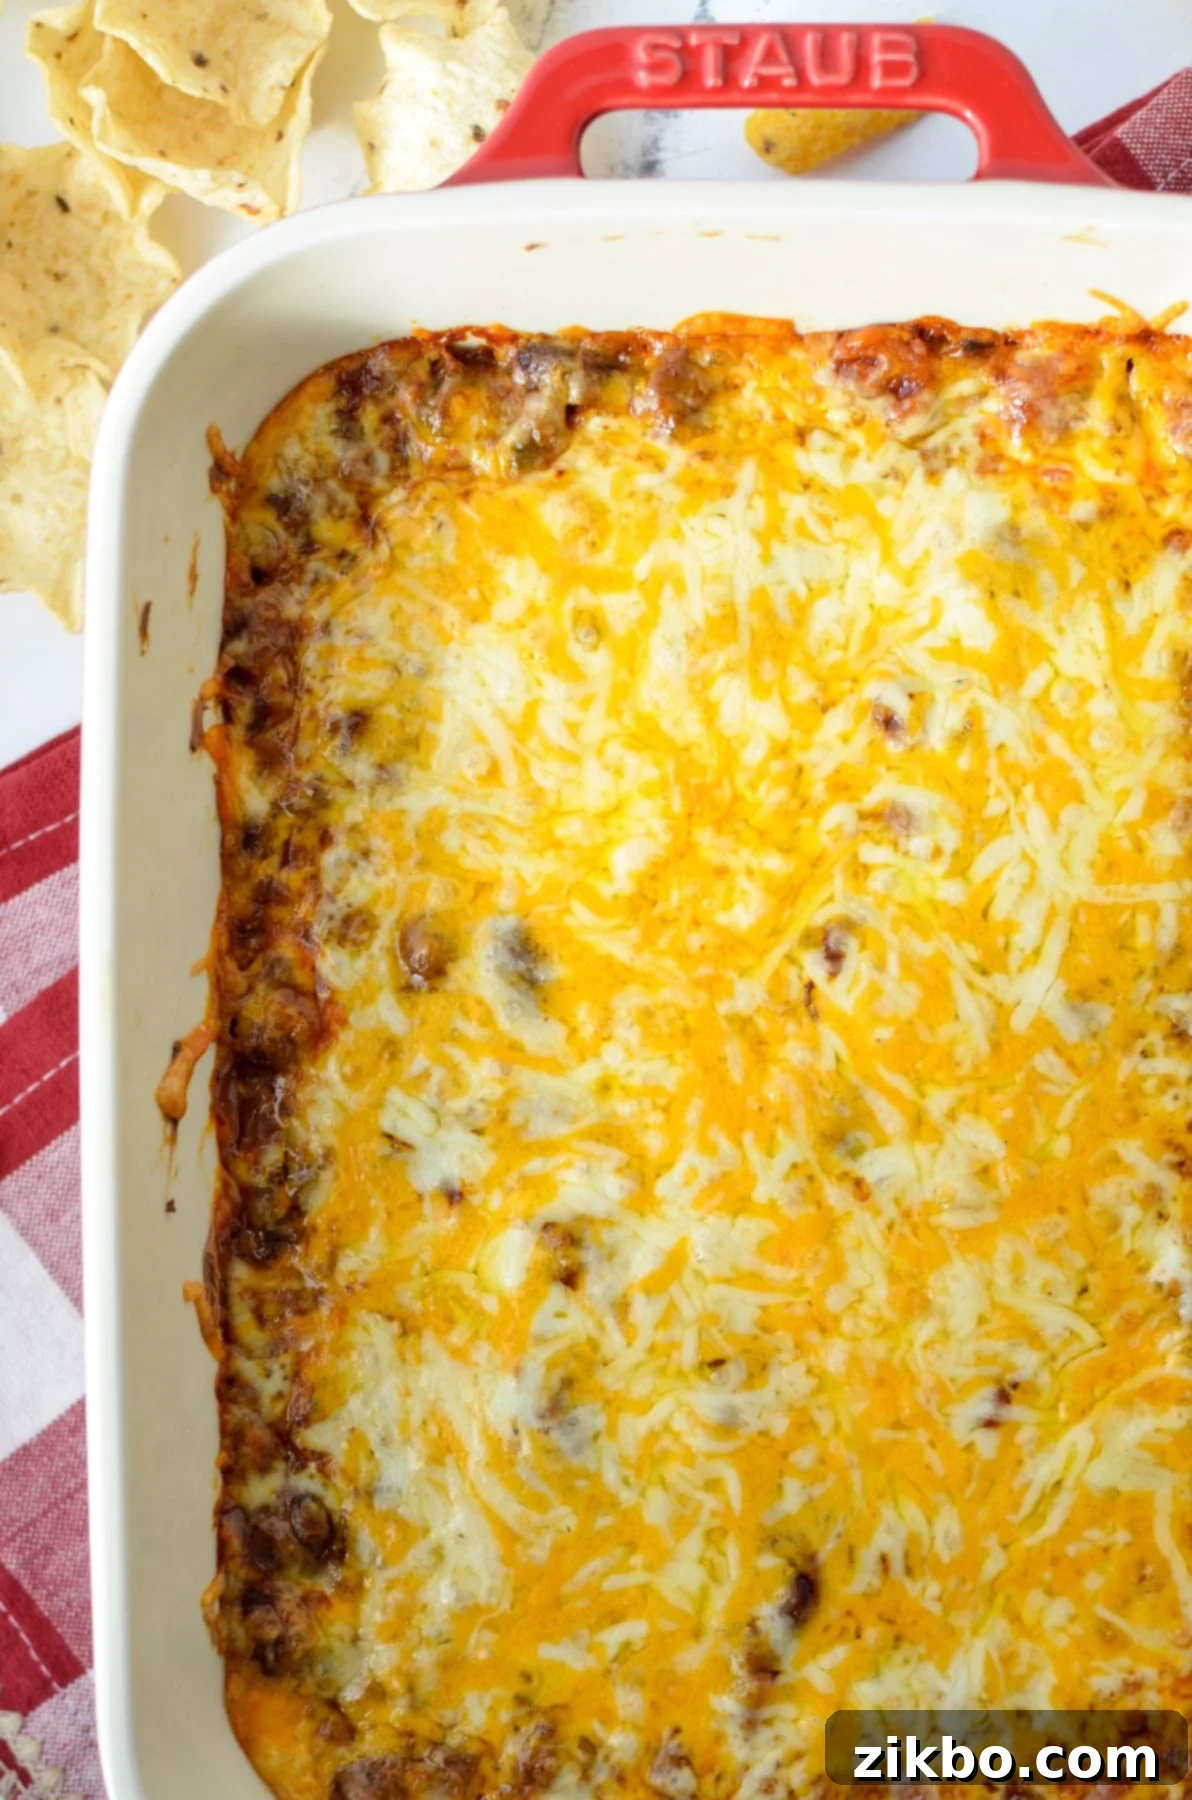
- Baking Dish: A medium-sized baking dish that is both oven-proof (or microwave-proof if you opt for that method) is necessary. I’ve found a Staub 7.5 X 6″ dish works wonderfully for its heat retention and presentation. Alternatively, a classic glass 8X8″ baking dish is a perfect and readily available option that offers ample space for all the delicious layers. A 2-quart capacity is ideal to prevent overflow.
- Hand Mixer: To achieve that wonderfully smooth and perfectly combined cream cheese and sour cream layer, an electric hand mixer is highly recommended. It effortlessly whips the ingredients into a creamy consistency, eliminating any lumps. If you don’t own one, don’t worry! Ensure your cream cheese is exceptionally soft and use a sturdy silicone spatula or fork to vigorously blend the cream cheese and sour cream until it’s as smooth as possible.
- Mixing Bowl: A medium-sized mixing bowl is useful for combining the cream cheese and sour cream before spreading.
How to Make the Best 4-Ingredient Chili Cheese Dip
Creating this delectable chili cheese dip is surprisingly quick and simple, making it a go-to recipe for any occasion. Follow these straightforward steps for a perfectly melty, flavorful dip:
To get started, first, you’ll need to preheat your oven to 400ºF (204ºC). While the oven heats, lightly spray your chosen medium-sized baking dish with cooking spray to prevent sticking. This small step ensures an easy cleanup later. Set the prepared dish aside.
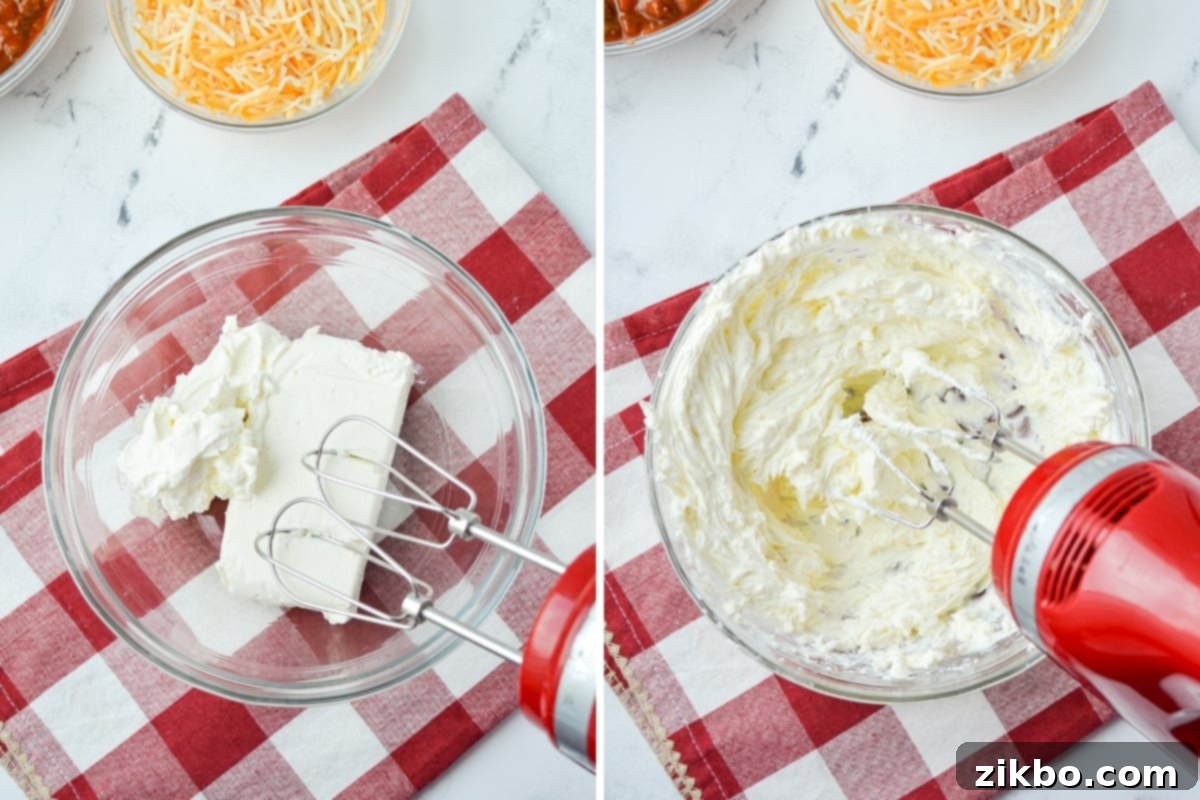
In a medium-sized mixing bowl, add the softened cream cheese and sour cream. Using an electric hand mixer (or a sturdy spatula if you don’t have one), whip the mixture vigorously until it’s completely smooth and creamy. This ensures a uniform, luscious base layer for your dip. Make sure there are no lumps of cream cheese remaining.
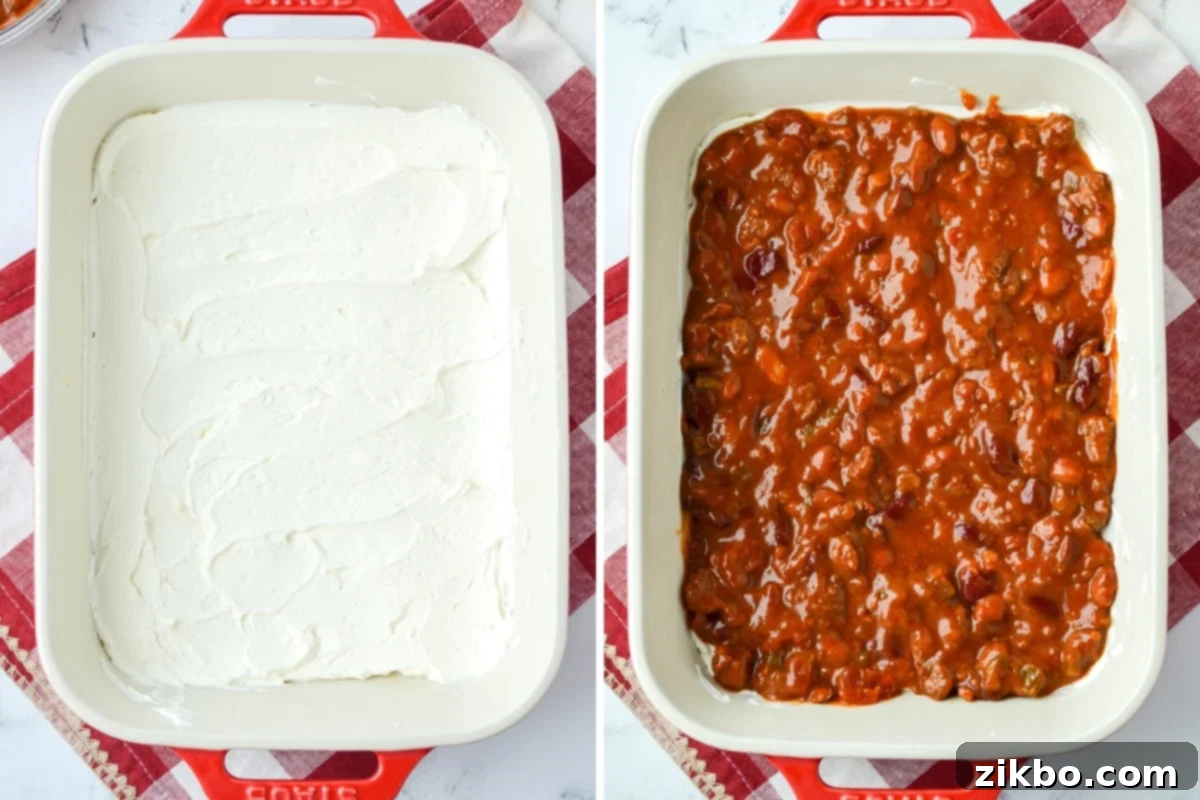
Next, carefully spread the cream cheese and sour cream mixture evenly into the bottom of your prepared baking dish. Aim for a smooth, consistent layer that reaches all the way to the edges of the dish. This forms the delightful creamy foundation of your dip.
Then, gently add the full can of chili on top of the cream cheese layer. Using the back of a spoon or a small spatula, carefully spread the chili out into an even layer, making sure it covers the entire cream cheese base. Be mindful not to mix the layers too much, maintaining distinct strata for optimal texture and presentation.
Finally, the moment for cheesy glory! Generously sprinkle 1 ½ cups of shredded Mexican blend cheese (or your chosen shredded cheese blend) over the chili layer. Ensure the cheese covers the entire surface for a perfect melt. Once the cheese is in place, carefully transfer your baking dish to the preheated oven.
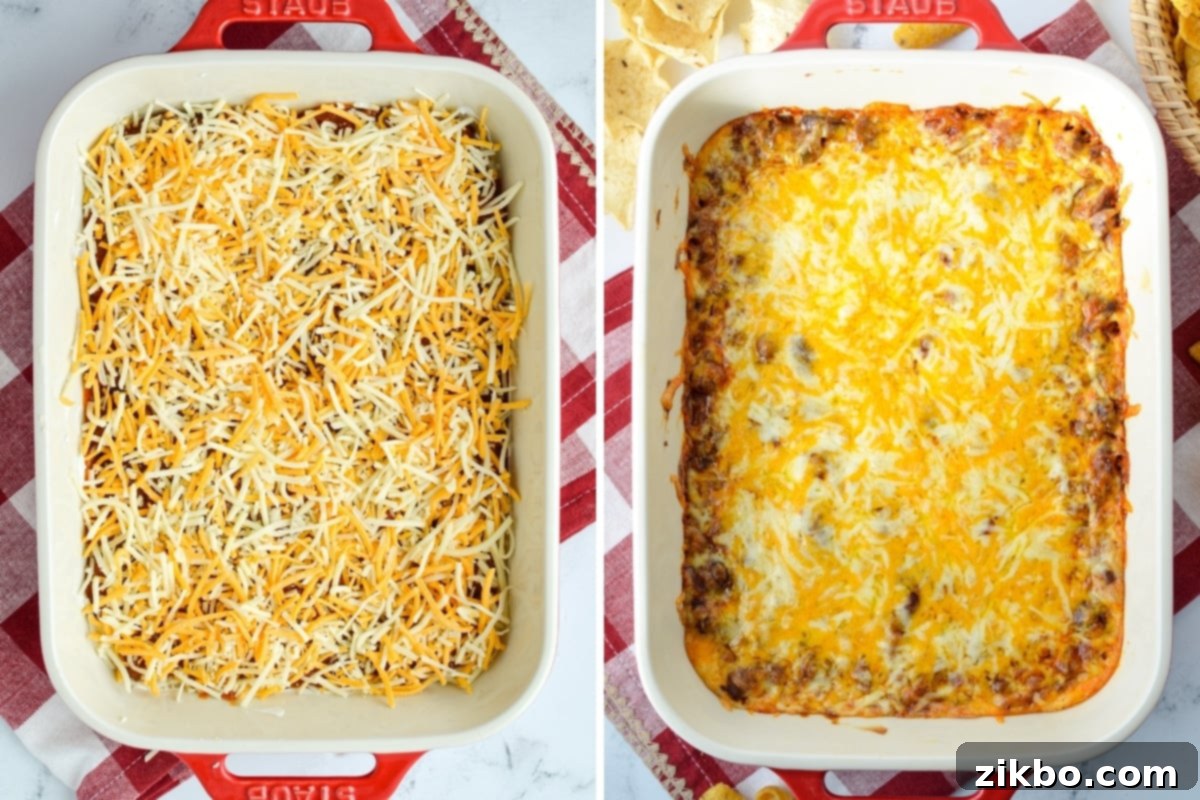
Bake the chili cheese dip in the preheated oven for 20-25 minutes. Keep an eye on it until it’s gloriously hot and bubbly around the edges, and all of the shredded cheese has melted into a golden, gooey crust. The exact baking time may vary slightly depending on your oven and dish size, so look for those visual cues!
Once baked to perfection, carefully remove the dish from the oven. It will be piping hot! Allow it to cool for a few minutes – typically 5-10 minutes – before serving. This brief resting period allows the layers to set slightly, making it easier to scoop and preventing burns. Serve this irresistible dip with your favorite tortilla chips, corn chips, crunchy veggie sticks, or even toasted baguette slices.
For an extra touch of flavor and visual appeal, feel free to sprinkle the top with fresh, chopped garnishes such as vibrant green onions, diced green peppers, finely minced red onion, or even a dollop of extra sour cream. These additions can truly elevate the dish and allow you to personalize it to your taste!

Quick Microwave Chili Cheese Dip
In a rush or don’t want to heat up your oven? This chili cheese dip is incredibly adaptable and can be made in the microwave for a super speedy and equally delicious result. It’s the ultimate easy dip when time is of the essence!
- **Prepare the Base:** Begin by spreading the softened cream cheese (and sour cream, if using) onto a shallow, microwave-safe plate or baking dish. An 8×8 inch dish works well here. Ensure the layer is as even as possible for uniform heating.
- **Add Layers:** Evenly top the cream cheese layer with the canned chili, spreading it gently to the edges.
- **Cheesy Topping:** Finally, sprinkle the shredded cheese generously over the chili layer.
- **Microwave and Serve:** Microwave on high for 2-4 minutes, checking periodically. The goal is for the dip to be hot and bubbly, with the cheese fully melted and gooey. Cooking times may vary depending on your microwave’s wattage, so start with 2 minutes and add more time as needed.
- **Enjoy:** Carefully remove from the microwave (it will be hot!) and serve immediately with your favorite tortilla chips, corn chips, or fresh veggies.
Storing and Reheating Your Chili Cheese Dip
Proper storage and reheating ensure you can enjoy this delicious dip even after the party is over. While best served fresh, leftovers are still fantastic with a few simple tips:
Storing Leftovers: Allow any leftover chili cheese dip to cool completely to room temperature before storing. Transfer it to an airtight container, or simply cover the baking dish tightly with plastic wrap. Store the dip in the fridge for 1-2 days. While it might last a bit longer, beyond two days, the layers tend to “weep” and release more liquid, which can affect the texture.
Reheating Leftovers: When you’re ready to enjoy your leftovers, you have a couple of options: the oven or the microwave. I’ve tested both, and generally, the microwave yields the best results for reheating. The oven method, while effective, can sometimes cause the cream cheese and sour cream layer to curdle slightly due to slower heating, though it will still taste perfectly fine.
- **Microwave Reheating:** For the microwave, transfer a portion of the dip to a microwave-safe dish. Heat in 1-minute intervals on high, stirring gently in between, until the dip is warmed through and the cheese is melty again. This method helps maintain creaminess.
- **Oven Reheating:** If using the oven, place the cold dish (covered with foil to prevent drying) into a cold oven. Set the oven temperature to 350ºF (175ºC) and allow the dip to gradually heat as the oven preheats. Continue baking until it’s thoroughly warmed through and bubbly, usually about 20-30 minutes, depending on the amount.
Make Ahead: This cheesy dip is a fantastic make-ahead option, perfect for reducing stress on party day. You can assemble the entire dip up to 1 day in advance. After layering all the ingredients in your baking dish, cover it tightly with plastic wrap and store it in the refrigerator. When you’re ready to bake, place the cold dish directly into a cold oven. Then, set the heat to 400ºF (204ºC). The dip will slowly come to temperature with the oven, preventing thermal shock, and then bake until hot and bubbly, typically requiring a slightly longer baking time than if baked from room temperature.

Chili Cheese Dip Variations and Substitutions
While this 4-ingredient chili cheese dip is a winner as-is, it’s also wonderfully versatile! Don’t hesitate to experiment with these ideas to tailor it to your personal taste and dietary preferences, adding a unique twist to this easy party favorite.
- Favorite Toppings: Even though the base recipe is designed for simplicity, a few extra toppings can elevate this dip into a gourmet experience. Consider adding:
- Sliced fresh or pickled jalapeños for a spicy kick.
- Chopped fresh green onions or chives for a mild oniony flavor and pop of color.
- A spoonful of seasoned ground beef (if your canned chili is bean-only or you want extra meatiness).
- A drizzle of your favorite hot sauce for extra heat.
- Diced bell peppers or finely minced red onion for crunch and freshness.
- A dollop of extra sour cream or a sprinkle of fresh cilantro just before serving.
- Alternative Cheeses: The Mexican blend cheese is a reliable choice, but don’t limit yourself! Feel free to use what you have on hand or combine several varieties for a truly custom flavor profile. Excellent options include:
- Pepper Jack cheese for a spicier, creamier melt.
- Colby Jack or a sharp shredded cheddar cheese for classic, robust flavor.
- A small amount of mozzarella cheese can be added for extra stretchiness and a mild flavor.
- Consider a smoky Gouda or a creamy Havarti for a unique twist.
- Chili Choices: The convenience of canned chili is unmatched, but your options for this chili cream cheese dip extend far beyond!
- If you have some delicious leftover homemade chili, it’s an ideal substitute and will infuse the dip with even deeper flavors.
- Explore different varieties of canned chili: all-meat chili, chili con carne, or even a spicy bean and meat blend.
- For a meatless appetizer, easily find and use vegetarian chili options available in cans or prepare your own hearty vegetable chili.
- Adjust the spice level by choosing mild, medium, or hot chili varieties.
- Keto/Low Carb Adaptations: This dip is already quite friendly to low-carb diets with a few adjustments.
- Ensure you use an all-meat chili that is free of beans and added sugars (either homemade or carefully selected canned).
- Serve with carb-conscious dippers like crisp celery sticks, vibrant mini bell peppers, cucumber slices, radishes, or Quest chips.
Slow Cooker Chili Cheese Dip for Easy Entertaining
For effortless entertaining, especially when you need to keep your chili cheese dip warm for an extended period, adapting this recipe for the slow cooker is a brilliant idea. It’s perfect for potlucks, tailgates, or long game days where you want hot, melty dip available throughout.
I highly recommend using a smaller 4-quart slow cooker for this recipe. Larger 6-quart models might not heat as efficiently or evenly when less than half full. Alternatively, if you only have a larger slow cooker, you can place an oval baking dish containing the assembled dip inside the slow cooker and fill the outer crock with water. This “water bath” method ensures the dip heats gently and evenly without scorching.
- **Prepare Crock:** Lightly spray the inside of your slow cooker crock with cooking spray to prevent sticking and ensure easy cleanup.
- **Creamy Base:** In a separate bowl, combine the softened cream cheese and sour cream until it’s completely smooth and free of lumps.
- **Layer One:** Spread this creamy mixture evenly into the bottom of the slow cooker crock, creating a delicious base layer.
- **Layer Two:** Add the full can of chili on top of the cream cheese layer, spreading it out into an even, consistent layer.
- **Final Topping:** Generously top with the shredded cheese, ensuring it covers the entire surface of the chili.
- **Cook:** Cover the slow cooker and cook on “high” for 2 hours, or on “low” for 3-4 hours. The dip is ready when it’s hot, bubbly, and the cheese is fully melted and gooey. Stir gently if needed before serving to combine any softened cheese.
- **Serve and Enjoy!** Keep the slow cooker on the “warm” setting during serving to maintain optimal temperature and melty goodness throughout your event.
More Easy Appetizer Recipes You’ll Love
If you’re a fan of simple, delicious appetizers that make entertaining a breeze, then you’ll love these other quick and easy recipes:
- Layered Salsa Dip (Nacho Dip): Another fantastic layered dip that’s vibrant and packed with flavor.
- Air Fryer Jalapeno Poppers: Crispy, cheesy, and perfectly spiced, made easy in your air fryer.
- Easy Parmesan Crisps: A naturally gluten-free and low-carb crunchy snack that’s great with dips or on its own.
- Air Fryer Paneer: A quick and tasty Indian-inspired appetizer that’s surprisingly simple to prepare.
- Jalapeno Popper Dip – Yellow Bliss Road: A creamy, spicy, and incredibly addictive dip inspired by classic poppers.

Chili Cheese Dip
Print
Pin
Rate
Equipment
-
Medium baking dish 8″ X 8″ or 7.5″ X 6″
-
Electric Hand Mixer optional, for smoothest cream cheese layer
-
Medium Mixing Bowl
Ingredients
- 8 ounces cream cheese brick style, softened
- ½ cup thick sour cream (optional, but recommended)
- 15 ounce can of chili (your favorite brand)
- 1 ½ cups shredded Mexican blend cheese or cheese of choice
Instructions
-
Preheat the oven to 400ºF (204ºC) and lightly spray a 2-quart baking dish with cooking spray. Set aside.
-
Add the softened cream cheese and sour cream (if using) to a medium-sized bowl and blend with an electric mixer or sturdy silicone spatula until well combined and smooth, with no lumps.
-
Spread the cream cheese and sour cream mixture evenly into the bottom of the prepared baking dish, covering the entire base.
-
Add the full can of chili on top of the cream cheese layer and spread it into an even layer with care, avoiding mixing the layers.
-
Finally, generously sprinkle on 1 ½ cups of shredded cheese over the chili layer, ensuring full coverage for a perfect melt.
-
Bake in the preheated oven for 20-25 minutes, or until hot, bubbly around the edges, and all the cheese is melted and slightly golden.
-
Remove from oven and let cool for 5-10 minutes before serving with your choice of tortilla chips, corn chips, sliced veggies, or other favorite dippers. Garnish with fresh toppings if desired.
Video
Notes
Slow Cooker Method: Lightly spray a 4-quart slow cooker. Layer softened cream cheese/sour cream, then chili, then shredded cheese. Cook on “high” for 2 hours, or “low” for 3-4 hours, until hot and melty. Keep on warm setting for serving.
What to serve with Chili Cheese Dip: Classic options include tortilla chips, corn chips, and pita chips. For healthier or low-carb alternatives, try celery sticks, mini peppers, cucumber slices, or toasted baguette slices.
Make Ahead Tips: Assemble the entire dip in its baking dish, cover tightly with plastic wrap, and refrigerate for up to 1 day. When baking, place the cold dish into a cold oven, then set the temperature to 400ºF (204ºC). Bake until hot and bubbly, allowing for slightly extended cooking time.
Storage & Reheating: Allow leftover dip to cool completely, then cover tightly and store in the fridge for 1-2 days. Reheat best in the microwave in 1-minute intervals until warmed through, stirring gently. Oven reheating may cause cream cheese to curdle slightly.
Nutrition
Please note that some of my blog posts here at Dash for Dinner may contain affiliate links. If you make a purchase through these links, I will get a small commission at no additional cost to you. Please see my Disclaimer for more information.
