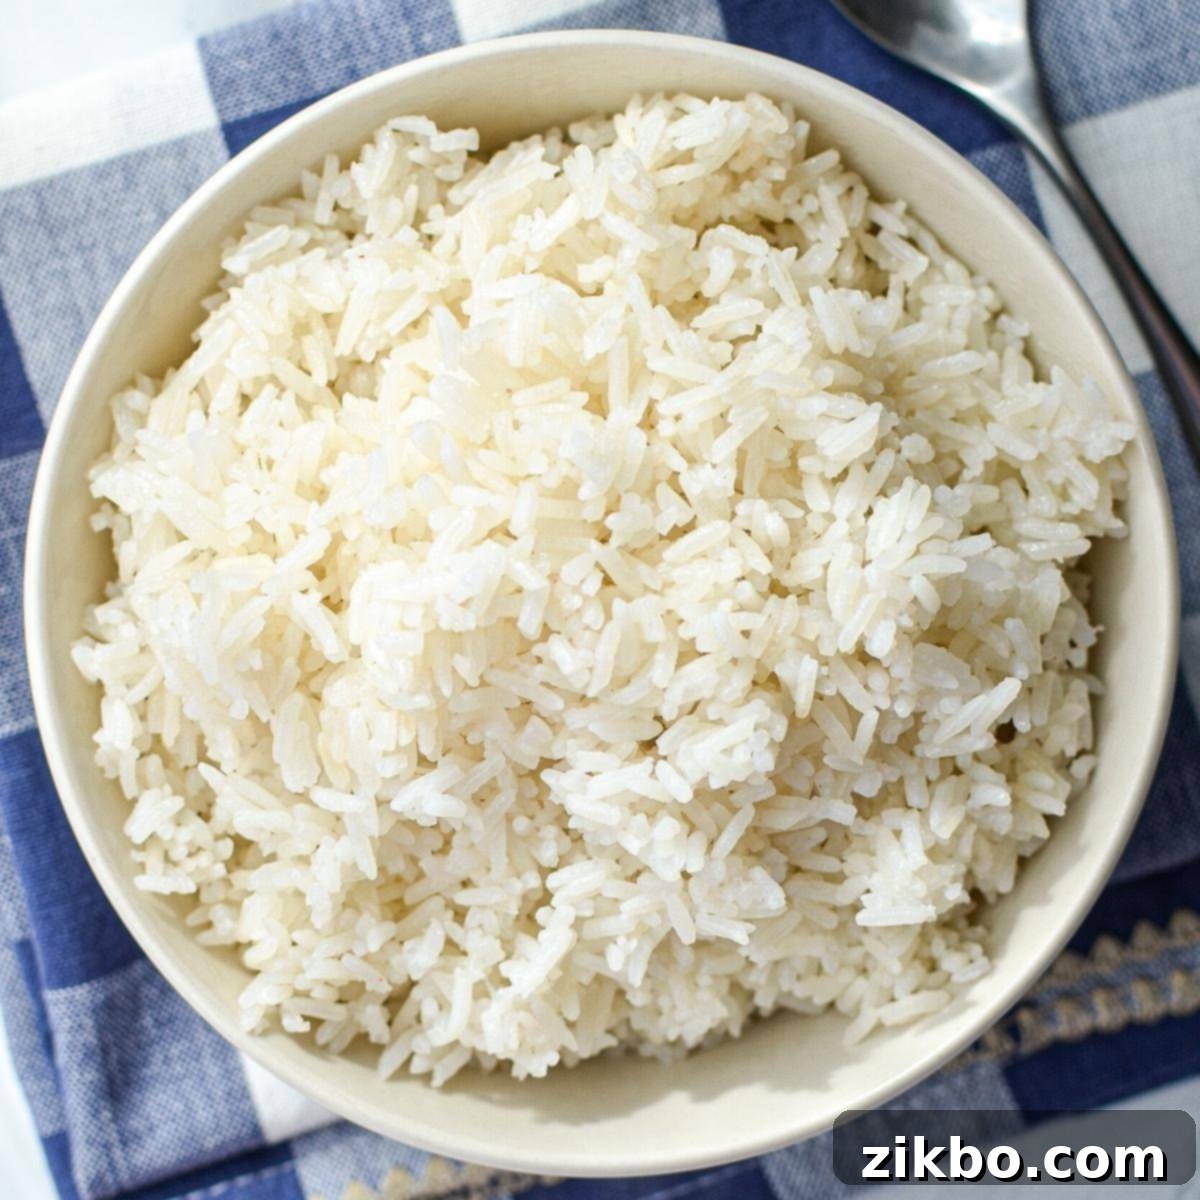
Perfect Fluffy Instant Pot White Rice: Your Easy, Foolproof Guide
If you’re searching for the ultimate quick and easy method to cook delicious, fluffy white rice, look no further! This **foolproof recipe for Instant Pot white rice** is a game-changer. With minimal hands-on time, you can prepare this incredibly versatile side dish in less than 20 minutes, including both prep and pressure release. It’s the perfect accompaniment to virtually any meal and an absolute lifesaver for efficient meal prepping.
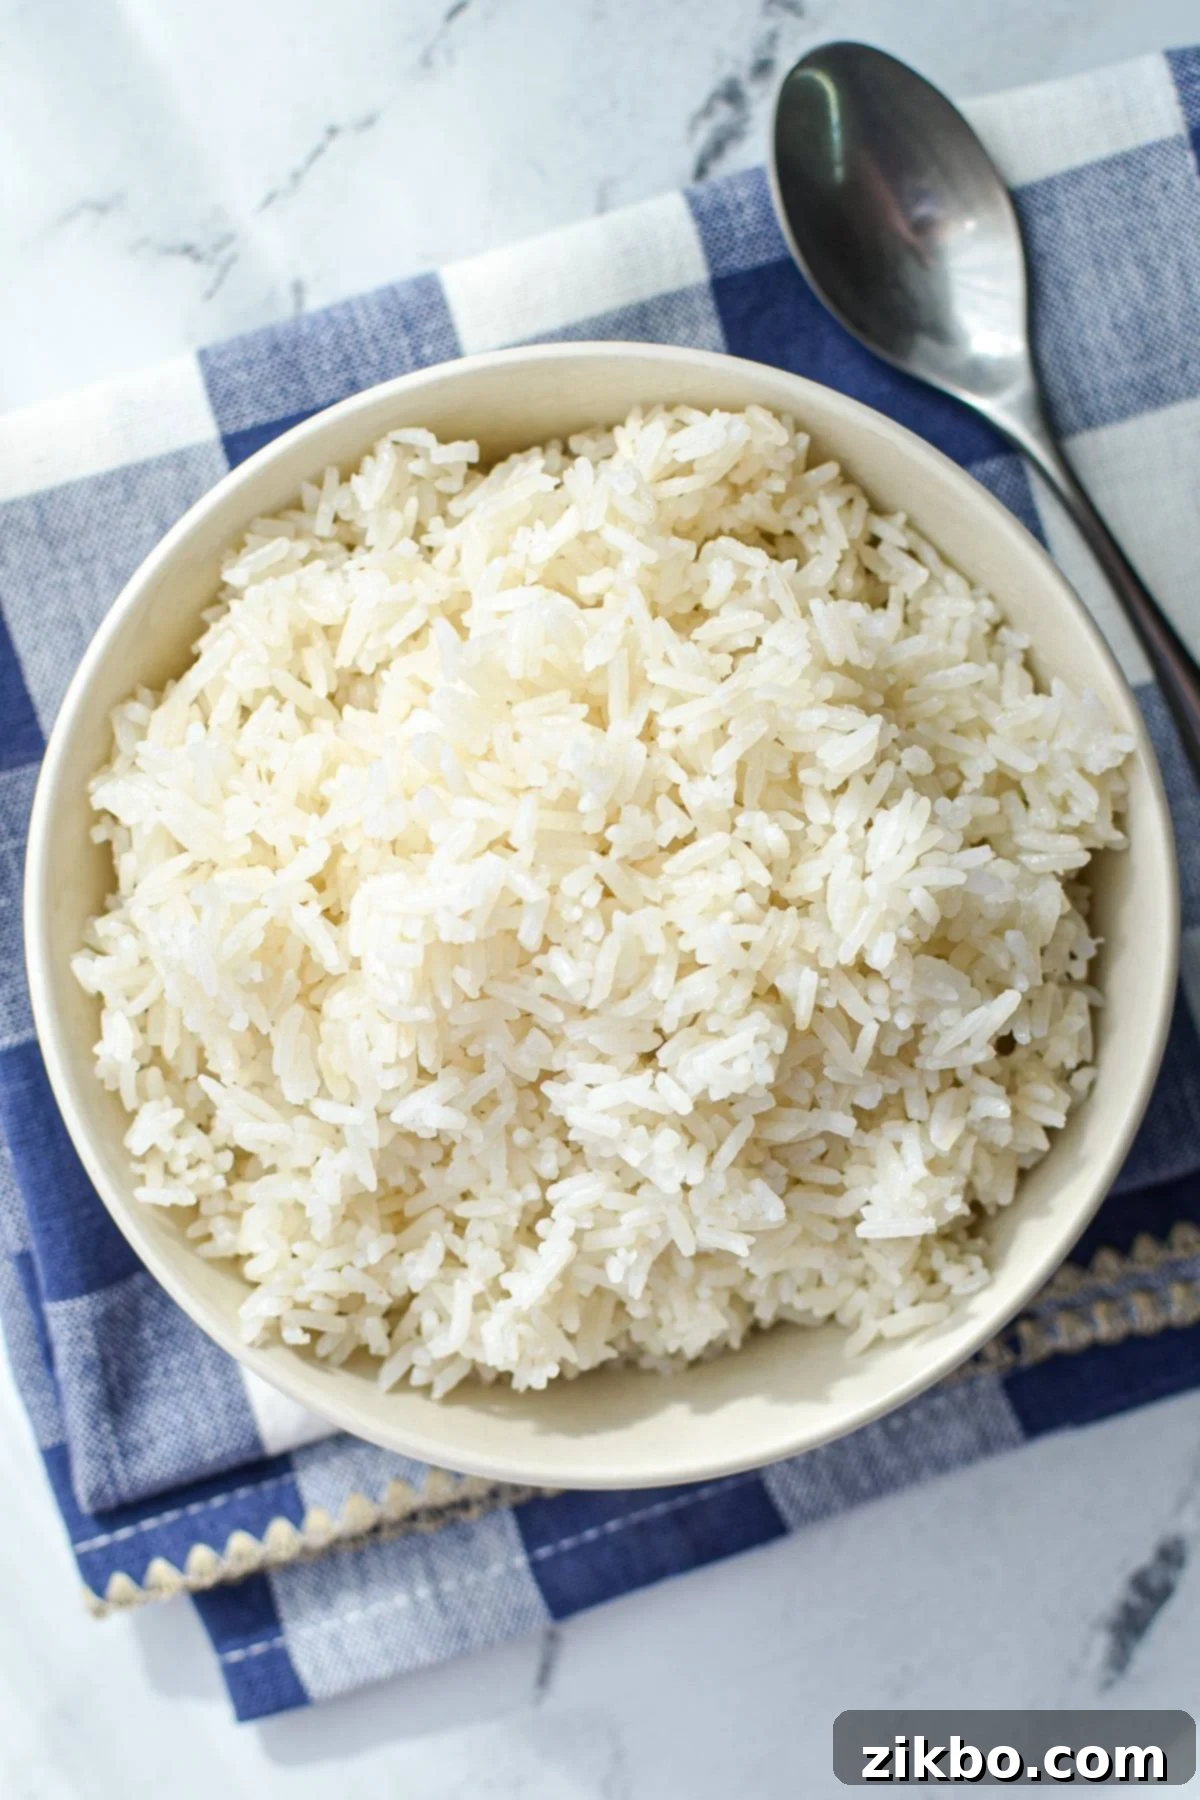
My journey with the Instant Pot began about three years ago, shortly after my son was born. Those first few months were a whirlwind of sleepless nights and colic, leaving very little time for elaborate cooking. I desperately needed a way to prepare nourishing meals and sides with minimal effort and supervision. That’s when the Instant Pot truly came to my rescue, transforming my approach to home cooking!
One of the very first things I mastered in my Instant Pot was simple, reliable white rice. I wanted to start with something **simple, versatile, and consistently delicious**, and it exceeded all expectations. Over the years, I’ve refined this method, incorporating a touch of oil to achieve an even softer, more tender result. This has become my absolute favorite way to make rice, serving as a perfect side dish for countless recipes. It pairs exceptionally well with dishes like my Air Fryer Sausage and Peppers – another recipe leveraging time-saving appliances! But honestly, you can serve this fluffy Instant Pot rice with almost any meal. It’s also fantastic for batch cooking and meal prepping for the week ahead. If you’re a fan of other grains, I also have an Instant Pot recipe for a hearty wild rice blend!
Why You’ll Love This Foolproof Instant Pot White Rice Recipe:
-
Effortless & Hands-Free Cooking: Forget constant monitoring! This method allows your Instant Pot to do all the work, freeing you up to focus on other parts of your meal or simply relax. It’s a truly easy and hands-free way to make perfect white rice every single time.
-
No Rice Cooker Needed: If you’re looking to minimize kitchen gadgets, your Instant Pot pulls double duty, expertly cooking rice alongside main dishes. There’s no need for a separate rice cooker when you have this versatile appliance.
-
Incredibly Fast: From initial prep to a finished, fluffy bowl of rice, this recipe takes just about 20 minutes. This includes a quick pressure build-up, a mere 4 minutes of cook time, and a crucial 10-minute natural pressure release.
-
Perfectly Versatile & Naturally Gluten-Free: This Instant Pot white rice is the ideal companion for any cuisine, from Asian stir-fries to Mexican bowls, or even as a simple base for a hearty stew. It’s naturally gluten-free, making it a healthy and inclusive side dish option for everyone.
-
Consistently Fluffy Results: The specific rice-to-water ratio and pressure cooking method ensure each grain is cooked to perfection, resulting in light, separated, and wonderfully fluffy rice – never sticky or mushy.
Simple Ingredients for Perfect Instant Pot Rice
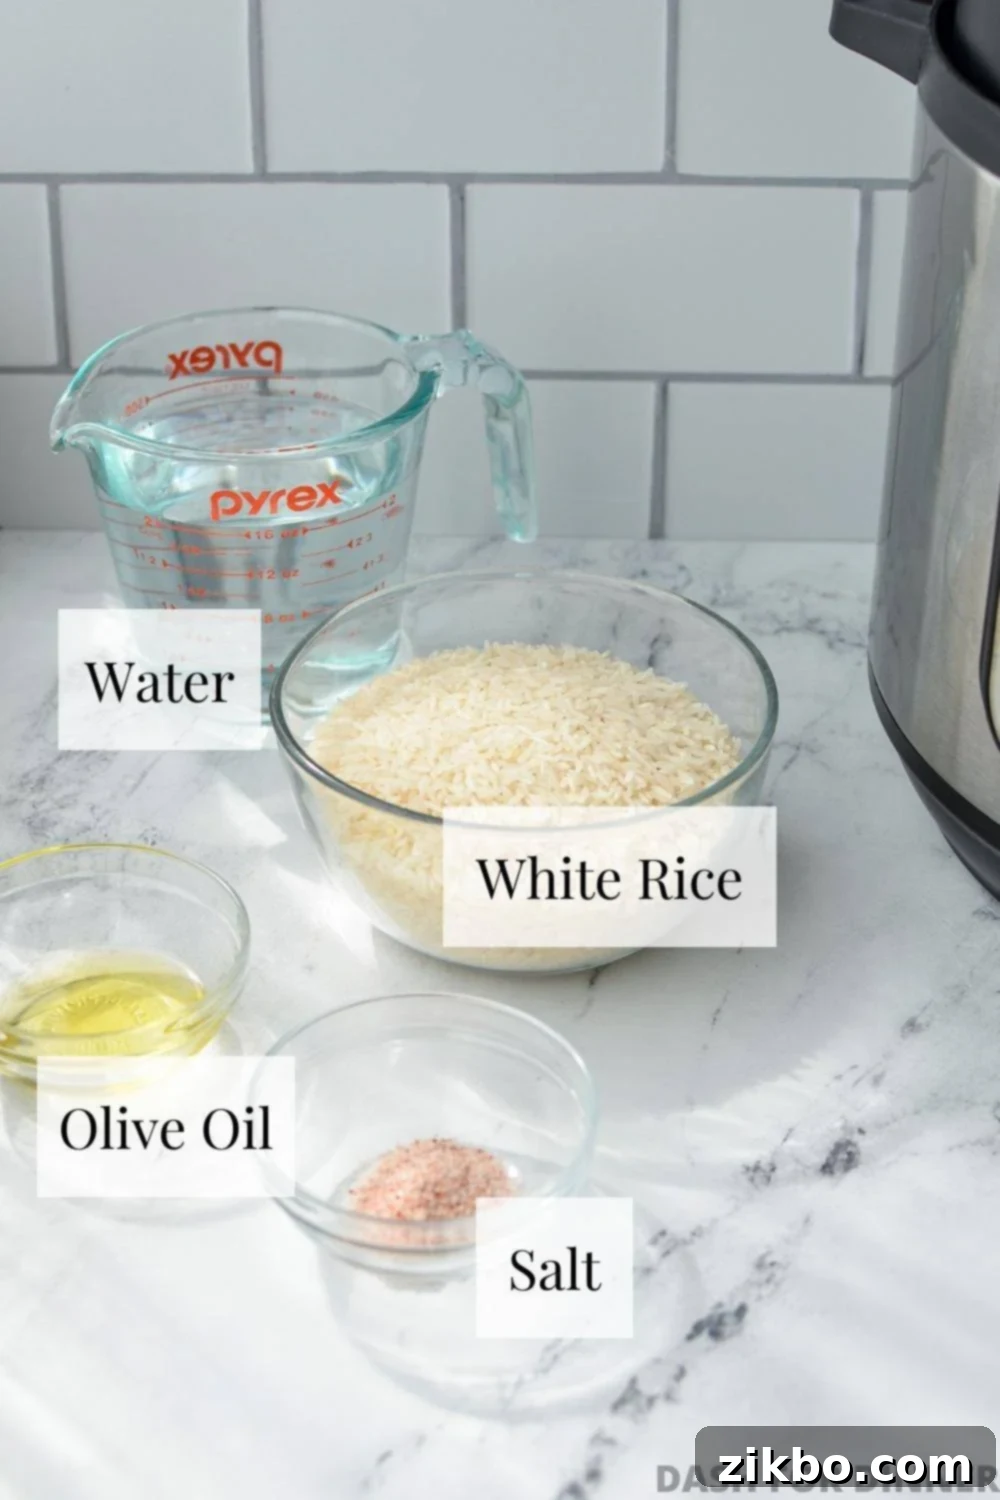
- Long Grain White Rice: The foundation of our dish! For best results, choose your favorite brand of long grain white rice. While some recipes suggest rinsing rice, for the Instant Pot method, it’s often optional. Rinsing can help remove excess starch, leading to slightly less sticky rice, but the pressure cooking environment already helps achieve fluffy grains. If you do rinse, ensure you drain it very well.
- Oil (Olive or Avocado): I typically opt for olive oil, but avocado oil is another excellent choice. Butter can also be used for a richer flavor, though it sometimes results in a slightly chewier or gummier texture. The oil helps to prevent sticking and contributes to the rice’s soft, separated texture.
- Salt: A small amount of salt enhances the natural flavor of the rice, making it more palatable on its own or as a complementary component of a larger meal. Adjust to your personal taste.
- Water (Cool): The magic ratio for Instant Pot white rice is 1:1. This means for every 1 cup of dry rice, you will need exactly 1 cup of cool water. Using cool water is generally recommended as it allows the Instant Pot to build pressure gradually, which can contribute to more evenly cooked rice.
My Favorite Instant Pot Models:
Choosing the right Instant Pot can make all the difference for a seamless cooking experience. Here are my top recommendations:
- Instant Pot Duo 6 qt: This is a fantastic standard model, perfect for most households. It’s incredibly versatile and can handle a wide variety of dishes, from perfectly cooked rice and steamed vegetables to comforting main courses. It’s an excellent choice for everyday cooking.
- Instant Pot Duo 8 qt: This is the model I personally keep on my countertop and use most often! Its larger capacity is ideal for preparing bigger batches of meals, such as rich bone broth, hearty soups, or large roasts. If you frequently cook for a crowd or enjoy meal prepping, the 8-quart size offers great flexibility.
How to Make Fluffy White Rice in an Instant Pot: Step-by-Step
Achieving perfectly cooked white rice in your Instant Pot is incredibly simple. Follow these straightforward steps for a delicious, fluffy result every time:
-
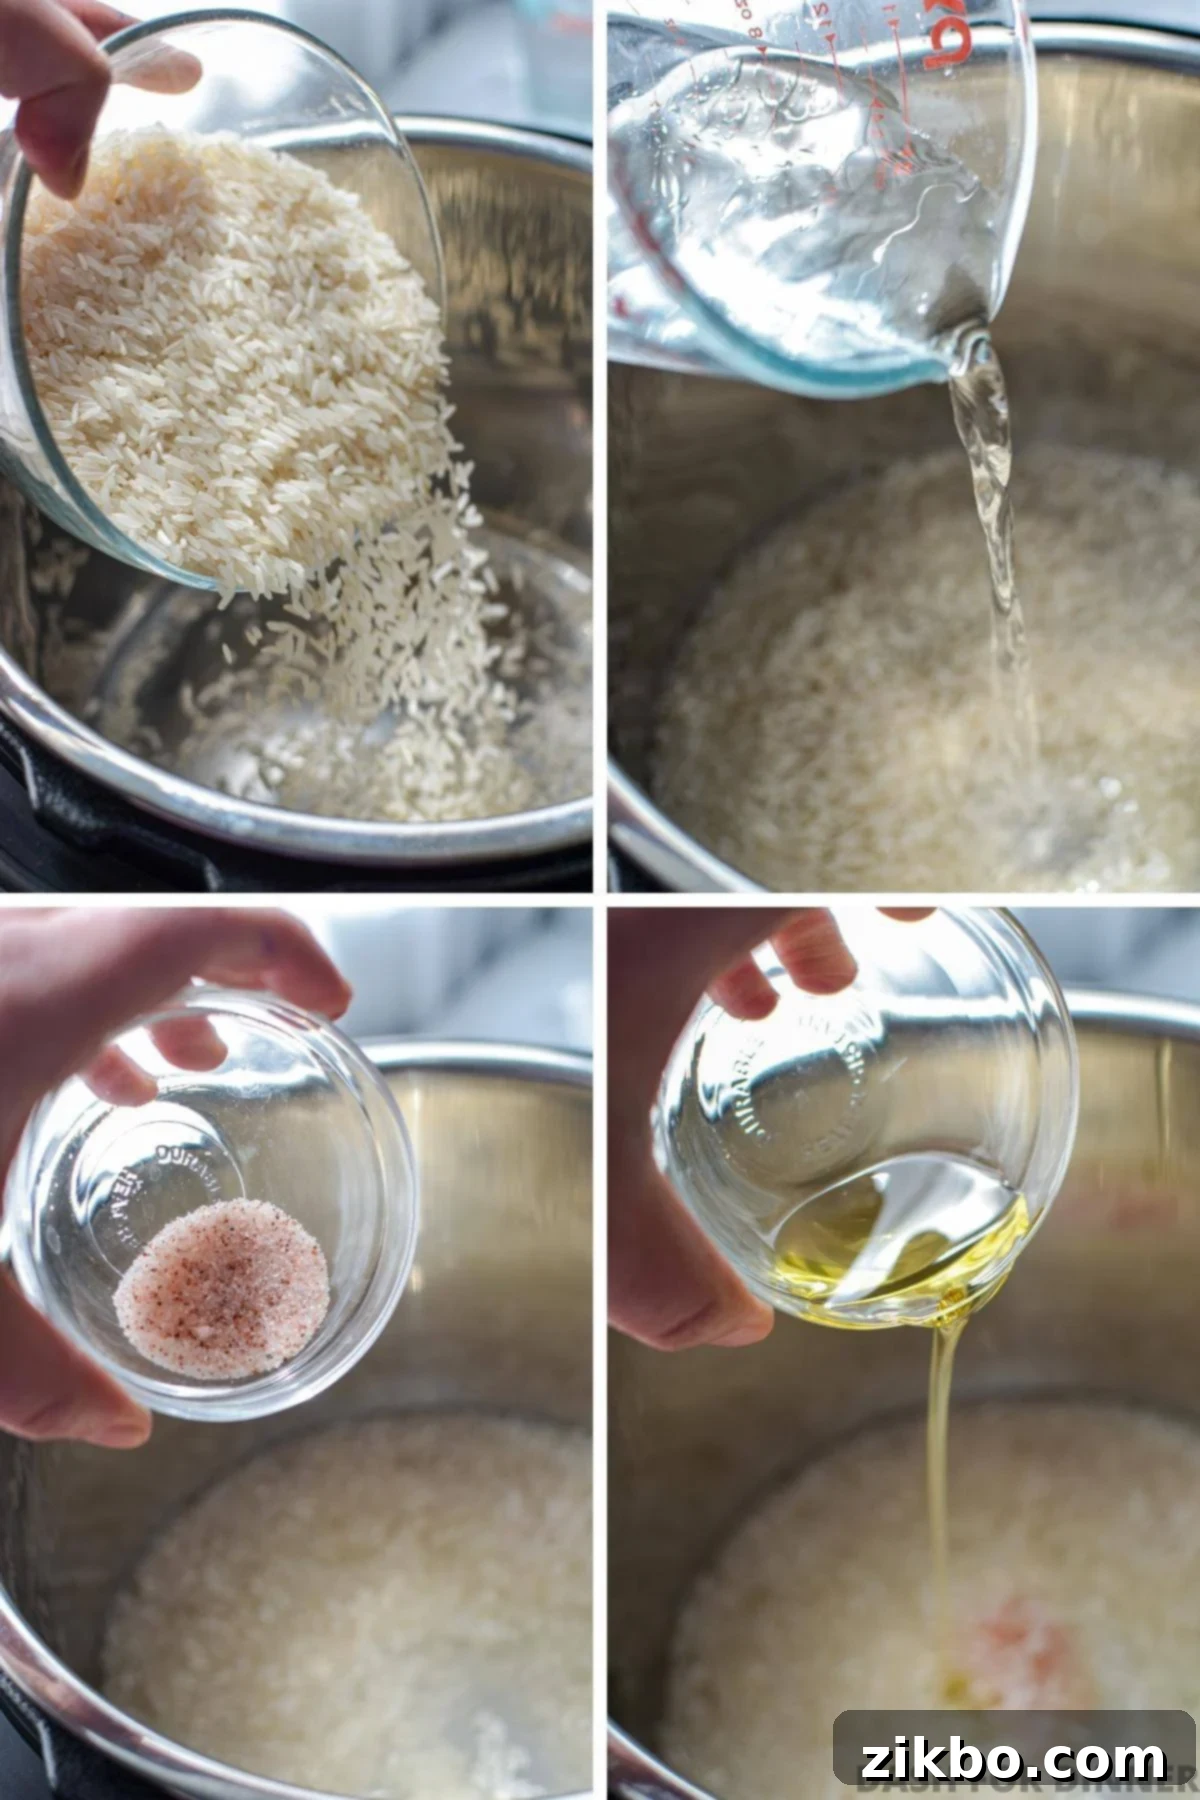
Add Ingredients to the Inner Pot: Carefully add your chosen long grain white rice to the insert of your Instant Pot. It’s important to note that if you’re using a larger 8-quart sized pot, you will need to cook a minimum of 1 ½ cups of rice (along with 1 ½ cups of cool water) to ensure the pot can properly reach pressure. Smaller batches may not pressurize correctly in larger models.
-
Pour in the Water: Now, add your cool water following the crucial 1:1 ratio. For instance, if you used 1 cup of rice, you’ll need 1 cup of water; for 2 cups of rice, use 2 cups of water, and so on.
-
Season and Flavor: Next, add your desired amount of salt to the pot. Then, pour in your chosen oil. These ingredients are key for flavor and texture, ensuring your rice is not bland and cooks up beautifully.
-
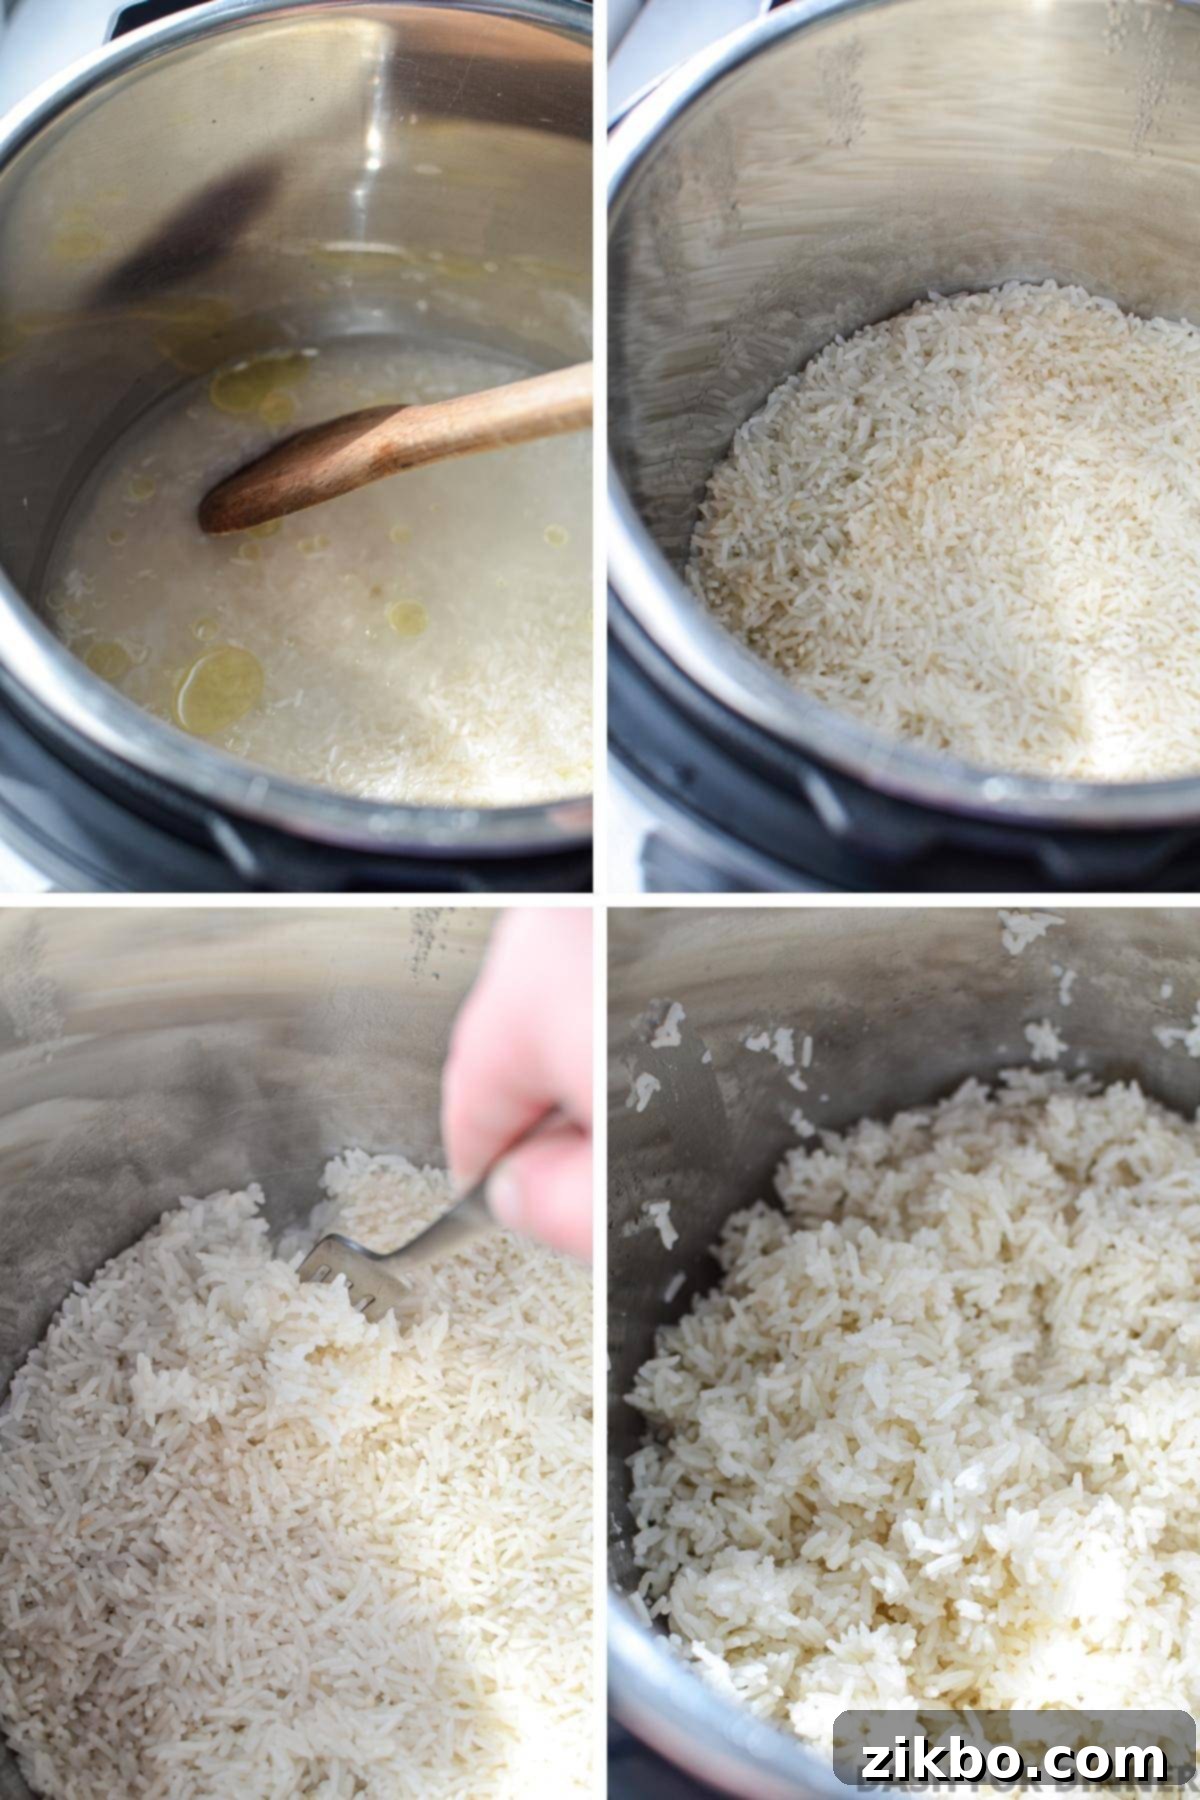
Stir Gently: With all ingredients in, give everything a gentle stir. This ensures the oil and salt are evenly distributed throughout the rice and that all the rice grains are submerged under the water. This promotes even cooking.

Stir to combine, then fluff to perfection! -
Seal and Cook: Secure the lid onto your Instant Pot and turn the valve to the “sealing” position. Select the “Manual” or “Pressure Cook” setting (depending on your model) and set the cooking time for **4 minutes** on high pressure. The Instant Pot will take a few minutes to build pressure before the cooking countdown begins.
-
Natural Pressure Release (NPR): Once the 4-minute cooking cycle is complete, the Instant Pot will beep. **Do not open the valve immediately.** Allow for a **natural pressure release (NPR) for 10 minutes.** This gradual release is vital for rice, allowing the grains to fully absorb the moisture and preventing them from becoming dry or sticky. If your Instant Pot is set to “Keep Warm” mode, you’ll see a timer counting up (e.g., L0:01, L0:02, etc.).
-
Quick Pressure Release (QPR): After the 10-minute natural pressure release, carefully flip the valve to “venting” for a quick pressure release (QPR). A stream of steam will be emitted, releasing any remaining pressure. Once the pressure is fully released, the float valve (a small metal pin on the lid) will drop, indicating it’s safe to open the Instant Pot.
-
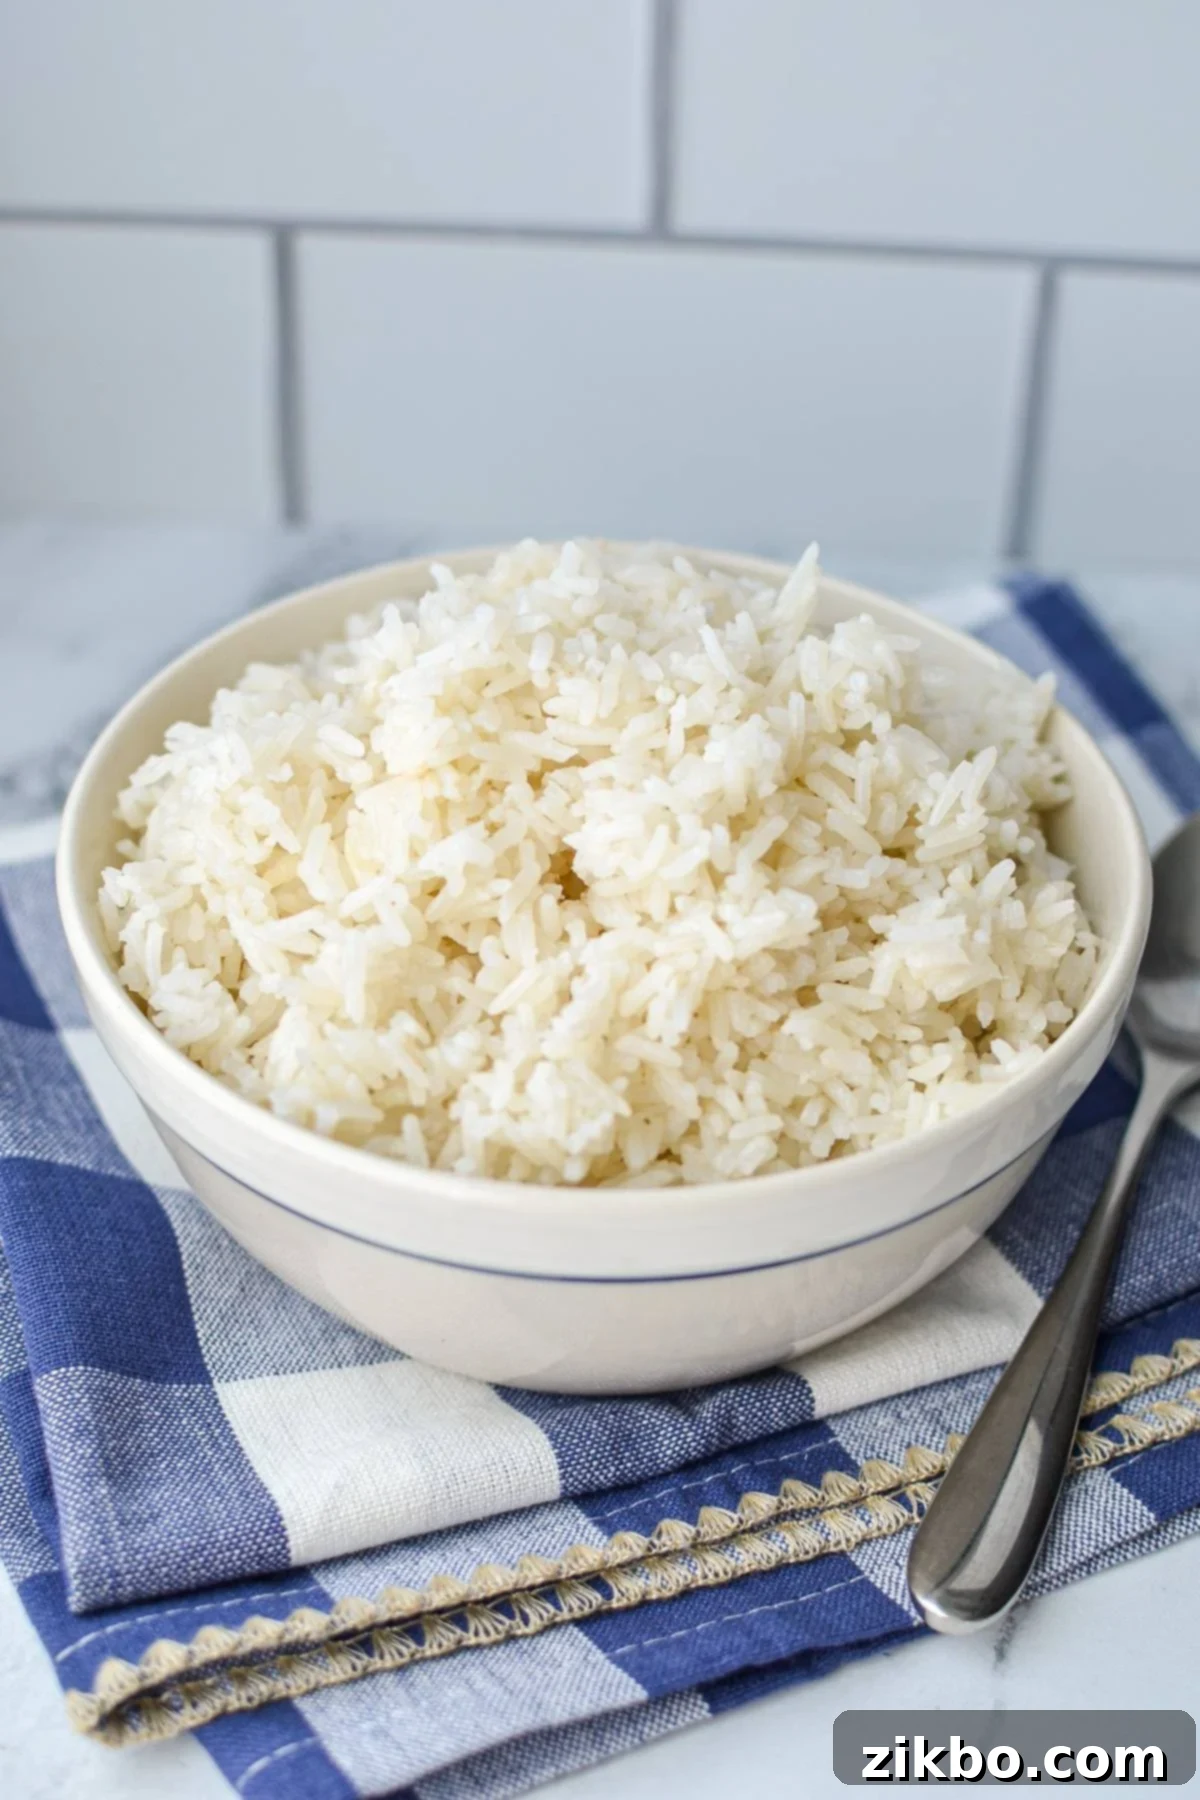
Open and Fluff: With the float valve down, carefully open the lid **away from your face** to avoid any residual steam. Use a fork to gently fluff the cooked rice. This separates the grains and releases any remaining moisture, ensuring a light and airy texture. Serve your perfectly cooked Instant Pot white rice immediately, or replace the lid and keep it on the “warm” setting for up to 20-30 minutes for the best results.
Understanding Natural Pressure Release (NPR)
A natural pressure release (NPR) means allowing the Instant Pot to gradually depressurize on its own, without any manual intervention on the steam release valve. This process is crucial for many recipes, especially delicate ones like rice, as it allows for continued gentle cooking and even distribution of moisture within the food.
If your Instant Pot is set to automatically switch to the “Keep Warm” mode after the cooking cycle (which is the default setting for most models), you’ll notice a digital display showing a timer that begins counting up. For example, “L0:08” means 8 minutes have elapsed since the cooking time finished and the natural pressure release began. This convenient timer helps you keep track of the NPR duration without needing an external timer.
Performing a Quick Pressure Release (QPR)
For this Instant Pot white rice recipe, once the display reads “L0:10” (indicating a 10-minute natural pressure release), your rice has achieved optimal texture. At this point, you have two options: you can either let the remaining pressure continue to release naturally (which will take longer), or you can carefully perform a quick pressure release (QPR).
To do a QPR, simply and cautiously flip the steam release valve to the “venting” position. Be mindful of the hot steam that will forcefully emit from the valve. Keep your hands and face away from the steam path. Continue to let the pot vent until all pressure has been completely released, and the float valve (the small silver or red pin on the lid) drops down. Once this pin is fully down, it’s a clear indication that it is safe to open your Instant Pot lid. Always open the lid away from your face to avoid any lingering steam.
Understanding the Rice to Water Ratio for Instant Pot
The beauty of cooking rice in an Instant Pot lies in its consistent and straightforward rice to water ratio. For most types of common rice, including long grain white rice, brown rice, jasmine rice, and basmati rice, the ideal ratio is a simple one-to-one (1:1). This means for every cup of dry rice, you add precisely one cup of water.
This 1:1 ratio differs significantly from stovetop cooking, where you typically need a higher water volume (often 1.5 to 2 cups of water per cup of rice) because more water escapes as steam. In the sealed environment of the Instant Pot, very little moisture is lost, allowing for this efficient ratio to work perfectly, producing fluffy, distinct grains without being mushy or undercooked.
Rice and Water Measurement Guidelines:
You can easily scale this recipe up or down while maintaining the perfect 1:1 ratio:
- 1 cup of rice : 1 cup of water
- 1 ½ cups of rice : 1 ½ cups of water
- 2 cups of rice : 2 cups of water
- 3 cups of rice : 3 cups of water
- 4 cups of rice : 4 cups of water
While you can scale based on this precise ratio, always **be sure not to pass your Instant Pot’s “Max Fill” line** when combining your rice and water. Overfilling can lead to improper pressurization or even safety issues. Additionally, larger Instant Pot models (like the 8-quart) require a minimum of 1 ½ cups of liquid to effectively build and maintain pressure. Therefore, avoid preparing batches smaller than this minimum in larger pots.
It’s also worth noting that really large batches of rice (e.g., 4 cups or more) might benefit from an additional minute of cooking time (5 minutes total) and potentially a slightly longer natural pressure release (12-15 minutes) to ensure uniform cooking and prevent any grains from becoming chewy or undercooked, especially if you haven’t rinsed your rice.
Frequently Asked Questions About Instant Pot White Rice
For 1 cup of white rice, add 1 cup of rice and 1 cup of cool water to the insert of a 6-quart Instant Pot. Add oil and salt to your taste preferences. Secure the lid, set the valve to “sealing,” and cook on high pressure for 4 minutes. Once the cooking time is complete, allow a natural pressure release for 10 minutes, followed by a quick pressure release. Open the lid safely and fluff the rice with a fork before serving.
The universally recommended water to rice ratio for most types of rice cooked in an Instant Pot, including white, brown, basmati, and jasmine rice, is a consistent 1:1. This means that for every 1 cup of dry rice you use, you will need to add exactly 1 cup of cool water to the Instant Pot’s inner pot. This ratio ensures optimal absorption and fluffy results due to the sealed pressure cooking environment.
For a natural pressure release (NPR), you generally do not need to turn your Instant Pot off. By default, most Instant Pot models automatically switch to a “Keep Warm” mode once the cooking cycle is finished. This mode also features a timer that begins counting up, indicating the duration of the natural pressure release (e.g., L0:01, L0:02, etc.). This makes it easy to track the NPR time. If you choose to turn your Instant Pot off, you will simply need to set a separate external timer to monitor the natural pressure release period yourself.
The duration it takes for an Instant Pot to naturally release its pressure varies significantly based on several factors: the type of food cooked, the volume of contents inside the pot, and the initial cooking time. Denser, larger quantities of food, or those with more liquid, will take longer to naturally release pressure. For rice, a 10-minute natural pressure release is typically sufficient, often taking around 12-15 minutes in total for the float valve to drop completely. In contrast, a large pot of thick stew or bone broth could take 20 minutes or even longer to naturally depressurize.
Rinsing white rice is often recommended to remove excess starch, which can lead to fluffier, less sticky rice. While it’s optional for Instant Pot cooking, as the pressure environment already helps achieve good texture, rinsing can still improve the final result. If you choose to rinse, do so thoroughly under cold water until the water runs clear, then drain the rice very well before adding it to the Instant Pot to maintain the correct water ratio.
More Easy Instant Pot Recipes You’ll Love
Once you’ve mastered Instant Pot rice, you’ll be eager to explore more ways to use this incredible appliance. Here are some of my other favorite, easy Instant Pot recipes:
- Instant Pot Frozen Broccoli: Perfectly cooked, tender-crisp broccoli in minutes!
- Instant Pot Creamy Chicken Tortilla Soup: A comforting and flavorful soup that’s quick to prepare.
- 5 Ingredient Instant Pot Mac and Cheese: The easiest, cheesiest mac and cheese recipe you’ll ever make.
- Instant Pot Hamburger Helper: A nostalgic favorite, made quicker and simpler in the pressure cooker.
- Instant Pot Bacon: Yes, you can even cook bacon perfectly in your Instant Pot!
- Instant Pot Butter Chicken – Two Sleevers: A rich and creamy Indian classic, made easy.

Instant Pot White Rice
Print
Pin
Rate
Equipment
-
Instant Pot (6-quart or 8-quart recommended)
Ingredients
- 2 cups long grain white rice (rinsed, if desired)
- 2 cups cool water
- 1 teaspoon salt (or to taste)
- 2 teaspoons olive or avocado oil (or butter)
Instructions
-
Add the long grain white rice (rinsed and drained, if desired) to the inner pot of your Instant Pot. Pour in the cool water following a 1:1 ratio (e.g., 2 cups rice to 2 cups water).
-
Add in the salt and oil, then stir everything well until thoroughly combined and all the rice grains are submerged below the water line.
-
Secure the lid onto the Instant Pot and ensure the steam release valve is set to the “Sealing” position.
-
Cook on “Manual” or “Pressure Cook” (High Pressure) for 4 minutes.
-
Once the 4-minute cooking time is up, the Instant Pot will beep to indicate it has finished. If the “Keep Warm” mode is enabled (default), you will see a timer on the digital display that counts up, tracking your natural pressure release time.
-
Allow the pot to perform a 10-minute Natural Pressure Release (NPR). The internal timer should display “L0:10” when this step is complete. This controlled release is crucial for perfectly fluffy rice.
-
After the 10 minutes of NPR, carefully flip the steam release valve to the “Venting” position to perform a Quick Pressure Release (QPR). Allow all the remaining steam to vent until the float valve on your Instant Pot lid drops down, indicating it’s safe to open.
-
Once depressurized, open the lid cautiously, directing it away from your face to avoid any lingering steam, and place it gently on the counter.
-
Using a fork, gently fluff the cooked rice. This separates the grains and releases any excess moisture, ensuring a light and airy texture. Serve immediately for the best texture and flavor. Alternatively, you can replace the lid and set the pot to “Keep Warm” mode to serve within the next 20-30 minutes.
Notes
Doubling and Tripling the Recipe: Feel free to scale the recipe up to make larger quantities, as long as the total volume does not exceed your Instant Pot’s “Max Fill” line. For significantly larger batches, you may find that adding an additional minute to the cook time (e.g., 5 minutes instead of 4) and extending the natural pressure release (e.g., 12-15 minutes instead of 10) helps achieve perfectly even and fluffy results, preventing any chewiness.
Nutrition
Tips for the Fluffiest Instant Pot White Rice
While this recipe is incredibly straightforward, a few extra tips can help you achieve truly restaurant-quality, fluffy rice:
- Don’t Skip the NPR: The 10-minute natural pressure release is non-negotiable for perfectly cooked rice. It allows the pressure to drop slowly and the rice to fully absorb moisture, preventing sticky or undercooked grains.
- Fluff with a Fork: After opening the lid, always use a fork (not a spoon) to gently fluff the rice. This separates the grains and releases trapped steam, ensuring a light and airy texture.
- Consider Rinsing: While optional, giving your white rice a quick rinse under cold water until it runs clear can remove excess surface starch. This often results in even fluffier, less sticky individual grains. Just be sure to drain it thoroughly!
- Use Cold Water: Starting with cool water helps the Instant Pot build pressure more gradually, which can contribute to more evenly cooked rice.
Serving Suggestions & Meal Prep Ideas
This Instant Pot white rice is incredibly versatile and makes an excellent base or side for a multitude of meals:
- Asian-Inspired Dishes: Pair with stir-fries, curries, teriyaki chicken, or sweet and sour pork.
- Mexican & Tex-Mex: Serve alongside fajitas, tacos, burritos, or as the base for a loaded burrito bowl.
- Classic Comfort: A perfect side for grilled chicken, baked fish, or hearty stews and chili.
- Meal Prep Powerhouse: Cook a large batch on Sunday, then divide it into containers for easy grab-and-go lunches or quick dinner sides throughout the week.
- Breakfast: Believe it or not, leftover rice can be used for delicious breakfast fried rice!
Storage and Reheating Your Instant Pot Rice
Proper storage ensures your delicious Instant Pot rice remains fresh and safe to eat:
- Storage: Allow cooked rice to cool completely within one hour, then transfer it to an airtight container. Store in the refrigerator for up to 3-4 days.
- Freezing: For longer storage, cooked rice freezes beautifully. Portion it into freezer-safe bags or containers and freeze for up to 3 months. Thaw overnight in the refrigerator before reheating.
- Reheating: For best results, reheat rice with a splash of water (about 1-2 tablespoons per cup of rice) in the microwave or on the stovetop over low heat. Cover to trap steam and ensure it heats evenly without drying out.
Please note that some of my blog posts here at Dash for Dinner may contain affiliate links. If you make a purchase through these links, I will get a small commission at no additional cost to you. Please see my Disclaimer for more information.
