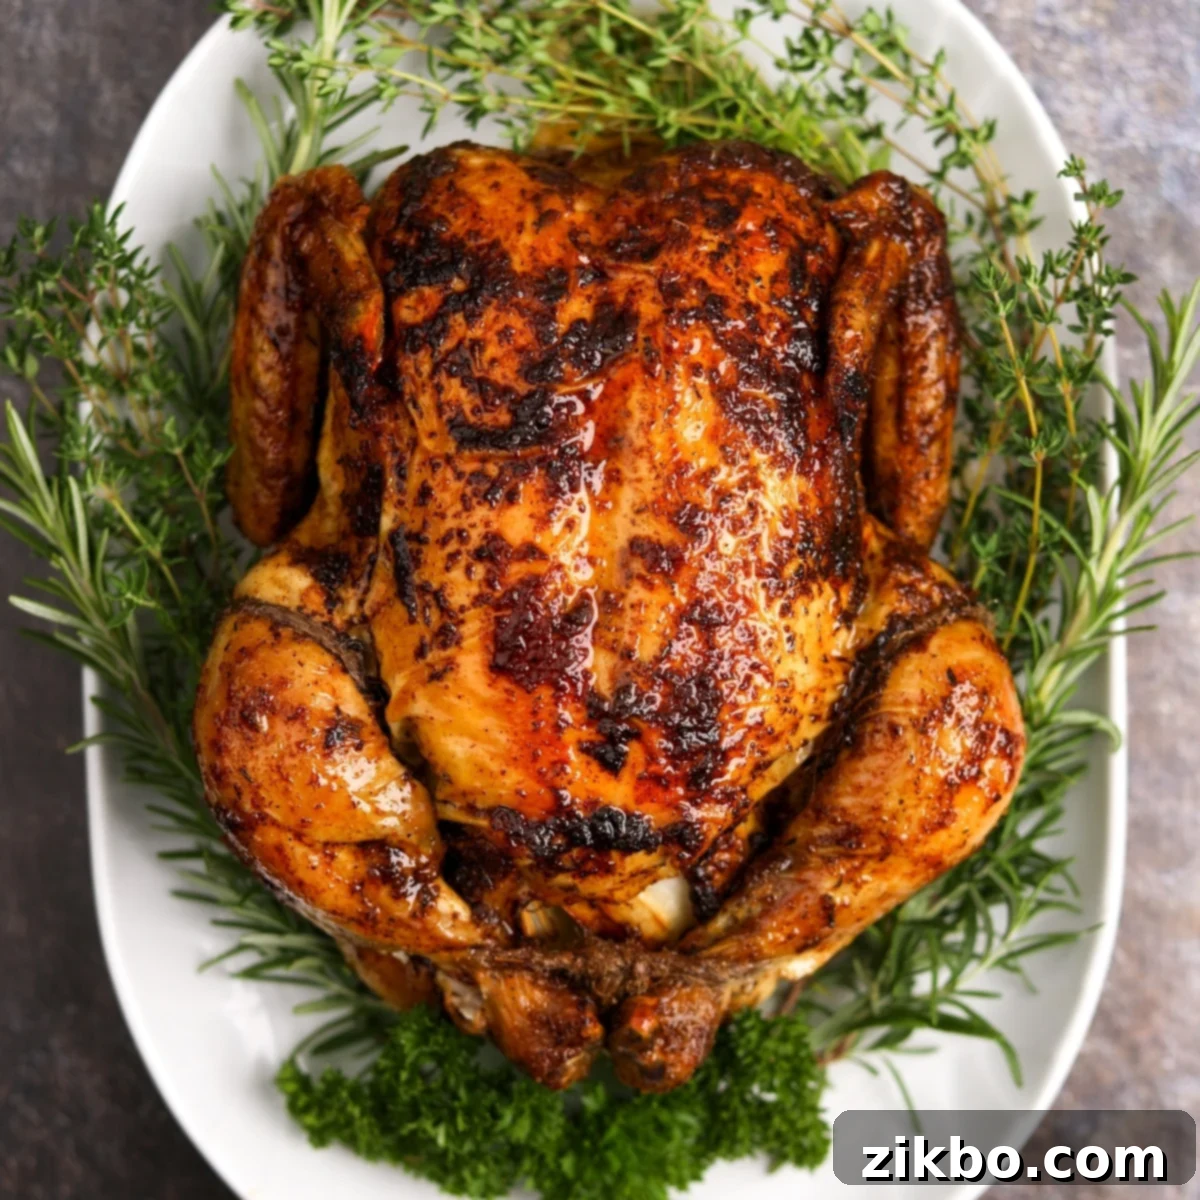
Mastering the Perfect Oven Roasted Whole Chicken: Juicy, Crispy, and Flavorful Every Time
There’s something incredibly satisfying about a perfectly roasted whole chicken. This classic dish, often considered the cornerstone of home cooking, delivers tender, juicy meat encased in wonderfully crispy skin, making it an instant family favorite. Whether you’re a seasoned chef or a beginner in the kitchen, this comprehensive guide will equip you with all the tips and techniques to master an **Oven Roasted Whole Chicken** that’s packed with flavor and absolutely unforgettable.
Beyond being a show-stopping main course for any occasion, a roasted chicken offers fantastic versatility. The succulent leftovers can be transformed into countless delicious meals, from hearty casseroles and sandwiches to the ever-popular buffalo chicken dip. And don’t forget the bones – they’re the perfect foundation for a rich, homemade chicken broth or stock, adding even more value to your cooking efforts.
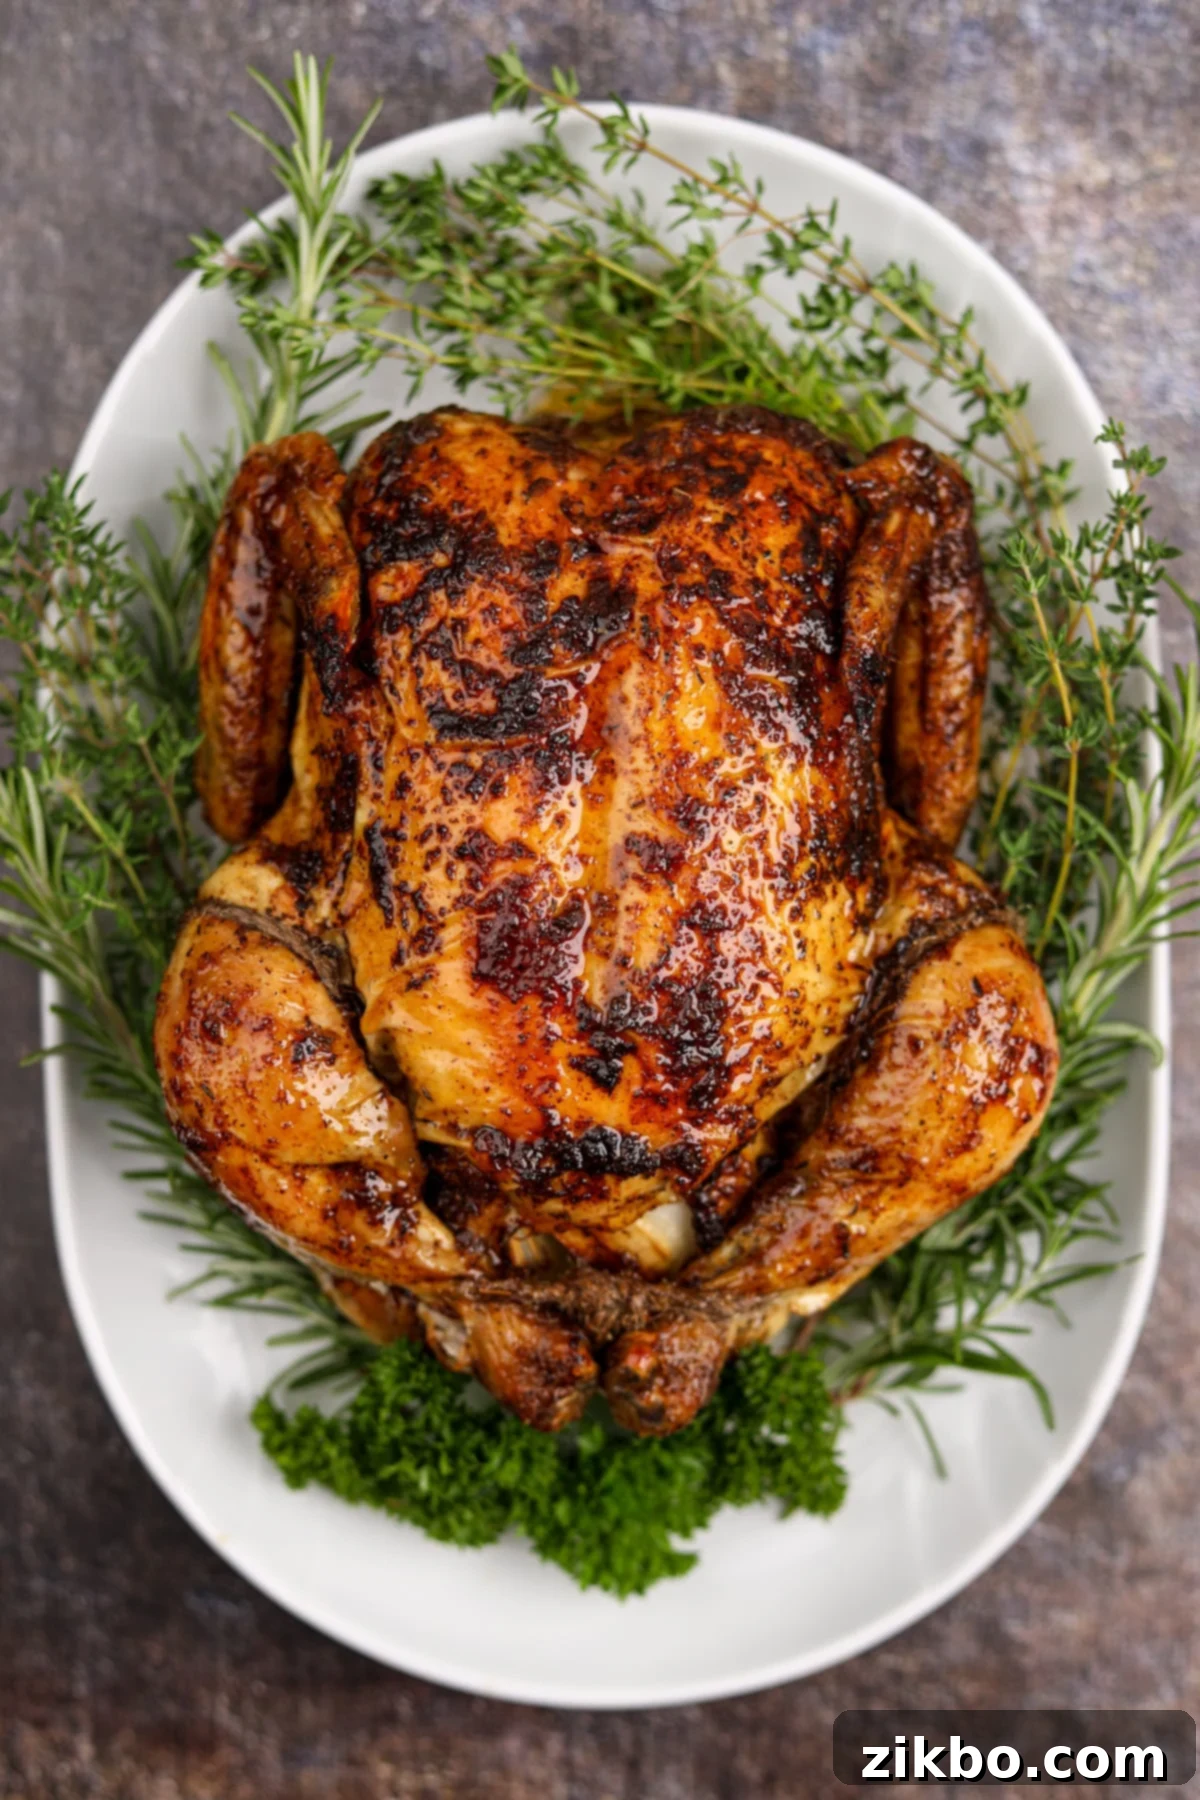
Among our most cherished recipes, this method for creating a **crispy, juicy, and flavor-packed** roasted chicken stands out. My journey with roasting chicken began in my early twenties, and it quickly became a regular and much-loved feature in my meal planning. Over the years, through countless attempts and careful observation, I’ve refined this recipe, focusing on what truly makes a difference in achieving a perfect whole roast chicken.
Many traditional roasting recipes can seem overly complicated, with steps like intricate trussing that, frankly, don’t always yield a significantly better result for the average home cook. My experience has taught me that simplicity often leads to perfection. For instance, while trussing might offer a slightly neater presentation (which you can achieve even after roasting if desired), it’s far less crucial than the type of fat you use to achieve that coveted crispy skin. Yes, the fat choice truly matters!
I’m excited to share my foolproof tips and techniques, allowing you to effortlessly create your own magnificent oven-roasted whole chicken without navigating a steep learning curve. This is about bringing straight-forward, **old-fashioned comfort food** to your table – a meal that feels special but is easy enough to prepare any day of the week. My son, a true connoisseur of roast chicken, always insists that the skin is the absolute best part! Trust me, if you don’t keep a watchful eye, you might just find yourself bringing a skinless chicken to the dinner table!
Why You’ll Adore This Oven Roasted Whole Chicken Recipe:
- Unbelievably Juicy Chicken: Forget dry, overcooked poultry. This recipe is designed to deliver a well-seasoned, perfectly cooked bird every single time. By using an inexpensive meat thermometer – your secret weapon in the kitchen – you’ll consistently achieve moist, tender results, making it truly the best roast chicken recipe out there.
- Simpler Than You Imagine! The idea of roasting a whole chicken can feel a bit daunting, perhaps because it seems like such a “fancy” dish. However, this recipe breaks down the process into easy-to-follow steps that will surprise you with their simplicity. You’ll be amazed at how quickly you master it, and you’ll undoubtedly fall in love with the consistently delicious outcomes.
- Fantastic for Leftovers & Meal Prep: One of the greatest benefits of roasting a whole chicken is the abundance of flavorful leftover meat. This makes it incredibly economical and perfect for meal planning. Use the shredded chicken in your favorite casseroles, hearty soups, flavorful salads, tacos, or even to create the beloved buffalo chicken dip. It’s a gift that keeps on giving throughout the week!
- Remarkably Budget-Friendly: Purchasing a whole chicken is typically more cost-effective per pound than buying individual cuts like breasts or thighs. This makes it an excellent choice for feeding a family without breaking the bank. Plus, as mentioned, the leftover bones can be simmered to create a rich, nutritious homemade bone broth, maximizing every part of your purchase.
Essential Ingredients for Your Perfect Roast Chicken
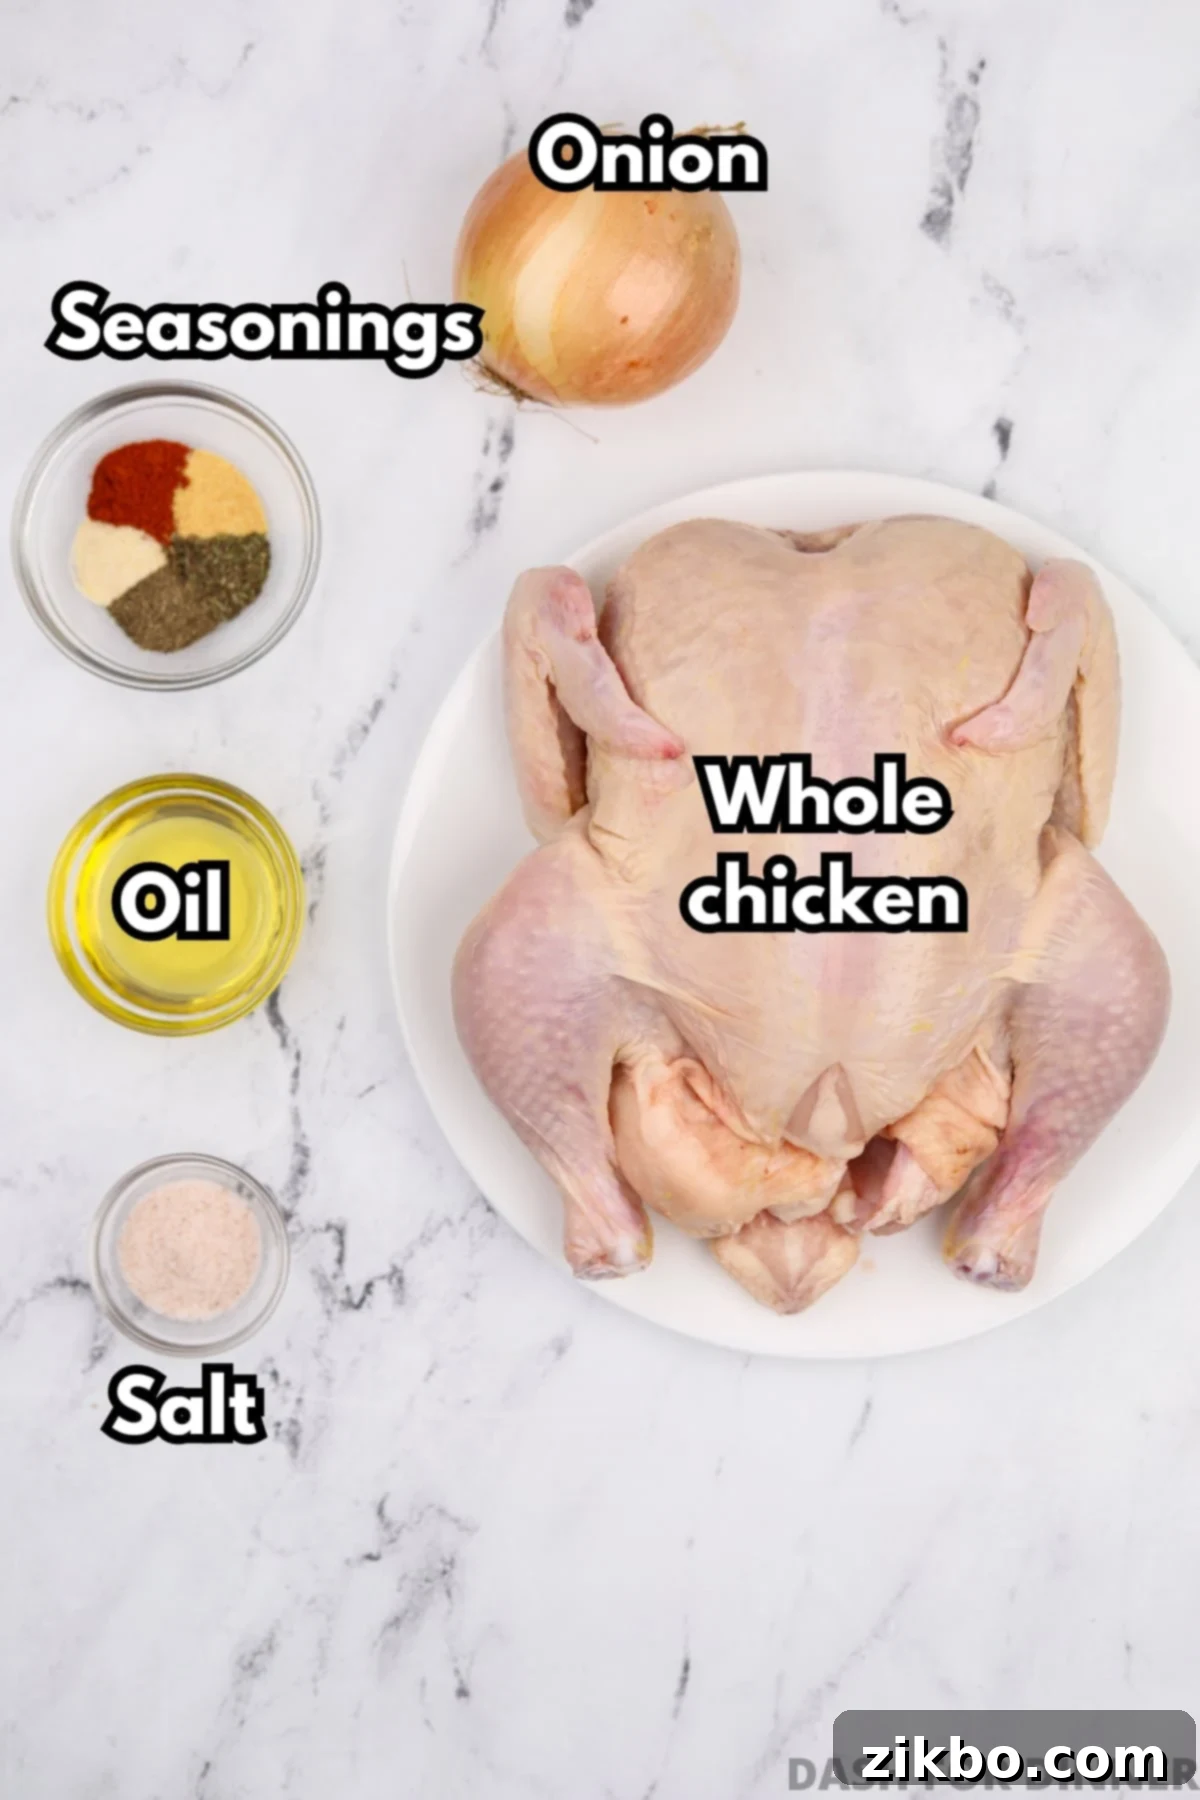
- Whole Chicken: Start with a fresh, whole chicken weighing approximately 3-5 pounds (about 1.3-2.3 kilograms). Before you begin, remember to remove the giblets from the cavity – you can save them for making a rich gravy if you wish. Patting the skin thoroughly dry with paper towels is a crucial step for achieving maximum crispiness.
- Avocado Oil (or alternatives like Olive Oil, Melted Butter): The choice of fat for coating your chicken skin is more important than you might think! I’ve rigorously tested this recipe with avocado oil, olive oil, vegetable oil, and melted butter. Avocado oil consistently delivered the best flavor and, most importantly, the crispiest skin, making it my top recommendation. Its high smoke point also makes it ideal for high-heat roasting.
- Carefully Selected Seasonings: A harmonious blend of smoked paprika, garlic powder, onion powder, dried thyme, and black pepper creates a robust and aromatic flavor profile that penetrates the chicken meat and enhances the skin. Smoked paprika, in particular, adds a beautiful color and a subtle smoky depth that elevates the dish.
- Salt: This recipe calls for 1 ½ teaspoons of fine sea salt. This amount is calibrated to create a wonderfully flavorful skin, reminiscent of the rotisserie chickens you find at the grocery store. If you prefer a slightly less salty profile, feel free to reduce the salt by up to ½ teaspoon to suit your taste.
- Onion: Peel and quarter a medium onion and place it inside the chicken cavity. This simple addition not only infuses the chicken with subtle, sweet aroma and flavor as it roasts, but it also helps to hold the chicken’s shape, contributing to even cooking.
- Optional Flavor Boosters: For those looking to add an extra layer of complexity, consider stuffing the cavity with a few crushed garlic cloves, lemon halves (or a sprinkle of lemon zest), and fresh herbs like rosemary or thyme sprigs. These aromatics will gently perfume the chicken from the inside out, creating an even more fragrant and delicious final product.
For a precise list of ingredients and exact quantities, please refer to the recipe card below.
Your Step-by-Step Guide: How to Roast a Whole Chicken to Perfection
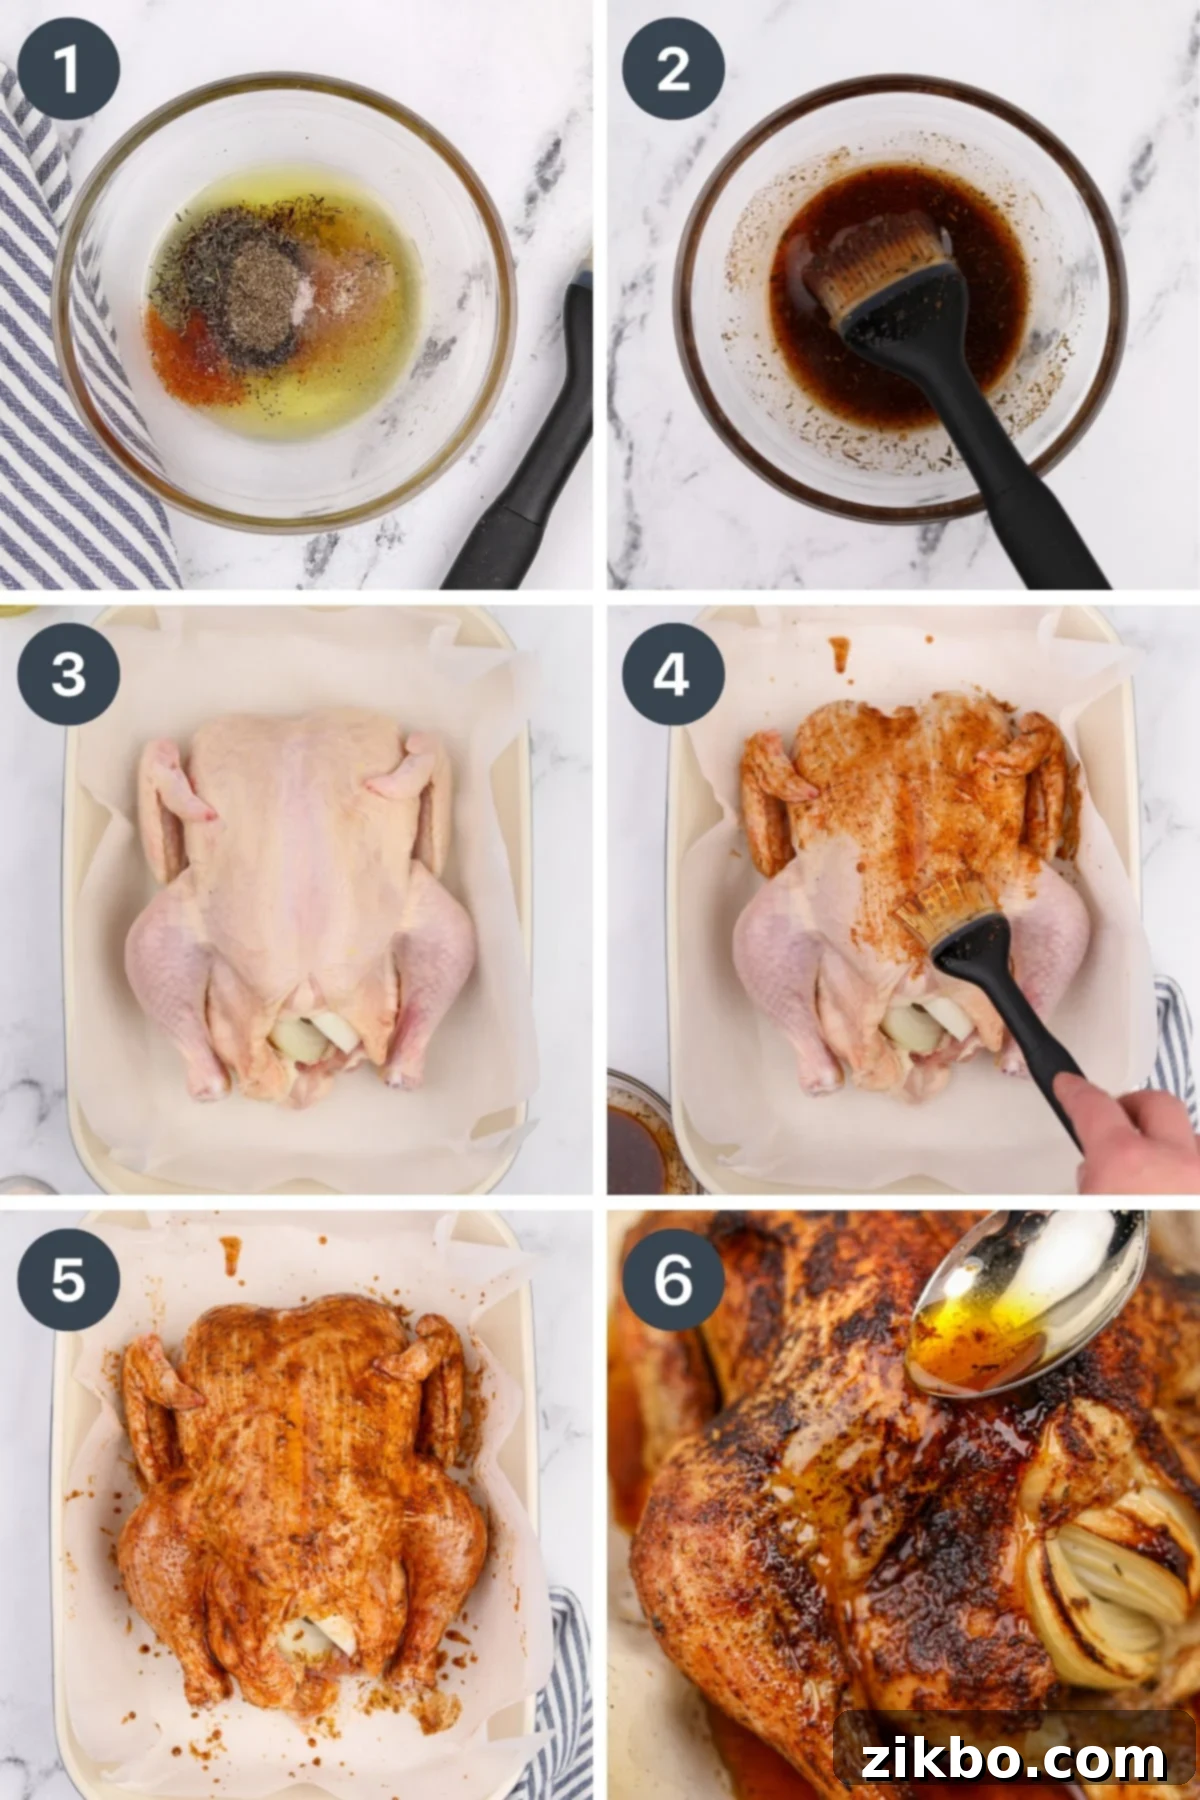
- Prepare the Seasoning Paste: In a small bowl, combine 2 tablespoons of avocado oil (or your chosen fat) with the salt and all the specified seasonings. Stir them together thoroughly until you form a cohesive paste. This ensures even distribution of flavor.
- 1 ½ teaspoons fine sea salt
- 1 teaspoon smoked paprika
- ½ teaspoon onion powder
- ½ teaspoon garlic powder
- ½ teaspoon dried thyme
- ½ teaspoon ground black pepper
- Chicken Preparation: Place your whole chicken, breast-side up, in a 9×13″ (23 x 33 cm) baking dish or a sturdy roasting pan. For easier clean-up, I highly recommend lining the dish with parchment paper. Ensure you’ve removed the giblets from the cavity and, most importantly, use paper towels to pat the entire surface of the chicken skin thoroughly dry. This step is critical for achieving crispy skin!
- Stuff the Cavity: Fill the chicken cavity with the quartered onion. If you’re using them, now is the time to add optional aromatics like garlic cloves, lemon halves, and fresh herbs (rosemary or thyme work wonderfully). These will impart subtle flavors to the meat as it cooks.
- Season the Chicken: Using a pastry brush, generously apply the seasoned oil paste over every exposed surface of the chicken. Don’t forget to get under the wings and legs, ensuring every inch of skin is coated for maximum flavor and crispiness.
- Roast to Perfection: Transfer the prepared chicken to a preheated 425ºF (218ºC) oven. Roast for 70-90 minutes. The exact cooking time will depend largely on the size of your chicken. The most reliable way to determine doneness is by checking the internal temperature with a meat thermometer:
- The thickest part of the breast and thigh should register a minimum of 165ºF (74ºC).
- For dark meat, a slightly higher temperature of 170-175ºF often yields the best texture, but remember the temperature will continue to rise a few degrees after it rests.
- Basting & Crispy Skin: Baste the chicken with the savory pan juices 1-2 times during the first half of the roasting process. This helps to develop flavor and keep the meat moist. However, if your goal is truly crispy skin, it’s essential to avoid basting for the final 20-30 minutes of cooking. This allows the skin to dry out and crisp up beautifully.
- Rest Before Carving: Once the chicken reaches the desired internal temperature, remove it from the oven and transfer it to a cutting board. Tent it loosely with foil and allow it to rest for at least 10-15 minutes before carving. This crucial resting period allows the juices to redistribute throughout the meat, resulting in an even juicier and more flavorful chicken.
To truss or not to truss? That is the question! In my many years of roasting chicken, I’ve found that while trussing can offer a slightly tidier, more compact presentation and helps the chicken hold its shape, it can also sometimes make it a bit trickier to ensure even cooking and reach the target temperature in all parts. For home cooking, I often skip trussing. If a picture-perfect presentation is important, I sometimes like to truss my chicken *after* roasting if I’m serving it to dinner guests, maintaining its shape without complicating the cooking process.
Elevate Your Meal: Using the Drippings to Make Homemade Gravy
One of the true advantages of roasting a whole chicken is the flavorful pan drippings left behind. These golden juices are the foundation for an incredible homemade gravy, transforming your meal from great to gourmet. You’ll ideally need at least 1 cup of reserved juices or broth to make a decent amount of gravy. Most single chickens yield about ½ cup of drippings during cooking, but this can easily be supplemented with store-bought chicken stock/broth or even water to reach the desired volume.
The most crucial step in making a silky, non-greasy gravy is to allow the pan drippings to rest in a measuring cup for at least 5-10 minutes. This allows the fat to separate and rise to the top, which you can then easily spoon off. Skipping this step often results in a very greasy gravy that can overpower the delicate flavors of your meal.
The drippings from this specific recipe are wonderfully concentrated and intensely flavorful due to the seasoning blend. I’ve found that adding a little water to dilute the flavor and thin the gravy to your desired consistency is very helpful, ensuring it complements the chicken without being too rich or salty.
To make homemade gravy:
- Heat a stainless steel saucepan over medium heat.
- Add 1 tablespoon of unsalted butter and stir until it’s completely melted and begins to foam slightly.
- Sprinkle in 1 tablespoon of all-purpose flour, whisking continuously to form a smooth paste, known as a roux.
- Continue to cook the roux, whisking often, for 1-2 minutes until it turns a light blonde color. This cooks out the raw flour taste.
- Gradually pour in 1 cup of your reserved (de-fatted) pan juices or chicken broth, adding a little at a time and whisking vigorously after each addition to prevent lumps.
- Once all the liquid is incorporated and the gravy begins to thicken, bring it to a gentle simmer. If desired, add a little water, a tablespoon at a time, to thin the gravy to your preferred consistency and to mellow the concentrated flavor. Taste and adjust seasoning as needed.
- Serve this rich, homemade gravy generously with your roast chicken, creamy mashed potatoes, or any other accompanying dishes.
This basic gravy recipe is easily scalable; you can double, triple, or adjust the quantities based on the amount of pan liquid you have available.
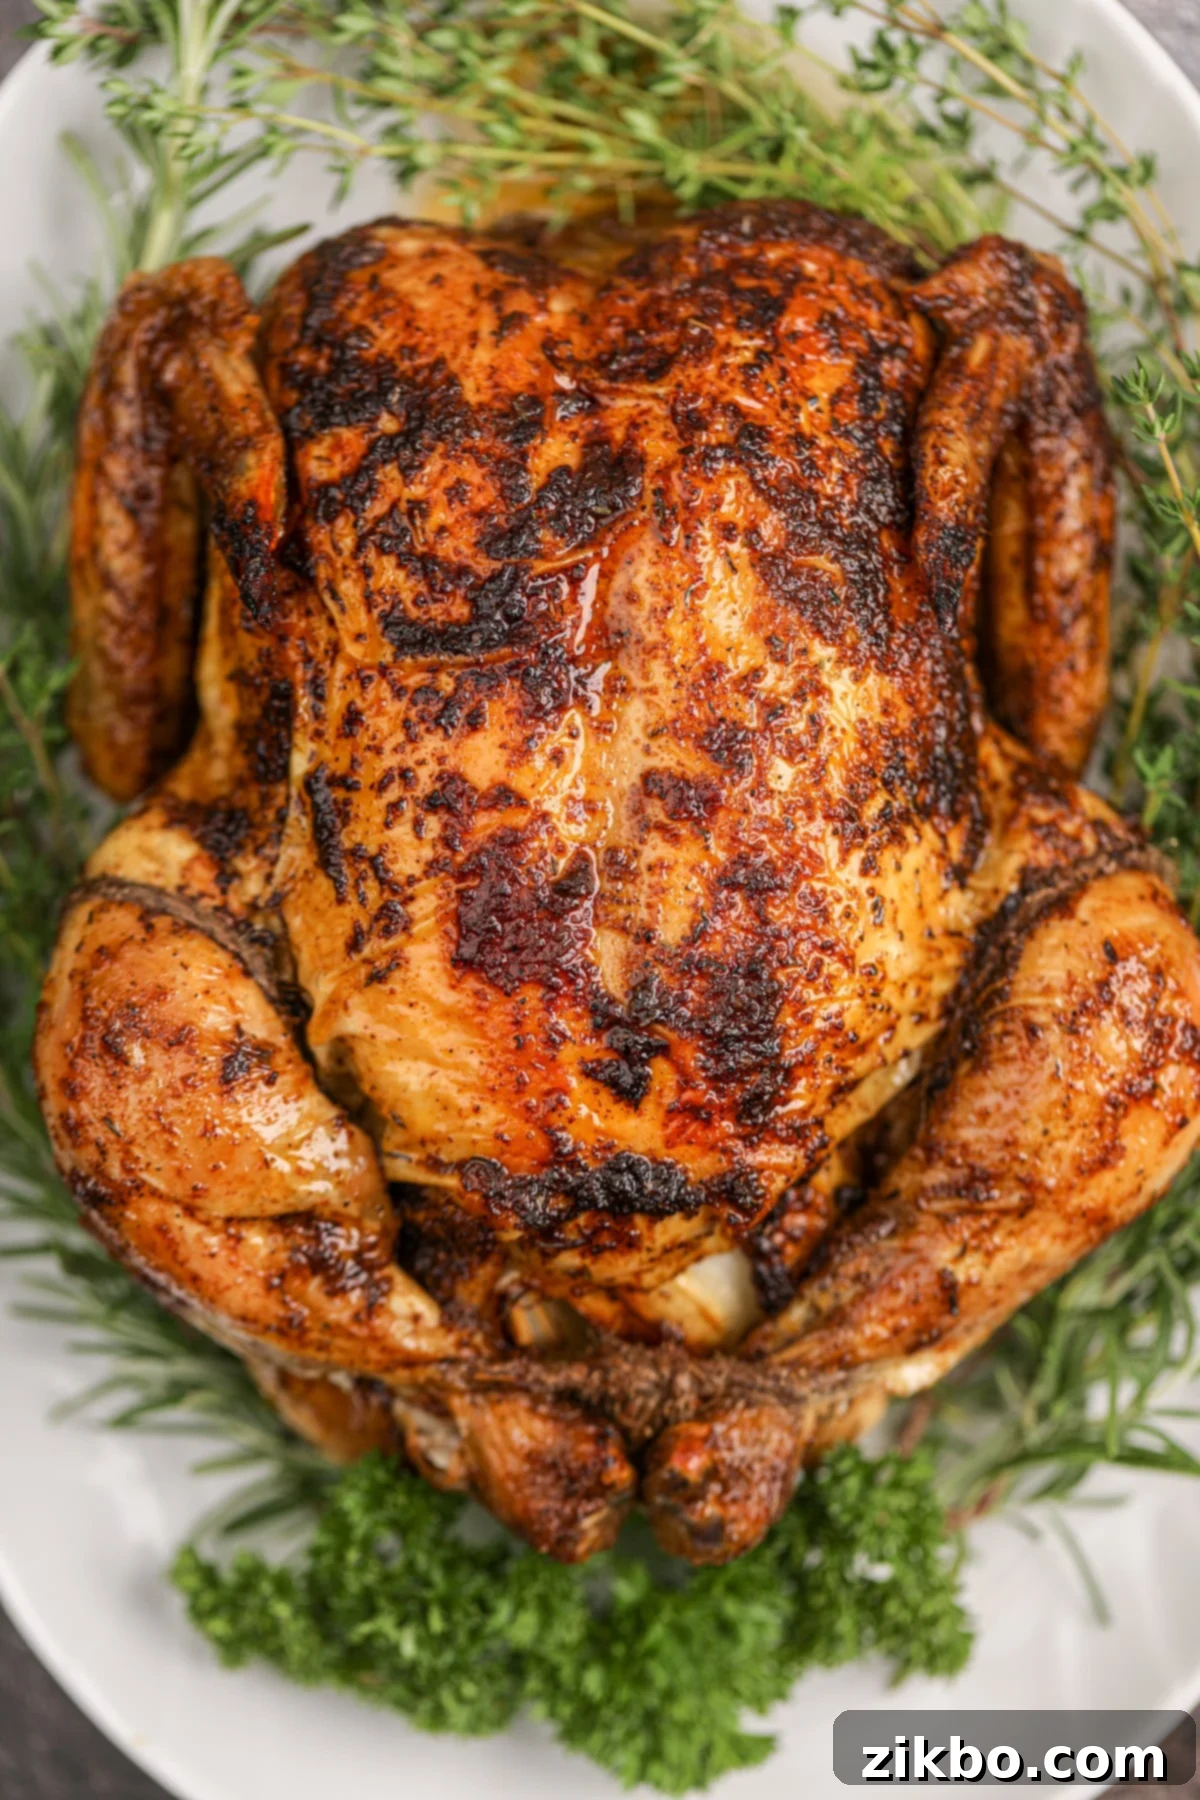
The Golden Rule: Always Check Internal Temperature with a Thermometer
- The single most effective way to guarantee success with whole roasted chicken (and indeed, almost any meat you cook) is to verify its internal temperature using an instant-read thermometer. These invaluable kitchen tools, also known as meat thermometers or digital thermometers, are relatively inexpensive and make a world of difference in ensuring your meat is cooked to the perfect temperature, ensuring both safety and optimal taste.
- For chicken, the minimum safe internal temperature is 165ºF (74ºC). This applies to all parts of the bird.
- When testing a whole chicken, it’s crucial to check multiple portions of the bird. Insert the thermometer into the thickest part of the thigh, making sure to avoid hitting any bone, as bones will register a much higher temperature than the surrounding meat. Also, probe deep into the center of the breast. Multiple readings ensure the entire bird is cooked evenly and safely.
- Remember that meat continues to cook even after it’s removed from the oven – this is called carryover cooking. If you let the chicken rest for 5-10 minutes after roasting, you’ll observe a slight increase in temperature. I generally prefer to remove the chicken from the oven once the dark meat reaches around 165ºF (74ºC); after a quick rest, it should rise to approximately 170-175ºF (77-79ºC), which many find to be the ideal temperature for perfectly tender and juicy dark meat.
Storing Leftovers & Creative Meal Ideas
Proper storage of your delicious roast chicken leftovers is key to enjoying them for days to come. Tightly cover any remaining chicken or transfer it to an airtight container. Store it in the refrigerator for up to 3 days. For longer storage, shredded or sliced chicken can be frozen in a freezer bag or airtight container for up to 3 months.
When reheating, a quick blast in the microwave usually works best for maintaining moisture. Beyond simple reheating, embrace the versatility of your cooked chicken! It’s fantastic in creamy chicken gnocchi soup (like my creamy chicken gnocchi soup), chicken salads, quesadillas, stir-fries, or even as a pizza topping. The possibilities are endless, making roast chicken an excellent choice for efficient meal prep.
Perfect Pairings: What to Serve With Your Roast Chicken
A beautifully roasted chicken deserves equally delicious accompaniments. Here are some classic and comforting side dishes that pair wonderfully with its rich flavors:
- Creamy Mashed Potatoes: A quintessential pairing, perfect for soaking up any extra juices and gravy.
- Roasted Vegetables: Carrots, potatoes, Brussels sprouts, or asparagus roasted alongside the chicken or separately for a healthy and flavorful side.
- Maple Glazed Carrots: A touch of sweetness and vibrant color.
- Fluffy Baked Potatoes: Simple, satisfying, and a great base for butter, sour cream, and chives.
- Sweet Corn on the Cob: A seasonal favorite that adds a burst of freshness.
- Steamed Green Beans: Light, crisp, and a healthy counterpoint to the rich chicken.
- Crispy Roasted Potatoes: Another potato option, offering a different texture.
- Savory Rice Dishes: Consider my French onion rice for an elevated side, or a simple pilaf.
- Warm Dinner Rolls or Fresh Bread: Ideal for sopping up gravy and juices.
- A Fresh Green Salad: A simple vinaigrette-dressed salad can provide a refreshing contrast.
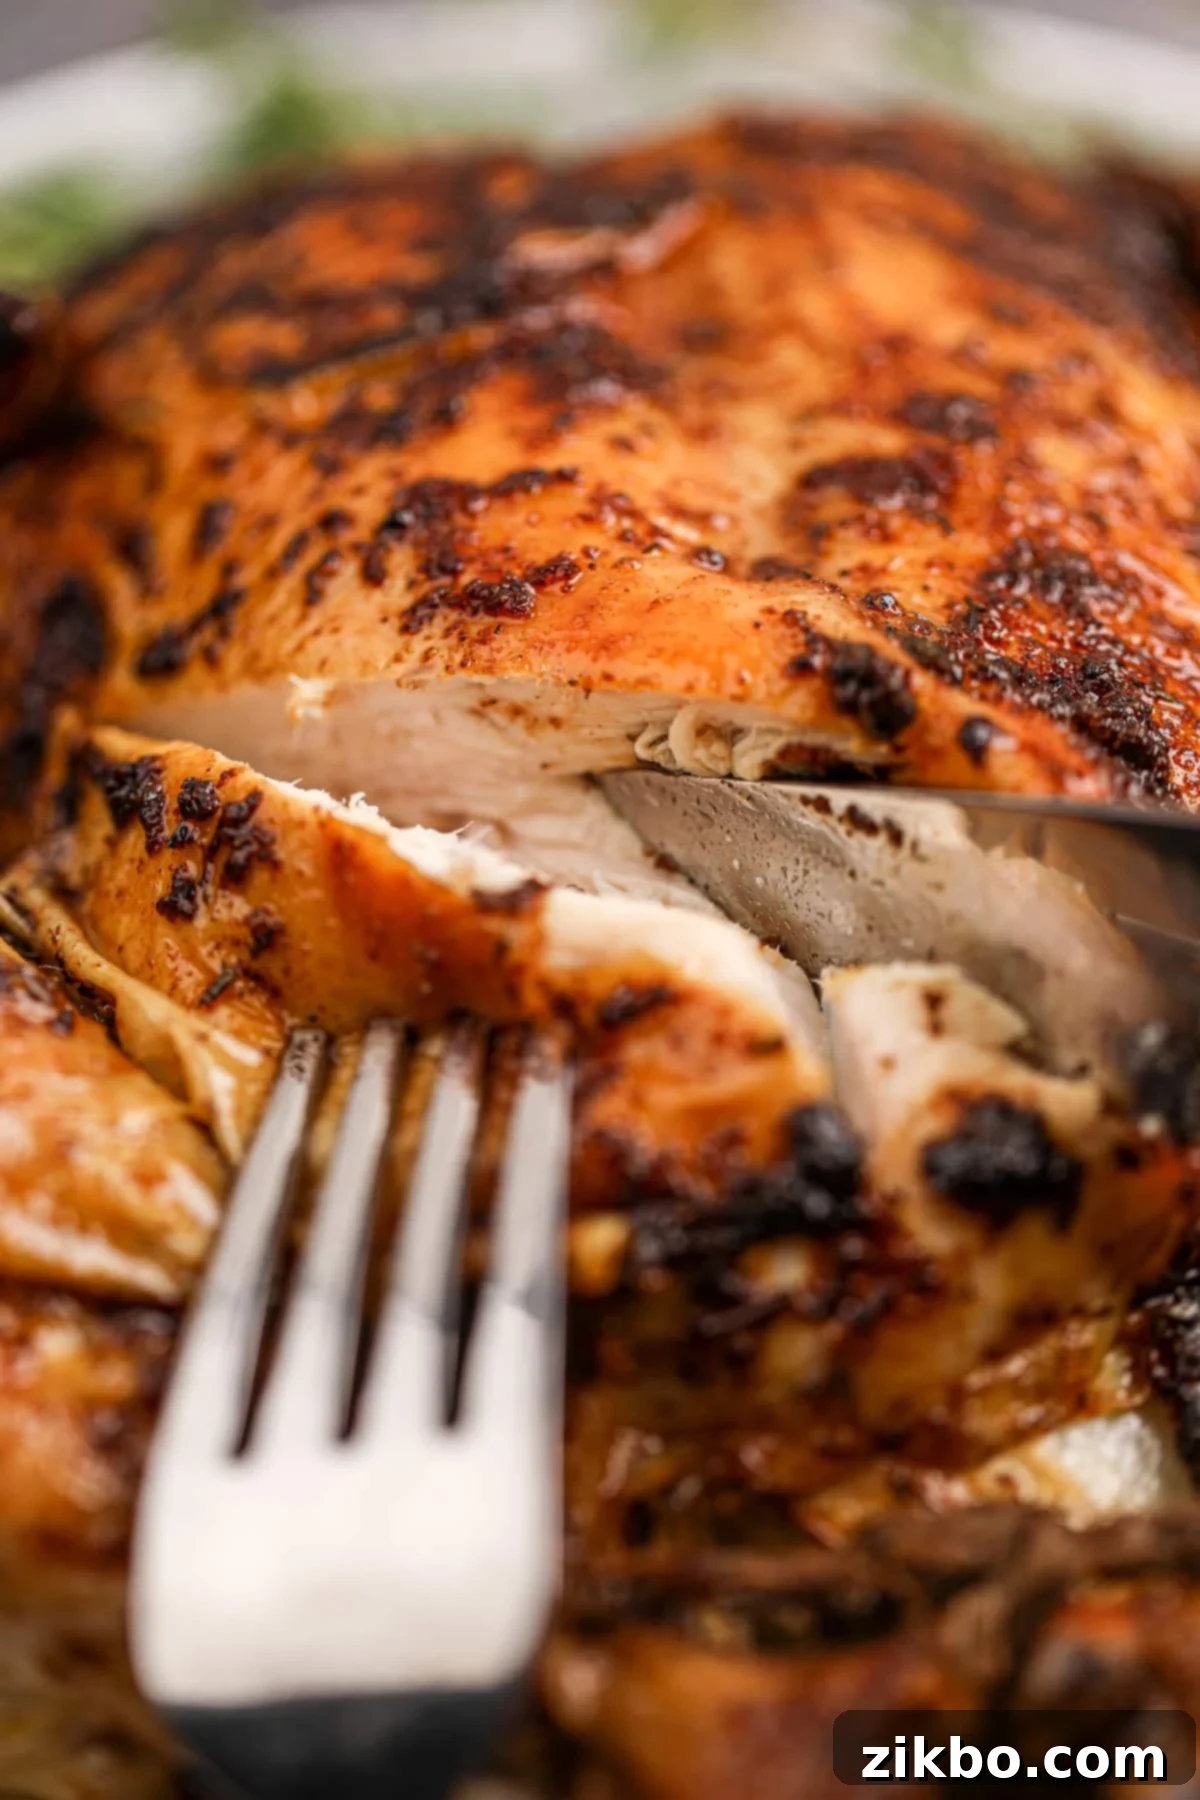
Expert Tips for Roast Chicken Success
- Bring Chicken to Room Temperature: Before you even think about putting your chicken in the oven, allow it to rest at room temperature for about 30-60 minutes after removing it from the refrigerator. This crucial step promotes more even cooking and significantly reduces excess steam in the oven, which is key to achieving that irresistibly crispy skin. You can even season the chicken at the beginning of this resting time to allow the flavors to penetrate more deeply.
- Baste Wisely, Not Excessively: Basting the chicken with its own pan juices helps build layers of flavor and contributes to a beautiful, golden-brown crust while keeping the meat moist. I recommend basting 1-2 times during the initial roasting period. However, be mindful not to overdo it, especially towards the end of cooking, as excessive basting can introduce too much moisture, preventing the skin from crisping up properly and potentially making it soggy.
- Protect the Breast Meat: Chicken breasts cook faster than the darker meat of the thighs and legs, and they can easily dry out. If you notice your chicken breasts are browning too quickly or reaching temperature before other parts of the chicken, simply create a “tent” with aluminum foil and place it loosely over the breast. This will shield them from direct heat, allowing the rest of the bird to cook through without drying out the delicate white meat.
- Transform Bones into Liquid Gold: Homemade Bone Broth: Don’t let those delicious chicken bones go to waste! Making your own nutrient-rich chicken bone broth is incredibly easy and adds another layer of value to your roast. After enjoying your chicken, simply place the leftover carcass in an Instant Pot (or a large stock pot). Add aromatic vegetables like a stalk of celery, a carrot, a quartered onion, a few peppercorns, and a pinch of salt. Cover everything with water and cook at high pressure for 2 hours (or simmer on the stovetop for 4-8 hours). Once done, release the pressure, strain off the bones and vegetables, and you’ll be left with a flavorful, wholesome liquid gold to use in your favorite soups, stews, or even just to sip on its own.
The Quest for Crispy Skin: Secrets Revealed
That golden, crackling, perfectly seasoned chicken skin is often the most sought-after part of a roast chicken. Achieving it is a combination of a few simple, yet critical, techniques:
- Eliminate Excess Moisture: Moisture is the enemy of crispy skin. Start by thoroughly draining the chicken cavity and patting the skin absolutely dry with paper towels before seasoning. During the roasting process, as you baste, try to remove some of the pan juices if they accumulate excessively. Too much liquid in the pan creates steam, which will soften the skin instead of crisping it.
- Choose the Right Fat: As highlighted earlier, the type of fat you use matters significantly. In my tests, avocado oil outperformed melted butter (which was quite a surprise!) for both flavor contribution and its ability to render the skin incredibly crispy. Its high smoke point allows it to withstand the high roasting temperature without burning, facilitating optimal crisping.
- Hold Off on Late Basting: While basting is beneficial in the early stages of roasting for flavor and moisture, it’s crucial to stop basting during the last 20-30 minutes of cooking. This final period allows ample time for any remaining moisture on the skin to evaporate completely, leaving you with that irresistible, shatteringly crisp texture.
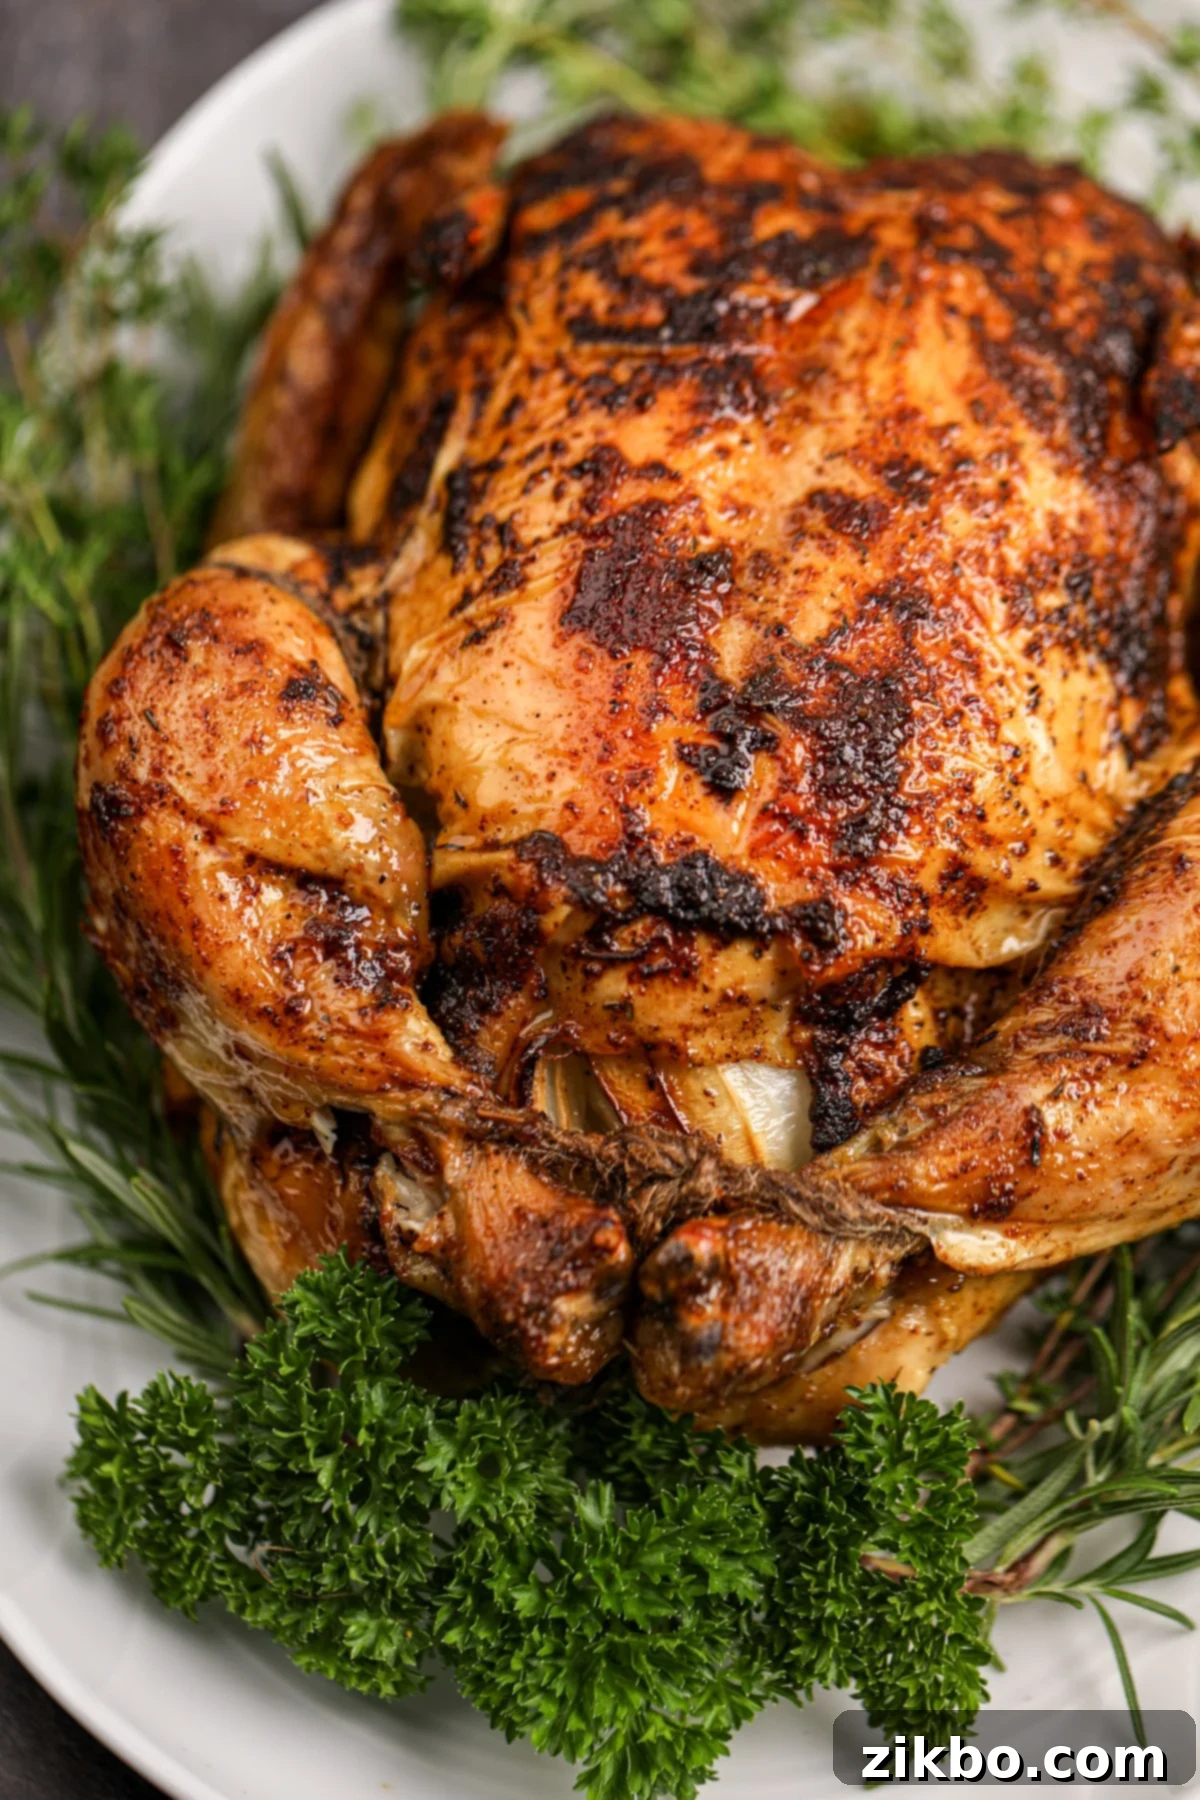
Frequently Asked Questions About Roasting Whole Chicken
- How long does it take to roast a whole chicken?
A 3-5 lb (1.3-2.3 kg) chicken typically takes 70-90 minutes at 425ºF (218ºC). Always use a meat thermometer to ensure the thickest part of the thigh and breast reach at least 165ºF (74ºC). - Do I need to wash the chicken before roasting?
No, it is generally recommended NOT to wash raw chicken. Washing can spread bacteria around your kitchen, increasing the risk of cross-contamination. Patting it dry with paper towels is sufficient. - What if my chicken is bigger or smaller than 3-5 lbs?
Adjust cooking time accordingly. Smaller chickens will cook faster, larger chickens will take longer. The internal temperature is your most reliable guide, not just the clock. For very large birds (over 6 lbs), you might consider lowering the oven temperature slightly to 375-400ºF and increasing the cooking time to prevent the exterior from burning before the inside is cooked. - Can I brine the chicken for extra juiciness?
Yes, brining (either a wet brine or a dry brine) can significantly enhance the juiciness and flavor of your roast chicken. If you choose to brine, remember to adjust the salt in the seasoning blend, as the brine itself will add sodium. - My chicken skin isn’t getting crispy. What am I doing wrong?
The most common culprits are insufficient drying of the skin, too much moisture in the pan (steam), or basting too close to the end of cooking. Ensure the chicken is very dry before seasoning, use a high smoke point oil like avocado oil, and stop basting for the last 20-30 minutes. Also, allowing the chicken to come to room temperature before roasting helps.
If you loved this recipe for oven roasted whole chicken and found these tips helpful, please let me know by leaving a 5-star review in the recipe card below or sharing your feedback in the comments! You can also tag me on Instagram @dashfordinner to show off your culinary masterpiece!
Oven Roasted Whole Chicken
Print
Pin
Rate
Ingredients
- 1 3-5 lb whole chicken giblets removed (about 1.3-2.3 kg)
- 1 medium onion peeled and halved
- 2 tablespoons avocado oil olive oil, or melted butter
- 1 ½ teaspoons salt
- 1 teaspoon smoked paprika
- ½ teaspoon onion powder
- ½ teaspoon dried thyme
- ½ teaspoon garlic powder
- ½ teaspoon ground black pepper
Instructions
-
Optional: For best results and crispier skin, allow your chicken to rest at room temperature for 30-60 minutes after removing it from the refrigerator.
-
Preheat your oven to 425ºF (218ºC). Line a 9×13” (23×33 cm) baking dish or a roasting pan with parchment paper for easy clean-up (this step is optional but recommended).
-
Place the whole chicken, breast side up, onto the prepared roasting pan. Ensure you have removed the giblets from the cavity and thoroughly pat the chicken skin dry with paper towels.
-
Stuff the chicken cavity with the onion halves. For an extra flavor boost, you can also add a few garlic cloves and a cut lemon if desired.
-
In a small bowl, combine the avocado oil (or olive oil, or melted butter) with the salt, smoked paprika, onion powder, thyme, garlic powder, and black pepper. Stir well until a paste forms.
-
Using a pastry brush, generously brush the seasoned oil mixture over every exposed surface of the chicken, ensuring full coverage, including the underside of the wings and legs.
-
Roast the chicken in the preheated oven for 70-90 minutes, or until all parts of the chicken register a minimum internal temperature of at least 165ºF (74ºC) when checked with an instant-read thermometer. Baste the chicken 1-2 times during the first half of the roasting process. For the crispiest skin, avoid basting during the final 20-30 minutes of roasting.
-
Once cooked, carefully remove the chicken from the oven and transfer it to a clean serving platter or cutting board.
-
Allow the chicken to rest, loosely tented with foil, for 10-15 minutes before carving and serving. This allows the juices to redistribute, resulting in a more tender and juicy chicken.
-
If desired, carefully retain the flavorful pan juices (drippings) from the roasting pan to make a delicious homemade gravy (*see notes for gravy instructions).
Notes
Cover the Breast Meat: If you observe that your chicken breasts are cooking faster or reaching temperature before the thighs and legs, gently tent them with aluminum foil. This helps prevent them from drying out while the rest of the chicken continues to cook to perfection.
*Gravy Instructions: Approximately ¾ – 1 cup of drippings are ideal for a small batch of homemade gravy. If you’re roasting only one chicken and have less than 1 cup of drippings, you can easily supplement with store-bought or homemade chicken broth to reach the required volume. Before making the gravy, transfer the drippings to a measuring cup and let them sit for 5-10 minutes. Then, carefully spoon off the layer of fat that rises to the top to ensure a rich, non-greasy gravy.
- To make the roux, melt 1 tablespoon of butter in a stainless steel saucepan over medium heat, then sprinkle in 1 tablespoon of flour and whisk until a smooth paste forms. Cook for 1-2 minutes until lightly blonde.
- Gradually add the de-fatted pan juices/broth a little at a time, whisking constantly to prevent lumps.
- Once thickened, I often add a small amount of water to thin the gravy to my preferred consistency and to slightly dilute the concentrated flavor of the chicken seasoning blend. Taste and adjust as needed.
Storage: Store any leftover roast chicken in an airtight container in the refrigerator for up to 3 days. For longer storage, the chicken can be frozen for up to 3 months in a freezer-safe bag or container.
Homemade Bone Broth: Maximize your chicken by using the leftover bones to create a flavorful bone broth. Place the remaining chicken carcass in an Instant Pot or a large stock pot. Add a stalk of celery, one carrot, a quartered onion, a few peppercorns, and a pinch of salt. Cover with water and cook on manual high pressure for 2 hours (or simmer on the stove for 4-8 hours). Once done, release the pressure, strain out the solids, and reserve the golden, nutrient-rich broth for future recipes.
Nutrition
Please note that some of my blog posts here at Dash for Dinner may contain affiliate links. If you make a purchase through these links, I will get a small commission at no additional cost to you. Please see my Disclaimer for more information.
