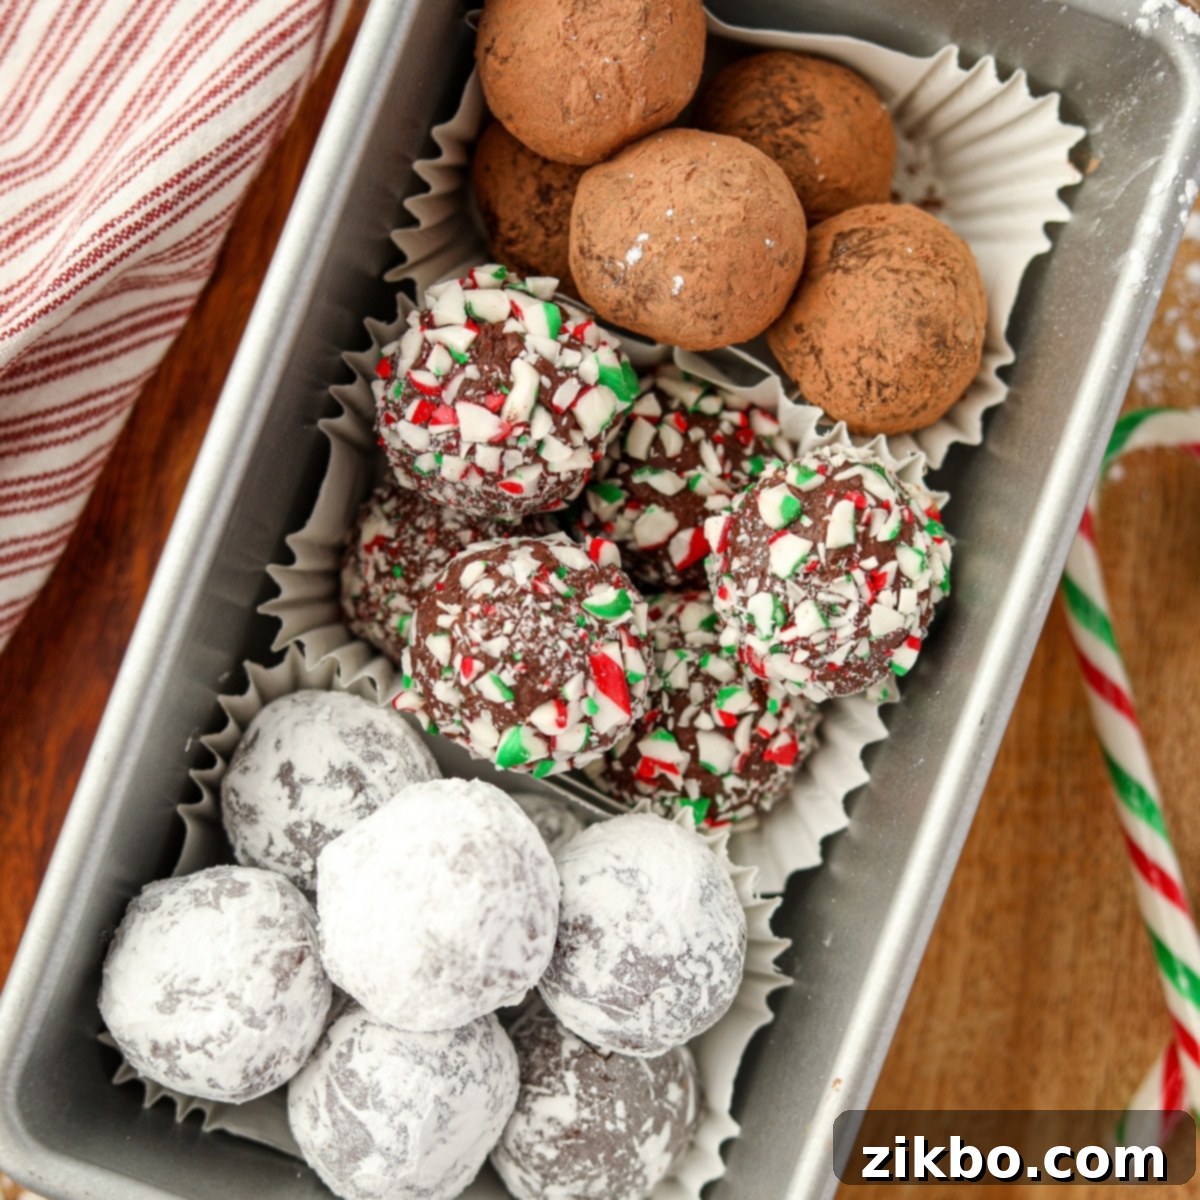
Easy 5-Ingredient No-Bake Peppermint Truffles Recipe: Your Ultimate Holiday Treat Guide
Prepare to discover your new favorite holiday confection with this incredibly easy recipe for Peppermint Truffles! Crafted with just 5 simple ingredients, these decadent, no-bake treats are not only a joy to make but also perfect for gifting to loved ones. And here’s a bonus: they freeze beautifully, meaning you can enjoy their refreshing minty-chocolate goodness long after the holiday season has passed.
If you’re a fan of simple, delicious homemade sweets, you’ll also adore our recipe for Orange Chocolate Truffles – they offer a delightful citrus twist and are just as effortless to prepare as these festive peppermint delights.
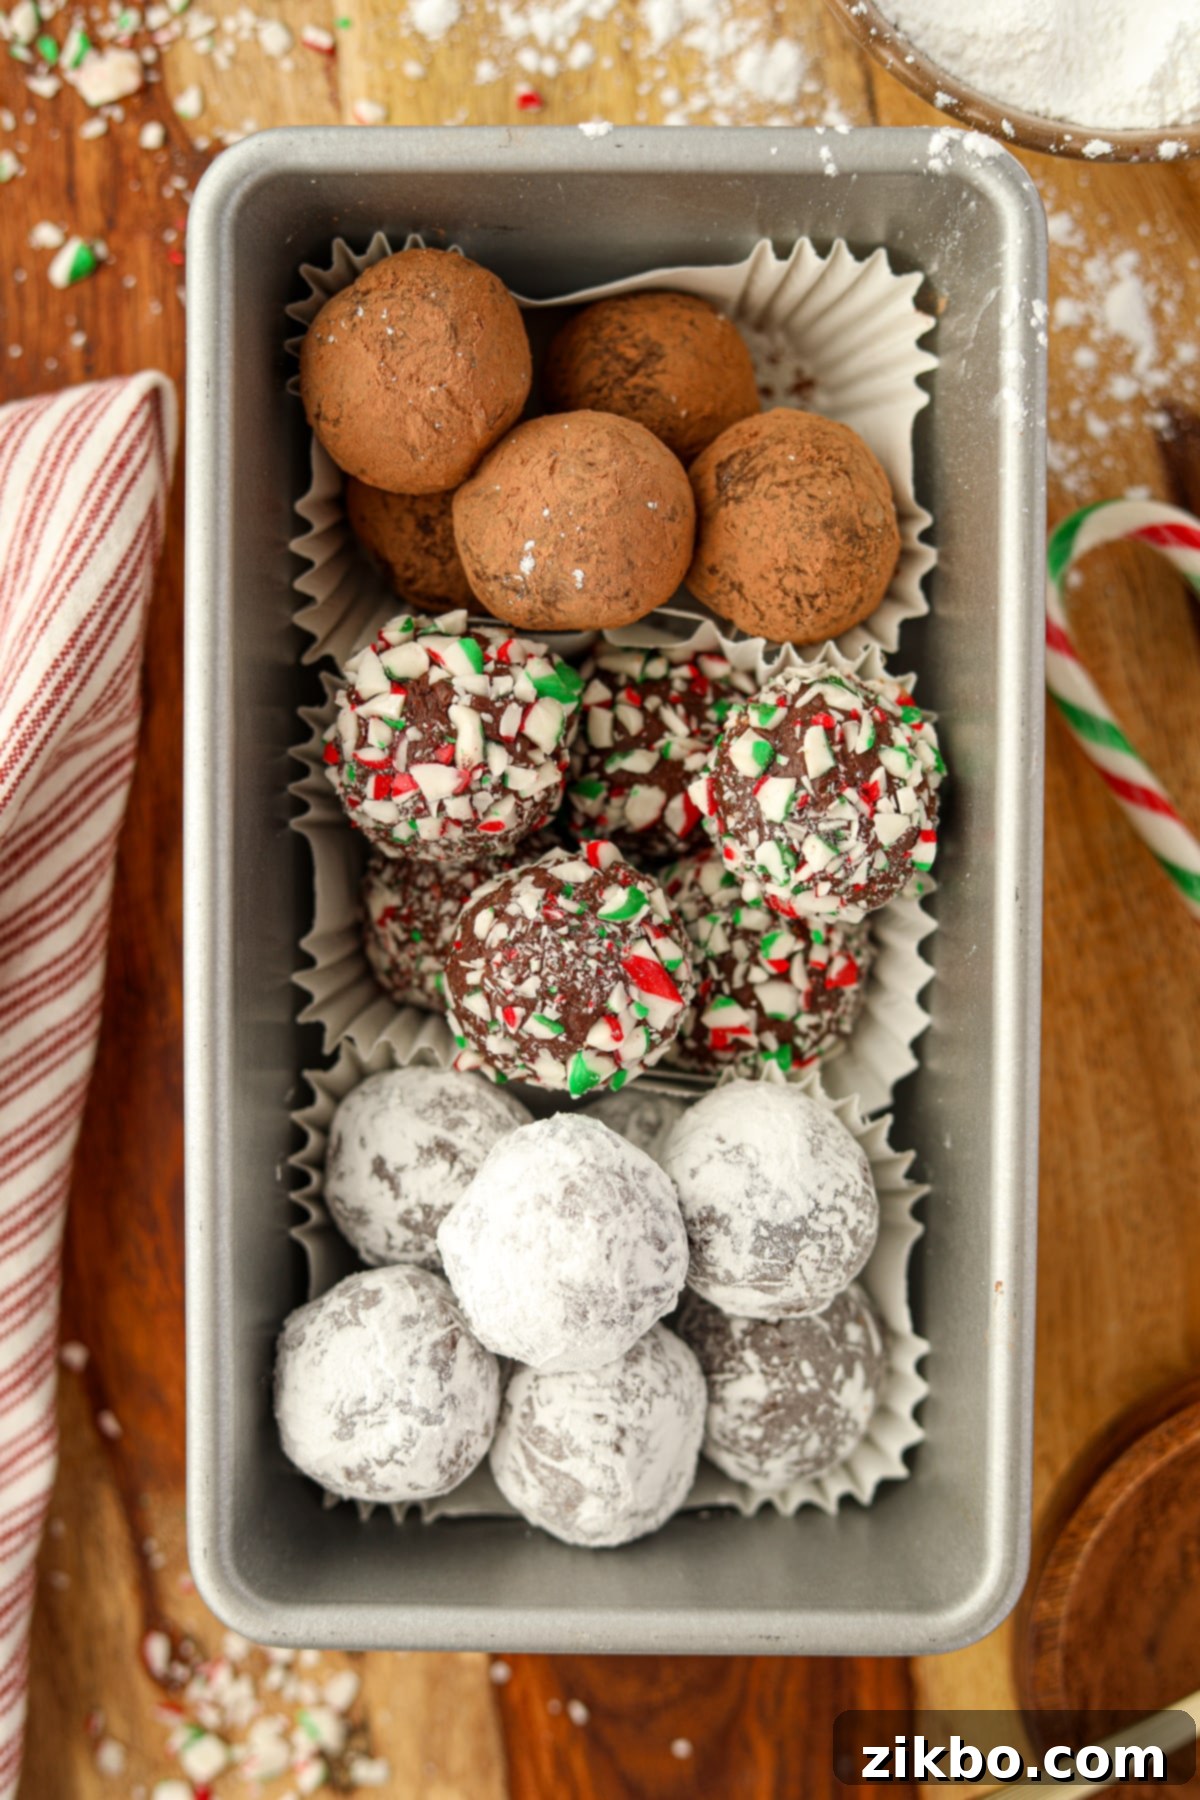
For many years, the holiday season in our household was marked by an eagerly anticipated gift from my husband’s Aunt: a batch of her legendary peppermint truffles. These were more than just sweets; they were a cherished tradition, a source of pure joy that we tried to make last as long as humanly possible, savoring each bite of their cool, rich flavor. The anticipation for these homemade peppermint truffles built up every year, making them a true highlight of our festive celebrations.
When I finally gathered the courage to ask for the coveted recipe, hoping to recreate their magic year-round, I was genuinely astonished by its simplicity. The only hurdle? Her original recipe called for peppermint chocolate chips, an elusive ingredient even during peak holiday shopping, and virtually impossible to find at any other time of the year. This challenge, however, led to a wonderful culinary discovery and a much-improved, accessible version of the recipe.
I took on the delicious task of reverse-engineering the recipe, cleverly substituting hard-to-find peppermint-flavored chocolate chips with readily available peppermint extract. This minor, yet significant, tweak, along with a few other refinements, transformed the recipe into something anyone can make, anywhere, anytime the irresistible craving for peppermint and chocolate strikes. Now, geographical location or seasonal availability won’t stop you from enjoying these exquisite treats. This adaptation ensures that the delightful flavor of homemade peppermint truffles is always within reach.
Our family has cherished these truffles for over a decade, and I have no doubt that your family and friends will fall in love with them just as deeply. They embody the spirit of homemade goodness and festive cheer, making them an ideal addition to any celebration, a thoughtful gift, or simply a delightful indulgence to brighten any day.
Why You’ll Fall in Love with This Easy Peppermint Truffles Recipe
This recipe isn’t just easy; it’s a game-changer for anyone who loves homemade treats but is short on time or baking expertise. Here’s why these no-bake peppermint truffles are destined to become a staple in your kitchen and a favorite among your loved ones:
- Only 5 Simple Ingredients. Yes, you read that right! You only need a handful of pantry staples to create these gourmet-tasting truffles. Two of these are extracts, which means the base is incredibly minimal, allowing the quality of your chocolate and the refreshing peppermint to truly shine through. This incredible simplicity translates to less shopping, less prep time, and ultimately, more time to enjoy your delicious creations. It truly is a testament to how fantastic a few key ingredients can be when combined properly.
- Effortlessly Easy to Make. Whether you prefer the classic stovetop method for melting chocolate or the quick convenience of a microwave, this recipe is incredibly forgiving and designed for success. If you can melt chocolate without burning it (and we’ll provide all the essential tips to ensure you don’t!), you can absolutely master these truffles. There’s no complicated tempering, no special equipment beyond basic kitchen tools, just straightforward steps for consistently smooth, rich, and delicious results every time. It’s the perfect recipe for beginners and seasoned home cooks alike.
- The Perfect Homemade Gift. Ditch the generic store-bought sweets this year and impress everyone on your list with a batch of these homemade peppermint truffles. They are not only irresistibly delicious but also beautifully customizable, making them a thoughtful and personal present. Package them into elegant decorative cookie tins, festive jars, or small treat boxes, tie with a beautiful ribbon, and you’ve got a heartfelt gift that speaks volumes. They’re a wonderful way to spread holiday cheer, show appreciation to teachers, colleagues, or neighbors, and offer a truly unique, edible token of affection.
- Freezer-Friendly for Make-Ahead Convenience. One of the most practical and appealing features of these peppermint truffles is their excellent freezer stability. This means you can prepare large batches weeks or even months in advance, stash them away in your freezer, and simply pull them out when you’re ready to serve or gift them. This capability significantly reduces the stress of last-minute holiday preparations or party planning, allowing you to enjoy the festivities even more, knowing you have delicious homemade treats on standby.
- Versatile Coating Options. While powdered sugar is a classic choice for a delicate, snowy finish, the fun doesn’t stop there! This recipe encourages creativity and personalization. You can roll your truffles in a wide variety of coatings to suit different tastes and occasions, adding not only visual appeal but also exciting textural contrasts. Imagine crushed candy canes for a festive crunch, rich unsweetened cocoa powder for a sophisticated, slightly bitter note, colorful candy melts for a playful look, or even finely chopped nuts for an added layer of texture. The possibilities are truly endless, allowing you to tailor each batch to perfection.
Essential Ingredients You’ll Need for Peppermint Truffles
Gathering your ingredients is the first and simplest step to creating these irresistible peppermint truffles. Here’s a detailed look at what you’ll need and some tips for selecting the best quality for optimal flavor and texture:
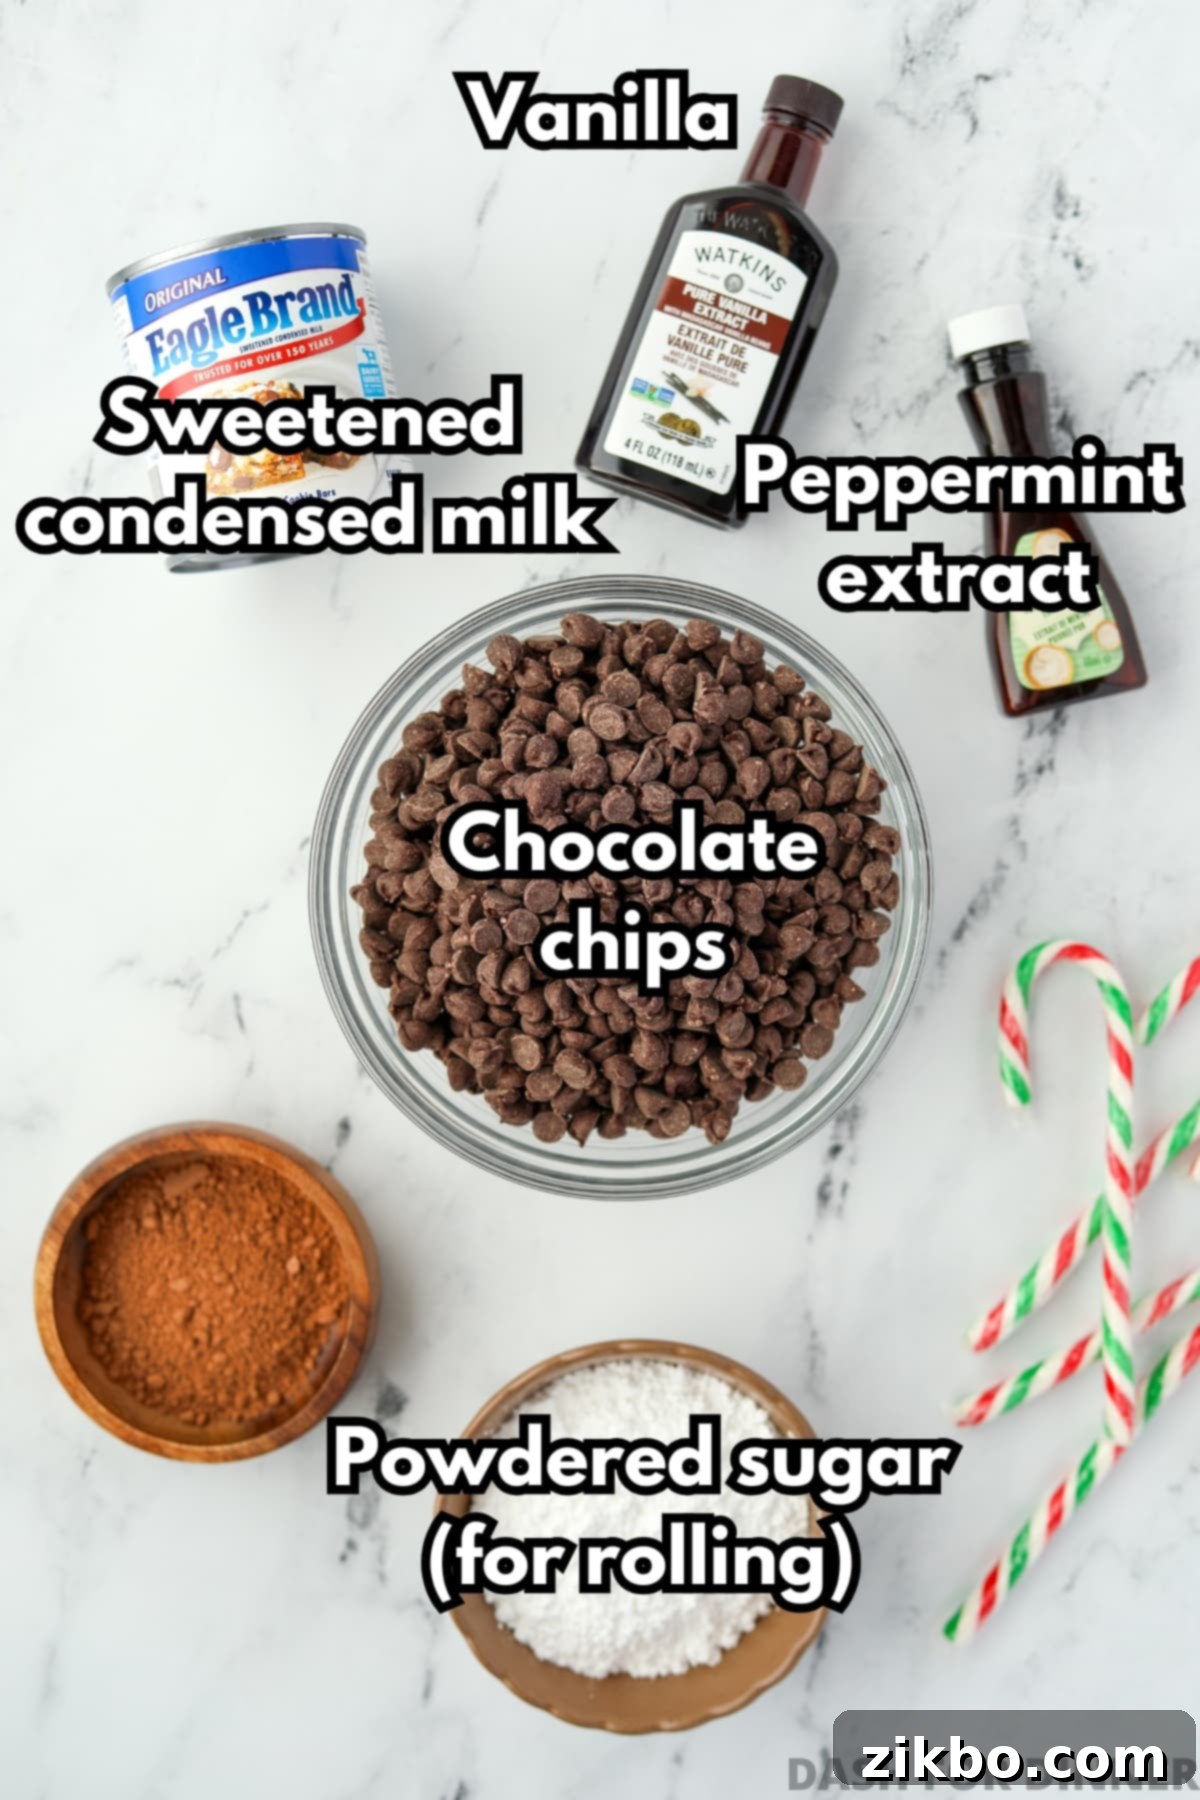
- Chocolate Chips: For this specific recipe, I highly recommend using high-quality semi-sweet chocolate chips. They offer a perfect balance of sweetness and rich cocoa flavor that pairs wonderfully with the refreshing peppermint. While most well-known brands work well, be aware that some, like Nestle Tollhouse, can sometimes harden more quickly during the chilling process, so you might need to adjust chilling time slightly. You can certainly experiment with other types of chocolate:
- Dark Chocolate Chips: For a more intense cocoa flavor and a less sweet truffle, which can be a sophisticated pairing with peppermint.
- Milk Chocolate Chips: Will yield a sweeter, creamier, and milder chocolate flavor, perfect for those who prefer a less bold chocolate presence.
- White Chocolate: Though not in the original, using white chocolate chips can create a beautiful, creamy, and distinctively minty truffle. If you opt for white chocolate, melt it very carefully (see expert tips) and consider adding a teaspoon of coconut oil to help with a smooth melt.
The key is to use a chocolate brand you trust for good melting consistency and flavor.
- Sweetened Condensed Milk: This is truly the magical “secret ingredient” that makes these truffles incredibly smooth, creamy, and allows them to be a complete no-bake marvel. It’s a thick, highly sweetened milk product found in the baking aisle, and it’s absolutely crucial not to confuse it with “evaporated milk,” which is unsweetened and will not yield the same results. Sweetened condensed milk acts as both a primary sweetener and a powerful binder, creating that perfect dense, fudgy truffle texture without any actual cooking.
- Peppermint Extract: This is where the signature, invigorating flavor of your truffles originates! While sometimes a bit tricky to locate outside the holiday season, most larger grocery chains will stock peppermint extract, especially in their baking or spice aisle. Look for pure peppermint extract for the most authentic flavor. If pure peppermint extract proves elusive in your area, a general “mint” extract will work perfectly fine, though the flavor might be slightly milder or have a hint of spearmint. Ensure you use a good quality extract for the best and most vibrant flavor payoff.
- Vanilla Extract: A small touch of vanilla extract is added not just for its own subtle flavor, but primarily to beautifully enhance, round out, and deepen the vibrant peppermint notes. It adds a layer of warmth and complexity to the overall flavor profile of the truffle, preventing the peppermint from tasting too sharp or one-dimensional. Using a good quality pure vanilla extract will make a noticeable difference.
- Powdered Sugar (for rolling): While powdered sugar (also universally known as confectioners’ sugar or icing sugar) is my personal favorite for a classic, elegant, and snowy finish, the fun truly doesn’t stop there! I often use a variety of coatings for a stunning presentation, especially when preparing these for gifting. Other fantastic and creative options include:
- Unsweetened Cocoa Powder: For those who appreciate a deeper, slightly bitter chocolate flavor. Rolling truffles in cocoa powder creates a sophisticated look and a wonderful contrast to the sweet interior.
- Crushed Candy Canes: A quintessential holiday coating! Crush regular or mini candy canes (see the “Candy Cane Truffles” section below for detailed crushing tips) to a fine or slightly coarse consistency. This adds a vibrant pop of red and white color, a delightful crunchy texture, and an intensified burst of peppermint flavor that is truly festive.
- Crushed Peppermint Candies: Similar to candy canes, but these usually yield a finer, smoother coating if you crush them well, offering a more intense and consistent mint flavor.
- Melted Candy Melts: For a hard, colorful, and glossy shell. Green or white candy melts are popular choices for a minty theme, but any color can add a fun and eye-catching touch. You can dip the truffles and then drizzle with contrasting colors or sprinkles before they fully harden.
- Melted Chocolate Coating: For a thin, crisp chocolate layer, use chocolate bark or chocolate-flavored melting wafers. Dip the truffles for a beautiful, even coating.
- Edible Glitter or Sprinkles: For an extra touch of sparkle, especially if making these for children or a themed party.
- Finely Chopped Nuts: While not a traditional peppermint pairing, finely chopped almonds, pecans, or walnuts can add a delightful textural crunch and a nutty flavor if you’re looking for a different kind of contrast.
Recommended Equipment for Optimal Truffle Making
While you don’t need a lot of specialized tools, having these items on hand will make your truffle-making process much smoother, more efficient, and ultimately, more enjoyable, ensuring professional-looking results:
- Medium Saucepan (or Microwave-Safe Bowl): Essential for melting the chocolate mixture. Choose one appropriate for your chosen melting method.
- Heatproof Bowl: To transfer the melted truffle mixture for chilling. Glass or ceramic bowls work well.
- Plastic Wrap: Crucial for covering the mixture while chilling to prevent a “skin” from forming.
- Cookie Scoop (or Heaping Tablespoon): A #40 cookie scoop (approximately 1 ½ to 2 tablespoons) is ideal for creating uniformly sized truffles, which not only look professional but also ensure consistent serving portions. A regular heaping tablespoon works perfectly well for creating consistent sizes if a scoop isn’t available.
- Baking Sheet: Lined with parchment paper, this is where your formed truffles will rest both before and after coating, preventing them from sticking.
- Shallow Bowl (or Rimmed Tray): Perfect for holding your chosen coatings and making the rolling process easy, efficient, and less messy.
- Parchment Paper or Wax Paper: Indispensable for lining baking sheets and containers, preventing the truffles from sticking during chilling, coating, and storage.
How to Make (Truly Easy) Peppermint Truffles: Step-by-Step Guide
Making these peppermint truffles is a delightfully straightforward process, whether you opt for the classic stovetop method or the quicker microwave alternative. Follow these simple steps for perfectly smooth, firm, and delicious results every time.
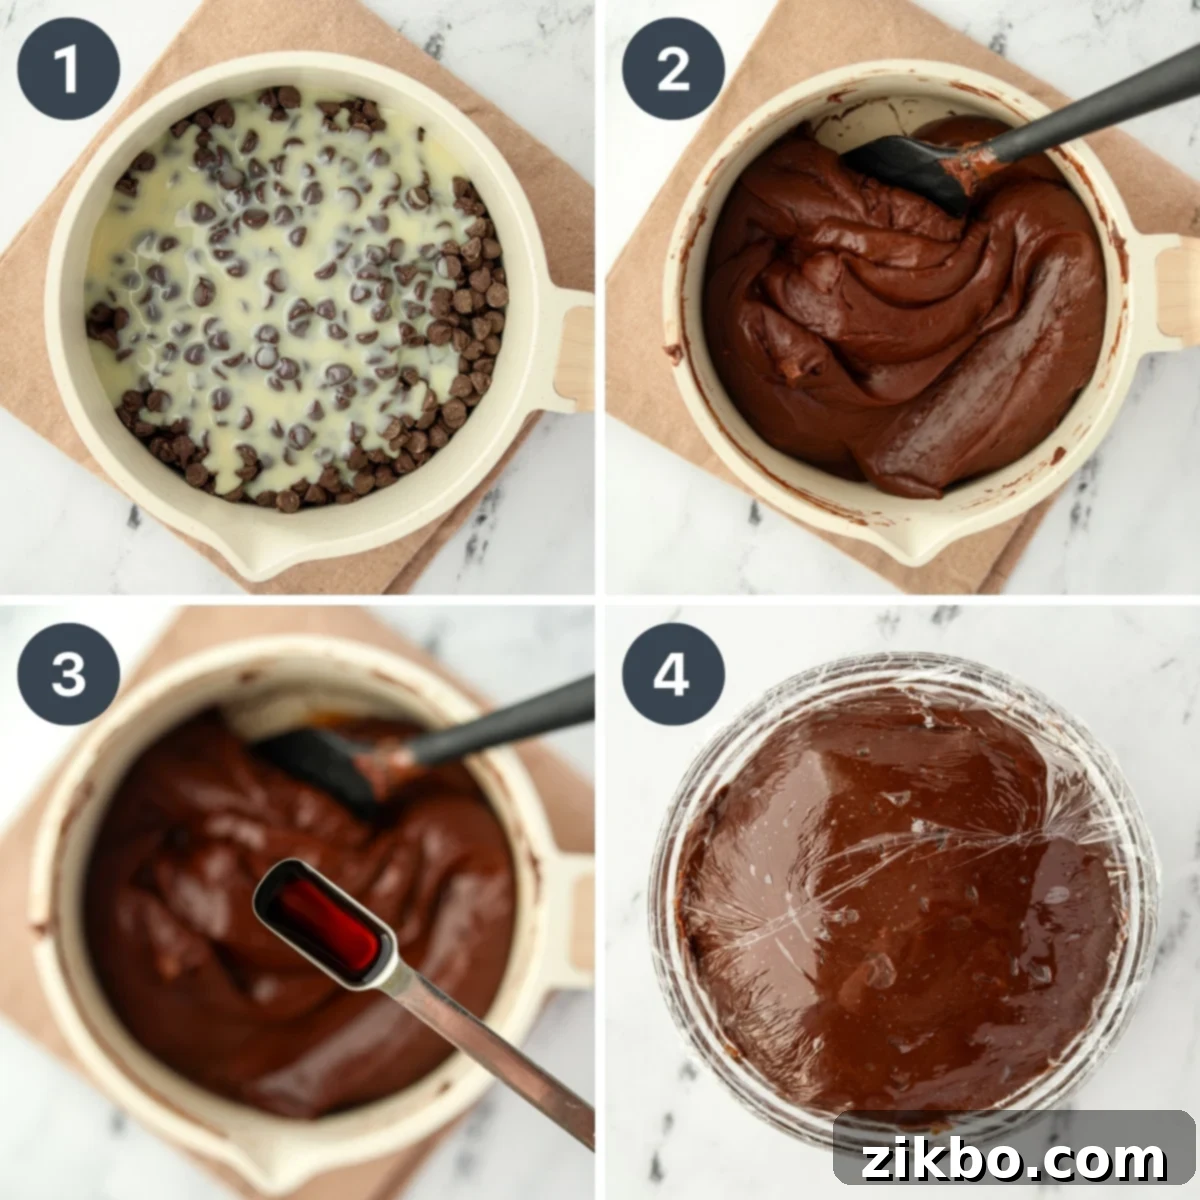
The Stovetop Method (Recommended for Best & Most Consistent Results)
- Combine Ingredients: Begin by adding 3 cups of your chosen chocolate chips (semi-sweet is highly recommended for its balanced flavor) and the full 14oz can of sweetened condensed milk to a medium-sized, clean, and dry saucepan.
- Melt Gently Over Low Heat: Place the saucepan over a low heat setting. It is absolutely crucial to melt the mixture slowly and gently to prevent the delicate chocolate from seizing or scorching. Stir the mixture often, almost continuously, with a heatproof spatula or wooden spoon. Continue heating and stirring until all the chocolate chips have completely melted and the mixture transforms into a wonderfully smooth, uniform, and glossy consistency. This careful process usually takes about 5-8 minutes, so be patient.
- Infuse with Flavor: Once the chocolate mixture is perfectly smooth and free of lumps, immediately remove the saucepan from the heat. Now, stir in 1 tablespoon of peppermint extract and 1 teaspoon of vanilla extract. Mix thoroughly until both extracts are fully incorporated into the chocolate and the delightful aroma fills your kitchen.
- Prepare for Chilling: Transfer the warm truffle mixture from the saucepan into a clean medium heatproof bowl. This helps it cool more efficiently and ensures an even chill.
- Cover Tightly for Chilling: This is a crucial step to maintain the texture of your truffles! Wrap the bowl tightly with plastic wrap.
- Top tip for chilling: Press the plastic wrap directly against the entire surface of the chocolate mixture, ensuring there are no air gaps between the chocolate and the wrap. This technique effectively prevents a discolored, dry, or crusty “skin” from forming on top as it cools, maintaining the perfectly smooth and uniform texture of your truffles.
Crucial Chilling Phase: Approximately Two Hours
Once the bowl is securely wrapped and sealed, transfer it to the refrigerator. Allow the chocolate mixture to chill for approximately 2 hours, or until it reaches a consistency that is firm enough to easily scoop, yet still pliable enough to roll smoothly without crumbling. It should not be rock-hard. Avoid over-chilling, as it can make the mixture too difficult to work with (but don’t worry, we have expert tips for how to fix this if it happens!).
The Microwave Method (A Quicker Alternative, But with Caution)
If time is of the essence and you need a quicker melting process, the microwave offers a faster way to prepare your chocolate base. However, it requires a bit more vigilance and care, as it’s considerably easier to accidentally overheat the chocolate in a microwave. Overheating can cause the chocolate to “seize” – meaning it becomes thick, grainy, and hard, rendering it unsuitable for truffles. If you choose this method, proceed with caution and follow these guidelines precisely:
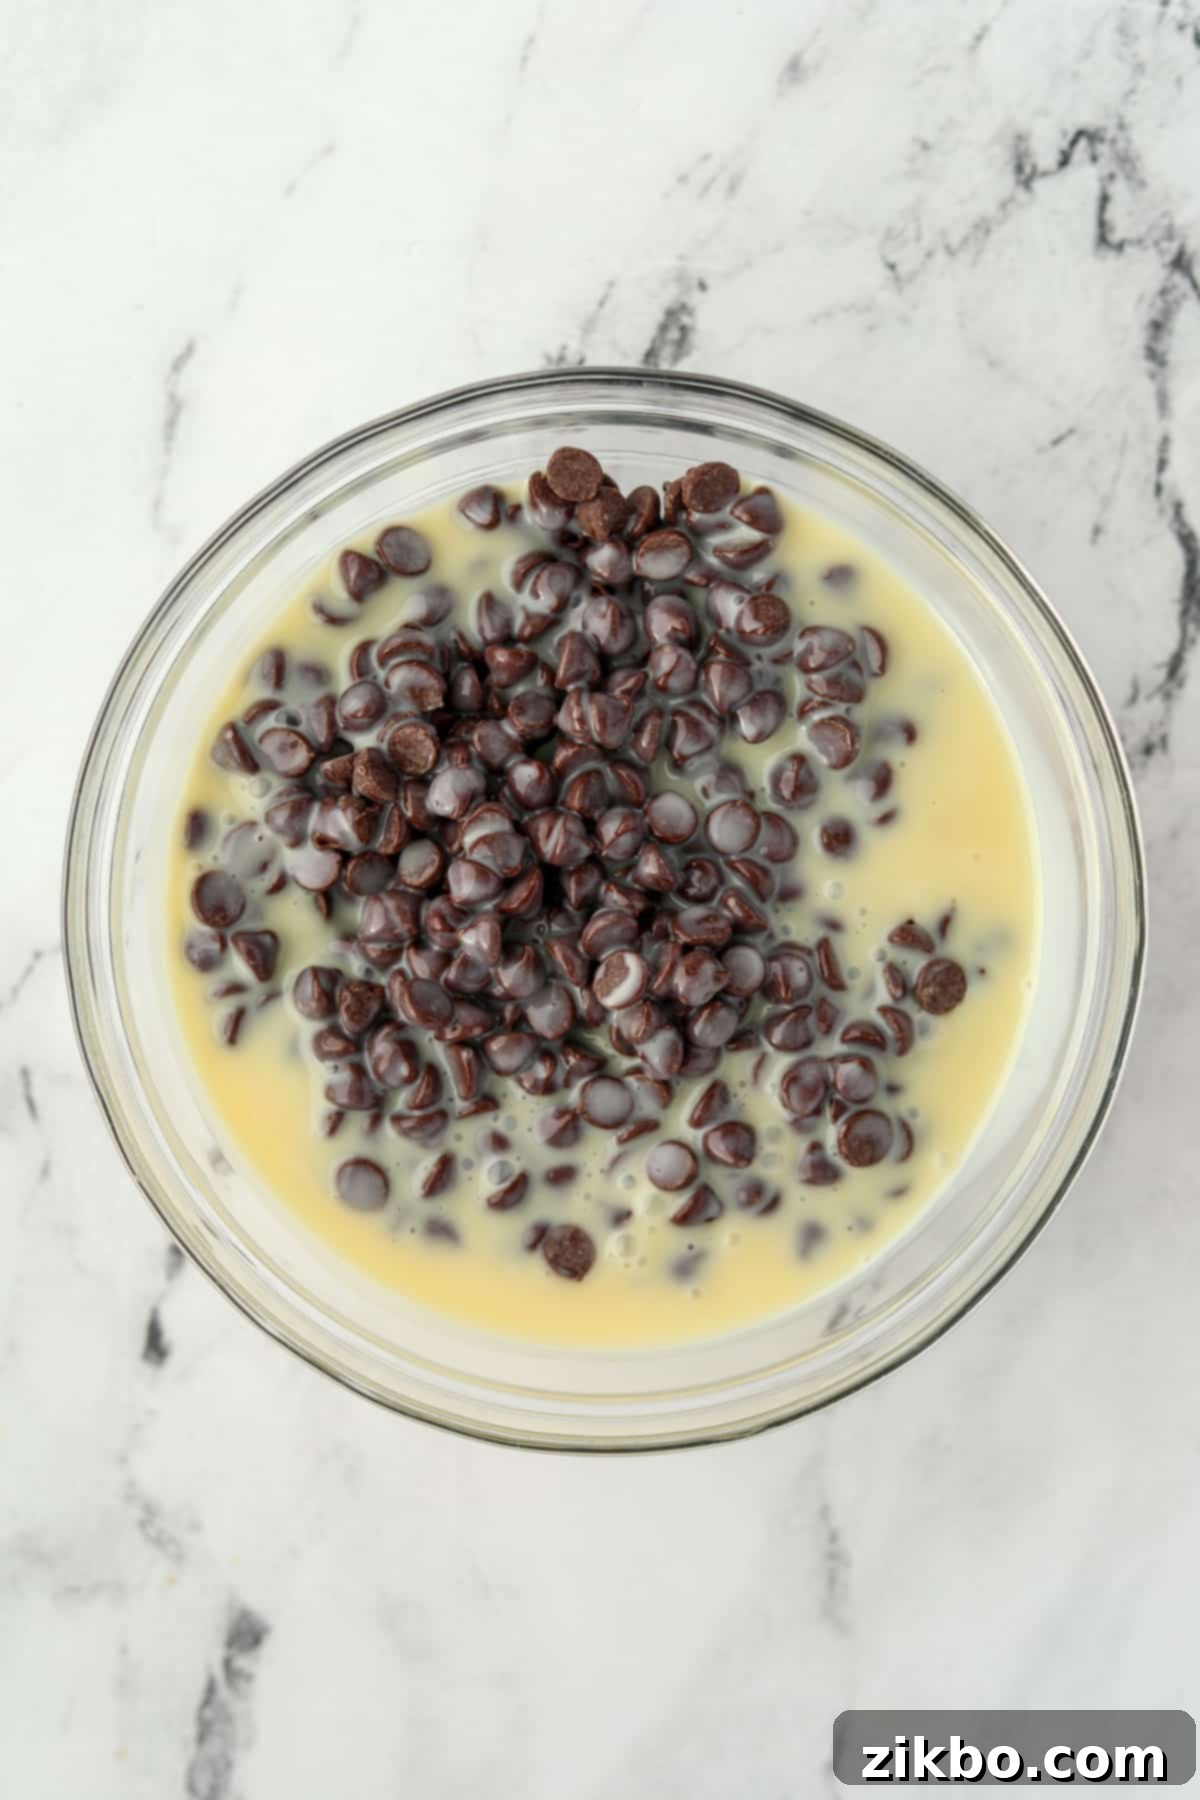
- Combine in Microwave-Safe Bowl: Add the chocolate chips and sweetened condensed milk to a large, microwave-safe bowl. Stir them together briefly before heating to help distribute the sweetened condensed milk evenly among the chips.
- Heat in Short Intervals: Microwave the chocolate mixture in short bursts of 30-second intervals. After each interval, remove the bowl from the microwave and stir the chocolate thoroughly with a spatula. Even if it doesn’t appear significantly melted at first, stirring helps to distribute the heat evenly throughout the mixture and encourages the chocolate chips to melt from the residual warmth.
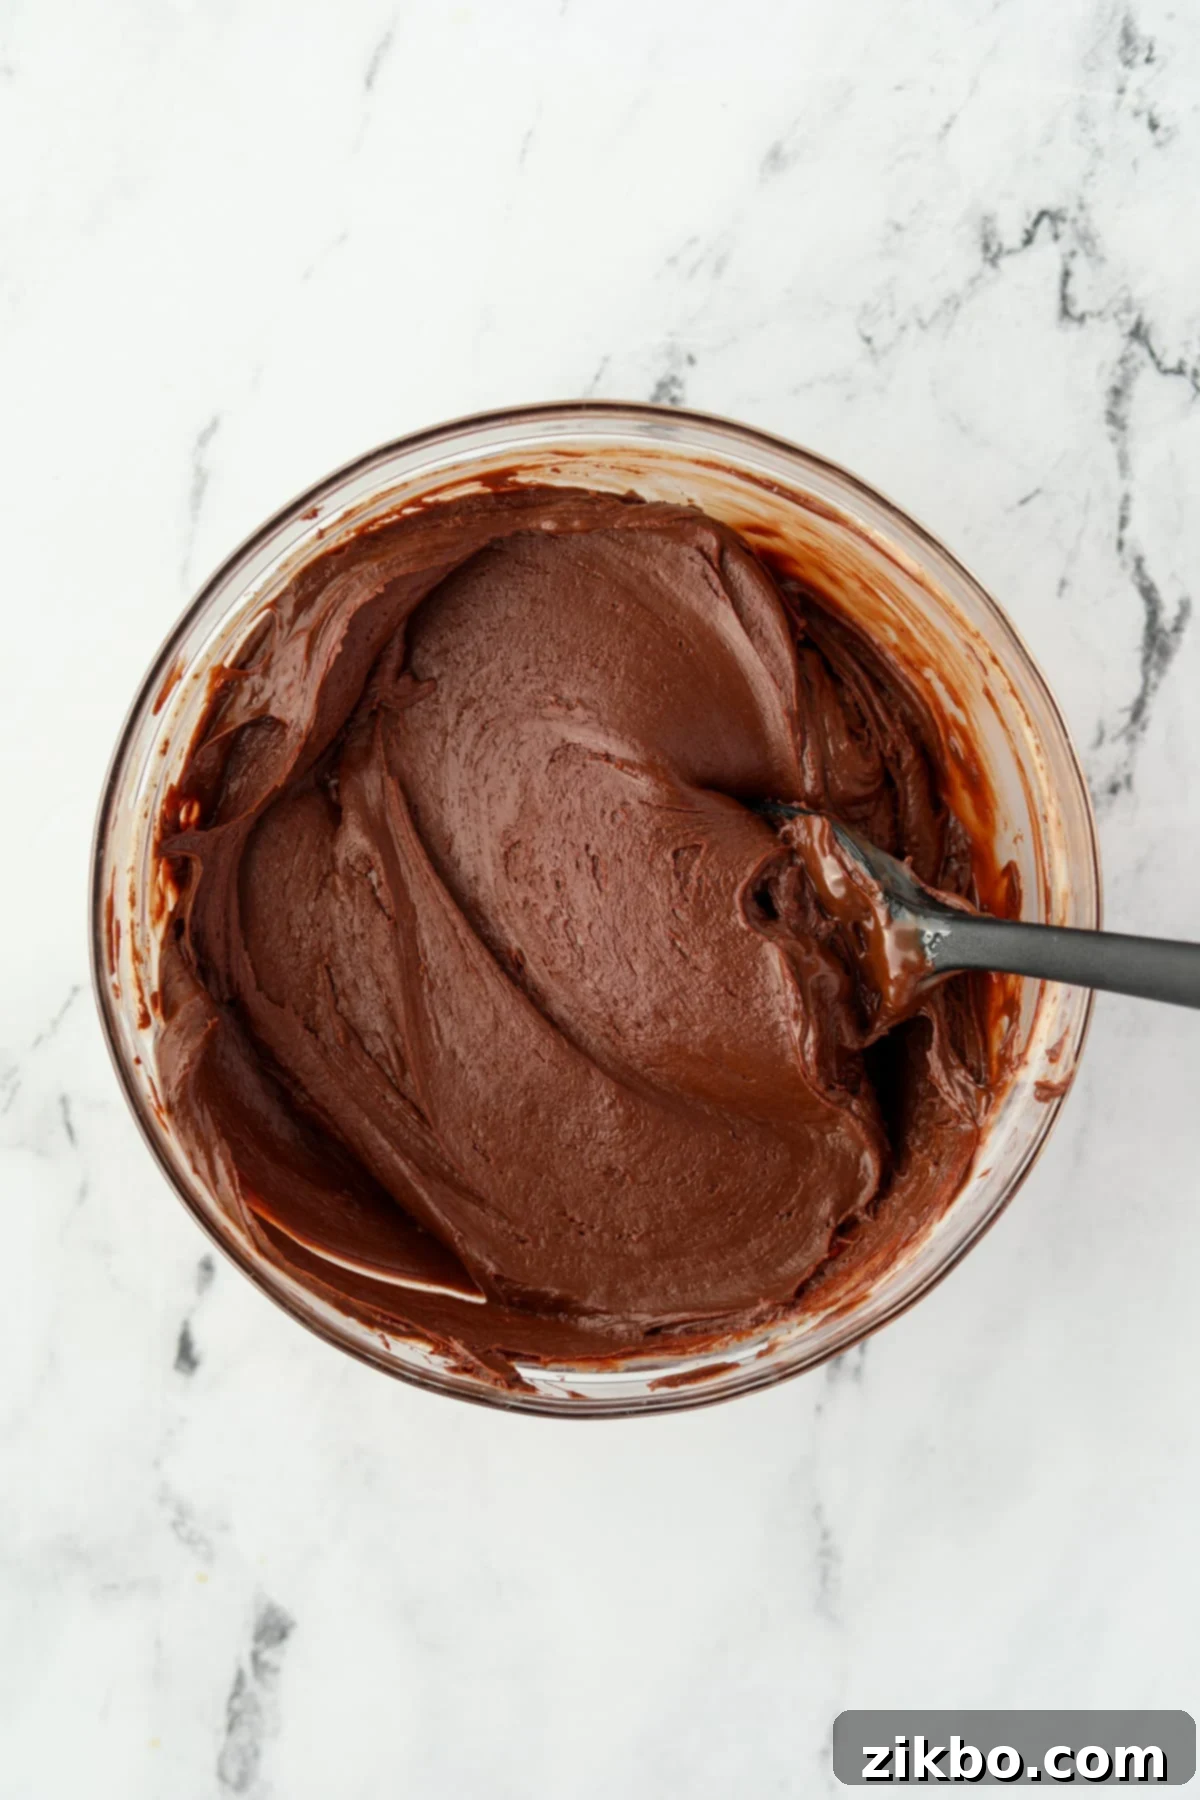
- Achieve Smoothness and Flavor: After approximately 3-4 intervals (this can vary depending on your microwave’s wattage and the specific type of chocolate), the chocolate should melt into a smooth, glossy, and uniform consistency after stirring. Once it reaches this point, immediately add in 1 tablespoon of peppermint extract and 1 teaspoon of vanilla extract; stir very well until fully combined and the mixture is fragrant with mint.
- Chill and Finish: Once the mixture is flavored, proceed to chill, portion, and shape the chocolate exactly as outlined in the main stovetop recipe instructions. Remember, careful and incremental heating is the absolute key to success when using the microwave for melting chocolate.
Mastering the Art of Shaping and Rolling Your Peppermint Truffles
Once your truffle mixture is perfectly chilled, it’s time for the most enjoyable and creative part: shaping them into beautiful, bite-sized delights and giving them their final decorative flourish!
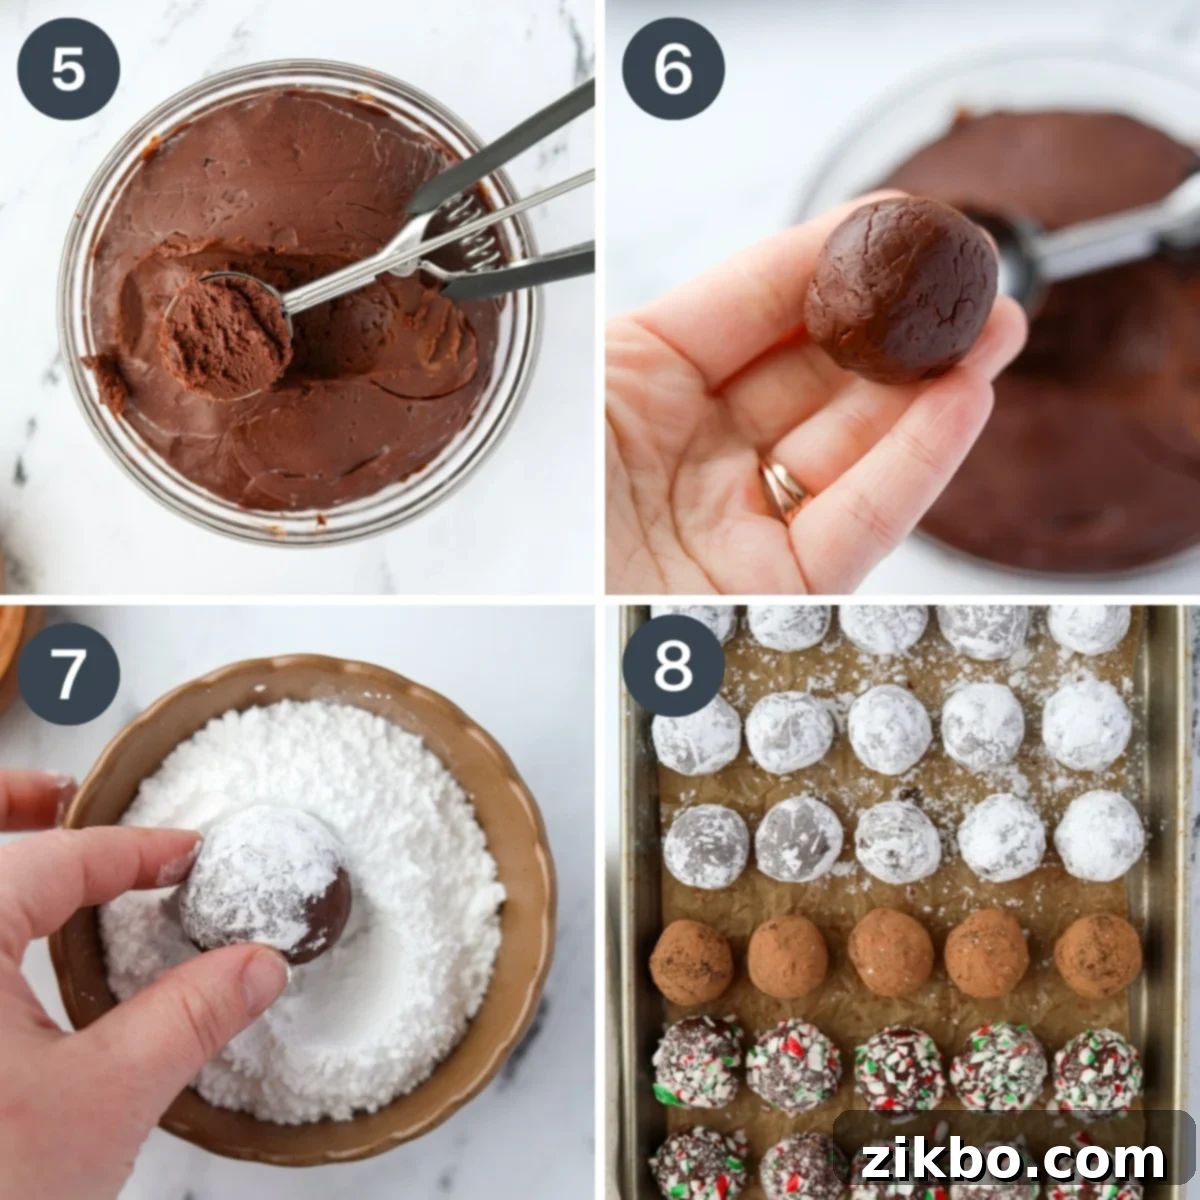
- Scoop the Chilled Mixture: After the chocolate has thoroughly chilled in the refrigerator for about two hours, it should be firm enough to handle easily, yet still relatively pliable and easy to scoop. The ideal consistency is firm but not rock-hard, allowing for smooth shaping.
- For uniformly sized and professional-looking truffles, use a #40 cookie scoop (which typically holds about 1 ½ to 2 tablespoons of mixture). This ensures all your truffles are consistently sized. Alternatively, a standard heaping tablespoon works perfectly well for creating consistent portions if a scoop isn’t available. Scoop out portions onto a parchment-lined baking sheet as you go, preparing them for the next step.
- Shape into Smooth Balls: Take each scooped portion of chocolate and gently roll it between your palms to form a smooth, round ball. Work relatively quickly, as the warmth from your hands can start to soften the chocolate. If the mixture becomes too sticky or soft to handle, you can either chill it again briefly (5-10 minutes) or lightly dust your hands with a small amount of powdered sugar to help prevent sticking.
- Prepare Your Chosen Coating: Select your desired coating(s) from the wide array of options available – whether it’s classic powdered sugar, rich cocoa powder, festive crushed candy canes, or any other choice. Add your chosen coating to a shallow bowl or a rimmed tray. This setup makes the rolling process efficient, contained, and minimizes mess.
- Coat the Truffles Evenly: Gently drop a few rolled truffles into the shallow bowl containing your chosen coating. Toss them around lightly, or use your fingers to roll them gently, until each truffle is evenly and completely coated on all sides. For coatings like crushed candy canes or finely chopped nuts, you might need to gently press the coating into the truffle with your fingertips to ensure it adheres well and creates a beautiful, even layer.
- Final Placement for Setting: Once fully coated, carefully transfer the finished peppermint truffles to another parchment-lined tray, a decorative cookie tin, or an airtight container. Repeat this entire process with the remaining truffle mixture until all of the chocolate has been scooped, shaped, and beautifully coated.
- Chill Before Serving: For the best texture and to ensure they hold their shape perfectly, it’s highly recommended to return the coated truffles to the refrigerator for at least another 30 minutes before serving. This final chill will set the coatings and firm up the truffles to their ideal consistency.
Creative Options for Rolling and Garnishing Your Peppermint Truffles
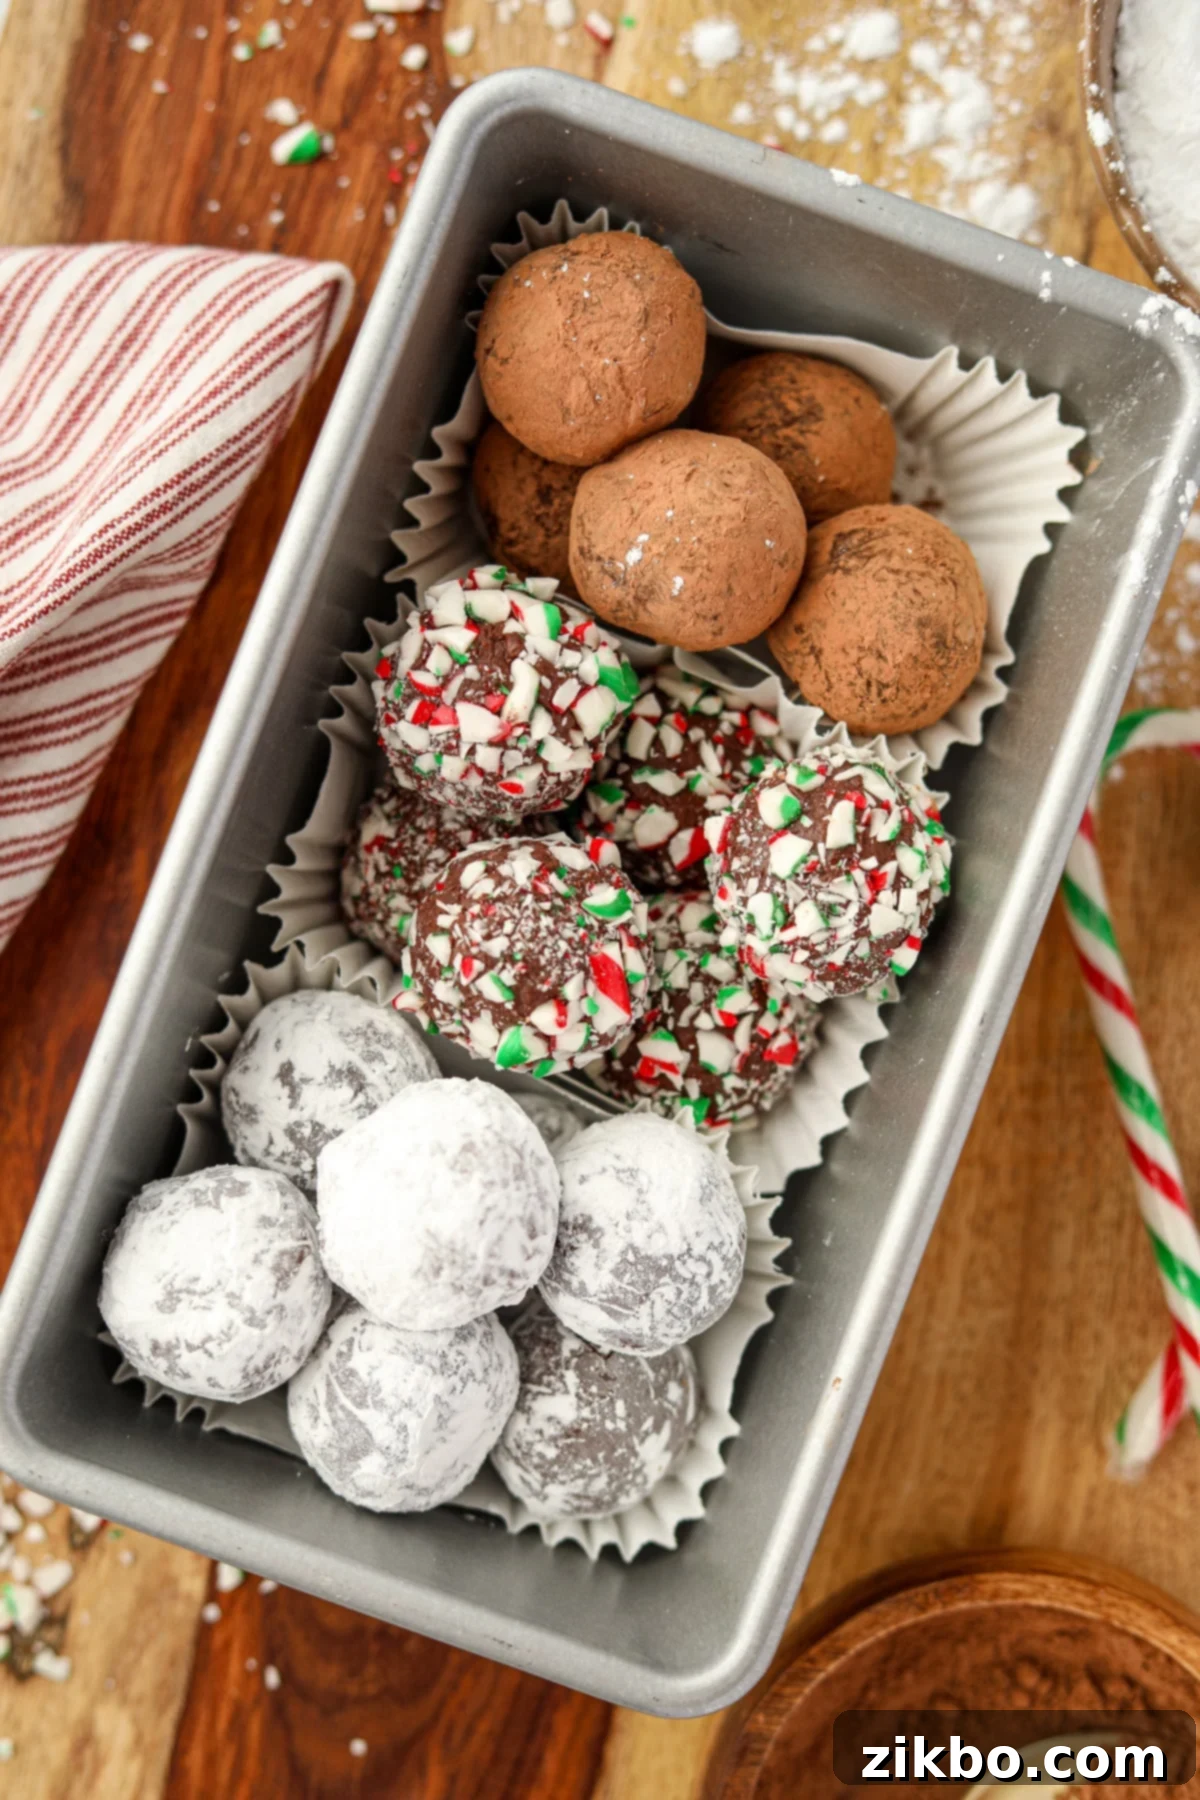
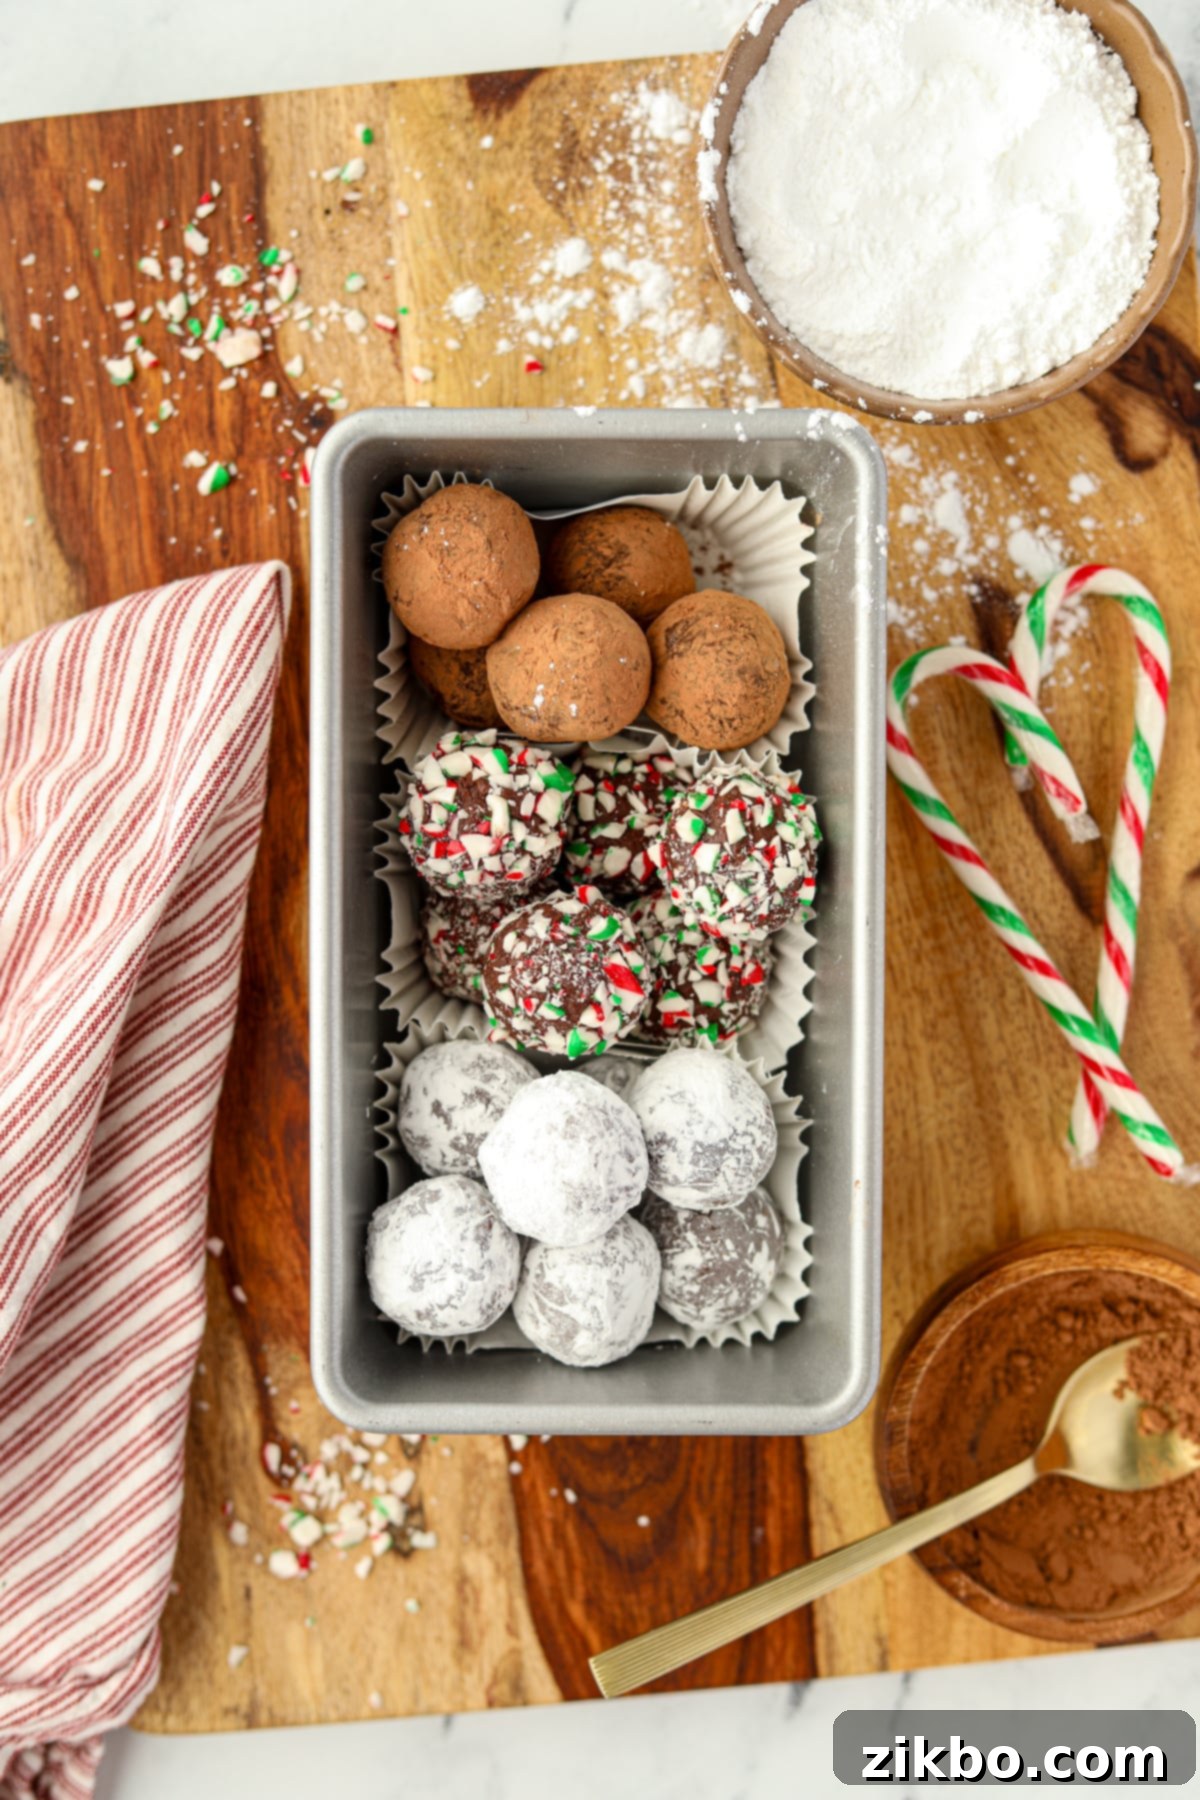
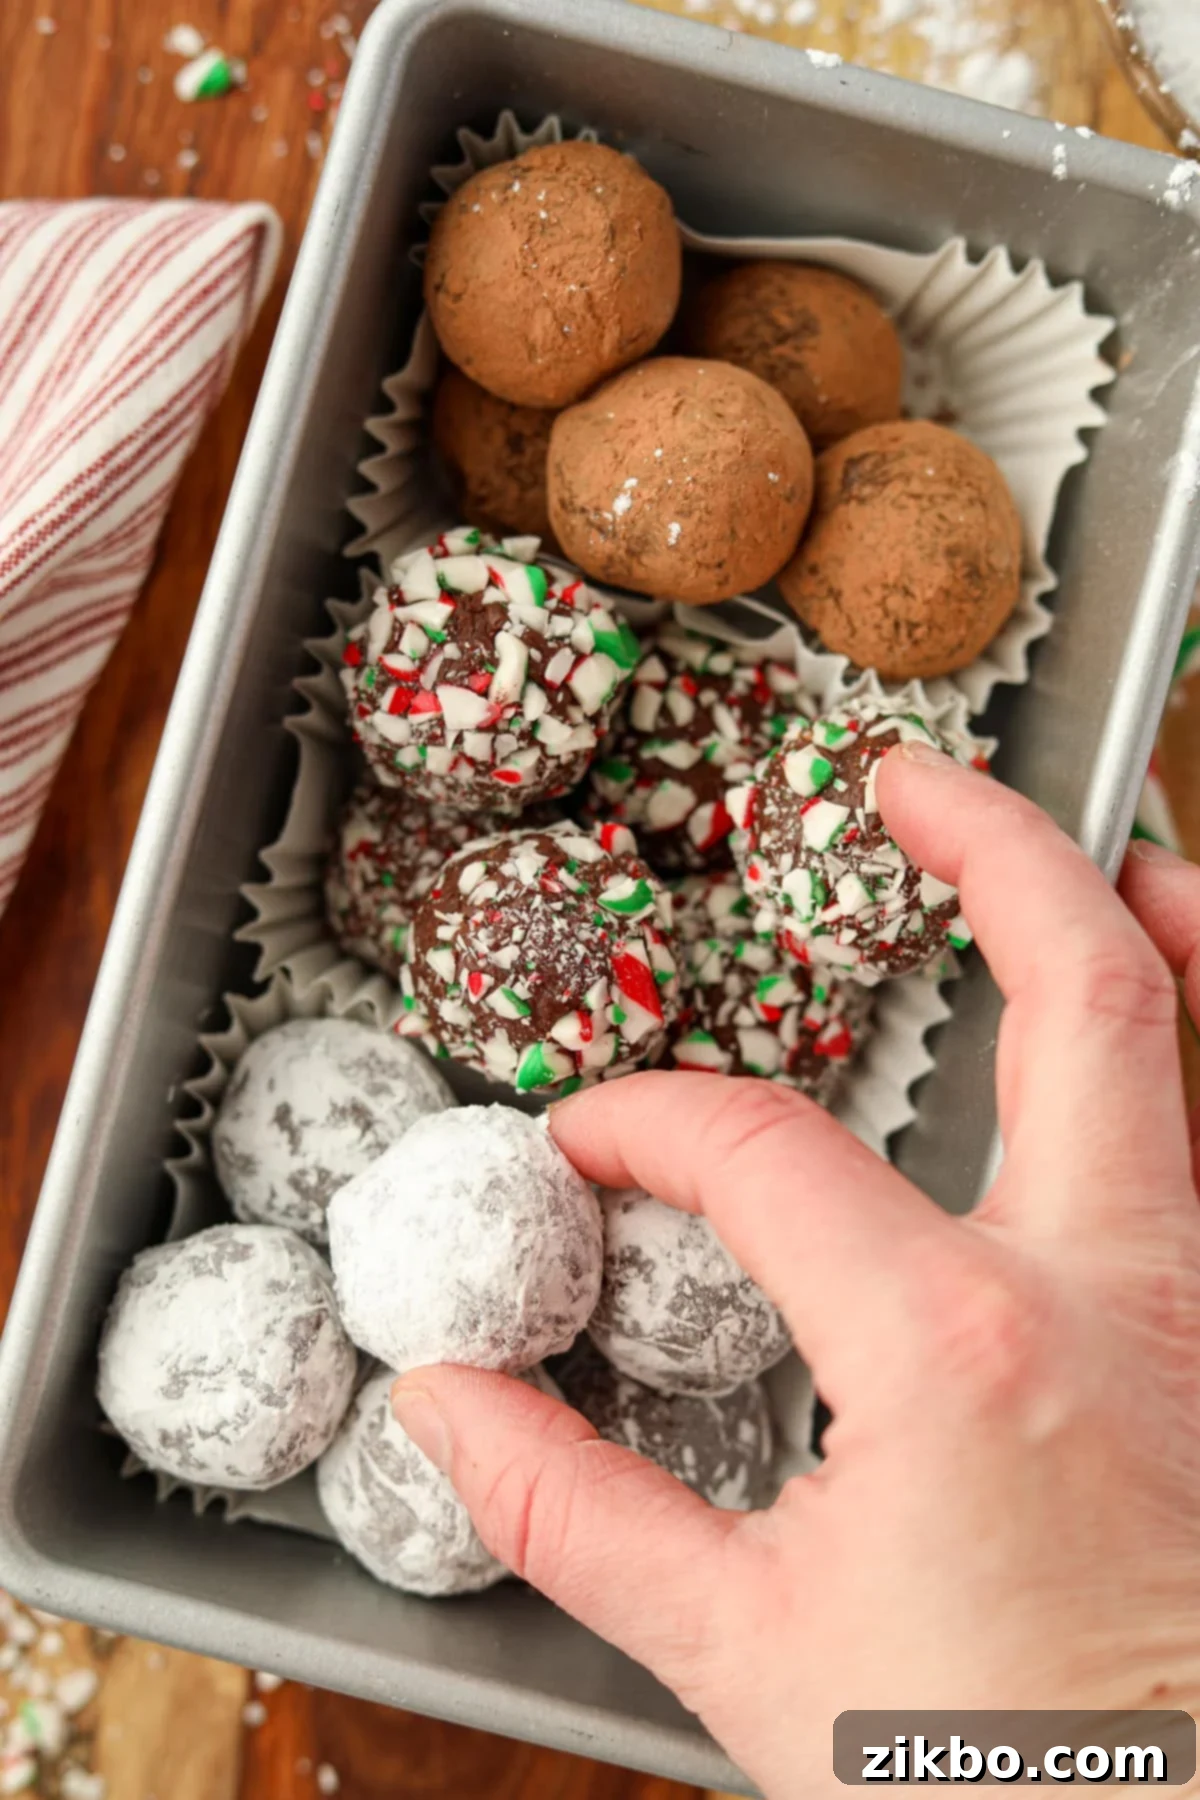
The true beauty of these truffles lies not just in their refreshing taste, but also in their incredibly customizable appearance. While powdered sugar offers a timeless and classic elegance, don’t hesitate to unleash your creativity! My personal preference for a delicate finish is always powdered sugar, but my husband simply can’t get enough of the festive crunch and vibrant color of crushed candy canes. When I’m preparing these homemade peppermint truffles for gifting, I absolutely love to incorporate a variety of coatings to create a visually appealing and exciting assortment in a decorative tin or jar. This way, there’s a little something for everyone!
Here are some fantastic ideas to elevate the visual appeal and textural experience of your peppermint truffles:
- Powdered Sugar (AKA Confectioners’ or Icing Sugar): This is arguably the most traditional and simplest coating method. It imparts a soft, velvety texture and a beautiful, snowy white appearance to your truffles, making it perfect for a classic and elegant presentation. It also adds a touch more sweetness that beautifully balances the rich chocolate and bold peppermint flavors.
- Unsweetened Cocoa Powder: For those who appreciate a deeper, more intense chocolate flavor with a sophisticated, slightly bitter contrast. Rolling truffles in unsweetened cocoa powder creates a rich, dark, and often velvety look, reminiscent of gourmet European truffles. It provides a wonderful depth of flavor that chocolate connoisseurs will adore.
- Crushed Candy Canes: A quintessential holiday coating that screams festive! Crush regular or mini candy canes (refer to the “Candy Cane Truffles” section below for detailed crushing tips to achieve your desired consistency, from fine dust to small crunchy pieces). This vibrant coating adds an undeniable pop of red and white color, a delightful crunchy texture, and an intensified burst of peppermint flavor that is truly seasonal and irresistible.
- Crushed Peppermint Candies: Similar to candy canes, but these usually yield a finer, smoother coating if crushed well, often offering a more intense and consistent mint flavor throughout. They are excellent for a powerful peppermint punch.
- Melted Candy Melts (Green, White, or Your Preferred Color): For a more structured, glossy, and vibrantly colorful coating, melt candy melts according to their package directions. Dip each truffle completely into the melted candy, allowing any excess to drip off, then place them on parchment paper to set and harden. You can then drizzle them with contrasting colors or sprinkles before they fully harden for an artistic touch. Green and white candy melts are particularly striking for peppermint-themed truffles, offering a visually stunning contrast.
- Melted Chocolate Coating: For a thin, crisp, and extra layer of chocolate, use good quality chocolate bark or melting wafers. Dip the truffles as described for candy melts. You can even create a delightful double-chocolate effect by using dark chocolate chips for the truffle base and a milk chocolate coating, or vice-versa, for layers of flavor.
- Edible Glitter or Sprinkles: For an extra touch of festive sparkle and fun, especially if you’re making these for children, a birthday, or a lively holiday party.
- Finely Chopped Nuts: While not a traditionally peppermint-pairing, finely chopped nuts like almonds, pecans, or walnuts can add a delightful textural crunch and a subtle nutty flavor if you’re looking for a different kind of contrast and complexity.
Don’t be afraid to mix and match! A beautifully arranged tin filled with peppermint truffles sporting different coatings is always a showstopper and makes for a truly memorable gift.
Variation: Delightful Candy Cane Peppermint Truffles
For an extra festive touch and an irresistible crunch that perfectly complements the smooth, rich chocolate, transforming your classic peppermint truffles into stunning candy cane truffles is an absolute must! This vibrant variation adds both significant visual appeal and a delightful textural element to your holiday treat repertoire, making them stand out on any dessert platter.
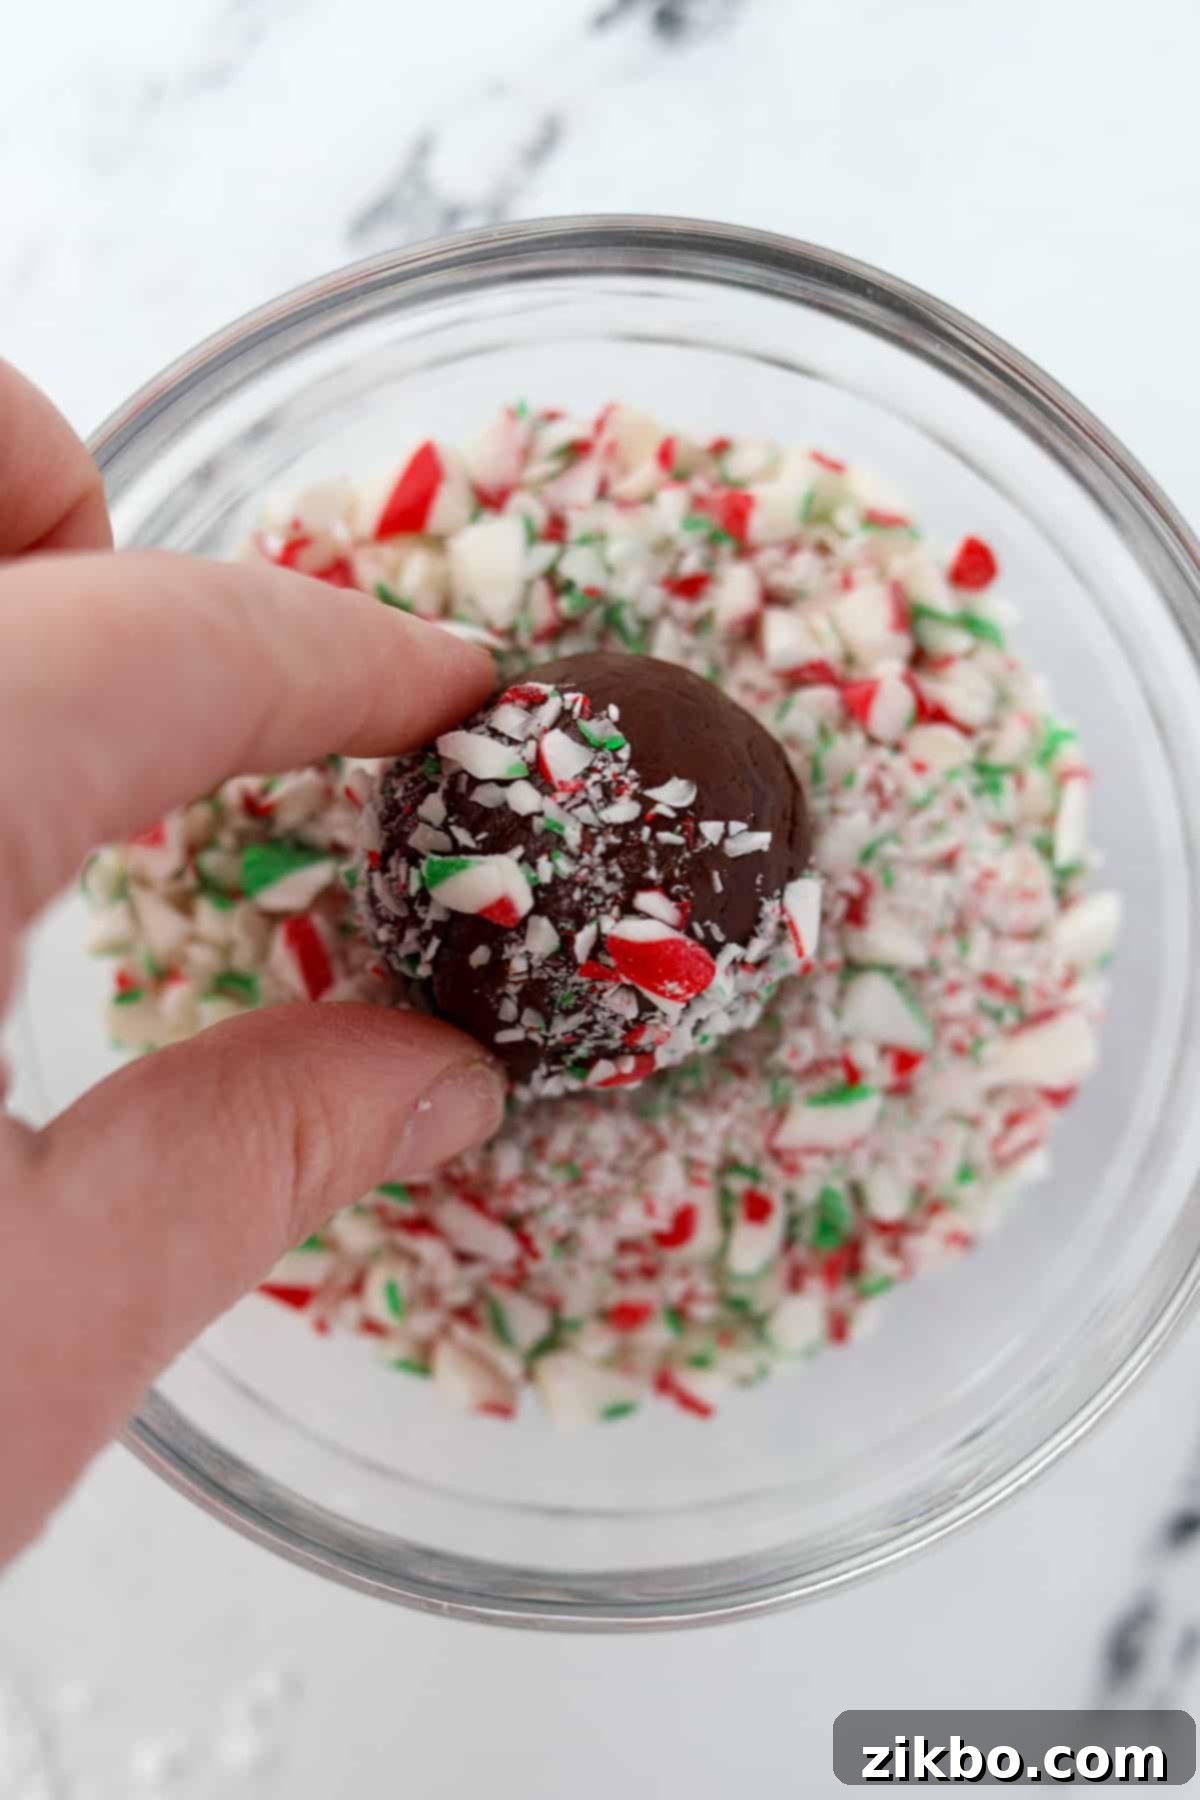
Here’s how to easily make this vibrant and crunchy variation of peppermint truffles:
- Prepare Crushed Candy Canes: Take about 5-6 standard-sized candy canes (or a handful of smaller peppermint candies) for a good batch. You have a couple of effective options for crushing them to your desired consistency:
- Zippered Freezer Bag Method: Place the candy canes in a heavy-duty zippered freezer bag. Ensure it’s sealed tightly to prevent pieces from escaping. Then, use a rolling pin, a sturdy meat tenderizer, or even the bottom of a heavy pan to crush them into your desired consistency – from a fine dust-like powder to small, delightfully crunchy pieces.
- Food Processor Method: For a quicker, more uniform crush, break the candy canes into smaller, manageable pieces and place them in a food processor. Use the pulse function in short bursts until you reach your desired texture. Be cautious not to over-process them into an overly fine powder if you desire some textural crunch.
Once crushed, spread the candy canes evenly in a shallow bowl or a rimmed tray, creating a bed for your truffles.
- Roll the Truffles: Once your chocolate balls are perfectly formed and firm (as per steps 5 and 6 of the main instructions), gently drop them into the prepared bowl of crushed candy canes. Roll each truffle around until it is thoroughly coated on all sides. If needed, lightly press the crushed candy into the truffle with your fingers to ensure it adheres well and completely covers the surface.
- Set and Store: Carefully transfer the beautifully coated candy cane truffles to a parchment-lined cookie tin or a baking tray. Repeat this process until all your truffles are adorned with their festive candy cane crust. These truffles are not only incredibly delicious but also exceptionally appealing to the eye, making them an outstanding addition to holiday platters, dessert buffets, and thoughtful gifts.
Storing Your Delicious Homemade Peppermint Truffles
Proper storage is absolutely key to maintaining the freshness, perfect texture, and vibrant flavor of your homemade peppermint truffles. These essential tips will help you enjoy your delightful treats for as long as possible, whether for a few days or several months:
Refrigeration for Short-Term Storage: Place your finished peppermint truffles in a single layer (if possible) within a parchment-lined cookie tin or an airtight container. If you need to stack them, always separate layers with a sheet of parchment paper to prevent them from sticking together or losing their shape. Store them in the refrigerator for up to 2 weeks. The consistently cool temperature helps them retain their firm, fudgy shape and prevents them from becoming too soft, sticky, or melty, which can compromise their delicious texture.
Freezing for Long-Term Enjoyment & Make-Ahead Planning: Yes, these truffles are wonderfully freezer-friendly, making them perfect for preparing ahead of busy holiday seasons or for simply having a sweet treat on hand whenever a craving strikes! For optimal freezing, follow these steps: first, arrange the truffles in a single layer on a parchment-lined baking sheet and freeze until they are completely solid (this usually takes about 1-2 hours). Once firm, transfer the frozen truffles to an airtight freezer container or a heavy-duty, tightly sealed freezer bag. Properly stored, they will last for a good 2-3 months in the freezer without losing their quality, flavor, or texture. To thaw them, simply move the desired number of truffles to the refrigerator for a few hours, or let them sit at room temperature for about 15-30 minutes before serving, allowing them to soften slightly to that perfect bite.
Always Keep Chilled During Serving: It’s crucial to keep your truffles refrigerated in between servings. If they are left out at room temperature for too long, especially in warmer environments or during extended periods, they will quickly soften, become overly sticky, and lose their beautiful spherical shape. This also negatively impacts their overall longevity and taste. Always ensure they are kept chilly to firm up between serving times, particularly if they’re part of a dessert platter that might sit out for a while at a party. Promptly return any uneaten truffles to the fridge to maintain their optimal texture and freshness.
Thoughtful Tips and Tricks for Gifting Your Homemade Truffles:
Homemade truffles make exceptionally thoughtful and impressive gifts, showcasing your effort and care. Here’s how to make your gifted batches extra special and memorable:
- Offer a Delightful Variety of Flavors and Coatings: To create an even more impressive and exciting gift, consider making a few different batches with various flavor extracts (like the popular orange, raspberry, or coconut variations mentioned later) and roll them in diverse, complementary coatings. A beautifully arranged box filled with a colorful array of truffles (some with powdered sugar, some with rich cocoa, some with crunchy crushed candy cane, or even vibrant green candy melt) is always a stunning presentation that delights the recipient and offers a sensory experience.
- Choose Decorative and High-Quality Packaging: Invest in beautiful, festive cookie tins, elegant decorative boxes, or attractive jars. The packaging itself adds significantly to the charm and perceived value of the gift. Select containers that are sturdy and appealing.
- Line with Festive Paper: Before carefully placing the truffles, always line your chosen container with festive parchment paper, pretty wax paper, or even decorative tissue paper. This not only adds a layer of hygiene and visual appeal but also prevents the truffles from sticking to the container and makes the gift feel more luxurious and professionally presented.
- Prepare Several Large Batches for Efficiency: If you have many people on your holiday gift list, it’s often far more efficient to make several large batches of truffles at once rather than numerous small ones. This streamlines your preparation process, saves time, and ensures you have enough delicious treats for everyone you want to share with.
- Utilize the Freezer for Advance Preparation: Take full advantage of the truffles’ excellent freezer-friendly nature! Prepare your batches weeks or even months before the holiday season or the gifting occasion. Once frozen solid and stored in an airtight freezer container or a vacuum-sealed bag, they’ll stay perfectly fresh and delicious until needed. Just remember to thaw them gently in the refrigerator before presenting them.
- Include a Recipe Card and Storage Instructions: For an extra thoughtful and personal touch, include a small handwritten or beautifully printed recipe card. This not only shares the love of baking and the delicious recipe but also provides essential instructions for keeping the truffles refrigerated between servings, ensuring the recipient enjoys them at their absolute best and knows how to properly care for them.
Creative Substitutions and Variations for Your Peppermint Truffles
This easy peppermint truffle recipe is incredibly versatile, making it a fantastic base for adapting to different tastes, dietary needs, or simply using what you have on hand. Don’t be afraid to experiment and make these truffles uniquely yours!
- Other Flavor Extracts: The possibilities are truly endless when it comes to swapping out the peppermint extract for other delightful flavors! I’ve experimented with many, and most have been absolutely delicious and well-received. Here are some popular and delightful alternatives to inspire you:
- Chocolate Orange Truffles: A perennial favorite that’s bright and refreshing! Simply substitute the peppermint extract with 1 tablespoon of high-quality orange extract or even a teaspoon of fresh orange zest for a vibrant, citrusy chocolate treat.
- Raspberry Chocolate Truffles: For a delightful fruity twist, use 1 tablespoon of raspberry extract or bakery emulsion. The subtle tartness of raspberry beautifully complements and cuts through the richness of the chocolate.
- Coconut Chocolate Truffles: Swap the peppermint extract for 2 teaspoons of coconut extract. For an extra tropical touch and textural appeal, roll the finished truffles in finely shredded toasted coconut.
- Almond Chocolate Truffles: Almond and chocolate are a classic and sophisticated pairing! Use 1 tablespoon of almond extract for a nutty, aromatic, and distinctly gourmet flavor.
- Coffee/Espresso Truffles: For a rich, bold, and invigorating flavor, add 1-2 teaspoons of instant espresso powder (dissolved in a tiny bit of hot water) or coffee extract directly to the melted chocolate mixture.
- Liqueur-Infused Truffles: For a more adult and sophisticated treat, a small amount (1-2 tablespoons) of a complementary liqueur like crème de menthe (for an intensified mint), Kahlúa (for coffee notes), or Bailey’s Irish Cream can be added with the extracts. Be mindful of the liquid ratio to maintain the truffle’s consistency.
- Dairy-Free Option: Making these delicious truffles dairy-free is surprisingly simple and yields equally satisfying results! Just swap the traditional sweetened condensed milk for a reliable brand of sweetened condensedcoconutmilk (always read labels carefully to ensure it’s truly sweetened condensed and not just regular coconut milk). Pair this with your favorite brand of high-quality dairy-free chocolate chips, and you’ll have a wonderfully rich, creamy, and completely vegan truffle that everyone can enjoy.
- Chocolate Chip Varieties: The type of chocolate chips you choose to use significantly impacts the final flavor profile and sometimes even the texture of your truffles.
- Semi-Sweet: Our recommended choice for a beautifully balanced flavor that appeals to most palates.
- Good-Quality Milk Chocolate Chips: Will yield a sweeter, creamier, and milder chocolate flavor. This is perfect for those who prefer less intense chocolate and a more classic candy-like sweetness.
- Dark Chocolate Chips: For a more intense, robust, and less sweet truffle. Dark chocolate pairs exceptionally well with peppermint for a sophisticated and deeply flavored treat. The higher cocoa content will naturally result in a slightly firmer truffle.
- White Chocolate: While I haven’t personally tried white chocolate yet for this specific recipe, I am confident it would work beautifully to create a creamy, minty delight without the dark chocolate notes! However, white chocolate can be a bit trickier to melt smoothly without seizing. If using, melt it very carefully over low heat or in short microwave intervals, and consider adding 1 teaspoon of neutral-flavored coconut oil (or vegetable shortening) to aid in achieving a smooth, fluid melt.
Expert Tips for Achieving Peppermint Truffle Perfection Every Time
Even though this no-bake recipe is incredibly easy, a few expert insights and techniques can help you avoid common pitfalls and ensure your peppermint truffles turn out absolutely perfectly, consistently delicious, and beautifully textured every single time.
- Always Be Careful Not to Overheat Chocolate: This is arguably the most critical tip for any chocolate-based recipe. Chocolate is a delicate ingredient. If you overheat it, especially rapidly in the microwave or over high stovetop heat, it will “seize.” Seized chocolate transforms into a thick, grainy, lumpy, and unworkable mess because the cocoa solids separate from the fat. At this point, it’s unfortunately very difficult to salvage the batch. So, remember: the golden rule is to go slow and low with your heat, and stir constantly and diligently. If you’re nervous or prefer a completely fool-proof method, using a double boiler (a heatproof bowl set snugly over a saucepan of simmering water, ensuring the bowl’s bottom does not touch the water) is a fail-safe technique that provides gentle, indirect heat, making seizing almost impossible.
- Don’t Chill for TOO Long: While adequate chilling is absolutely essential for firming up the truffle mixture to a scoopable consistency, leaving it in the refrigerator for an excessive amount of time can actually make it excessively hard and difficult to scoop and roll smoothly. I’ve personally made the mistake of forgetting about a batch, and it became almost rock-solid! If you find your chocolate mixture has over-chilled (this typically happens beyond 2-2 ½ hours, depending on your refrigerator’s temperature and the specific chocolate brand used), don’t panic! You have two effective options to rescue the batch:
- Soften at Room Temperature: The simplest solution is to simply leave the bowl out on your kitchen counter at room temperature for 2-4 hours. It will gradually soften to a perfectly scoopable and pliable consistency on its own.
- Gentle Rewarming: If you’re in a hurry, you can very gently rewarm the mixture in a saucepan over extremely low heat, stirring constantly, just until it becomes pliable again. I strongly do not recommend using the microwave for rewarming over-chilled chocolate, as it’s too easy to overheat it and risk seizing at this delicate stage. Once softened, cover the mixture again and re-chill for approximately 2 hours, or until it reaches the ideal scoopable firmness.
- Stovetop is the Best Method (Especially for Beginners): Through extensive testing of both stovetop and microwave methods, the stovetop consistently wins for reliability, ease of control, and superior results. While the microwave is undeniably faster, the intense and often uneven heat can quickly lead to overheated or seized chocolate, particularly if you’re not experienced with melting chocolate. For consistently smooth, silky, and perfectly textured chocolate truffles, I wholeheartedly recommend melting your mixture on the stovetop over low heat. It provides a more gentle and gradual melt, giving you far better control over the process and significantly reducing the risk of errors, making it the ideal choice for beginners and experts alike.
- Use Quality Ingredients: Given that this recipe uses so few ingredients, the quality of each really shines through in the final product. Always opt for good quality chocolate chips and pure, high-grade extracts for the best and most authentic flavor profile in your truffles.
- Taste and Adjust Flavor: Before the chilling process, take a tiny taste of your melted mixture (once it’s cooled slightly). Does it have enough peppermint? Is it too subtle? You can always add a tiny bit more extract if needed, but remember that a little peppermint extract goes a long way, so add sparingly and taste as you go.
- Keep Hands Cool When Rolling: If your hands are naturally warm, the chocolate mixture will melt and become sticky very quickly during the rolling process. To combat this, you can rinse your hands with cold water and dry them thoroughly before you begin rolling. Alternatively, lightly dust your palms with a small amount of powdered sugar to create a barrier and prevent sticking.
- Work in Small Batches if Making a Large Quantity: If you’re preparing a very large quantity of truffles, it’s a good idea to keep portions of the truffle mixture in the refrigerator while you work on rolling and coating others. This prevents the entire batch from getting too soft at room temperature, ensuring consistent texture across all your truffles.
Discover More Festive Desserts
If you’ve fallen in love with these easy peppermint truffles, you’ll surely want to explore more delicious and festive recipes perfect for holiday gatherings, thoughtful gifting, or simply treating yourself and your loved ones during the special seasons!
- Cranberry Bliss Bars
- Cinnamon Roll Casserole
- Christmas Rice Krispie Treat Recipe
- Cranberry Pretzel Salad
If you loved this easy recipe for peppermint truffles, please let me know by leaving a 5-star review in the recipe card below or sharing your thoughts in the comments! Your feedback helps others discover delicious recipes. You can also tag me on Instagram @dashfordinner to show off your creations – I’d love to see them!

Easy Peppermint Truffles (Just 5 Ingredients!)
This incredibly simple recipe for Peppermint Truffles uses only 5 ingredients and is perfect for holiday gifting, make-ahead party treats, or simply a refreshing sweet indulgence. These no-bake chocolate balls are a festive delight!
★★★★★
5 from 1 vote
Print Recipe
Pin Recipe
Rate This Recipe
Equipment
- #40 cookie scoop (or a heaping tablespoon)
- Medium saucepan (for stovetop method) or Microwave-safe bowl (for microwave method)
- Heatproof bowl for chilling
- Plastic wrap
- Parchment paper-lined baking sheet
- Shallow bowl or rimmed tray for rolling
Ingredients
For the Truffles:
For Rolling/Coating:
Instructions
- Melt Chocolate (Stovetop Method): In a medium saucepan, combine the chocolate chips and the full can of sweetened condensed milk. Heat over low heat, stirring constantly, until the chocolate chips are completely melted and the mixture is smooth and uniform. This should take 5-8 minutes. (Alternatively, see Microwave Method in Notes below).
- Remove from Heat and Flavor: Once melted, remove the saucepan from the heat. Stir in the 1 tablespoon of peppermint extract and 1 teaspoon of vanilla extract until fully incorporated.
- Transfer and Cover: Transfer the warm truffle mixture to a medium heatproof bowl. Cover the surface directly with plastic wrap, pressing it down firmly against the chocolate to prevent a “skin” from forming as it cools.
- Chill Thoroughly: Place the covered bowl in the refrigerator and chill for approximately 2 hours, or until the chocolate mixture is firm enough to scoop but still pliable.
- Scoop and Roll: Once chilled, use a #40 cookie scoop (about 1 ½ – 2 tablespoons) or a heaping tablespoon to scoop portions of the chocolate mixture. Roll each portion between your palms to form smooth, round balls.
- Prepare Coatings: Pour your chosen coating (powdered sugar, cocoa powder, crushed candy canes, etc.) into a shallow bowl or rimmed tray.
- Coat Truffles: Drop a few rolled chocolate balls into the coating. Toss or roll them around until they are evenly and completely coated. For crushed candy canes, gently press the coating to ensure it adheres.
- Store: Place the finished truffles on a parchment-lined tray, in a cookie tin, or an airtight container. Repeat with the remaining mixture until all truffles are shaped and coated. Keep truffles refrigerated until serving. They are best served chilled and will last longer if kept cool between servings.
Notes
Microwave Method: For a quicker melt, combine chocolate chips and sweetened condensed milk in a large microwave-safe bowl. Heat in 30-second intervals, stirring well after each interval to distribute heat and encourage melting. This usually takes 3-4 sessions. Once smooth, stir in extracts, then chill, shape, and roll as directed above.
Caution: Be very careful not to overheat chocolate in the microwave, as this can cause it to “seize” and become hard and unusable for truffles. Go slow and stir often!
If Chocolate Becomes Too Hard from Over-Chilling: If you accidentally leave your truffle mixture in the refrigerator for too long (over 2-2.5 hours) and it becomes too firm to scoop, you can remedy it. Either leave the bowl at room temperature for 2-4 hours to allow it to soften gradually, OR gently rewarm the mixture in a saucepan over very low heat, stirring constantly, until it’s pliable again. Then cover and re-chill for 2 hours until firm but scoopable. Avoid reheating in the microwave if it’s already too hard, as it increases the risk of seizing.
Variations:
- Orange Chocolate Truffles: Use 1 tablespoon of orange extract instead of peppermint extract.
- Raspberry Chocolate Truffles: Substitute the peppermint extract for 1 tablespoon of raspberry extract (or bakery emulsion).
- Chocolate Coconut Truffles: Substitute the peppermint extract for 2 teaspoons of coconut extract. Roll in shredded toasted coconut for an extra touch.
- Dairy-Free: Use sweetened condensed coconut milk and dairy-free chocolate chips.
- Dark Chocolate: Use dark chocolate chips for a richer, less sweet truffle.
Nutrition Information (per truffle, approximately)
Calories: 93kcal | Carbohydrates: 12g | Protein: 0.03g | Fat: 5g | Saturated Fat: 3g | Polyunsaturated Fat: 0.001g | Monounsaturated Fat: 0.01g | Cholesterol: 0.1mg | Sodium: 0.5mg | Potassium: 54mg | Sugar: 11g | Vitamin A: 1IU | Vitamin C: 0.01mg | Calcium: 14mg | Iron: 0.001mg
Please note that some of my blog posts here at Dash for Dinner may contain affiliate links. If you make a purchase through these links, I will get a small commission at no additional cost to you. Please see my Disclaimer for more information.
