Irresistible Cadbury Mini Egg Cookies: The Ultimate Easter Dessert Recipe
Welcome to your new favorite cookie recipe! These delightful Mini Egg Cookies feature a rich, buttery, and vanilla-scented cookie dough base, generously studded with crushed Cadbury Mini Eggs. Whether you’re planning your Easter Desserts menu or looking for a creative way to use up leftover Easter candy, these warm, chocolatey Cadbury egg cookies are guaranteed to be a huge hit.

Cadbury Mini Eggs hold a special place in many hearts – including mine! As a Canadian, I’m lucky enough to find these incredible chocolates year-round, which means these cookies aren’t just for spring. After sharing my popular Mini Egg Ice Cream recipe, I simply couldn’t wait to bring you this incredibly easy Cadbury Mini Egg Cookies recipe. It’s truly one of my favorite ways to enjoy that distinctive candy shell crunch and creamy chocolate interior.
If you’re on the hunt for the perfect Easter cookies, look no further. This recipe not only showcases everyone’s beloved Easter candy but is also wonderfully straightforward to make. Seriously, if you can master classic chocolate chip cookies, you’ll find these Mini Egg Cookies a breeze!
Our bakery-style cookie recipe starts with a foundational cookie dough that is soft, chewy, and perfectly balanced in sweetness. We then elevate it with a generous infusion of crushed Mini Eggs, ensuring every bite delivers a delightful crunch and chocolate burst. For an added touch of beauty and irresistible appeal, we top them with whole Mini Eggs for a truly stunning presentation. These Easter egg cookies are ideal for sharing as thoughtful homemade gifts, bringing to potlucks, or simply rounding out your holiday table with an extra special treat.
And for those of us not bound by seasonal candy availability (ahem, Canadians!), these Mini Egg Cookies are a fantastic indulgence any time of the year. Get ready to bake a batch that will impress everyone!
Why You’ll Fall in Love with This Mini Egg Cookie Recipe
There are countless reasons to adore these Cadbury Mini Egg Cookies, but here are a few highlights that make them an absolute must-bake:
- Perfect for Any Occasion: While they shine as Easter treats, their festive look and incredible taste make them suitable for any gathering, bake sale, or simply as a comforting snack with your afternoon coffee or tea. They’re sure to be a hit whether at work, school, or home.
- Smart Use of Leftovers: This recipe is a brilliant and delicious solution for using up any leftover Easter candy that might be lingering around after the holiday. Transform those extra Mini Eggs into something truly spectacular!
- A Tried-and-True Base: We’ve adapted a beloved chocolate chip cookie base, known for its perfect texture and flavor, and infused it with the magic of Cadbury Mini Eggs. The result is a cookie that’s chewy, soft, and utterly satisfying.
- It’s All About Cadbury Mini Eggs: Let’s be honest, the star of the show is the iconic Cadbury Mini Egg! Their vibrant colors, crisp candy shell, and creamy milk chocolate center make these cookies uniquely delicious and visually appealing.
Essential Ingredients for Your Mini Egg Cookies
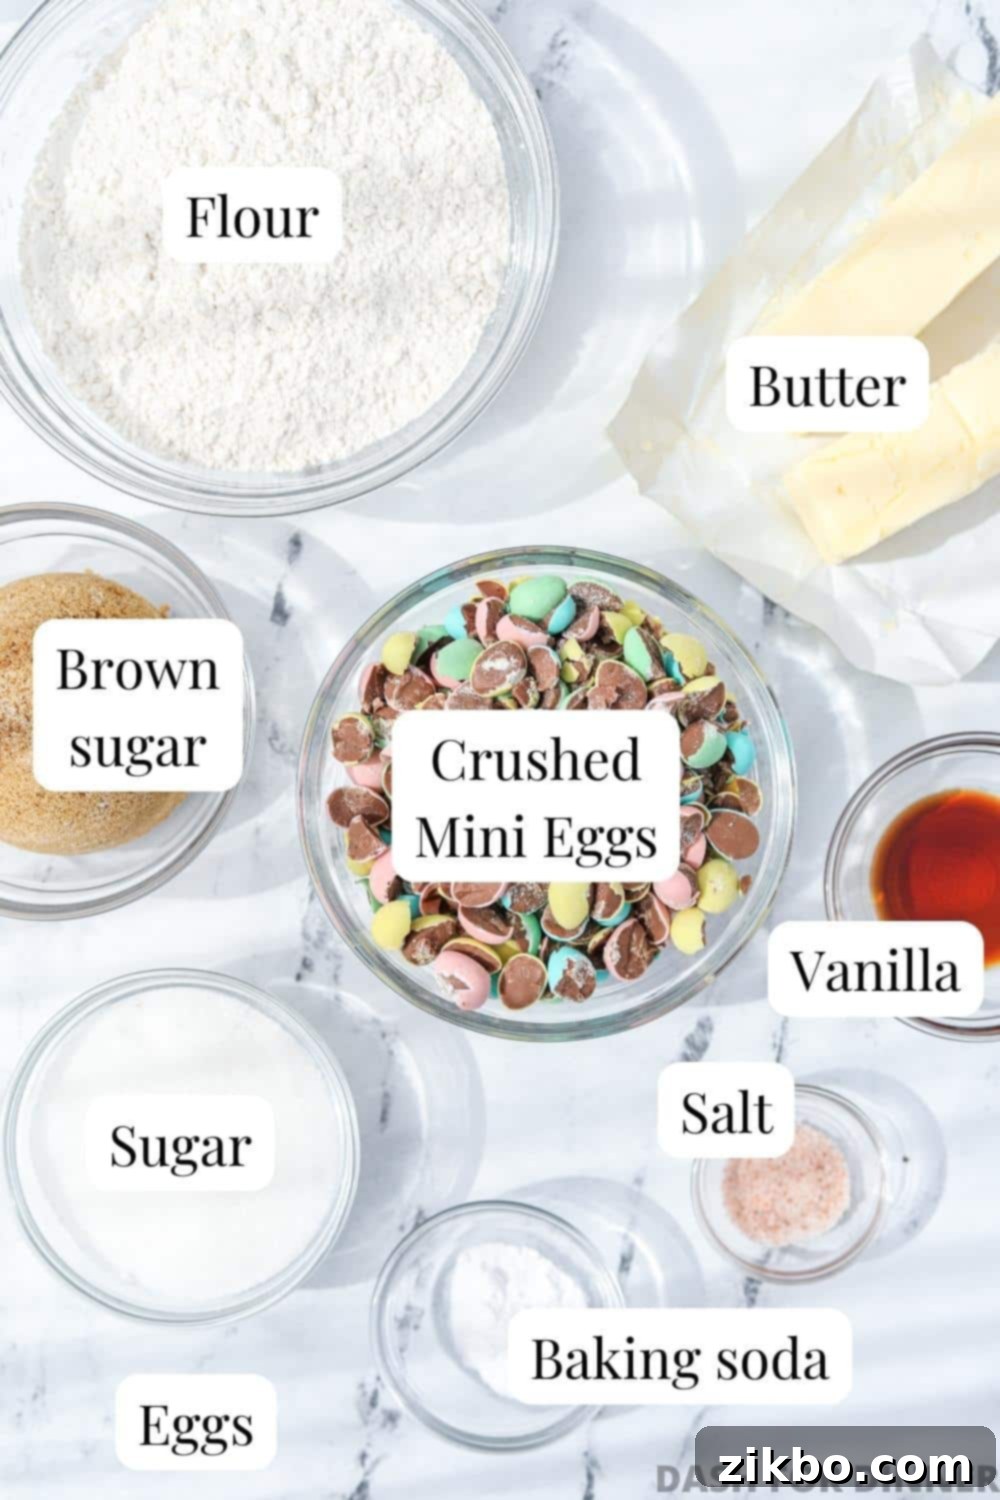
Gathering your ingredients is the first step to creating these heavenly cookies. You’ll find most are common pantry staples, with our special addition being the beloved Mini Eggs.

- Cadbury Mini Eggs: You’ll need approximately 2 cups of crushed mini eggs for the cookie dough itself, plus an optional extra ½ cup for pressing into the tops of the freshly baked cookies. For crushing, a large knife, rolling pin, or even a bench scraper pressed down firmly works well. Aim for a mix of smaller pieces and some slightly larger chunks for varying textures.
- Unsalted Butter: About 1 cup (or 2 sticks) of softened, room-temperature butter is key. Softened butter creams beautifully with sugar, incorporating air for a lighter, fluffier cookie. If your butter is too cold, it won’t cream properly; if it’s melted, your cookies will spread too much.
- Sugar Duo (Brown and White): We use a combination of brown sugar and white granulated sugar. Brown sugar adds moisture, chewiness, and a subtle molasses flavor, while white sugar contributes to crisp edges and overall sweetness. This balance creates the perfect cookie texture.
- Large Eggs: You’ll need 2 large eggs, ideally at room temperature. Room temperature eggs emulsify better with the butter and sugar, leading to a smoother, more uniform dough. Don’t worry if you forget; cold eggs will still work, but room temperature gives a slight edge in texture.
- Pantry Basics: Don’t forget your baking essentials! This includes pure vanilla extract for that classic warm flavor, all-purpose flour (ensure it’s spooned and leveled, not scooped directly from the bag, to avoid too much flour), baking soda for leavening and chewiness, and a pinch of salt to balance the sweetness and enhance all the flavors.
Pro Tip for Topping: An additional ½ cup of whole (or slightly larger crushed) Mini Eggs, pressed into the hot cookies as soon as they come out of the oven, will make them look absolutely stunning and add an extra layer of deliciousness and texture. This step is optional but highly recommended for that professional, bakery-fresh appearance.

Essential Equipment for Cookie Baking Success
Having the right tools can make your baking experience smoother and more enjoyable. Here’s what you’ll need for these Mini Egg Cookies:
- Stand Mixer or Electric Hand Mixer: While I adore my stand mixer for its power and hands-free operation, a large bowl and a reliable electric hand mixer will achieve fantastic results too. Both are crucial for creaming butter and sugar effectively.
- Silicone Spatula: These flexible tools are indispensable for scraping down the sides of your mixing bowl, ensuring all ingredients are fully incorporated, and gently folding in the crushed Mini Eggs without overmixing. I suggest a set of three (small, medium, and large) for versatility in the kitchen.
- Cookie Scoop: The secret to perfectly uniform cookies that bake evenly is a cookie scoop. A medium-sized scoop (about 1.5-2 tablespoons) is my go-to for most cookie recipes, including this one.
- Baking Sheets: You’ll need at least one standard cookie sheet or a half-size sheet pan. I personally prefer sheet pans because they’re versatile for many other culinary uses. Lining them with parchment paper or a silicone mat is key for easy release and cleanup.
- Wire Cooling Rack: Essential for allowing your cookies to cool properly, preventing them from becoming soggy on the bottom and ensuring they maintain their crisp edges. A sturdy wire cooling rack is a great investment.
How to Bake the Best Mini Egg Cookies
Let’s get baking! This step-by-step guide will walk you through the process, ensuring you end up with a batch of bakery-quality Mini Egg Cookies.
Before you begin, preheat your oven to 375ºF (191ºC). Then, line your cookie sheets or sheet pans with parchment paper or a reusable silicone liner. This crucial step prevents sticking and makes cleanup incredibly easy!
Part 1: Crafting the Perfect Cookie Dough
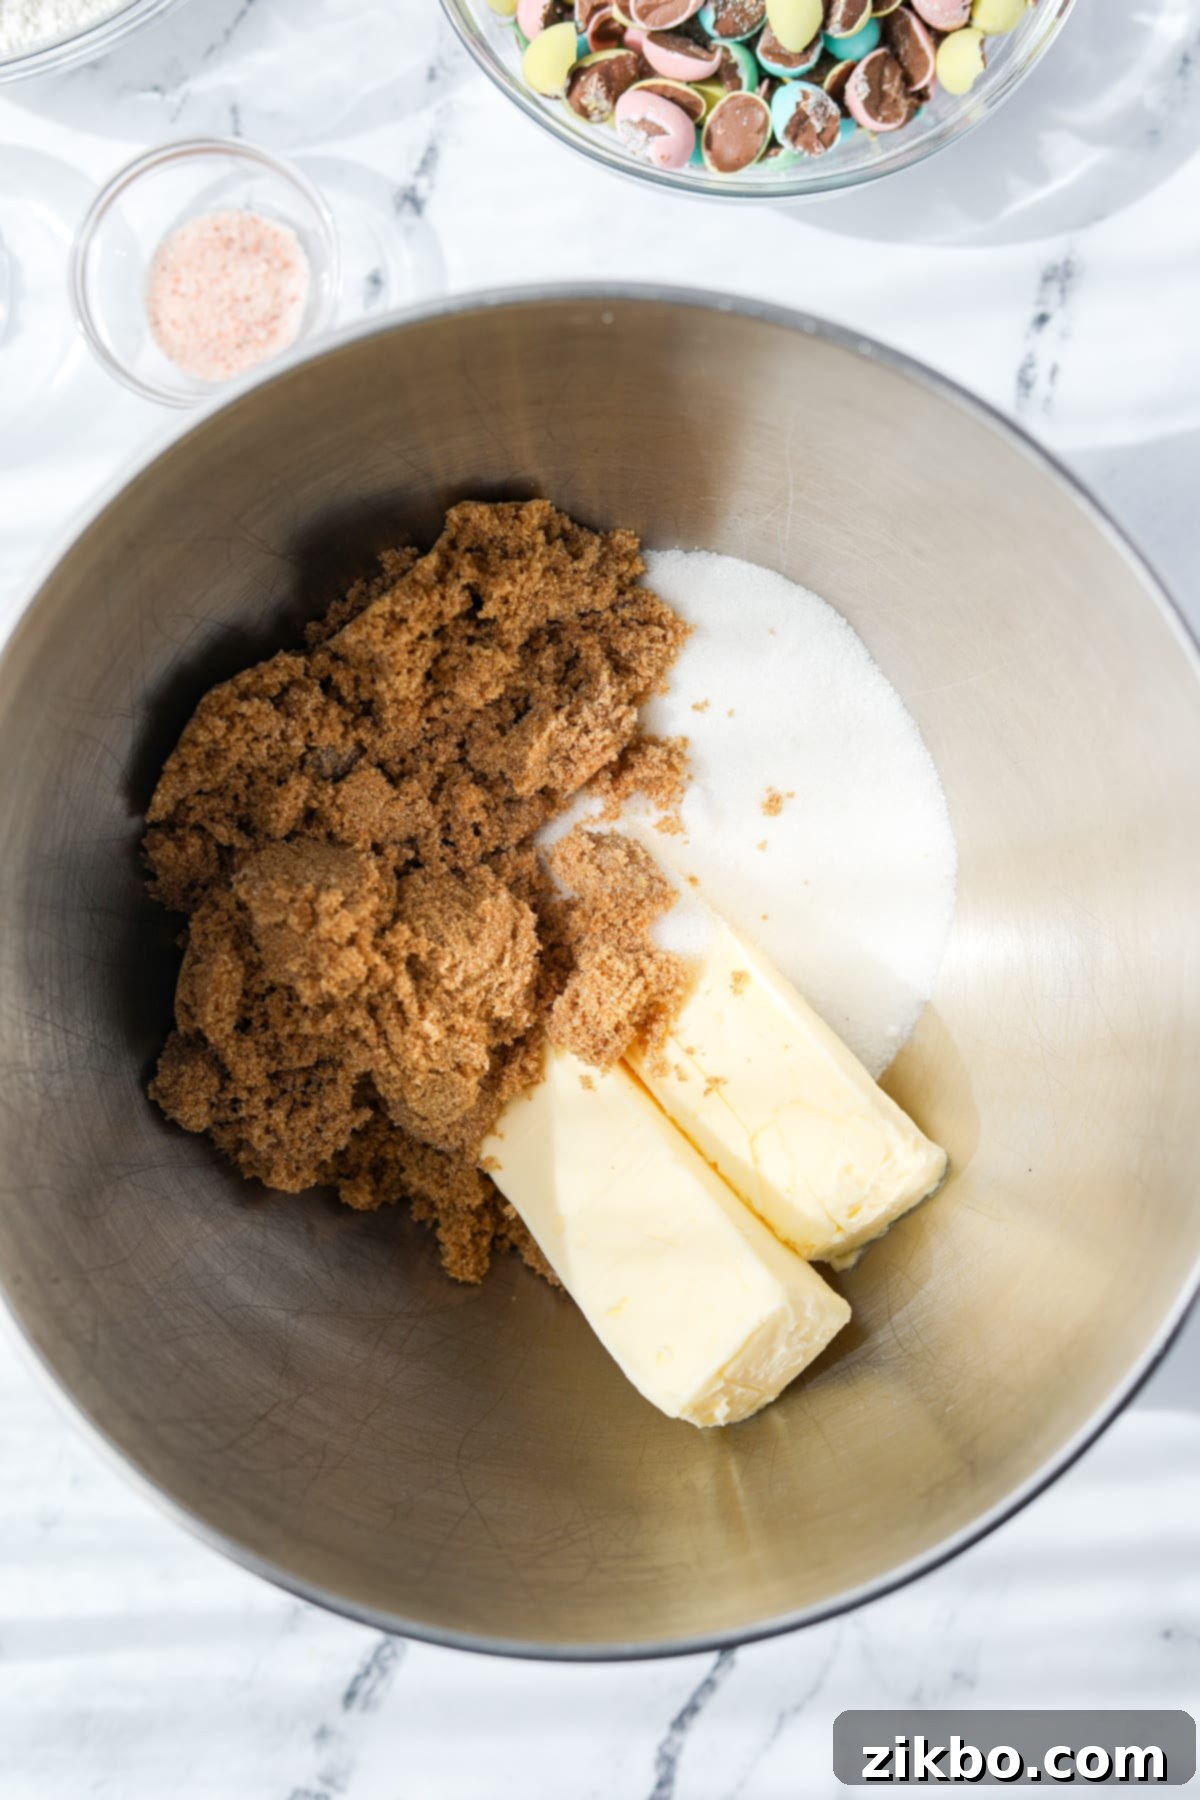
Step One: Cream the Butter and Sugars. In the bowl of your stand mixer (or a large mixing bowl if using a hand mixer), combine the softened butter, packed golden brown sugar, and white granulated sugar. Ensure your butter is truly at room temperature for optimal creaming.

Step Two: Beat Until Fluffy. Using the paddle attachment on your stand mixer (or beaters on your hand mixer), cream together the butter and sugars on medium speed for about 2-3 minutes. You want the mixture to become light, fluffy, and visibly paler in color. This process incorporates air, which is vital for a soft and chewy cookie texture.
Part 2: Incorporating Wet and Dry Ingredients

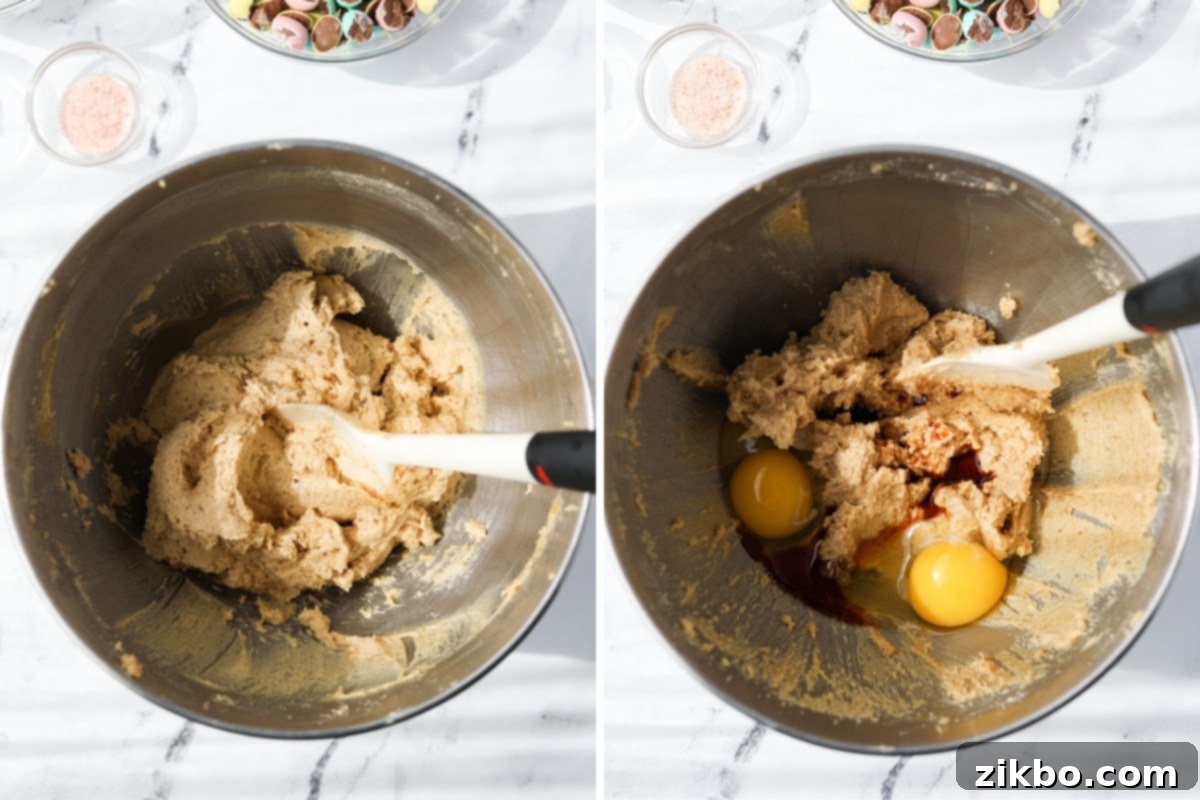
Step Three: Add Eggs and Vanilla. Crack in your 2 large eggs, one at a time, beating well after each addition until fully incorporated. Follow with the vanilla extract, mixing until just combined and smooth. Scrape down the sides of the bowl with your silicone spatula to ensure everything is thoroughly mixed.
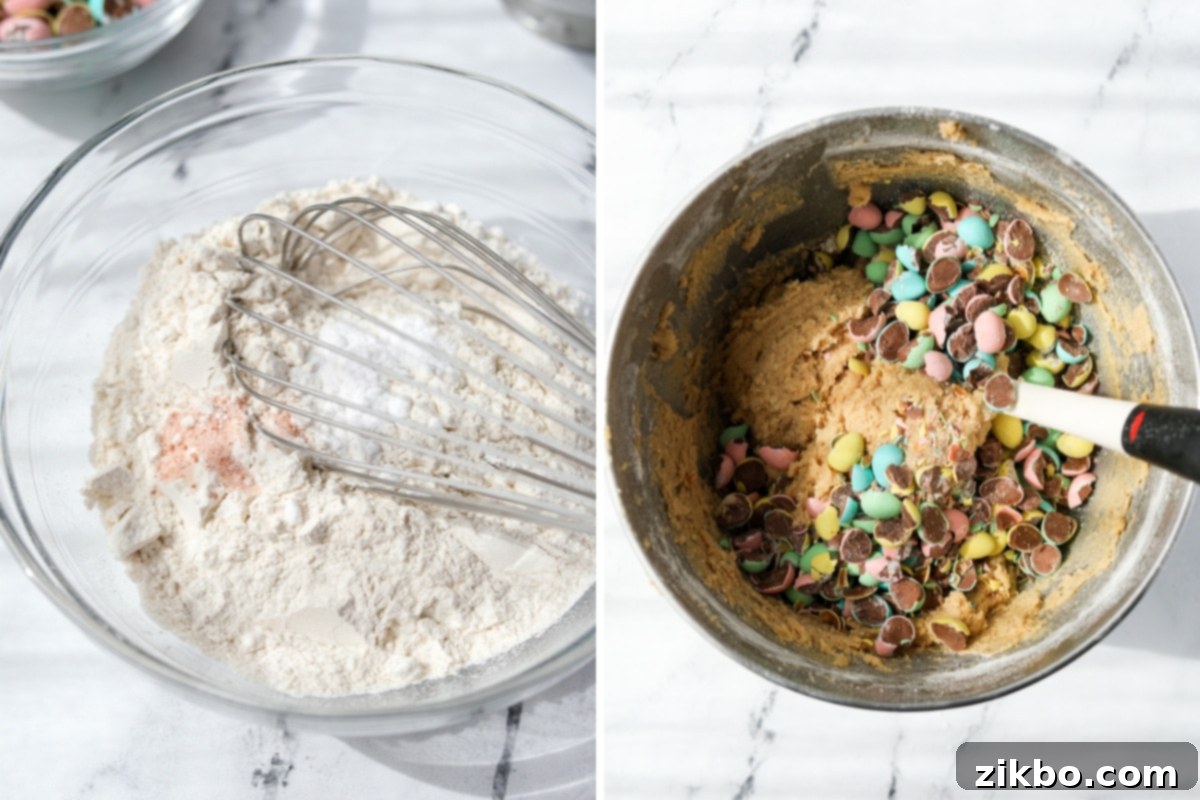
Step Four: Prepare Dry Ingredients. In a separate medium-sized bowl, whisk together the all-purpose flour, baking soda, and salt. Whisking ensures these dry ingredients are evenly distributed, especially the baking soda, which is crucial for even rising.
Step Five: Combine Wet and Dry. Gradually add the flour mixture to your wet ingredients in the stand mixer bowl. Mix on low speed just until no streaks of dry flour remain. Be careful not to overmix at this stage; overmixing develops gluten, which can lead to tough cookies.
Part 3: Folding in the Mini Eggs

Step Six: Fold in Crushed Mini Eggs. Pour your crushed Mini Eggs into the dough. Using your silicone spatula or a sturdy wooden spoon, gently fold them in by hand until they are evenly distributed throughout the dough. This gentle action prevents overmixing and keeps the Mini Eggs from breaking down too much.
Tips for Crushing Mini Eggs:
For best results, place a small amount of Mini Eggs on a sturdy cutting board. Use the side of a large chef’s knife or a heavy rolling pin to firmly press down and crush them into smaller, varied pieces. Avoid using a food processor or blender, as it often turns them into a dusty powder rather than distinct chunks.
Important Note for Young Children: If you are preparing these cookies for small children (under 5 years old), it is crucial to crush all of the Mini Eggs into very small pieces and avoid including any whole mini eggs. The shape and size of whole Mini Eggs can pose a similar choking hazard to grapes or other small, round foods. Safety first!
Step Seven: Scoop and Space. Using your medium-sized cookie scoop (or a heaping tablespoon), portion out the cookie dough onto your prepared baking sheet. Ensure you space the cookie balls about 2 inches apart to allow for spreading during baking. Depending on the size of your sheet, you’ll typically fit about 9-12 cookies per sheet. If baking in batches, keep the remaining dough chilled in the refrigerator.
Part 4: Baking and Finishing Your Cookies
Step Eight: Bake to Golden Perfection. Place the baking sheet in your preheated oven (375ºF / 191ºC) and bake for 10-12 minutes. The cookies are ready when the edges are just beginning to turn golden brown, and the centers still look slightly soft. They will continue to set as they cool.

Step Nine: Add Decorative Mini Eggs (Optional). As soon as you remove the cookies from the oven, immediately press 2-3 whole (or larger crushed) Mini Eggs onto the top of each hot cookie. Work quickly, as the dough needs to be hot and malleable for the candies to adhere properly. This step is purely for aesthetics and extra texture, but it makes a big difference in presentation.
Allow your beautiful Mini Egg Cookies to cool on the baking sheet for about 5-10 minutes before carefully transferring them to a wire rack to cool completely. This prevents them from breaking and helps them firm up.

Storing Your Delicious Mini Egg Cookies
Once your Mini Egg Cookies have completely cooled to room temperature, you’ll want to store them properly to maintain their freshness and deliciousness. Whether you’re planning to enjoy them over a few days or save some for later, here’s how:
- Room Temperature Storage: Place the cooled cookies in an airtight container or a large freezer bag. They will stay fresh and soft at room temperature for 2-3 days. For best results and to prevent sticking, you can place sheets of parchment paper between layers of cookies.
- Refrigerator Storage: For slightly longer freshness, transfer your cooled cookies to an airtight container and store them in the refrigerator for up to 1 week. Bring them to room temperature or warm them slightly in the microwave for a few seconds before serving.
- Freezer Storage: These cookies freeze beautifully! Once completely cooled, place them in a single layer on a baking sheet and flash freeze for about an hour until solid. Then, transfer the frozen cookies to a freezer-safe Ziplock bag or airtight container. They will keep well in the freezer for up to 2 months. Thaw at room temperature or warm gently.

Pro Tips for Perfect Mini Egg Cookies Every Time
- Keep the Dough Chilled: If you’re baking your cookies in multiple batches, it’s essential to keep the unbaked cookie dough chilled in the refrigerator between batches. As butter warms, it softens, causing cookies to spread more in the oven. A chilled dough helps the cookies maintain their shape and prevents excessive spreading, resulting in thicker, chewier cookies.
- Embrace Room Temperature Ingredients: This is a golden rule for many baking recipes! Your butter should be soft enough that you can easily press your thumb into it, but not melted. Melted butter will lead to thin, greasy cookies, while hard, cold butter won’t cream properly, resulting in a crumbly dough. While not strictly required, using room-temperature eggs helps them emulsify better with the butter and sugar, creating a smoother dough and a more consistent final product.
- Achieve that Bakery-Fresh Look: For those picture-perfect cookies, don’t skip the step of pressing whole (or larger crushed) Mini Eggs into the cookies immediately after they come out of the oven. This must be done while the cookies are piping hot and still malleable. Work quickly! I like to press about 2-3 candies into the top of each cookie, gently securing them with my thumb. Then, let them cool for 5-10 minutes on the baking sheet before transferring them to a wire cooling rack.
- Don’t Overmix the Flour: Once you add the dry ingredients to the wet, mix only until just combined. Overmixing develops gluten, which can make your cookies tough and dense. A few streaks of flour are better than an overmixed dough; the residual flour will incorporate during the gentle folding of the Mini Eggs.
- Know Your Oven: Every oven is a little different. Keep an eye on your cookies, especially during the first batch. If your oven has hot spots, you might need to rotate the baking sheet halfway through baking. The goal is golden edges and slightly soft centers.

Creative Variations and Simple Substitutions
This Mini Egg Cookie recipe is wonderfully adaptable! Feel free to experiment with these variations to suit your dietary needs or personal preferences.
Go Gluten-Free!
Good news for those with gluten sensitivities! Cadbury Mini Eggs are generally considered gluten-free in terms of ingredients (though always check packaging for cross-contamination warnings). To make these cookies gluten-free, simply substitute the all-purpose flour with a high-quality 1:1 gluten-free baking mix, such as Bob’s Red Mill Gluten Free Baking Flour. Follow the package instructions for any specific liquid adjustments, though often a direct swap works perfectly.
Swap Out the Candy!
Don’t have Mini Eggs or want to try something different? This versatile cookie base is perfect for a variety of mix-ins! Simply substitute the 2 cups of crushed Mini Eggs for 2 cups of your chosen additions. Fantastic options include: classic chocolate chips (milk, dark, or semi-sweet), chunky chocolate chunks, chopped nuts (like pecans or walnuts for added crunch), white chocolate chips, M&M’s, or even other seasonal candies. The possibilities are endless!
More Easy Dessert Recipes You’ll Love
If you enjoyed these Mini Egg Cookies, be sure to explore some of our other crowd-pleasing, easy-to-make dessert recipes:
- Homemade Mini Egg Ice Cream
- Magical Lucky Charms Treats
- Simple No-Bake Peanut Butter Bars
- Easy No-Bake Chocolate Chip Cheesecake
- Fun Lucky Charms Ice Cream
We hope you adore this recipe for Cadbury Mini Egg Cookies as much as we do! If you give them a try, please let me know by leaving a 5-star review in the recipe card below or by commenting. Your feedback helps other bakers! You can also tag me on Instagram @dashfordinner – I’d love to see your creations!

Cadbury Mini Egg Cookies
Print
Pin
Rate
Equipment
-
Stand mixer or electric hand mixer
-
Silicone spatula
-
Cookie Sheet or sheet pan
-
Cookie scoop
Ingredients
- 1 cup butter softened to room temperature
- 1 cup packed brown sugar
- ½ cup sugar
- 2 large eggs
- 1 ½ teaspoons vanilla extract
- 2 ¼ cups all-purpose flour
- 1 teaspoon baking soda
- ½ teaspoon salt
- 2 cups crushed Cadbury Mini Eggs plus more for topping, if desired
Instructions
-
Preheat the oven to 375ºF and line a baking sheet with parchment paper.
-
Add the softened butter, brown sugar, and white sugar to the bowl of a stand mixer fitted with the paddle attachment, OR use a large bowl with an electric mixer.
-
Beat the butter and sugar mixture until light, fluffy, and well combined. About 2-3 minutes.
-
Add in the eggs and vanilla extract and beat again until smooth and creamy. Scrape down the sides of the bowl as necessary. Set aside.
-
Add the flour, baking soda, and salt to a separate medium bowl and whisk until combined.
-
Transfer the flour mixture to the sugar and butter mixture, and mix it on low just until combined with no dry flour bits remaining.
-
Finally, add the crushed mini eggs and fold them in gently with a silicone spatula.
-
Use a medium-sized cookie scoop or a heaping tablespoon to drop mounds of cookie dough onto the prepared baking sheet, about 2” apart, working in batches.
-
Place the baking sheet in the oven and bake for 10-12 minutes, or until the very edges are turning golden brown.
-
Remove the cookies from the oven and immediately press in a few whole (or chopped) Mini egg pieces into the hot cookies (if desired).
-
Allow the cookies to cool for 5-10 minutes on the baking sheet before transferring them to a wire cooling rack.
-
Repeat with the remaining cookie dough.
-
Allow the cookies to cool to room temperature before packing and storing.
Notes
Working in batches: If you’re using just one baking sheet you will need to work in batches of about 12 cookies at a time. Keep the cookie dough in the fridge in between batches to ensure it does not warm too much, which causes the cookies to spread.
Crushing Mini Eggs: The best way to crush mini eggs is by using the side of a large knife or a bench scraper. They do not do well in food processors or blenders in my experience.
Storage: Your cookies will keep at room temperature for 2-3 days, or up to 1 week in the refrigerator. They freezer very well when transferred to freezer bags, and will store well in the freezer for up to 2 months.
Nutrition
Please note that some of my blog posts here at Dash for Dinner may contain affiliate links. If you make a purchase through these links, I will get a small commission at no additional cost to you. Please see my Disclaimer for more information.
